Advertisement
Table of Contents
- 1 Table of Contents
- 2 Know Your Product
- 3 Technical Specifications
- 4 Description of Symbols
- 5 Contents of Electric Garden Lawn Mower
- 6 General Safety Instructions
- 7 Additional Safety Instructions for Electric Garden Lawn Mower
- 8 Assembly Instructions
- 9 Operation
- 10 Maintenance
- 11 Warranty
- Download this manual
Advertisement
Table of Contents

Subscribe to Our Youtube Channel
Summary of Contents for jobmate YT5107
-
Page 2: Table Of Contents
CONTENTS Know Your Product....................4 Technical Specifications..................4 Description of Symbols................... 5 Contents of Electric Garden Lawn Mower............. 6 General Safety Instructions..................7 Additional Safety Instructions for Electric Garden Lawn Mower......9 Assembly Instructions....................12 Operation.......................14 Connecting to Power Supply................14 Staring......................14 Mowing ......................15 Tips for Using Your Electric Lawn Mower............15 Maintenance...................... -
Page 3: Know Your Product
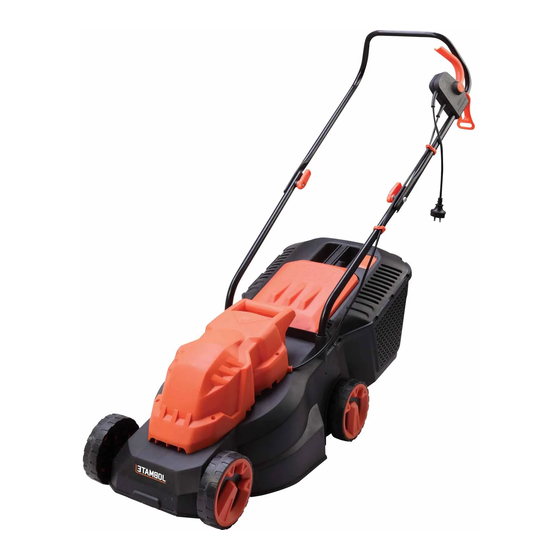
KNOW YOUR PRODUCT 1 Upper handle 2 Lower handle 3 Switch box assembly 4 Grass catcher 5 Wheel 6 Motor assembly 7 Cord retainer TECHNICAL SPECIFICATIONS SKU 232480 SKU 232483 Voltage 230V ~ 50Hz 230V ~ 50Hz Rated power 1000W 1300W No-load speed 3250/min... -
Page 4: Description Of Symbols
DESCRIPTION OF SYMBOLS The rating plate on your tool may show symbols. These represent important information about the product or instructions on its use. Disconnect from mains power immediately if the power cord becomes damaged. Wear hearing protection. Wear eye protection. Wear respiratory protection. -
Page 5: Contents Of Electric Garden Lawn Mower
DESCRIPTION OF SYMBOLS (CONT.) Indicated danger, warning, or caution Do not run the machine over objects. They can be thrown and cause severe injury This symbol is known as the ’Crossed-out Wheelie Bin Symbol’. When this symbol is marked on a product or battery, it means that it should not be disposed of with your general household waste. -
Page 6: General Safety Instructions
GENERAL SAFETY INSTRUCTIONS WARNING! Read all instructions. Failure to follow all the instructions listed in all of the warnings listed below refers to your mains operated (corded) power tool or battery operated (cordless) power tool. SAVE THESE INSTRUCTIONS 1) Work area •... - Page 7 GENERAL SAFETY INSTRUCTIONS (Cont.) that have the switch on may cause an accident. • Remove any adjusting key or wrench before turning the power tool on. A wrench or key left attached to a rotating part of the power tool may result in personal injury.
-
Page 8: Additional Safety Instructions For Electric Garden Lawn Mower
ADDITIONAL SAFETY INSTRUCTIONS FOR ELECTRIC GARDEN LAWN MOWER • Only use this Lawn Mower when a Residual Current Device (RCD ) with a tripping current of not more than 30mA is in the circuit. • If an extension cord is used make sure it is for outdoor use and marked as such. - Page 9 ADDITIONAL SAFETY INSTRUCTIONS FOR ELECTRIC GARDEN LAWN MOWER (CONT.) • Do not start the machine when it is not in the operating position. • Thoroughly inspect the mower for loose or damaged parts before each use. Do not use the unit before adjustments or repairs are made. •...
- Page 10 ADDITIONAL SAFETY INSTRUCTIONS FOR ELECTRIC GARDEN LAWN MOWER (CONT.) • Keep your hands, face and feet away from all moving parts. • If possible, avoid cutting wet grass. • Exercise proper precaution when mowing on sloping ground. Watch your footing and wear non-slip footwear.
-
Page 11: Assembly Instructions
ASSEMBLY INSTRUCTIONS Preparation: 1) Put the cable hook on upper handle.(fig.1 a) 2) Connect upper and lower handles with supplied screws and knobs.(fig.1b) 3) Insert the handles into the mower body and tighten the fixed screws.(fig.1c) 4) Fix the cable holders.(fig.1d) - Page 12 ASSEMBLY INSTRUCTIONS (CONT.) 5) Grass collection box assembly. Assemble two the lugs.(Fig.1g) 7) Before using, always visually inspect to see that the blades, blade bolts and cutter assembly are not worn or damaged. Replace worn or damaged blades and bolts in sets to preserve balance. 8) Keep all nuts, bolts and screws tight to be sure the equipment is in safe working condition.
-
Page 13: Operation
ASSEMBLY INSTRUCTIONS (CONT.) 1) Turn the mower on its side. 3) Locate the wheel axle into the desire cutting height adjustment position. OPERATION Connect to power supply Warning! Before connecting to the mains supply, always check the switch is in the off position! Connect the plug into the RCD protected power supply. -
Page 14: Mowing
OPERATION (CONT.) We recommend to use your mower as outlined in this section in order to achieve optimum results and to reduce the risk of cutting the mains cable. • Place the bulk of the mains cable on the lawn, close to the starting point. •... -
Page 15: Maintenance
OPERATION (CONT.) them frequently and use them to instruct other users. If you loan some one this unit, also loan them these instructions. The operator or user is responsible for accidents or hazards occurring to other people or their property. Failure to follow operating instructions and safety precautions in this instruction manual can result in serious injury. -
Page 16: Warranty
WARRANTY POLICY Congratulations on your purchase of Electric lawn mower. In order to get maximum benefit from your new purchase, please be aware of the warranty provisions outlined in this document. 2 YEAR [REPLACEMENT/REPAIR] WARRANTY Your lawn mower is guaranteed for a period of 24 months from the original date of purchase. - Page 17 Mitre 10 or Mitre 10 MEGA store where the product was purchased from, for the warranty to be applicable. Please retain your Proof of Purchase. Only the original owner is covered by the manufacturer’s warranty and must have purchased the product from a Mitre 10 or Mitre 10 MEGA store in New Zealand. What is not covered under warranty? •...

Need help?
Do you have a question about the YT5107 and is the answer not in the manual?
Questions and answers