Table of Contents
Advertisement
Advertisement
Table of Contents

Related Manuals for jcb Toughphone


Summary of Contents for jcb Toughphone
- Page 2 Copyright © 2007 JCB Ltd at their end-of-life. The name JCB and the JCB logo Disposal of battery are trademarks owned by Please check local regulations for J.C.Bamford Excavators Ltd and disposal of batteries.
-
Page 4: Table Of Contents
Charge the battery Set battery alert Your SIM card Insert the SIM card Removing the SIM card Key operations without your SIM card Parts of the JCB™ TOUGHPHONE™ JCB™ TOUGHPHONE™ keypad Standby mode Operations in standby mode Basic settings Keypad functions... - Page 5 Your JCB TOUGHPHONE™ Main menu Home screen indicators Settings Ringer settings Phone settings Network settings Managing the phone book Add a new number Send a namecard Edit or delete phone records Copy or move numbers to other lists Managing personal information...
- Page 6 Messages Message settings Text input mode Conventional text input Predictive text input Write messages Send an SMS via phone book Manage your messages Inbox Unsent messages Sent messages Predefined SMS messages View SMS memory SMS broadcasts Voice mail Tools Organiser Create new event entries Edit organiser entries Delete entries...
- Page 7 Personalise your phone Themes Manage your files SIM card menu End user licence agreement Index...
-
Page 8: General Information
The JCB™TOUGHPHONE™ is fully compliant with the recently ratified Open Mobile Alliance (OMA) GSM standard specification. It has an intuitive, feature-rich user interface that allows you to make the best use of the functions offered on your JCB™TOUGHPHONE™ device. Network services These are additional services that you can avail through your network service provider. -
Page 9: Use The Guide Effectively
Use the guide effectively Acquaint yourself with the terminology and symbols used in the guide to help you use your phone effectively. Means to press and release a key Press immediately. For example, Press 2 means that you press the key on the keypad that is labelled with the numeral 2 and the alphabets “ABC”. - Page 10 Press and hold Means to press and hold a key for 2–3 seconds before releasing the key. This action is typically used when trying to switch on/ off the phone or when using shortkeys to access specific functions. For example. press and hold 1 to access Voicemail.
-
Page 11: Options Commonly Used Across Menu Items
Options commonly used across menu items The following are common actions used across various menu items: Displays the previous screen. Exit Use the Right Selection key to perform this function. Deletes data character by char- Clear acter. Use the Right selection key to perform this function. -
Page 12: Your Safety Guidelines
60 and avoid damage to your phone. The symbol of the crossed-out The JCB™ TOUGHPHONE™ is wheeled bin indicates that within water-resistant, dust-resistant and the countries in the European rugged. However, it is not water-... -
Page 13: Battery Care
Battery care Battery performance A rechargeable battery powers your device. Use the battery only for its intended purpose. Never use any charger or battery that is damaged. If the battery is completely discharged, it may take a few minutes before the charging indicator appears on the display or before any calls can be made. -
Page 14: Avoiding High Temperatures
Avoiding high temperatures Leaving the battery in hot or cold places, such as in a closed car in summer or winter conditions, will reduce the capacity and lifetime of the battery. Always try to keep the battery between 15 C and C (59 F and 77 F). -
Page 15: Child Safety
for more information. For other medical devices, please consult your physician and the manufacturer of the device. Comply with instructions to switch off the device or deactivate the RF transmitter function when asked to do so, especially when posted in hospitals and aeroplanes. Equipment used in these places may be sensitive to radio waves emitted from the device and adversely affect their operation. -
Page 16: Sar Certification
EN 50360:2001, the allowed limit of SAR averaged for 10g tissue is 2.0 (W/kg). The localised SAR of the portable JCB™TOUGHPHONE™ device has been measured in all cases as requested by the relevant international standards. The maximum localised SAR value for which... -
Page 17: Getting Started
Getting started Battery information Battery usage • Use only an JCB™TOUGHPHONE™ certified battery, charger or any other accessories that are designed for this phone model. • The use of other batteries, chargers and accessories may void the warranty terms of your phone and cause damage. -
Page 18: Charge The Battery
Lift the flap that covers the battery. Insert battery Lift the battery cover Insert the battery flush into the battery slot such that the three metallic contacts at the top of the battery are aligned with the metallic contacts within the battery compartment. Place the cover back and turn the battery cover knob clock wise to lock the battery cover. - Page 19 If the battery is being charged when the phone is switched off, only the battery icon with the message Charging is displayed (as shown in the adjacent figure). When the battery has been fully charged, the message Completed is displayed. If the battery is being charged while the phone is switched on, you will notice that the bars in the battery charge icon (visible on the home screen) show movement indicating...
-
Page 20: Set Battery Alert
Set battery alert When you set the battery alert, every time the battery charge is low you hear an alarm. To set the battery alert select Menu > Quick settings > Normal > Personalise > Battery alert > On or, press Menu key to select the checkbox beside Battery alert to activate the alert. -
Page 21: Removing The Sim Card
Insert SIM card Replace the battery and the cover. Turn the battery cover knob clockwise to lock the battery cover. Removing the SIM card Ensure the phone is switched off. Lift the battery cover to remove the battery. Refer instructions in the section “Insert and remove the battery” on page 17. -
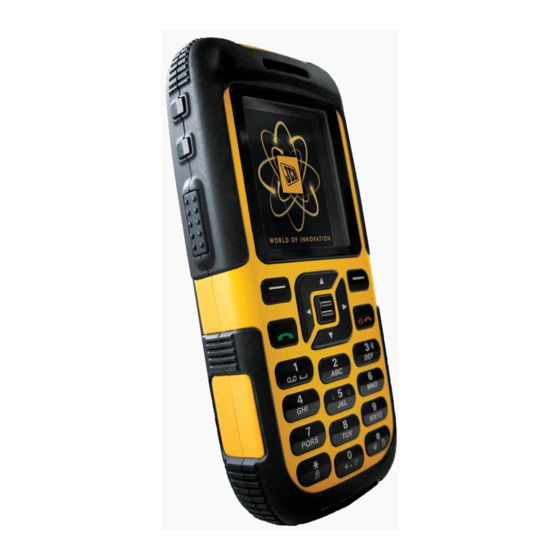
Page 22: Parts Of The Jcb™ Toughphone
Parts of the JCB TOughPhONE™ ™ The JCB™ TOUGHPHONE™ keypad has six function keys and 12 alphanumeric keys. The left side of the phone has the three Push-to-Talk (PTT) keys as shown in the figure: JCB™ TOughPhOne™ at a glance... -
Page 23: Jcb™ Toughphone™ Keypad
JCB™ TOUGHPHONE™ keypad The various keypad keys and their corresponding functions are described in the following figure. The alpha-numeric keys comprise numbers from one to zero, alphabets from A-Z, plus [*] and [#] keys. By pressing the designated key you can input numbers or characters. -
Page 24: Standby Mode
Standby mode Certain information is displayed when the phone is in standby mode, for example, the name of the service provider, date and time, battery charge status, PTT and GPRS connectivity. Other indicators may be displayed (if the feature is activated), like the alarm, call forward etc. In PTT activated phones, the connectivity icon will be displayed. -
Page 25: Operations In Standby Mode
Operations in standby mode The following can be accessed from the home screen when the phone is in standby mode or when the phone is not in use. Press To access Up arrow Call list Down arrow Phone book list Right arrow Write message Left arrow... -
Page 26: Basic Settings
Basic settings When you switch on your phone, you can see the service provider’s name on the display. Security settings To prevent unauthorised use of your phone, you can set a PIN code. Select Menu > Settings > Security settings > PIN code > On > OK. After this is set, every time you power on the phone, you will be requested to enter the PIN. -
Page 27: Keypad Functions
Keypad functions The following table displays the various keys and the corresponding functions they perform: Keypad Key Operation Power On/Off/End call Press and hold to switch on or switch off the mobile phone. Press when in Menu or Edit modes to return to Standby mode. - Page 28 Press while in standby mode to enter the main Menu key (centre) menu. Press when required to be used as a toggle key to select or clear a checkbox. Press to perform similar tasks as the Left Selection Key. Press to select the OK command. The Left and Right Selection keys, Power On/Off and Pickup keys surround this key group.
- Page 29 Press the required keys to enter the desired phone Numeric keys number and press to make a call. Alternatively enter the number and select Options to Dial the number. Press and hold any numeric key to create shortcuts from the available options. Press and hold in standby mode to access your Voice mail.
-
Page 30: Your Jcb Toughphone
Your JCB Toughphone ™ phone This model is a bar type phone with a single LCD screen. The graphic field of the screen is 129 (w) and 160 (h) pixels. The CSTN technology used displays 65K colours. Main menu To access the main menu press the Menu key or press the Left... - Page 31 Display indicators Name Description Battery Five clear bars indicate maximum battery charge. Opaque bars indicate decline in battery charge. Roaming This icon is only displayed when your phone is registered with a non-home network. GPRS G displayed in green indicates that the GPRS network is present.
- Page 32 Display indicators Name Description Missed Calls Indicates that there are missed PTT and GSM calls and Instant Personal Alerts. Navigation arrows Indicates the available directions for navigation and is always displayed at the bottom of the screen. Event reminder Reminds you of a new event.
-
Page 33: Settings
Settings You can create and modify various settings on your JCB™ TOUGHPHONE™ phone. On the Standby screen select Menu > Settings to display the options. Ringer settings You can set different tunes for your incoming calls, SMS alerts and alarms. Separate tunes can also be set for different caller groups that are maintained in the phone book, for example, family, friends et al. -
Page 34: Phone Settings
Phone settings Select Menu > Settings > Phone settings > OK. The phone settings displayed are: Auto power: switches off and switches on the phone automatically, at the specified time set by you. Welcome text: allows you to create the welcome text that is dis- played when the phone is switched on. -
Page 35: Network Settings
Backlight: keeps the screen display active for the period chosen by you. The duration could be 30 seconds, a minute or three minutes. Shortcuts: allows you to assign a hotkey for a specific function. To set a shortcut, on the Shortcuts screen, select a key, choose from the list of empty keys displayed and select OK. - Page 36 Show list Displays a list of preferred network providers. Scroll to a network and Select. The preferred network is displayed at the top of the list. Delete list Removes a network provider from the existing list. Available networks Locates and displays the network providers available to you.
- Page 37 Attach gPRS: permits continuous GPRS connectivity when the option Always attached is selected. Select Attached during PDP session, if you want GPRS connectivity only when required. GPRS connectivity is required to initiate a PTT session. Register again: allows you to register your phone again. If you have chosen a different network, select this option to register with the new network.
- Page 38 Account name: allows you to rename the selected network account. Bearer: allows you to choose from two protocols for WAP service. You can either choose GSM only or GPRS only. GPRS is required to access the PTT service. gSM settings: The following GSM settings can be configured: Data call type: choose between ISDN and Analogue.
-
Page 39: Managing The Phone Book
Managing the phone book You can use the phone book to maintain phone numbers of your contacts. This feature enables you to add, delete, dial phone numbers and send SMS messages. When you switch on the phone, it takes some time for the phone book to initialise. -
Page 40: Send A Namecard
To enter a symbol for email address, press 1 repeatedly till you get the desired symbol. For example, press 1 thrice to display ‘@’ and press 1 four times to display ‘_’. Select Phonebk > scroll to Add New > OK. Enter the Name and Phone number and select Save. -
Page 41: Edit Or Delete Phone Records
Save: option to store the message. Save as user defined: allows you to save the namecard information for reuse. Add icon: allows you to insert an image from the existing emoticon folder. Edit or delete phone records • To edit a record •... -
Page 42: Copy Or Move Numbers To Other Lists
Copy or move numbers to other lists • To copy all records from SIM card to Phone memory Select Phonebk > Advanced > OK > Copy all from SIM to phone > OK. • To copy all records from Phone memory to the SIM card Select Phonebk >... -
Page 43: Phone Book Memory
To mail your information to another person, Phonebk > Own info > OK > Send own info > OK. To view your own information select Phonebk > Own info > OK > Display own info > OK. Phone book memory You can store records in both phone memory and SIM card. -
Page 44: Make Calls
> Dial > Dial > OK. Dialling a number using the Easy call key When you hold the JCB™ TOUGHPHONE™ device, a group of three keys are available to the left of the device. The large key or the Easy call key is used to make quick calls. For information on parts of the device, refer “Parts of the JCB™... - Page 45 In PTT activated phones, the key has a different function. For more information refer to the PTT leaflet. Dialling a number via phone book You can dial a number directly from the Phone book list or either from the Search option or the View list option in the Phone book. To locate a phone number: On the home screen select Phonebk >...
-
Page 46: Dialling A Number Via The Call List Menu
Dialling a number via the call list menu This Call list comprises separate lists for Outgoing, Answered and Missed calls. In this menu you can view the list of calls, delete an entire list of calls and review call information related to cost, duration, time of call etc. To access the Call list select Menu >... -
Page 47: Speed Dial
• Send SMS: sends an SMS message to the specified contact. Select Option to view the SMS options. • Send phone number: displays your phone number to the recipient. • Delete: deletes the contact number from the Call list. • Check number: displays the contact number of the caller. -
Page 48: Receive A Call
Receive a call To receive a call, press the Accept key (this key is used to send and accept a call). To reject a call press the Power on/off key . To receive another call while you are already speaking, the call waiting feature for GSM calls should be enabled via the Settings menu. -
Page 49: Call Barring
The Call forward options are mentioned below: Call Forward option Function Unconditional Forward all incoming calls to a pre-designated number. If busy Forward calls when your phone is busy. If no reply Forward calls when you do not answer the incoming calls. If unreachable Forward calls when you have switched off your phone. -
Page 50: Call Waiting
Cancel barring: when you cancel the call barring facility you are prompted to enter a restriction password again. If the password is correct, your phone will contact the network to disable this function. Barring status: when you check the status, your phone will send a request to the network and the feedback will be displayed on your screen. -
Page 51: Auto Redial
You can choose to accept or reject the call. If you accept the GSM call, the WAP session closes. If you reject the incoming call, you continue with the WAP session. To set Call waiting facility select Menu > Settings > Call settings>... -
Page 52: Filter Calls
Filter calls This function enables you to avoid receiving unnecessary calls. Phone numbers of calls you do not want to answer can be placed in the “black list” while phone numbers of calls you want to answer can be placed in the “white list”. When a contact number is added to Black list or White List, the new number should be prefixed by ‘+’... -
Page 53: White List Calls
Search for black listed numbers To locate a black listed number, on the Call filter screen, select Blacklist > Search > OK. Scroll to a number and select Option > Change > OK to modify a number or select Option > Delete > OK to remove a number from the black list. -
Page 54: Other Call Settings
Other call settings • Minute reminder: when enabled prompts you at the 50th second of every minute during a conversation. Select Menu > Settings > Call settings > Minute reminder > On. • Send ID: when enabled displays your ID to the recipient when you call or send a message. - Page 55 your SIM card contains charging information. Use this service to configure or view all charge information related to your calls. The following can be configured: Show cost Displays total charges of all outgoing and incoming calls since the last reset. Reset charge count Resets the counter to zero (protected by PIN2 code).
-
Page 56: Messages
Messages SMS is a convenient and inexpensive means of communication. You can send a text message to other people via this service. You can use the SMS menu in your phone to send an SMS message to other mobile phones or any other equipment that can receive SMS. To access the SMS function select Menu >... -
Page 57: Text Input Mode
to select the option and select OK. • Signature: enable this option to set a signature that will be suffixed to your sent messages. Use the Menu key to select the option and select OK. Enter the signature and select Save. If your message exceeds the maximum number of characters, the signature automatically gets omitted from your message. -
Page 58: Predictive Text Input
exclamation mark (!) and question mark (?) automatically becomes capital. To enter a character, press the numeric key repeatedly until the desired character appears on the screen. For example, to enter GOOD, in the text mode, press 4 once to display G, press 6 thrice to display O, and again press 6 thrice to display O and press 3 once to display D. -
Page 59: Write Messages
keys to locate the right word. If not you can choose the nearest word and build on it. When the desired word is displayed, select Select or press Key 1, to accept the word and display it in the text pane. -
Page 60: Send An Sms Via Phone Book
message. • Save: saves the message in the memory. • Save as user defined: saves the created message as a user defined SMS for reuse. • Add icon: adds an emoticon in your message. • Insert defined SMS: enables you to insert a predefined SMS message from the Defined message list. -
Page 61: Unsent Messages
To open a message, scroll to a message and press the Menu key. After a message is opened other functions can be performed. Select Option to list the options. • Reply: sends a response to the sender of the message. •... -
Page 62: Sent Messages
Sent messages Transmitted messages are stored in Sent messages folder. To access sent messages select Menu > Messages > SMS > Sent messages > OK. Select Option to display the delete options. Press the Menu key to view the message. Press the Menu key >... - Page 63 Receive SMS broadcasts To receive or stop broadcast messages, you can choose to enable or disable Cell Broadcast (CB) service. To receive broadcast messages select Menu > Messages > SMS > scroll to Broadcast SMS > Reception > On > OK. Choose Off to stop this service. New cell broadcast messages are directly shown on your standby display, until you press any key.
-
Page 64: Voice Mail
Voice mail Your incoming calls can be forwarded to your voice mail. Callers will be prompted to leave a message for you. This feature requires you to enter a voice mail number which is provided by your service provider. To set voice mail number select Menu > Messages > Voice mail >... -
Page 65: Tools
Tools Organiser The Organiser has a calendar to enable you to set appointments, cre- ate appropriate notes, schedule reminders when required, set alerts and repeat specific settings. Tasks can be viewed on a daily, weekly and monthly basis. To access the Organiser and its associated functions, select Menu >... -
Page 66: Create New Event Entries
Create new event entries You can create two types of event entries. Meeting: set the date and time for a meeting. • Choose a date on the calendar and select Option > New > Meeting > OK or alternatively, choose a date and press the Menu key >... -
Page 67: Delete Entries
Delete entries You can delete one entry at a time or all entries simultaneously. To delete entries collectively, select Menu > Tools > Organiser> Option > Delete all. To delete entries separately, select Menu > Tools > Organiser. Scroll to a date and press the Menu key. Scroll to an entry and select Option >... - Page 68 Navigation Key Operator * (Multiply) Down / (Divide) Left + (Add) Right - (Subtract) After performing the calculations, press the Menu key for the final result. Select Option to display further options. Options Explanation CE - Clear Enables you to clear and re-enter a number.
-
Page 69: Audio Recorder
Devices within a range of 10 meters can be connected wireless using Bluetooth™ technology. JCB™ TOUGHPHONE™ is compliant with Bluetooth™ specification 1.2 supporting the following profiles: Headset profile, Hands free profile, Object push profile, Dial up networking profile, Serial port profile. -
Page 70: Activate Bluetooth
There may be restrictions on using Bluetooth™ technology in some locations. Check with your local authorities or service provider. Activate Bluetooth™ Select Menu > Tools > Bluetooth > Activate. When the Bluetooth™ is activated, Bluetooth™ icon is dis played on the home screen. Deactivate Bluetooth™... -
Page 71: Pair Devices
Pair devices Select Menu > Tools > Bluetooth > All devices. Select Scan More...to view the list of devices within a range of 10 metres with Bluetooth™ connectivity. Select the device of your choice. Select OK. Enter the pin code ‘0000’ in the Enter pin code screen. The same Pin code must be entered to the other device. -
Page 72: Delete Pairing
Delete Pairing Select Menu > Tools > Bluetooth > All device. Select the paired device to be deleted. Select Options > Delete. If you cancel the pairing with a device that is connected, pairing is removed and the connection is switched off immediately. -
Page 73: Receive Data
When the other device rejects the file, the message connection failed is displayed on the screen. JCB™ TOUGHPHONE™ supports audio formats such as .mid/.amr/.wav/.mp3/.aac and image formats such as .jgp/. bmp/.wbmp. Receive data To receive data using Bluetooth™, your device should be Bluetooth™... -
Page 74: Count-Down Timer
Count-down timer This function is helpful when you need to be reminded of a specific event or you want to time a particular task. Select Menu > Tools > Count-down timer > On > Specify the time when you need to be reminded in terms of hours and minutes. - Page 75 Personalise your phone You can customise ring tones, alerts and alarms on your phone for different environments. Select Menu > Quick settings. There are four environment profiles present in this phone. Normal is the default profile, while the other profiles are Silent, Meeting, Outdoors and Use in car.
- Page 76 • Silent: mutes all sounds in the phone. To disable all sounds, select Silent > On. Alternatively, press and hold the # key when the phone is in standby mode. Select View to see the list of alerts that will be disabled. •...
- Page 77 For pictures select Embedded pictures or Own pictures, that you would have downloaded via WAP . For sounds select Standard tunes or Own melodies that you would have downloaded or recorded. For more information refer, “Audio recorder” on page 69. Scroll to file from the displayed list and select Option to display further options.
- Page 78 This mobile phone has an internal WAP browser that allows you to browse contents of various WAP websites on the Internet. This facility is made available only if you subscribe to a data service from your network operator for Internet access. You need to consult your local operator for more details.
- Page 79 Access the web pages you visited last via this menu. Select the Back and Forward options to move between web pages. Enter address: You can enter a web address directly and browse using this menu. Settings: The following configurations can be set via this menu: Select profile: In this menu, existing profiles are listed on the display.
- Page 80 End user licence agreement This wireless device, (the “Device”) contains software owned by Sonim Technologies Inc and its third party suppliers and licensors (collectively, the “Software”). As user of this Device, Sonim grants you a non-exclusive, non-transferable, non-assignable license to use the Software solely in conjunction with the Device on which it is installed and/or delivered with.
- Page 81 You should always make backup copies of all the information stored on your Sonim Product such as downloads, calendar and contacts before handing in your JCB Product for repair or replacement.
- Page 82 Conditions The warranty is valid only if the original proof of purchase issued to the original purchaser by a Sonim authorised dealer, specifying the date of purchase and serial number for this Product, is presented with the Product to be repaired or replaced.
- Page 83 pixels and occur when individual dots have malfunctioned and can not be adjusted. Several defective pixels are deemed acceptable. This warranty does not cover Product failures caused by installations, modifications, or repair or opening of the Product performed by a non-Sonim authorised person. Tampering with any of the seals on the Product will void the warranty.
- Page 84 call meters 54 cost 55 alpha-numeric 23 last call 54 audio last GPRS call 54 own melodies 33, 69, channel lists 63 contact playback 33 copy 42 recorder 69 create 39 standard tunes 33, 77 delete 41 auto power on 34 edit 41 battery GPRS 31, 35, 37...
- Page 85 meeting mode 76 OMA 1 message settings organiser memory 57 capacity 65 reply path 56 check 65 service number 56 create new event 66 signature 57 delete 67 status report 56 edit 66 validity period 57 meeting 66 messages memo 66 conventional text 57 new 65 delete 60...
- Page 86 forward 48 predefined 62 receive 48 send 60 speed dial 47 phone settings auto answer 51 themes 76 auto redial 51 call timer 54 minute reminder 54 universal time send ID 54 daylight saving time 74 local 74 receive SMS broadcasts 63 use in car mode 76 safety guidelines 12 voice mail 63...
Need help?
Do you have a question about the Toughphone and is the answer not in the manual?
Questions and answers
My phone does not show its number when dialling out