Table of Contents
Advertisement
Available languages
Available languages
Quick Links
Advertisement
Table of Contents

Related Manuals for Grohe Geneva 19 044


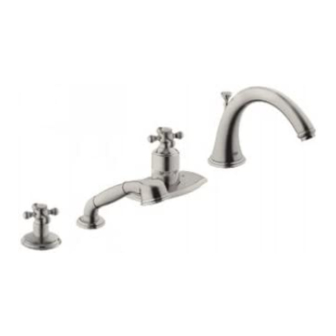
Summary of Contents for Grohe Geneva 19 044
- Page 1 Linie Europlus Geneva 19 044 English English page ..1 page ..1 Français Français page ..2 page ..3 Español Español página ..3 página ..5 94.465.131/ÄM 200351/06.04 TP 135 B041...
- Page 2 (7-10) Please pass these instructions on to the end user of the fitting! S.v.p remettre cette instruction à l'utilisateur de la robinetterie! Entregue estas instrucciones al usuario final de la grifería!
- Page 3 E1 100 °F 2,5mm Y2 Z2 *19 208 *19 207 17mm...
-
Page 4: Specifications
5. Tighten the lift rod knob (T2) to lift rod assembly (T1). plate (A) (not included in the scope of delivery) show a form of installation suggested by GROHE, for which no further 6. Install one of the elbows (R3) to the diverter (T). -
Page 5: Maintenance
English Install handle, see Fig. [7]. I. Thermostatic cartridge, non-return valve and isolating valves, see Fig. [9]. 1. Grease the o-ring of the cap (Q) with special grease supplied. 1. Same procedure as for closing isolating valves, steps 1 - 6. 2. -
Page 6: Caractéristiques Techniques
(A) (non inclus à la livraison) montrent une forme 6. Installer l'un des coudes (R3) sur l'inverseur (T). d'installation suggérée par GROHE, qui ne nécessite aucun 7. Brancher le flexible (R2) sur l'inverseur et le robinet d'arrêt. élément supplémentaire, se reporter au volet I. -
Page 7: Entretien
Français Vérifier l'étanchéité des connexions. I. Elément thermostatique, clapets anti-retour et robinets d’arrêt, voir fig. [9]. Installer la poignée, voir fig. [7]. 1. Même procédure que pour refermer les robinets d’arrêt, 1. Lubrifier le joint torique du capuchon (Q) avec la graisse étapes 1 à... -
Page 8: Especificaciones
(A) (no incluida en el suministro) muestran una 2. Introducir el caño (S) a través del rosetón (R) y la placa de forma de instalación sugerida por GROHE, para la cual no son montaje (A). necesarios más componentes, ver página desplegable I. -
Page 9: Mantenimiento
Español Fijar los tubos flexibles (G) a las conexiones existentes, ver 5. Desmontar los tornillos (J4) y el rosetón (J). fig. [7]. 6. Desmontar la base de fijación del rosetón (J2). 7. Aflojando los tornillos (E), la unidad thermostatique puede Conexión de agua fría a la derecha, conexión de agua ser desplazada a derecha e izquierda, ver fig.
Need help?
Do you have a question about the Geneva 19 044 and is the answer not in the manual?
Questions and answers