
Related Manuals for AEC Selfnergy Series


Summary of Contents for AEC Selfnergy Series
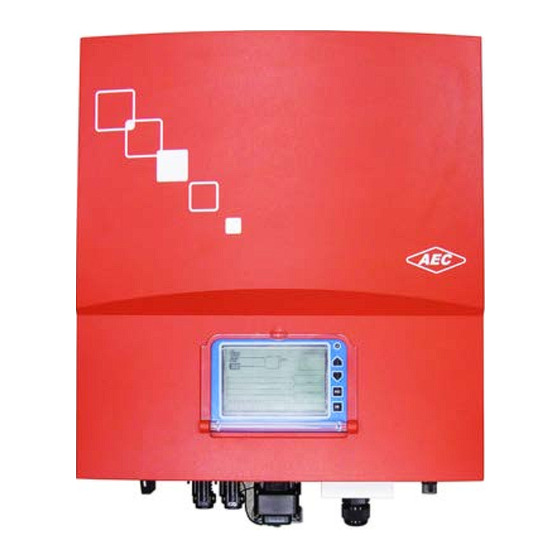
- Page 1 Allis Electric Co., Ltd. Installation Manual Single-Phase Hybrid Photovoltaic Inverter SELFNERGY -Hybrid Series...
- Page 3 Ver. 2.0 All specifications are subject to change without prior notice.
- Page 4 These applied symbols are important for human safety. Violation of warnings may result in injury to persons or cause death. WARNING! RISK OF ELECTRIC SHOCK WARNING! RISK OF ELECTRIC SHOCK, ENERGY STORAGE TIMED DISCHARGE WARNING! RISK OF DANGER WARNING! HOT SURFACE REFER TO THIS OPERATIONAL MANUAL Copyright©2014 SELFNERGY-series Products.
- Page 5 Safety Notes Read and follow all instructions in this manual. Failure to comply with General Cautions the warnings in this manual may violate safety standards. The manufacturer assumes no liability for the customer’s failure to comply with these requirements. ! Installation of the device must be in accordance with the relevant safety regulations.
- Page 6 Maintenance and Clean Each inverter is well calibrated before shipment and needs no additional maintenance during normal operation. Alterations are not to be made and no tampering with the assembly in the inverter without the manufacturer’s authorization unless specified elsewhere in this manual. They may result in injury, electric shock, or fire and void the warranty.
-
Page 7: Table Of Contents
Contents 1 INTRODUCTION................1 1.1 G ..................1 ENERAL 1.2 S ................2 PECIFICATIONS 1.3 F ............6 UNCTIONS AND EATURES 1.4 A .................. 7 CCESSORIES 2 INSTALLATION ................8 2.1 P ..................8 LACEMENT 2.2 M ..................9 OUNTING 2.2.1 S ......................9 AFETY... - Page 8 3.4.1 O ..................37 PERATIONAL TATUS 3.4.2 C ..................39 HECK RROR ESSAGE 3.4.3 S ................40 ETTING BEFORE PERATION 3.4.4 I ......................43 NFORMATION 3.4.5 B ..................45 ATTERY ARAMETERS 3.4.6 S )............48 TALIAN MARKET ONLY 3.5 D ..........54 ESCRIPTIONS OF RROR ESSAGES 3.6 T ..............
- Page 9 List of Figures Fig 1: Energy storage for grid connected solar system overview......... 1 Fig 2: Accessories in the package..................7 Fig 3: Hanging surface......................9 Fig 4: Clearances required for installation ...............10 Fig 5: Fasten the mounting bracket ...................11 Fig 6: Hook the inverter on the mounting bracket ............12 Fig 7: Fasten the screws ......................12 Fig 8: Enclosure bottom view ....................14...
- Page 10 Fig 29: Connection power cable ..................28 Fig 30: Lock the protective cover ..................29 Fig 31: Connection RS485 communication cable ............29 Fig 32: Connecting Battery Temperature Sensor ............30 Fig 33: Assemble your AC terminals ..................31 Fig 34: Check the phase and ground terminals ..............32 Fig 35: Fasten the gland nut....................32 Fig 36: Push the connector until the latch is positioned..........33 Fig 37: Overview front panel of the inverter ..............34...
-
Page 11: Introduction
Introduction General The SELFNERGY series is a compact storage solution from AEC. It's a single-phase inverter with integrated Lead-acid/Li-ion battery, especially suitable to the needs of households. The grid-connected inverter converts DC power yielded from solar array into AC power for household consumption. -
Page 12: Specifications
Specifications Model Selfnergy-3300 Selfnergy-4000 Selfnergy-5000 Maximum AC Output Power 3300 VA 4000 VA 5000 VA* Output Data (AC) Maximum AC Output Current 16.5 a.c.A 20 a.c.A 24.5 a.c.A* Nominal AC Voltage 230 a.c.V Grid AC Frequency 50 / 60 Hz, auto-selection Power Factor >... - Page 13 Maximum Discharging Power 3600 W 4300 W 5300 W Input Data (Battery) Maximum Discharging Current 18 d.c.A 20.0 d.c.A 24.5 d.c.A* Maximum Charging Current 20.0 d.c.A Maximum Battery Voltage 400 d.c.V Configurable Voltage Range 198-400 d.c.V Nominal battery voltage 240 d.c.V (Lead-acid), 216 d.c.V (Li-ion) Battery Type / Capacity (range) FLA, VRLA, Li-ion** / 14 Ah ...
- Page 14 VDE-AR-N 4105 , CEI 0-21 Warranty 5 years * For VDE-AR-N4105, the inverter is rated 4600 VA. ** With AEC specified battery pack. Non-isolated inverters shall be provided with installation instructions that require PV modules that have an IEC 61730 Class A rating.
- Page 15 Adjustable voltage, Frequency and Reconnection Settings Range Default VDE-AR-N 4105 Setting 50.05~51.50 51.5 Over-frequency (Hz) (60.05~61.50)* (61.5)* Over-frequency disconnection time (cycle) 1~10 47.50~49.95 47.50 Under-frequency (Hz) (57.50~59.95)* (57.50)* Under-frequency disconnection time (cycle) 1~10 Over-voltage (Vac) 235~264.5 264.5 Over-voltage disconnection time (cycle) 1~10 Under-voltage (Vac) 184~225...
-
Page 16: Functions And Features
Functions and Features DSP (Digital Signal Processor) makes use of the advanced digital control technology to enhance the conversion efficiency and the added functions. Conformity to the EMC, Low Voltage Directives and Standards, e.g. 2004/108/EC, 2006/95/EC, IEC/EN 62109-1/-2, IEC/EN 62040-1, ... -
Page 17: Accessories
Accessories Please check the inverter and accessories in the package. If there is some part incomplete or any pages missing from the manual, please contact the authorized agent. Please check the following items in the box: Photovoltaic Inverter x 1 Mounting Bracket x 1 Female Cable Coupler Plus Key x 2 and Minus Key x 2 AC Female Connector x 1... -
Page 18: Installation
Installation 2.1 Placement Please take the following points into consideration when installing the inverter and selecting the installation location: A solid and vertical wall is essential; not to hand it on a forward-tilting surface. The backward-tilting angle must be less than 10°. ... -
Page 19: Mounting
Fig 3: Hanging surface Mounting 2.2.1 Safety Notes Don’t remove the external cover of the inverter. No parts inside the inverter are to be maintained by the user. If necessary, only qualified maintenance staff can carry out; The solar panel exposed to sunlight supplies DC power. -
Page 20: Install Inverter On Wall
2.2.2 Install Inverter on Wall Select the appropriate space and the solid and vertical surfaces enough to support the inverter. The space surrounding the inverter must be appropriate so that heat can be dissipated easily and maintained conveniently, as shown below. Fig 4: Clearances required for installation... -
Page 21: Fig 5: Fasten The Mounting Bracket
The wall bracket is fixed on the wall by these 4~6 screws. The position of the fixing hole can be selected according to the wall condition. The construction can be referred in the following figure. Fig 5: Fasten the mounting bracket... -
Page 22: Fig 7: Fasten The Screws
The four holes behind the inverter are simultaneously aligned with the four hooks on the bracket. Two persons are required to complete this step safely and correctly. Fig 6: Hook the inverter on the mounting bracket Finally, the screws (see Appendix H in 1.4) are used to lock in the holes on the left and right sides of the support, so that the inverter can be fixed on the wall rack. -
Page 23: Status
2.2.3 Check Installation Status Ensure the backward tilting angle of the installation wall should not exceed 10 , and the inverter can’t be installed on the walls which have forward-tilt. Ensure the inverter is correctly fixed on the hooks at the four corners of hanger. -
Page 24: Iring The Nverter
Wiring the Inverter 2.3.1 Safety Notes The parts inside the inverter could be damaged due to the electric Avoid static discharge damaging inverter. static discharge. Please take the grounding measures prior to ! touching any internal parts and terminals. 2.3.2 Introduction The inverter comprises DC input (connect to solar panel and battery), AC output (connect to service entrance, utility power) and communication ports (monitor the inverter status). -
Page 25: Dc Input Wiring
2.3.3 DC Input Wiring 2.3.3.1 Safety Notes Touching the energized parts or the metal part of the connector may cause electric shock. The solar panel exposed to sunlight supplies hazardous DC voltage. The maximum DC (PV array) input current of this inverter is 26.5 A and the DC connector rating is 25 A, so need to connect two DC input connector to apportion. -
Page 26: Fig 9: Assemble Your Dc Terminals (Solar Panel) - Step 1
2.3.3.2 Connect Solar Connector 1. Take the solar connectors from the package, which includes 2 male connectors (positive and negative, see section 1.4). 2. Peel the DC wires insulation about 8~10 mm and insert them into the metal terminals to the end. Then use a connector plier to press the terminals. -
Page 27: Fig 11: Complete Your Dc Terminals (Solar Panel)
4. Ensure both the DC disconnect switch and the external AC breaker are in OFF position. 5. Insert the pressed terminals to the female sockets. Only if the latch is in position does the DC wires connection be completed. Fig 11: Complete your DC terminals (solar panel) 2.3.3.3 Connect Battery Connector 1. -
Page 28: Fig 13: Assemble Your Dc Terminals (Battery) - Step 2
3. Then install the connector housing, which includes positive (Red housing) and negative (Black housing) connectors. Red(+) Black(-) Fig 13: Assemble your DC terminals (Battery) - step 2 4. Ensure the electrical polarity (see Fig 14) and push the connector into the inline receptacle kit until the latch is positioned. -
Page 29: Fig 16: Remove The Battery Connector Cover
5. Loosen nuts on the connectors. Insert the pressed terminal to a locked extent, and try pulling back to check its tightness. Then, fasten the gland nut to keep the waterproof usage. Fig 15: Assemble your DC terminals (Battery) - step 4 6. -
Page 30: Fig 17: Complete Your Dc Terminals (Battery)
7. Insert the pressed terminals to the female sockets. Only if the latch is in position does the DC wires connection be completed. Fig 17: Complete your DC terminals (Battery) 8. If you need to remove the battery connector can use a dedicated connector plug. -
Page 31: Com Line Connection
RS485 supports communication between multiple inverters in parallel so the two sets of RS485 pins are provided for this function. LAN can use AEC's Ethernet or WiFi module to connect to the Web server. A battery management system (BMS) based on the CAN 2.0A was designed for the Li-ion battery pack. - Page 32 +24V ISO GND (for Li-ion) NTC GND(for Lead-acid) NTC (for Lead-acid) LAN Port:(Only use AEC’s Ethernet / WiFi card) Only one interface (Battery temperature sensor or CAN) is functioning at a time. BMS socket uses the CAN 2.0A as its main communications channel for Li-ion batteries.
-
Page 33: Fig 21: Remove The Rs485 Port Housing
2.3.4.2 Connection Ensure both the DC disconnect switch and the external AC breaker are in OFF position; loosen the screws and remove the housing of COM port. Fig 21: Remove the RS485 port housing Counter-clockwise loosen the waterproof cable gland nut, remove waterproof plugs behind cable gland nut. -
Page 34: Fig 23: Assemble The Communication Cable
Loosen the rear nut on the gland and pass the communication cable through one of the rubber holes. Connect each thread to the correct terminal contact (see Fig 23: Assemble the communication cable 2.3.4.1) and lock the COM port housing back to the inverter. Fig 24: Lock the RS485 port housing Check the cable length and tightness. -
Page 35: Fig 26: Multi-Inverter Wiring By Rs485
2.3.4.3 Connection in Parallel by RS485 For more than one inverter in a system, RS485 provides this convenient communication functions. The inverter provides two RS485 contacts. Basically one (contact) is of connecting to your monitoring device (e.g. PC); and the other one is for connecting with adjacent inverter. -
Page 36: Fig 27: Selfnergy (Optional Smart Power Console) System Overview
2.3.4.4 Connect Smart Power Console The AEC Smart power console is ALLIS Electric Corp. developed to support Selfnergy series solar inverter, in a power interruption provide emergency backup power solutions. The device measures the demand from the loads and detects the amount of power being supplied to the grid. - Page 37 Smart Power Console Specifications The emergency load (LOAD(M) terminal) and non- emergency load (LOAD(S) terminal) total the maximum full ! load current is 25A. And the emergency load (LOAD(M) terminal) must less than its maximum 76A inrush current when starting.
-
Page 38: Fig 28: Remove The Protective Cover
First, the smart power console mounted on the wall. Then, counter-clockwise loosen the screw and remove the protective cover. Fig 28: Remove the protective cover Connect the AC wires L as live (brown or black) and N as neutral (blue) to the "GRID" terminals, and the outputs of the inverter are connected directly to the "INVERTER"... -
Page 39: Fig 30: Lock The Protective Cover
The smart power console must be connected to the home ! wiring connected directly to the generation/consumption meter, bef ore any branches to consumers in the house. Connect each power cables to the correct terminal contact and lock the protective cover back to the smart power console. Fig 30: Lock the protective cover The RJ45 plug of the smart power console must be connected to the correct EM socket. -
Page 40: Fig 32: Connecting Battery Temperature Sensor
2.3.4.5 Connect Battery Temperature Sensor/CAN For the inverter, the BMS socket uses the CAN 2.0A as its main communications channel for Li-Ion batteries. Otherwise, use the temperature sensor if used lead-acid batteries. Connect the battery temperature sensor to the correct BMS socket. (See section 2.3.4.1) The temperature sensor measures the temperature of the battery during charging. -
Page 41: Ac Output Wiring
2.3.5 AC Output Wiring 2.3.5.1 Safety Notes Ensure both the DC disconnect switch and the external AC breaker are in OFF position. The maximum AC output current of this inverter is 24.5 A and the AC connector rating is up to 25 A. The diameter of the power wire (e.g. -
Page 42: Fig 34: Check The Phase And Ground Terminals
Connect the AC wires L as live (brown or black), N as neutral (blue) and Ground (green with yellow stripes). Align two smooth gaps over the connector when jointing. Fig 34: Check the phase and ground terminals Push the connector until the latch is positioned. Then, fasten the gland nut to keep the waterproof usage. -
Page 43: Fig 36: Push The Connector Until The Latch Is Positioned
Insert AC connector to the socket on the inverter. Align the hook on male connector with the square hole on female socket when jointing. Push the connector until the latch is positioned. Fig 36: Push the connector until the latch is positioned... -
Page 44: Operation
Operation 3.1 Overview The DC (PV) voltage reaches a certain minimum voltage if sufficient insolation is available, the inverter will enter “grid-feed” mode. If, as nightfall approaches, the voltage drops below the minimum voltage value, grid-feed mode ends and the inverter will shut down itself. Fig 37: Overview front panel of the inverter LCD Display LED Display (Green) -
Page 45: Lcd Display
3.2 LCD Display The display menu is shown once the inverter starts up. Measured values and all of the information are displayed here. The LCD continues to display the information following the process flow described below in this section. Fig 38: LCD display overview... -
Page 46: Buttons On Panel
3.3 Buttons on Panel By using the “▲”, “▼”, “OK” and “ESC” buttons, users may be able to view which measured value is to be displayed. 1. “▲”, “▼” k ey: Press “▲” or “▼” key to switch the various displays for measured values and data. -
Page 47: Operational Status
3.4.1 Operational Status The following paragraphs explain how the display works in each mode. 1. Illumination: Automatically the inverter shuts down in case of the low insolation. 2. Standby: The Inverter sets the initial values and it waits to start up automatically in case the PV array voltage is sufficient. - Page 48 7. Derating: The inverter is limiting the maximum AC power feeding. This is not a malfunction. 8. Warning: The system has encountered some minor warning, but it can continue to feed the AC power to the grid. 9. Sys. Flash: The firmware is being updated. 10.
-
Page 49: Check Error Message
3.4.2 Check Error Message When error messages display, users could select the "Error message" by press the “▼” or “▲” key from the main menu and then press the "OK" key to confirm. For each page, there are recorded error events as shown in the following figure. -
Page 50: Setting Before Operation
3.4.3 Setting before Operation There are some parameters that can be re-configured from the panel. Users may select "Setting" from the main menu and press the "OK" key to enter system setting as shown below. Only the standard selection is password protected. - Page 51 emergency AC power when grid failures occur. (2) SC-G (opt. Smart Power Console): The inverter is priority stored the energy required by the batteries, and the excess power produces required by the loads, thereby avoiding to inject any excess power into the electricity grid. And the inverter can provide emergency AC power when grid failures occur.
- Page 52 Press “▼ / ▲” key ↑↓ Press “▼ / ▲” key ↑↓ Press “▼ / ▲” key ↑↓ All the tripping-limit settings are protected by password. Only the authorized installers can adjust the protective functions under the approval of the distribution network operator (DNO). !...
-
Page 53: Information
3.4.4 Information Users may select the "Information" from the main menu and press the "OK" key to enter system information as shown below. The screen will display information of your inverter including firmware and etc. The model name of the inverter The serial number of the inverter ... - Page 54 Press “▼ / ▲” key ↑↓ Press “▼ / ▲” key ↑↓ Press “▼ / ▲” key ↑↓ Press “▼ / ▲” key ↑↓ Press “▼ / ▲” key ↑↓...
-
Page 55: Battery Parameters
3.4.5 Battery Parameters There are some parameters that can be re-configured from the panel. Users may select "Battery Setting" from the main menu and press the "OK" key to enter system setting as shown below. Users may change the values for other settings, such as battery capacity, battery series, maximum charge current, stat of charge (SOC), depth of discharge (DoD), and Relive cycle. - Page 56 Press “OK” key ↓ Press “▼ / ▲” key ↑↓ Press “▼ / ▲” key ↑↓ Press “▼ / ▲” key ↑↓ Press “▼ / ▲” key ↑↓ Press “▼ / ▲” key ↑↓ Press “▼ / ▲” key ↑↓ Press “▼...
- Page 57 Press “▼ / ▲” key ↑↓ Press “▼ / ▲” key ↑↓ Do not connect the first and last batteries together to form a complete circuit. This will be a direct short, and the batteries may explode. The inverter must set these battery parameters when using !...
-
Page 58: Fig 39: Search For Inverters
3.4.6 Self-Test (for Italian market only) 3.4.6.1 Use PC Software The Self-Test software as an accessory provided with the inverter should be install e d in a computer which is connected to the inverter through the “RS485 contacts”. Once the software is decompressed successfully, there is an execution file “Self Test”... -
Page 59: Fig 40: Communicated Successfully
Fig 40: Communicated successfully Only one inverter can be selected to run the Self-Test function even more than one inverter is found. Users can choose the inverter by highlight the serial number and then click the “Start Self Test” button to run the Self-Test function which will perform in the order as shown in Figure 38 and described below. - Page 60 minimum) threshold value. During the Self-Test the threshold value changes linearly and the measured voltage or frequency of the AC grid will be displayed on the PC screen. The maximum/minimum threshold values and the accepted trip time defined in CEI 0-21 are as follows: Maximum AC voltage threshold: 264.5V(S2), 253V(S1) ;...
-
Page 61: Fig 41: Self-Test Process
(a) Start Self-test (b) Self-test completed Fig 41: Self-test process After all sub tests are complete, a window “All tests are finished” will be pop out and users shall click the “OK” button to stop the Self-Test software. - Page 62 3.4.6.2 Use Self-testing It is also possible to run the Self-Test function without a computer connected. Users may select “Setting” from the main menu and then select “Self Test” and press “OK” to perform the Self-Test function as shown below. (Please refer to Section 3.4.3) Press “OK”...
- Page 63 Press “▼ / ▲” key ↑↓ Press “▼ / ▲” key ↑↓ CAUTION! If any one of these sub tests f ails, the inverter will go into the “f ault mode” and stop the test. It must re-run and pass the Self-Test function or the inverter will stay in “f ault mode”...
-
Page 64: Descriptions Of Error Messages
3.5 Descriptions of Error Messages In the event of a fault, the inverter will stop feeding the AC power to the utility grid and display the error message on the LCD. Qualified service staff shall do the analysis, measurement, and debug, if needed, according to the error message in order to resume normal conditions. - Page 65 Islanding is detected. An error occurred when reading or writing the EEPROM. *warning message. The AC frequency of the utility grid is above the upper limit. The AC frequency of the utility grid is under the lower limit. ...
- Page 66 The DC current has exceeded the maximum permissible value. Internal measurements from both CPU’s are different from each other. External communication between the smart power console and the inverter is abnormal. The direction of current flow of the smart power console is incorrect.
- Page 67 The residual current monitoring unit is abnormal. The output relay failed. The insulation resistance between PV array and the ground is below the allowable value. The RTC is stopped abnormally. *warning message The leakage current detected by inverter has exceeded the maximum permissible value.
- Page 68 The AC voltage of utility grid is above the upper limit. The AC voltage of utility grid is under the lower limit. The AC voltage detection circuit failed. The DC/DC converter is not working properly. Internal DC bus voltage is too high. ...
-
Page 69: Troubleshooting
3.6 Troubleshooting The Inverter requires very little maintenance. When the inverter has encountered an event of fault, the error message will be displayed on the LCD and recorded in memory. If you encounter problems with the inverter, refer to the tables in this chapter for probable causes and recommended solutions, and then remove the fault condition(s) to have the inverter return to normal condition and continue to feed AC power to the utility. - Page 70 EEPROM's Inform professional Error Message Possible Causes Disposal Measures parameters are service staff to update ■ ■ unrecognized the EEPROM's parameters Cables or wires Make sure that the insulation is damaged insulation rating is ■ ■ and it causes a high sufficient for the ground fault current application...
- Page 71 Calibration Restart the inverter Error Message Possible Causes Disposal Measures parameters have again if failed to restore ■ ■ deviated Inform professional Circuits inside inverter service staff to check the ■ are abnormal calibration parameters ■ The direction of Check current sensor current flow of the direction must flow into ■...
- Page 72 The residual current Restart the inverter again; Error Message Possible Causes Disposal Measures monitoring unit is Inform professional staff if ■ ■ abnormal. you fail to restore Dew or some object Check the impedance exits between PV array between PV(+), PV(-) and ■...
- Page 73 The natural air Remove any obstacle Error Message Possible Causes Disposal Measures circulation is near heat sink ■ ■ insufficient Main voltage or Wait until the grid is frequency is higher back to stable. ■ ■ or lower than the Request the utility permissible value supplier to improve and...
-
Page 74: Technical Documentation
Technical Documentation Outline Drawing Fig 42: Outline drawing... -
Page 75: Efficiency
4.2 Efficiency The efficiency is shown below. Fig 43: Euro. Efficiency of the Selfnergy-3300 = 96.1% Fig 44: Euro. Efficiency of the Selfnergy-4000 = 96.5%... -
Page 76: Fig 45: Euro. Efficiency Of The Selfnergy-5000 = 96.6
Fig 45: Euro. Efficiency of the Selfnergy-5000 = 96.6%... -
Page 77: Mpp Efficiency
4.3 MPP Efficiency The MPP efficiency is shown below. Fig 46: MPP Efficiency of the SELFNERGY-SERIES... - Page 78 ALLIS ELECTRIC CO., LTD. 12F No. 19-11 SAN-CHUNG ROAD,NAN KANG DISTRICT TAIPEI, TAIWAN, R.O.C TEL:+886-2-2655-3456 FAX:+886-2-2655-2286...
Need help?
Do you have a question about the Selfnergy Series and is the answer not in the manual?
Questions and answers