
Related Manuals for FAAC HOME SHIELD

Summary of Contents for FAAC HOME SHIELD
- Page 1 WIRELESS ALARM SYSTEM WIRELESS ALARM SYSTEM I n s t a l l a t i o n a n d u s e i n s t r u c t i o n s...
- Page 2 Presentation We thank you for the confidence you have in us by buying this alarm system. The system consists of a transmission control unit and a set of complementary devices. It protects a home against intrusions and can be remotely controlled and consulted by telephone. Installation advice - The different elements were prepared during production to operate together from the very first enablement, without the need for additional programming,...
-
Page 3: Table Of Contents
Index Operation of the alarm system ..p 4 Deleting system’s devices....p 28 The kit devices ....p 4 Deleting one device at a time ..p 28 Transmission by double band radio . -
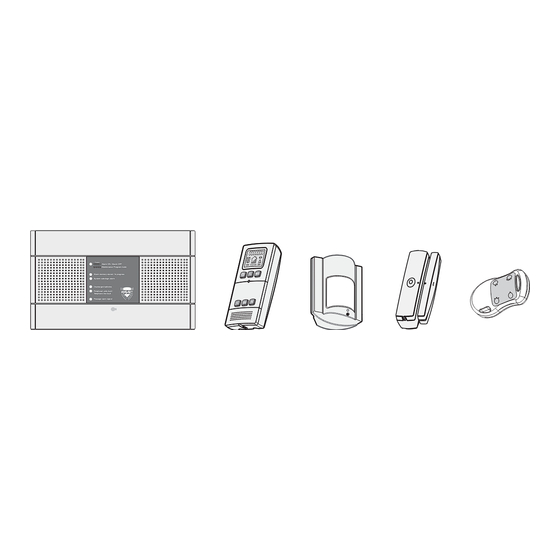
Page 4: Operation Of The Alarm System
Operation of the alarm system The kit devices To facilitate identification, we advise you to assign an identifier (name and number) to each device. These names will be used to name the devices with the control keypad. Example: “BEDROOM - No. 2” to indicate the second bedroom of a house. - Page 5 Control keypad It must be installed on a wall. It provides information on the system’s status, signalling any open doors or windows. By means of an access code, it enables the alarm to be enabled area by area, totally enabled or disabled. It provides a list of the latest events and indicates the external temperature (if an outdoor siren is connected to the system).
-
Page 6: Transmission By Double Band Radio
Operation of the HOME SHIELD alarm system Transmission by double band radio The radio transmission used by this system, is The language used by the devices to communicate is performed on two different frequencies. The messages a radio protocol. It guarantees protected digital... -
Page 7: Operation According To Areas
Operation according areas The protection mode will differ according to the type of life of the persons present in the rooms to be protected. In fact, theft can occur even if some persons are present in the rooms. Thanks to this alarm system, it is possible to protect only one part of the dwelling, or to use only one type of sensor (e.g.: the opening contacts and the glass breakage sensors, but not the movement sensors) -
Page 8: Installing The System Devices
Installing the system devices H4 Alarm Control Unit with telephone transmitter and siren Choice of location The control unit should be installed: - in a flat surface, with sufficient space around to open the battery compartment, not recommended recommended - in the centre of the house and high up (for better radio range), - in an obstacle-free place for excellent sound diffusion of the integrated siren,... - Page 9 Wiring the outputs The control unit supplies status and alarm information. Status: Closed contact: alarm system enabled. Open contact: alarm system disabled. Cable route Alarm: output of alarm in progress (open collector). The output, which is normally floating, is earth connected when the alarm is tripped.
-
Page 10: Hra Opening Detector
Installing the system devices HRA Opening Detector Selecting the position The opening detector should be installed: - inside the room to be protected, - above one of the main accesses (entrance door…), or above the less visible accesses (rear door, garage, first-floor window…). - Page 11 Start-up Remove the plastic strip from the batteries. Select the type of mode to trip the alarm. Immediate Delayed alarm alarm Immediate alarm: Immediate alarm: In case of detection, the alarm is tripped immediately. Dela ed alarm: Dela ed alarm: The alarm is tripped with a delay of about 45 seconds, to allow the user to disable the alarm after entering (example: disabling the system from the control...
-
Page 12: Hrm1 Movement Detector
Installing the system devices HRM1 Movement Detector Selecting the position The movement detector should preferably be located Installation at in a corner: a height of 2.3 m off the floor - avoid any heat source, or movement of a warm body, near the sensor (convector, fireplace/chimney…), - the detection field must be free of any obstacles (curtains, furniture…),... - Page 13 Start-up Remove the plastic strip from the batteries. Select the type of mode to trip the alarm. Immediate Delayed alarm alarm Immediate alarm: Immediate alarm: In case of detection, the alarm is tripped immediately Dela ed alarm: Dela ed alarm: The alarm is tripped with a delay of about 45 seconds, to allow the user to disable the alarm after entering (example: disabling the system from the control...
-
Page 14: The Control Keypad
Installing the system devices The control keypad Selecting the position We advise you to install the control keypad near one of the main accesses (for example: entrance door). It must be accessible to the user and can be wall mounted, at a height of about 1.50 m. Attention: Attention: If the control keypad is installed near a detector... -
Page 15: Adding Devices To The System
Adding devices to the system control unit MAINTENANCE PROGRAM mode The control unit must be in alarm OFF mode. select and then confirm Type in the code (see page 18) on the control keypad, confirm it, and then press the “configuration access” push-button. -
Page 16: Adding A Detector
Adding devices to the system Adding a remote-control = push-button 4 The remote-control (supplied) is programmed as follows: ON = push-button 4 OFF = push-button 1 This paragraph refers solely to the insertion of a new = push-button 1 remote-control: the one supplied with the kit is the master remote-control. - Page 17 light flashes, - press the OFF key of the remote-control for about one second; the control unit should should beep twice, - finish the insertion as described in step 2. control unit MAINTENANCE PROGRAM mode, using a remote-control The control unit must be in alarm OFF mode. Press push-buttons 1 and 2 of a Master remote-control, and release them when the indicator light flashes.
-
Page 18: Customising The System
Customising the system The control keypad Display of system status Before carrying out any operation on the keypad, you have to type in the access code (3 attempts at the most, after which you have to wait for a few minutes before re-inputting the access code). - Page 19 CUSTOMISING mode After you have typed in the access code for displaying the system’s status, press the configuration access push-button. Select the LEARNING menu, and then confirm. The countdown begins (from 69 to 0): the keypad and the control unit exchange the information required for customising the keypad.
-
Page 20: Naming Devices
Customising the system Naming devices After you have typed in the access code for displaying the system’s current status, press the configuration push-button. Select the LEARNING menu, and then confirm. As soon as learning has finished, select the NAME DEVICES menu and then confirm. There are two way of naming a device: - press the test push-button of the device to be named (remote-controls excluded), and the type of device and... -
Page 21: Creating Surveillance Areas
Creating surveillance areas After you have typed in the access code for displaying the system’s current status, press the configuration push-button. Select the LEARNING menu, and then confirm. As soon as learning has finished, select the INSTALLATION menu and then confirm. message OPEN THE CONTROL... -
Page 22: The Control Unit Telephone Transmitter
Customising the system The control unit telephone transmitter Impor tant: Impor tant: To modify the settings (telephone numbers, access codes, time…), the control unit must be in MAINTENANCE PROGRAM mode before making the call. Calling the control unit (method 1) Method 1 From a different telephone line, mobile or fixed, type in Type in the number of the system from an... - Page 23 Operation of the telephone transmitter How to access the CUSTOMISING menu After calling the telephone transmitter, input the 2 secs. Alarm ON / Alarm OFF Maintenance Program mode Alarm memory-stored / In progress System sabotage alarm Discharged batteries Peripheral units fault / Telephone line fault Passage open signal access code (6 digits).
-
Page 24: Telephone Numbers / Voice Message
Passage open signal Customising Menu When put into operation, the voice message is: “You - to modify the telephone numbers are communicating with your HOME SHIELD”. to be called, press Press , to modify - to modify the voice message,... -
Page 25: Access Code
Modifying the access code Modifying the date When put into operation for the first time, the code is As in the case of time, you must adjust the date in 123456. We strongly advise you to modify this code, to order to be informed of the exact day of events which prevent strangers disabling the alarm. - Page 26 Customising the system Alarm Control Unit 2 secs. internal functions Alarm ON / Alarm OFF Maintenance Program mode Alarm memory-stored / In progress System sabotage alarm Discharged batteries Peripheral units fault / Telephone line fault Control unit internal siren Passage open signal TEST In case of an alarm due to intrusion, the control unit’s internal siren is enabled.
-
Page 27: System Test
System test Warning signal test with the control Attention: Attention: If the control unit compartment is not already open, unit the control unit must be in MAINTENANCE PROGRAM mode. Press the green control unit’s “Test” push-button. Every siren emits a brief alarm signal. The control unit emits a brief alarm signal at the end Detectors of the test. -
Page 28: Deleting System's Devices
Deleting system’s devices Deleting one device at a time This operation is carried out from the control keypad. Before a device is eliminated, a LEARNING session must be carried out: - type in the access code, - press the configuration push-button, - select the INSTALLATION menu and confirm. -
Page 29: Deleting Several Devices
Deleting several devices Prepare the control unit before every operation - the control unit must be in ADD DEVICES mode (see chapter “Adding devices to the system”). Deleting all the devices except the outdoor siren To avoid having to re-configure the siren: - press, for more than 5 seconds, the yellow DELETE (EFF) push-button of the control unit, - the control unit sounds a long beep and the 5... -
Page 30: Turning The Alarm System On Or Off. P
Turning the alarm system ON or OFF General information Enabling the alarm When the alarm is enabled: Enabling the - the control unit beeps once, alarm - the indicator light lights up for a few seconds. If the control unit emits a series of beeps, when the BeeP alarm is enabled or disabled, this means there is a fault or trouble in the system. -
Page 31: By Remote-Control
By remote-control Enabling and disabling the alarm - Press the ON key to enable the alarm mode on, - Press the OFF key to disable the alarm. To eliminate the signalling of an alarm memory-stored, press OFF for 10 seconds. Enabling the alarm Type in the access code and confirm. -
Page 32: Forced Enable (With Passage Open)
Enabling and disabling the alarm system Forced enable (with passage open) When the alarm system is enabled, if an opening detector is declared active (e.g.: open window…), the control unit sounds several BEEPS, to signal the PASSAGE OPEN fault, and will not carry out the order. To make a forced enable possible of the alarm: - press again during the 10 seconds after the first... -
Page 33: Remote Control And Questioning Of The System
Remote control and questioning of the system Call the control unit 2 secs. Alarm ON / Alarm OFF Maintenance Program mode Alarm memory-stored / In progress System sabotage alarm Discharged batteries Peripheral units fault / Telephone line fault Passage open signal See chapter “Customising the system”... - Page 34 Remote control and questioning of the system 2 secs. Alarm ON / Alarm OFF Maintenance Program mode Alarm memory-stored / In progress System sabotage alarm Discharged batteries Peripheral units fault / Disabling the alarm Telephone line fault Passage open signal If the telephone transmitter signals that the alarm Alarm enabled, system is enabled, it can be disabled:...
-
Page 35: How An Alarm Takes Place
How an alarm takes place Intrusion or sabotage alarm The outdoor siren If a detector is tripped in one of the protected areas: is sounded - the sensor sends a signal to the control unit, - If the detector is set for a delayed alarm, the control 2 secs. - Page 36 Intrusion alarm. Press - the telephone transmitter asks the called person to press key, You are communicating with your Home Shield. At 23 hours and 15 minutes, garage intrusion alarm - reads the personal message and indicates the type of alarm,...
-
Page 37: Replacing The Batteries
Replacing the batteries Discharged batteries signal When the batteries of one of the devices are discharged, this is signalled by a set of BEEPS when the alarm is enabled or disabled To identify the device in question, use the key on INFO INFO the control keypad. -
Page 38: Technical Specifications
Technical specifications Opening detector Siren transmission control unit Power supply: two 1.5 volt alkaline batteries type LR203 (or AAA). Power supply: four 1.5 volt alkaline batteries type LR20 (included).. Time range: 3 years under normal use conditions. Time range: 2.5 years under normal use conditions. Radio range: from 200 to 300 m according to environment. -
Page 39: Troubleshooting
Troubleshooting The purpose of this chapter is to offer help to quickly solve the most frequent problems, and, if necessary, One of the devices is totally solve them during installation or use. inactive No beep can be heard from a detector, telephone transmitter, Untimely enablement of or siren when the test push-button is pressed. - Page 40 Troubleshooting Control keypad You have forgotten the telephone transmitter access code The keypad is not activating the control unit. Put the system in MAINTENANCE PROGRAM mode: • Check if the keypad is actually recognised by the control - simultaneously press push-buttons 1 and 2 of the remote- unit.
- Page 41 The descriptions and illustrations in this manual are not binding. While leaving the essential characteristics of the equipment unaltered, FAAC reserves the right, at any time and without having to update this publication, to make the modifications which it considers convenient for technical improvements or for any other construction or...
Need help?
Do you have a question about the HOME SHIELD and is the answer not in the manual?
Questions and answers