
Related Manuals for InvizBox Go


Summary of Contents for InvizBox Go
-
Page 1: User Manual
InvizBox Go User Manual Author: Vincent Riou Version: 4.0.11 Copyright: InvizBox Ltd 2019... -
Page 3: Table Of Contents
Contents 1 Device Description 1.1 Start/Stop Button 1.2 Charging the InvizBox Go 1.3 Using the InvizBox Go as a charger 1.4 Wi-Fi LED display 2 First Connection to the InvizBox Go 2.1 Starting the InvizBox Go 2.2 Connecting to the InvizBox Go 2.3 Accessing the InvizBox Go interface... - Page 4 Page 4 Section 5.8 Kernel Log Page 5.9 Update Log Page 5.10 Reboot Page 5.11 Adblock Page 5.12 Wireless Page 5.13 Diagnostics Page 5.14 Realtime Graphs Section 5.15 Basic Mode Link 6 Networking Management 6.1 Supported Networks and Encryptions 6.2 Storing and Reconnecting to Networks 7 Troubleshooting/Support...
-
Page 5: Device Description
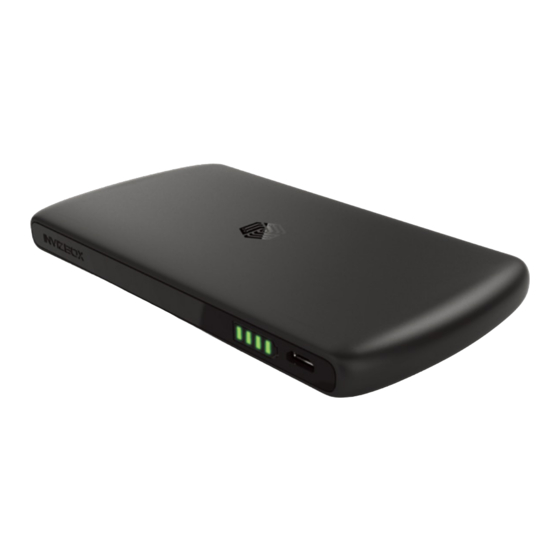
• a battery shaped LED display to let you know the battery state 1.3 Using the InvizBox Go as a charger On the other side of the InvizBox Go casing you can find a USB port. This port is used when you're using your InvizBox Go as a charger. -
Page 6: Wi-Fi Led Display
• On most devices, you will need to open your favourite browser and go to http://inviz.box • Some devices are unable to access that URL, if it is the case for you, you will then need to go to http://10.153.146.1 At any stage, you can access the InvizBox Go administration interface using http://inviz.box... -
Page 7: Installation Wizard
3.1 Welcome Page In this page, you just have to click on the "Let's Go" button to proceed with the rest of the wizard. Note that when clicking "Let's Go" on this page, you have accepted the Acceptable Use Policy (box cannot... -
Page 8: Choose Network Page
In this page, you have to select a network to connect to. The InvizBox Go will perform a scan of all networks available to you and list them in order of how strong their signal is. It also adds information regarding the fact that these networks require a password or not. - Page 9 Section 3.2 Choose Network Page Page 9...
-
Page 10: Wizard Complete Page
Congratulations, you have set up your device and are ready to access the Internet through a secure router. The next page you get to is the Status Page which if the main page of the Administration Interface and will show you the main information related to your InvizBox. -
Page 11: Using The Invizbox Go (Basic Mode)
Wi-Fi hotspot (you can change it in the Hotspot Page). If you haven't changed it, it is still the one that was provided to you on a card inside the packaging - labelled InvizBox Go Wifi Password.) -
Page 12: Basic Mode Menu
4.2 Basic Mode Menu When you first login to the InvizBox Go administration interface, you will find that you can navigate to different pages using a menu (collapsible if you're using a small screen such as a phone, in which case you will have to click the menu button first). -
Page 13: Status Page
4.3 Status Page The Status page is quickly going to become your "go to" page as it will provide you with a way to quickly understand in which state your InvizBox Go is. It will also provide you with quick acccess links to the most used configuration changes (such as connecting to a network, getting to a Captive Portal, changing VPN Location or changing Privacy Mode). - Page 14 Page 14 Section 4.3 Status Page • DHCP Lease: a list of connected devices • Support: a link to our InvizBox Go support page...
-
Page 15: Vpn Location Page
Section 4.4 VPN Location Page Page 15 4.4 VPN Location Page In this page, you have to choose the location which you want your VPN connection to use. For example, the default is the closest physical location to you when you did the original setup. This means you will appear as if you are located in that city when browsing the internet. -
Page 16: Privacy Mode Page
VPN account and select your VPN Location. • Tor: this is a mode where the InvizBox Go will connect to the internet through the Tor network. If you want to configure it further, you will have to go into Expert Mode •... -
Page 17: Hotspot Page
Page 17 4.6 Hotspot Page In this page, you can modify the name of the Wi-Fi hotspot that your InvizBox Go creates (default value being InvizBoxGo which you've experienced throughout the initial setup process). You can also deal with some settings for the WiFi hotspot. - Page 18 Page 18 Section 4.6 Hotspot Page...
-
Page 19: Account Details Page
Section 4.7 Account Details Page Page 19 4.7 Account Details Page In this page, you can enter modified VPN credentials (username and password). Your initial username and password have been stored on your device (possibly provided to you by email if you purchased your device before August 2017). -
Page 20: Logout Link
Page 20 Section 4.8 Logout Link 4.8 Logout Link This is a link that when clicked will log you out of your current session in the administration interface. 4.9 Expert Mode Link This is a link that will enable the Expert Mode Menu and therefore give you access to those advanced configuration pages. -
Page 21: Expert Mode
Section 5 Expert Mode Page 21 5 Expert Mode If you want to set some more advanced settings or get access to more advanced features (i.e. also risk getting your device in a non working state - no worries, it's always recoverable with a reset!). You can switch to the Expert Mode from the menu. -
Page 22: Tor Configuration Page
Page 22 Section 5.2 Tor Configuration Page 5.2 Tor Configuration Page This page is found in the InvizBox Go section and can be used to configure Tor. There are four sections in that page: 5.2.1 Tor Status The Tor status section allows you to: •... -
Page 23: Backup / Flash Firmware Page
The Reboot page provides you with a button to perform a reboot of the OS. 5.11 Adblock Page The Adblock page allows you to turn adblock on/off. When on, your InvizBox Go will stop ads from reaching your device by blacklisting (blocking) requests that are made to well known ads repositories. -
Page 24: Networking Management
6 Networking Management 6.1 Supported Networks and Encryptions The InvizBoz Go will only be able to scan and connect to 2.4GHz Wi-Fi networks (5GHz networks are not supported). The InvizBox Go will always choose psk-mixed and ccmp when setting up its hotspot.
Need help?
Do you have a question about the Go and is the answer not in the manual?
Questions and answers