Table of Contents
Advertisement
Advertisement
Table of Contents

Summary of Contents for Philips TD6816/BB051P
-
Page 2: Safety Information
Safety information marking on the product certifies its conformity with the technical regulations for user safety and electromagnetic disturbance which were applicable on the date of approval in accordance with European Union Directive No. N° 73/23/EEC, 89/336/EEC, 91/263/EEC and 93/68EEC. Power requirements This product requires an electrical supply of 230 volts, alternating monophased current, excluding IT installations defined in standard... -
Page 3: Table Of Contents
Introduction Installing your extra handset Deciding where to put the charger Installing the charger on a horizontal surface Mounting the charger on a wall Charging your handset Selecting the menu language Registering your extra handset with your Onis base station Changing the name of your base station Using your extra handset Making an outside call... -
Page 4: Introduction
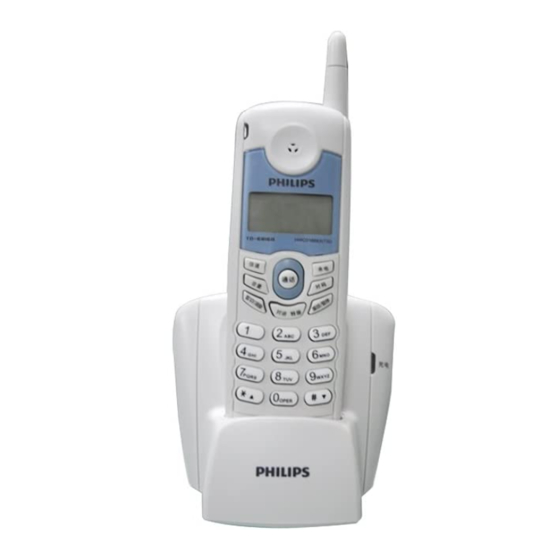
Introduction Your Onis extra handset comprises: • a charger, • a handset, • a power cable. • 2 standard AA/R6 rechargeable batteries. This guide shows you how to install and use your Onis extra handset. Please refer to the corresponding Onis user manual for information on: •... -
Page 5: Installing Your Extra Handset
Installing your extra Deciding where to put the charger • Place the charger near a main outlet supplying 220-240V at 50Hz. • To reduce to a minimum any interference with other electronic devices such as telephones, televisions, screens, etc. we advise you to place your charger at least 50 cm from any other electronic device. -
Page 6: Mounting The Charger On A Wall
Mounting the charger on a wall Fix the screws (not supplied) according to the diagram below. 2 - 2.5 mm Plug the power cable into the charger as shown on page 7. Mount the charger on the screws. Plug the power cable into the wall socket. Place the handset in the charger. -
Page 7: Charging Your Handset
Charging your handset Your handset is powered by 2 rechargeable AA/R6 batteries. Before you use your handset for the first time, charge it for at least 16 hours. life of the battery. To charge the handset, place it on the charger or on the base station. -
Page 8: Registering Your Extra Handset With Your Onis Base Station
Registering your extra handset with your Onis base station To register your extra handset with your base station, proceed as follows: Unplug the power cable of the base station, then plug it in again. The base station beeps to indicate that it is now in registration mode. -
Page 9: Changing The Name Of Your Base Station
Changing the name of your base station The default name of your base station is “PHILIPS”. You can change this name from your extra handset as follows: Press Press If the base station has a name, this will be displayed. You... -
Page 10: Using Your Extra Handset
Using your extra handset Making an outside call Direct dialling Press the tone in the handset earpiece. Dial the number using the number keys. The number called is displayed for 10 seconds after the last key is pressed. If the number you enter is longer than 10 digits, the display will scroll the number to the left to show the last digits. -
Page 11: Answering An Outside Call
Press the The number prepared is automatically dialled. You can also press activated and the number is dialled. To hang up, press charger. The call duration is displayed for 4 seconds. Answering an outside call When someone calls you, the base station and the extra handset ring, the symbol blinks on the extra handset display and the green light on the base station flashes. -
Page 12: Answering An Internal Call
Answering an internal call When another handset calls you, your handset will ring with the internal call melody, the number of the handset calling you will be displayed. Press To hang up, press charger. Using the handset loudspeaker Your extra handset is fitted with a loudspeaker as well, so that other people with you can listen to the conversation. -
Page 13: Transferring Calls
Note: The handset in Baby Sit mode will not ring but can be used to make and receive calls. To put the handset in Baby Sit mode back into normal mode, proceed as above. In step to select Using a handset in Baby Sit mode Place the handset set in Baby Sit mode, in the room you want to monitor (e.g. -
Page 14: Managing A Conference Call
Once the other handset answers, you can either: - Transfer the call by pressing - Switch back and forth between the other handset and your outside call by using If the other handset does not reply, you can return to your outside call by pressing outside and inside call by pressing Managing a conference call... -
Page 15: Using The Battery Saver
Using the battery saver Use the battery saver if you want to use the handset away from the base station or charger for a long period of time. Switching on the battery saver Press and hold the Your handset switches to battery saver mode. Note: In battery saver mode, the handset will not ring. -
Page 16: Maintenance
Your handset is powered by 2 rechargeable AA/R6 batteries. In case of replacement, you must use the following approved batteries: PHILIPS R6 NC-P, Saft RC6. The manufacturer is not liable if these recommendations are not respected. Slide down and lift off the battery cover. -
Page 17: Caring For Your Handset
Warning! Your handset batteries contain cadmium. Check your local regulations for special disposal instructions. Caring for your handset To clean your handset or charger, first unplug the mains cable. Wipe with a cloth or chamois moistened slightly with soapy water, then with a dry cloth.


Need help?
Do you have a question about the TD6816/BB051P and is the answer not in the manual?
Questions and answers