Technics SL-1210GREB Service Manual

Technics SL-1210GREB Service Manual

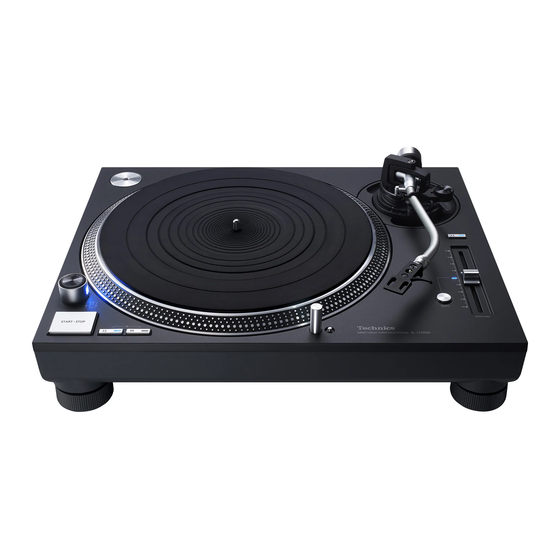
Direct drive turntable system

Advertisement

Direct Drive Turntable System
SL-1210GREB
Model No.
SL-1210GREG
Product Colour:
(K) ...... Black Type
© Panasonic Corporation 2017. All rights reserved.
Unauthorized copying and distribution is a violation
of law.
ORDER NO.AD1703015CE

Advertisement

Table of Contents
loading
Need help?

Need help?

Do you have a question about the SL-1210GREB and is the answer not in the manual?

Questions and answers

Subscribe to Our Youtube Channel

Summary of Contents for Technics SL-1210GREB

  • Page 1 ORDER NO.AD1703015CE Direct Drive Turntable System SL-1210GREB Model No. SL-1210GREG Product Colour: (K) ..Black Type © Panasonic Corporation 2017. All rights reserved. Unauthorized copying and distribution is a violation of law.
  • Page 2: Table Of Contents

    TABLE OF CONTENTS PAGE PAGE 1 Safety Precautions -----------------------------------------------3 1.1. General guidelines -----------------------------------------3 2 Warning --------------------------------------------------------------5 2.1. Prevention of Electrostatic Discharge (ESD) to Electrostatic Sensitive (ES) Devices ---------------5 2.2. Service caution based on legal restrictions----------6 3 Specifications ------------------------------------------------------8 4 Location of Controls and Components--------------------9 5 Troubleshooting Guide---------------------------------------- 10 5.1.
  • Page 3: Safety Precautions

    1 Safety Precautions 1.1. General guidelines 1. When servicing, observe the original lead dress. If a short circuit is found, replace all parts which have been overheated or damaged by the short circuit. 2. After servicing, see to it that all the protective devices such as insulation barriers, insulation papers shields are properly installed.
  • Page 5: Warning

    2 Warning 2.1. Prevention of Electrostatic Discharge (ESD) to Electrostatic Sensitive (ES) Devices Some semiconductor (solid state) devices can be damaged easily by static electricity. Such components commonly are called Electrostatic Sensitive (ES) Devices. Examples of typical ES devices are integrated circuits and some field-effect transistor-sand semiconductor "chip"...
  • Page 6: Service Caution Based On Legal Restrictions

    2.2. Service caution based on legal restrictions 2.2.1. General description about Lead Free Solder (PbF) The lead free solder has been used in the mounting process of all electrical components on the printed circuit boards used for this equipment in considering the globally environmental conservation. The normal solder is the alloy of tin (Sn) and lead (Pb).
  • Page 7 2.2.2. Precautions for servicing  Note for assembly and disassembly • When turning the unit over, be sure to close the dust cover or put a cardboard as a base, and place the unit on a soft thick cloth or cushion, etc, to prevent cracking. •...
  • Page 8: Specifications

    3 Specifications...
  • Page 9: Location Of Controls And Components

    4 Location of Controls and Components...
  • Page 10: Troubleshooting Guide

    5 Troubleshooting Guide 5.1. No power...
  • Page 12: Led Blinking Error

    5.2. LED blinking error...
  • Page 13: No Sound

    5.3. No sound...
  • Page 14: The Turn Table Does Not Operate (Rotate)

    5.4. The turn table does not operate (rotate)
  • Page 15: Leds Do Not Illuminate

    5.5. LEDs do not illuminate...
  • Page 20: Disassembly And Assembly Instructions

    6 Disassembly and Assembly Instructions  Note when replacing the dust cover unit • If the new dust cover unit rattles after replacement, make adjustment according to the following procedure. <Procedure> 1. With the dust cover unit attached to the main unit and closed, check which side (right or left) of the front side is floating. (Securely attach the dust cover unit with the hinge inserted firmly.) 2.
  • Page 21: Pcb Layout Drawing

    6.1. PCB layout drawing...
  • Page 22: Disassembly Flow Chart

    6.2. Disassembly flow chart  Note for assembly and disassembly • Replace the PCB, etc. from the bottom cover side. • When turning the unit over, be sure to close the dust cover or put a cardboard as a base, and place the unit on a soft thick cloth or cushion, etc, to prevent cracking.
  • Page 23 The following flow chart shows the procedure to disassemble exterior and interior parts for internal inspection. Assembly is done in reverse order of the flow chart.
  • Page 24: T/T Rubber Mat, Turntable Unit

    6.3. T/T RUBBER MAT, TURNTABLE 6.4. PITCH KNOB, PITCH KNOB UNIT SPACER, POWER SW KNOB 1. Remove the T/T RUBBER MAT and TURNTABLE UNIT 1. Remove the PITCH KNOB and PITCH KNOB SPACER in in the direction of arrow. the direction of arrow (1). 2.
  • Page 25: Insulators

    6.5. INSULATORS 6.6. BOTTOM CHASSIS 1. Remove the T/T RUBBER MAT and TURNTABLE UNIT. 1. Remove the T/T RUBBER MAT and TURNTABLE UNIT. (See 6.3. T/T RUBBER MAT, TURNTABLE UNIT, step1.) (See 6.3. T/T RUBBER MAT, TURNTABLE UNIT, step1.) 2. Upset the unit, and then put the dust cover unit. 2.
  • Page 26: Dc Motor Unit

    6.7. DC MOTOR UNIT 6.8. TONE ARM UNIT, QUEUING KNOB, ARMREST UNIT 1. Remove the T/T RUBBER MAT and TURNTABLE UNIT. (See 6.3. T/T RUBBER MAT, TURNTABLE UNITT, [Removing the TONE ARM UNIT] step1.) 1. Remove the T/T RUBBER MAT and TURNTABLE UNIT. 2.
  • Page 27: Main Pcb

    [Removing the ARMREST UNIT] [Ref.] When using a commercially sold board ratchet driver 1. Turn the arm height adjustable ring to raise it to the height • Use a driver suitable for working in the gap of 25 mm. of 6 mm (max). 2.
  • Page 28: Stylus Light Unit (With Led Pcb), Stylus Sw Pcb

    6.10. STYLUS LIGHT UNIT (WITH 5. Remove the coupler and screws B for removal. • Coupler: P401 LED PCB), STYLUS SW PCB • Screw B: XSN2+10FJ [0.1 - 0.3 N•m] (2) 1. Remove the T/T RUBBER MAT and TURNTABLE UNIT. (See 6.3.
  • Page 29: Range Pcb, Range Button Unit, Inner Support Plate, Pitch Control Unit (With Pitch Pcb)

    6.11. RANGE PCB, RANGE BUTTON 6. Remove the original screws B for removal. • Original screw B: XTB3+8JFJK [0.8 - 1 N•m] (2) UNIT, INNER SUPPORT PLATE, PITCH CONTROL UNIT (WITH PITCH PCB) 1. Remove the T/T RUBBER MAT and TURNTABLE UNIT. (See 6.3.
  • Page 30: Reset Pcb, Reset Sw Holder, Reset Button, Reset Button Ornament

    6.12. RESET PCB, RESET SW 6.13. SMPS PCB, SMPS HOLDER HOLDER, RESET BUTTON, 1. Remove the T/T RUBBER MAT and TURNTABLE UNIT. (See 6.3. T/T RUBBER MAT, TURNTABLE UNIT, step1.) RESET BUTTON ORNAMENT 2. Remove the INSULATORS. 1. Remove the T/T RUBBER MAT and TURNTABLE UNIT. (See 6.5.
  • Page 31: Ac In Pcb, Ac Holder Plate

    6.14. AC IN PCB, AC HOLDER 5. Remove the 2P wire unit and 7P wire unit from clamp part (2 points) of SMPS HOLDER. PLATE 1. Remove the T/T RUBBER MAT and TURNTABLE UNIT. (See 6.3. T/T RUBBER MAT, TURNTABLE UNIT, step1.) 2.
  • Page 32: Hinge Plate Unit

    6.15. HINGE PLATE UNIT 6.16. SW PCB, PANEL PCB, STROBE PCB, OPERATION UNIT, TOP 1. Remove the T/T RUBBER MAT and TURNTABLE UNIT. (See 6.3. T/T RUBBER MAT, TURNTABLE UNIT, step1.) PANEL 2. Remove the INSULATORS. (See 6.5. INSULATORS, step2 and 3.) 1.
  • Page 33 7. Remove the coupler and screw B for removal.  Note when replacing the STROBE PCB • Arrange the lead wire as shown a figure below. • Coupler: P700 • Screw B: XTN2+10JFJ [0.15 - 0.25 N•m] (1) 8. Remove the couplers and screws C for removal. •...
  • Page 34: Measurements And Adjustments

    7 Measurements and Adjustments Use the Service Mode to adjust this unit (PITCH ADJ Center Position Adjustment and Automatic Adjustment). • PITCH ADJ center position adjustment: Perform this adjustment when the PITCH CONTROL UNIT (PITCH PCB) or MAIN PCB is replaced. •...
  • Page 35: Pitch Adj Center Position Adjustment

    7.2. PITCH ADJ Center Position Adjustment <Status Check before Adjustment> • Check if the unit is in the following conditions. Item Condition Remarks Turntable Unit Attached to the main unit T/T Rubber Mat Attached to the main unit Record Not present Tone Arm Fixed to the arm rest <PITCH ADJ Center Position Adjustment Procedure>...
  • Page 36: Automatic Adjustment

    7.3. Automatic Adjustment This adjustment is automatically performed based on the learning function of the microcomputer. The following items of measurement/adjustment are automatically performed. • The reference voltage value • Start-up time • FG Wow and flutter • Stop time <Status Check before Adjustment>...
  • Page 37: Dimensions

    8 Dimensions...
  • Page 38: Block Diagram

    9 Block Diagram AC IN FUSE,SURGE ABSORBER AC IN PCB TONE ARM UNIT 100-240V P1701 JACK: PHOTO OUT(RCA) P1730 L+, L-, R+, R-, GND SWITCH-MODE SMPS PCB HEAD SHELL POWER SUPPLY SW PCB P1732 P2101 POWER P700 P2102 MAIN PCB SWITCH VCC LED DC MOTOR UNIT...
  • Page 39: Wiring Connection Diagram

    10 Wiring Connection Diagram TONE ARM UNIT AC IN PCB JACK P3101 P1702 P1701 (11P) (2P) (2P) DC MOTOR UNIT P1730 (2P) RENGE PCB PH1008 P800 (5P) (5P) SMPS PCB RESET PCB P2101 P600 P1732 PF1006 MAIN PCB (7P) (3P) (7P) (3P) P2102...
  • Page 41: Exploded View And Replacement Parts List

    11 Exploded View and Replacement Parts List Please click the radio button for "Diagrams II / Parts List" on the menu bar in XML Service Manual. If you want to print, please click the icon button for "Print" on the icon bar and select the item.

This manual is also suitable for:

Sl-1210greg

Table of Contents

Save PDF