
Related Manuals for Electrovert Bravo 8105

Summary of Contents for Electrovert Bravo 8105
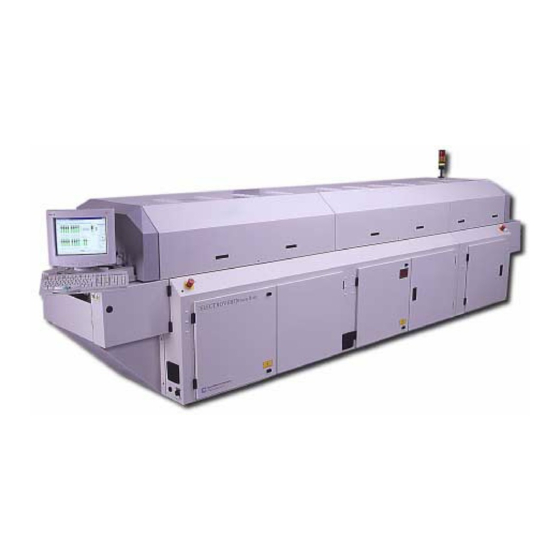
- Page 1 Bravo 8105® CONVECTION REFLOW SYSTEM PROGRAMMING AND OPERATIONS GUIDE Bravo™ 8105 Technical Manual P/N 110–00–0 Bravo™ 8105 Programming and Operations Guide P/N 3–9317–372–00–0...
- Page 2 Bravo™ 8105 Programming and Operations Guide...
- Page 3 Preface ........Overview In this section This preface covers the following information: Topic See Page...
- Page 4 P R E F A C E To Our Customers To Our Customers This Guide The purpose of this guide is to help the customer obtain the greatest return on investment. Speedline suggests that operators, supervisors, and technicians responsible for operating and maintaining this equipment become familiar with the contents of these Guides prior to using the equipment.
-
Page 5: Preface
• International Service Centers Main Offices Office Location Speedline Technologies, Inc. Technical Service Support Group Electrovert Main Sales and P.O. Box 709, Hwy. 5 South Service Office Camdenton, MO 65020-0709 Fax: 573-346-6878 Tel: 573-346-3341 or call Toll Free @ Tel: 1-800-737-8110 e-mail: electrovert_tsc@speedline.cookson.com... - Page 6 P R E F A C E Customer Support Structure Regional Service The following Service Centers are located throughout the United States: Centers (USA) Office Location North East Regional Service 472 Amherst St. Suite 6 Center Nashua, NH 03063 Fax:603-880-8757 Phone: 603-883-2488 South East Regional Service 1055 Windward Ridge Pkwy., Suite 140...
- Page 7 P R E F A C E Customer Support Structure International The following centers serve the international community: Service Centers Office Location Speedline Technologies, LTD Unit 1 Pincents Kiln Industrial Park Reading Bershire RG317SD Fax: 44 0 118 930 1401 Phone: 44 0 118 930 1400 Speedline Technologies, Gmbh Daimlerstrasse 1E...
-
Page 8: Before You Call
P R E F A C E Before You Call Before You Call Introduction To help Electrovert support your machine in a timely fashion, have the following specific information available when calling in: • System Software Version • Serial Tag Information Machine Serial Tag The machine serial tag is located on side of the rear electrical panel. -
Page 9: Table Of Contents
Table of Contents ........Preface Customer Support Structure ............Introduction . - Page 10 T A B L E O F C O N T E N T S Process Ready Power Requirements Table ......... 21 Electrical Codes and Compliance .
- Page 11 T A B L E O F C O N T E N T S User Profile: Operator Access........... User Profile: Maintenance Access .
- Page 12 T A B L E O F C O N T E N T S Options Tab ..............81 Options Alarms Setup Software Screen .
- Page 13 T A B L E O F C O N T E N T S Miscellaneous Parameters Configuration ..........Software Screen .
- Page 14 T A B L E O F C O N T E N T S Bravo™ Programming and Operations Guide Rev. 2...
- Page 15 Safety Information ........Overview Introduction Operation of this equipment exposes personnel to potential health and safety hazards.
- Page 16 S A F E T Y I N F O R M A T I O N Section A: Potential Hazards Overview Introduction This section describes various hazards the operator may encounter while operating an Bravo™ System. This section also describes warning tags installed on the system and ways to avoid the hazards encountered.
-
Page 17: Hot Surface Hazards
S A F E T Y I N F O R M A T I O N Hot Surface Hazards Hot Surface Hazards Introduction During normal operation, some components of this equipment operate at temperatures up to 300 °C (572 °F). The operator must use extreme caution and wear the recommended safety garments prior to coming in contact with hot surfaces or components. -
Page 18: Fire And Smoke Hazard
S A F E T Y I N F O R M A T I O N Fire and Smoke Hazard Fire and Smoke Hazard Introduction There are two (2) inherent fire hazards present in the reflow system. Safety Use good housekeeping techniques and follow the operating instructions and the suggested maintenance schedule to avoid fires. -
Page 19: Electrical Hazards
S A F E T Y I N F O R M A T I O N Electrical Hazards Electrical Hazards Introduction Installation of this equipment involves exposure to situations which may result in electrical shock if procedures are not properly followed. Pay close attention to warnings of this nature throughout the context of this Guide. -
Page 20: Mechanical Hazards
S A F E T Y I N F O R M A T I O N Mechanical Hazards Mechanical Hazards Introduction Stop all moving parts when making adjustments or performing maintenance. When the system is running, avoid moving mechanisms. Use caution when working on or near moving parts and wear safety gear. -
Page 21: Breathing Hazards
S A F E T Y I N F O R M A T I O N Breathing Hazards Breathing Hazards Introduction The lubricants used on the moving parts of the machine contain chemicals that may be harmful if contacted directly or for a prolonged period of time. Refer to the manufacturer MSDS (Material Safety Data Sheet) for information and safety precautions concerning their products and system exhaust specifications. -
Page 22: Inerting Hazards
S A F E T Y I N F O R M A T I O N Inerting Hazards Inerting Hazards Introduction Nitrogen can smother if the gas is not properly exhausted. Nitrogen has two distinct hazards associated with its use, asphyxiation and compressed gas hazards. -
Page 23: Other Hazards
S A F E T Y I N F O R M A T I O N Other Hazards Other Hazards Introduction Additional hazards include weight considerations when moving or adjusting the equipment and possible exposure to lead. Safety To ensure personal safety and avoid equipment damage, observe the following: CAUTION To avoid damage to the equipment, adjust the fork lift forks to their widest position. -
Page 24: Recommended Precautions
S A F E T Y I N F O R M A T I O N Section B: Safety Precautions Recommended Precautions Introduction Refer to the following general precautions and recommendations. Safety To ensure personal safety, observe the following: ATTENTION Please refer to specific chemical manufacturer Material Safety Data Sheet (MSDS) for specific use, handling, and safety procedures for chemical and... -
Page 25: Sound Level
S A F E T Y I N F O R M A T I O N Recommended Precautions Sound Level Noise levels are measured at 914.4 mm (36 in.) height and distance from the front, rear, load and unload sides of the machine. All noise levels consistently remain <70 dBa. -
Page 26: Chemical Precautions
S A F E T Y I N F O R M A T I O N Recommended Precautions Chemical Precautions Exercise caution when using strong cleaning agents, solvents, lubricants and other chemicals. MSDS guidelines contain specific uses and safety precautions which must be thoroughly understood and strictly followed. - Page 27 S A F E T Y I N F O R M A T I O N Overview Section C: Lock-Out Tag-Out ........Overview Introduction Be sure to perform Lock-Out Tag-Out steps before beginning maintenance,...
-
Page 28: Attach Facility Lock-Out Tag-Out Device
S A F E T Y I N F O R M A T I O N Attach Facility Lock-Out Tag-Out Device Attach Facility Lock-Out Tag-Out Device Introduction Refer to the following procedure to isolate and identify all facility energy sources. As soon as all energy sources are isolated and turned to the Off or Stop position, notify affected personnel and attach the lock-out tag-out device. -
Page 29: Attach Machine Lock-Out Tag-Out Device
S A F E T Y I N F O R M A T I O N Attach Machine Lock-Out Tag-Out Device Attach Machine Lock-Out Tag-Out Device Introduction Refer to the following procedure to isolate and identify all machine energy sources. -
Page 30: Perform Required Task
S A F E T Y I N F O R M A T I O N Perform Required Task Perform Required Task Introduction Proceed with the specific maintenance, installation, upgrade, or repair procedures required. Follow the directions in the Guides supplied with the system. Safety To ensure personal safety and avoid equipment damage, observe the following: Electrical Hazard... -
Page 31: Remove Lock-Out Tag Out Devices
S A F E T Y I N F O R M A T I O N Remove Lock-Out Tag Out Devices Remove Lock-Out Tag Out Devices Introduction Prior to removing the Lock Out device and resuming system operation, ensure the following is complete: •... - Page 32 S A F E T Y I N F O R M A T I O N Remove Lock-Out Tag Out Devices 1-18 Bravo™ 8105 Programming and Operations Guide Rev. 2...
-
Page 33: Chapter 2: Technical Data
Technical Data ........Overview Introduction This chapter provides the information the customer needs to prepare their facility for Bravo™... -
Page 34: Facility Requirements And Specifications
T E C H N I C A L D A T A Overview Section A: Facility Requirements and Specifications ........Introduction These general facility requirements cover several available options. -
Page 35: Electrical Information
T E C H N I C A L D A T A Electrical Information Electrical Information Introduction The following tables and calculations provide the information required to ensure adequate electrical connections for Bravot™ 8105 operation. Standard Power The following power configurations are available: Specifications •... -
Page 36: Electrical Codes And Compliance
T E C H N I C A L D A T A Electrical Information Electrical Codes and Refer to the following paragraphs for information concerning specific electrical Compliance certification. Underwriters Listed for Factory Automation Equipment, File #181408. Testing to specifically Laboratory (UL) include: •... -
Page 37: Forced Convection Heating Module Table
T E C H N I C A L D A T A Electrical Information Section B: Machine Components ........Introduction Refer to the following information for component specifications. -
Page 38: Forced Convection Air Cooling Module Table
T E C H N I C A L D A T A Electrical Information Forced Convection Air Cooling Module Table Cooling Chamber Length 762 mm (30 in.) Cooling Temperature Alarm 50 to 115 C Range (122 to 239 2-24 Bravo™... -
Page 39: Cooling Blower Specifications Table
T E C H N I C A L D A T A Electrical Information Cooling Blower Specifications Table Blower Rating at 0 Static 595 m3/hr (350 cfm Pressure TOTAL FORCED 60 Hz 50 Hz CONVECTION Cooling Zone 1 (1 Blower) 595 m3/Hr 565 m3/ (350 cfm) -
Page 40: Conveyor Specifications Table
T E C H N I C A L D A T A Electrical Information Conveyor Specifications Table Conveyor 3 to 178 cm/min (1 to 70 in./ Speed min) Speed +0.25 cm/min (+0.1 in./min) Accuracy Rail +0.5 mm (+0.020 in.) Parallelism Process Width Mesh Belt 457 mm (18 in.) -
Page 41: Physical Characteristics Table
T E C H N I C A L D A T A Electrical Information Section C: System Dimensions ........Physical Characteristics Table System Length... - Page 42 T E C H N I C A L D A T A Electrical Information 2-28 Bravo™ 8105 Programming and Operations Guide Rev. 2...
- Page 43 Software Navigation ........Overview ........The following chapter contains information pertaining to the operating software on the Bravo™...
-
Page 44: Standard Machine Software Operation
S O F T W A R E N A V I G A T I O N Process Graphic Screen Section A: Standard Machine Software Operation ........Process Graphic Screen Machine Components All of the components of the Bravo™... - Page 45 S O F T W A R E N A V I G A T I O N Process Graphic Screen The setpoint temperature displays in the field just above the zone. To enter a new setpoint, highlight the number and enter a new setpoint parameter. Press the Enter key.
-
Page 46: Conveyor Control
S O F T W A R E N A V I G A T I O N Process Graphic Screen Conveyor Control Turn the Conveyor On or Off by clicking on the button labeled “Conveyor”. If the Conveyor is Off, the display above the bar graph is Gray. If the Conveyor is On but not yet to Ready State speed, the display above the bar graph is Blue. -
Page 47: Blower Control
S O F T W A R E N A V I G A T I O N Process Graphic Screen Blower Control The Blowers are turned On and Off by clicking the toggle button located between the Blower Speed Setting drop down menus. The Blowers have four (4) speed settings: Low, Medium–... - Page 48 S O F T W A R E N A V I G A T I O N Overview Section B: Nitrogen (Inert) Machine Software Operation ........Overview Introduction The nitrogen (inert) option software is a slightly modified version of the standard...
-
Page 49: Process Graphic Screen
S O F T W A R E N A V I G A T I O N Process Graphic Screen Process Graphic Screen Nitrogen Controls The Process Graphic Screen contains an On/Off toggle for Nitrogen control. The button appears at the bottom right of the screen. If the optional IFM is also present, the On/Off button for the IFM appears above the Nitrogen On/Off button. -
Page 50: Process Tabular Screen
S O F T W A R E N A V I G A T I O N Process Tabular Screen Process Tabular Screen Introduction The Process Tabular Screen shows much the same information as the Process Graphic Screen but in a format of rows and columns. Nitrogen On/Off control may be performed through the tabular screen. -
Page 51: Machine Options Configuration For A Nitrogen Machine
S O F T W A R E N A V I G A T I O N Machine Options Configuration for a Nitrogen Machine Machine Options Configuration for a Nitrogen Machine Introduction Options configuration is preset at the factory. The “Inerting” option must be selected to gain access to the Inert Machine Configuration/Calibration Screen. - Page 52 S O F T W A R E N A V I G A T I O N Machine Options Configuration for a Nitrogen Machine CAUTION Increasing the temperature parameters in the Coolant Solenoid Control fields may cause the heat exchangers to overheat. Pressure build–up will make the quick disconnects very difficult to release.
-
Page 53: Alarms Configuration For The Nitrogen Machine Option
S O F T W A R E N A V I G A T I O N Alarms Configuration for the Nitrogen Machine Option Alarms Configuration for the Nitrogen Machine Option Introduction The alarms related to the Nitrogen Option are found in the Setup > Alarms > Option screen. -
Page 54: Disable Deviation Alarms During Startup
S O F T W A R E N A V I G A T I O N Alarms Configuration for the Nitrogen Machine Option Disable Deviation If Disable Deviation Alarms During Startup is selected, the deviation alarms for Alarms During Startup the heaters and the blowers do not activate while the machine is progressing to Ready state. -
Page 55: Recipe Parameters Unique To Inert Option Configuration
S O F T W A R E N A V I G A T I O N Recipe Parameters Unique to Inert Option Configuration Recipe Parameters Unique to Inert Option Configuration Introduction The nitrogen parameters are saved specific to a recipe. When a recipe is Auto Started, the nitrogen starts accordingly. - Page 56 S O F T W A R E N A V I G A T I O N Recipe Parameters Unique to Inert Option Configuration 3-42 Bravo™ 8105 Programming and Operations Guide Rev. 2...
-
Page 57: Chapter 4: Bravo™ System Operation
........Bravo™ System Operation ........First Time Power Up Do not attempt to power up the Bravo™... -
Page 58: Powering Up The Bravo
B R A V O ™ S Y S T E M O P E R A T I O N Powering Up the Bravo Section A: Machine Operation ........Powering Up the Bravo Introduction Refer to this section for information pertaining to starting the system. - Page 59 B R A V O ™ S Y S T E M O P E R A T I O N Powering Up the Bravo Software Figure 4–3 depicts the opening screen of the Bravo™ software. Representation Figure 4–3 2-9317-372-00-0 Bravo™...
-
Page 60: Security Access
B R A V O ™ S Y S T E M O P E R A T I O N Security Access Section B: Security Controls ........Security Access Introduction There are five (5) levels of security access available with the Bravo™... -
Page 61: Configuring Security Access And Passwords
Refer to the following section to configure or change the access parameters and the passwords. ATTENTION Speedline Electrovert recommends changing the Administrator password after the five (5) user levels are configured. By default, Administrator–level Security access allows access to all functions. - Page 62 B R A V O ™ S Y S T E M O P E R A T I O N Configuring Security Access and Passwords Software The following screens are accessed to configure Security parameters. Figure 4–4 Representation illustrates the selection of “Administrator” Security Level. Figure 4–5 illustrates the Security Access parameters that are set by the Administrator.
-
Page 63: Recipe
B R A V O ™ S Y S T E M O P E R A T I O N Configuring Security Access and Passwords Security Access Screen Introduction There are three (3) area of security that are configured in the Security Administration Screen. -
Page 64: Time Out In Minutes
B R A V O ™ S Y S T E M O P E R A T I O N Configuring Security Access and Passwords Time Out in Minutes The time a password remains active is set by the administrator in the Security > Administration Window. -
Page 65: Changing Passwords
B R A V O ™ S Y S T E M O P E R A T I O N Changing Passwords Changing Passwords Introduction Each User name has a default password. Refer to the following section to change the User name and/or password. -
Page 66: Changing The Password
B R A V O ™ S Y S T E M O P E R A T I O N Changing Passwords Changing the Password Step Action Select Security > Administration from the dropdown menu at the top of the screen. Enter the Administrator password. -
Page 67: Sample Access Profiles
B R A V O ™ S Y S T E M O P E R A T I O N Sample Access Profiles Sample Access Profiles Introduction If uncertain as to how to structure the user access profiles, refer to the following section. -
Page 68: User Profile: Maintenance Access
B R A V O ™ S Y S T E M O P E R A T I O N Sample Access Profiles User Profile: Maintenance Personnel need to access the functions required for scheduled Maintenance Access downtime. A typical Maintenance configuration includes Recipe Load, Machine Start and Stop, Maintenance Functions, SetUp Functions, Calibrate Functions and Motorized Width. -
Page 69: User Profile: Process Engineer Profile
B R A V O ™ S Y S T E M O P E R A T I O N Sample Access Profiles User Profile: Process A Process Engineer in charge of a production line probably needs access to most Engineer Profile or all functions on the Bravo™... -
Page 70: Starting And Stopping The Bravo™ System
B R A V O ™ S Y S T E M O P E R A T I O N Starting and Stopping the Bravo™ System Starting and Stopping the Bravo™ System Introduction The Bravo™ System has an AUTO Start feature that starts the components in a controlled manner. -
Page 71: Nitrogen Option On/ Off Control
B R A V O ™ S Y S T E M O P E R A T I O N Nitrogen Option On/ Off Control Nitrogen Option On/ Off Control Introduction Nitrogen control is saved specific to a recipe. If operating the machine in Manual Mode, clicking on the toggle button under “Nitrogen Control”... - Page 72 B R A V O ™ S Y S T E M O P E R A T I O N Nitrogen Option On/ Off Control 4-58 Bravo™ 8105 Programming and Operations Guide Rev. 2...
-
Page 73: Chapter 5: Printed Circuit Board Specification
Printed Circuit Board Specification ........Section A: Overview of PCB Data . -
Page 74: Relative Board
P R I N T E D C I R C U I T B O A R D S P E C I F I C A T I O N Configuring the Bravo™ for Printed Circuit Boards Relative Board The Relative Board count is the number of boards processed since the last Reset. -
Page 75: Adjusting The Width Of The Optional Pin Chain Conveyor
P R I N T E D C I R C U I T B O A R D S P E C I F I C A T I O N Adjusting the Width of the Optional Pin Chain Conveyor Section B: Optional Pin Chain Conveyor . - Page 76 P R I N T E D C I R C U I T B O A R D S P E C I F I C A T I O N Manually Adjusting the Pin Chain Conveyor Procedure Step Action Open the front Load End corner panel of the Bravo™...
-
Page 77: Adjusting The Pin Chain Conveyor Using The Motorized Width Adjust Option
P R I N T E D C I R C U I T B O A R D S P E C I F I C A T I O N Adjusting the Pin Chain Conveyor using the Motorized Width Adjust Option Photograph Figure 5–3 Adjusting the Pin Chain Conveyor using the Motorized Width Adjust Option... -
Page 78: Width Adjust In Process Tabular
P R I N T E D C I R C U I T B O A R D S P E C I F I C A T I O N Adjusting the Pin Chain Conveyor using the Motorized Width Adjust Option Software Representation Figure 5–4... - Page 79 P R I N T E D C I R C U I T B O A R D S P E C I F I C A T I O N Adjusting the Pin Chain Conveyor using the Motorized Width Adjust Option Software Representation Figure 5–6...
- Page 80 P R I N T E D C I R C U I T B O A R D S P E C I F I C A T I O N Adjusting the Pin Chain Conveyor using the Motorized Width Adjust Option 5-66 Bravo™...
-
Page 81: Chapter 6: Recipes
Recipes ........Section A: The Recipe Screen . -
Page 82: Editing A Recipe
R E C I P E S Creating, Editing and Changing Recipes Editing a Recipe Ensure that the desired recipe is selected in the Recipe Select drop down window. • Edit the Recipe as desired • Press the Save button at the bottom of the screen to save the new parame- ters. -
Page 83: Naming A Recipe
R E C I P E S Creating, Editing and Changing Recipes Naming a Recipe The Recipe Name field displays the name of the Recipe currently in the Recipe Editor. To save a Recipe to a new name, change the name in the Recipe Name field. - Page 84 R E C I P E S Creating, Editing and Changing Recipes Software The arrow points to the “Load Recipe” button at the bottom of the screen. Representation Figure 6–6 6-70 Bravo™ 8105 Programming and Operations Guide Rev. 2...
-
Page 85: Chapter 7: Alarms
Alarms ........Section A: The Alarms Screens . -
Page 86: Acknowledging Alarms
A L A R M S Software Display of Alarms Acknowledging Alarms When an alarm activates, the Current Alarms Window appears. Acknowledge the alarm either by pressing the space bar on the keyboard or by clicking on the ACK button by placing the mouse cursor over it and clicking on it. The Current Alarms Window displays the date and time the alarm occurred and a description of the alarm. -
Page 87: Alarm History
A L A R M S Alarm History Alarm History Introduction The Alarm History is a log file of the machine actions and alarms.The Alarm History Window displays the alarm log files created each night at Midnight (00:00) for the previous 24 hours. The files are saved by date in dd/mm/yy format;... -
Page 88: Navigating The Alarm History Window - Continued
A L A R M S Alarm History Navigating the Alarm Delete Selected File History Window – • Highlight a file in the History File Selection box and click on Delete Selected Continued File to permanently delete the file. Close History Window •... - Page 89 A L A R M S Alarm History ATTENTION Refer to Chapter 7, Setup, for information on configuring the Alarms setup. 2-9317-372-00-0 Bravo™ 8105 Programming and Operations Guide 7-75...
- Page 90 A L A R M S Alarm History 7-76 Bravo™ 8105 Programming and Operations Guide Rev. 2...
-
Page 91: Chapter 8: Setup Screens
Setup Screens ........Alarms Setup Introduction The Alarms are set up by selecting Setup >... -
Page 92: Standard Tab
S E T U P S C R E E N S Alarms Setup Standard Tab The following alarm conditions exist in the Setup > Alarms > Standard Tab. Refer to Figure 8–2. Convection Blower Failure One or more blowers in the heating zone fail. (Blower failure may result in heater over–temperature. -
Page 93: Standard Alarms Setup Software Screen
S E T U P S C R E E N S Alarms Setup Standard Alarms Setup Software Screen Figure 8–2 2-9317-372-00-0 Bravo™ 8105 Programming and Operations Guide 8-79... -
Page 94: Thermocouples Tab
S E T U P S C R E E N S Alarms Setup Thermocouples Tab Each Heating Zone, Cooling Zone and Rail Heater has an independent thermocouple to monitor operating temperature. If the thermocouple measures an over–temperature condition, the alarm response depends upon the configuration in this screen. -
Page 95: Options Tab
S E T U P S C R E E N S Alarms Setup Options Tab Refer to Figure 8–4. SMEMA PCB Transfer Error An alarm indicates a problem either receiving a board from upstream or attempting to pass the board downstream. Output Photocell PCB Dropped An alarm indicates if the PCB does not reach the output photocell when expected. -
Page 96: Options Alarms Setup Software Screen
S E T U P S C R E E N S Alarms Setup Options Alarms Setup Software Screen Figure 8–4 8-82 Bravo™ 8105 Programming and Operations Guide Rev. 2... -
Page 97: Plc Alarms Setup Tab
S E T U P S C R E E N S Alarms Setup PLC Alarms Setup Tab Refer to Figure 8–5. Hardware Error The PLC is not functioning due to a component failure. If re–starting the machine does not correct the problem, contact Speedline Technical Support. Communication Error The PLC–to–PC interface is not functioning properly. -
Page 98: Units Setup
S E T U P S C R E E N S Units Setup Units Setup Introduction Configure the units by selecting Setup > Units from the Menu Bar at the top of the screen. Refer to Figure 8–6. Metric is the standard of measurement utilizing centimeters for length and Celsius (Centigrade) for temperature. -
Page 99: Power Limiting Setup
S E T U P S C R E E N S Power Limiting Setup Power Limiting Setup Introduction To configure the Power Limiting feature, select Setup > Power Limiting from the Menu Bar at the top of the screen. Refer to Figure 8–7.The Power Limiting feature is user–configured. -
Page 100: Smema Setup
S E T U P S C R E E N S SMEMA Setup SMEMA Setup Introduction To configure the SMEMA setup, select Setup > SMEMA from the Menu Bar at the top of the screen. Refer to Figure 8–8. The SMEMA Option is a communications protocol that allows for automated operation with other equipment in the line. -
Page 101: Timed Start / Stop Setup
S E T U P S C R E E N S Timed Start / Stop Setup Timed Start / Stop Setup Description Access the setup window for the Timed Start / Stop by selecting Setup > Timed Start / Stop. Refer to Figure 8–9. Timed Start / Stop automatically starts or stops the machine at predetermined times. -
Page 102: Motorized Width Option Setup
S E T U P S C R E E N S Motorized Width Option Setup Motorized Width Option Setup Introduction The Motorized Width Option Setup is available only with the optional Pin Chain Conveyor. Access the Motorized Width Option Setup from the menu bar in Setup >... -
Page 103: Chapter 9: Configuration Screens
Configuration Screens ........Overview Introduction The software is configured at the factory for optimal machine performance. The settings should not be altered. -
Page 104: Pc Settings Configuration
C O N F I G U R A T I O N S C R E E N S PC Settings Configuration PC Settings Configuration Introduction The PC Settings are configured by selecting Configure > PC Settings from the Menu Bar at the top of the screen. -
Page 105: Log Actions
C O N F I G U R A T I O N S C R E E N S PC Settings Configuration Log Actions Records what software screens are accessed and what actions are performed using the machine software. If this feature is not selected, the alarms are not recorded in the log history. -
Page 106: Options Configuration
C O N F I G U R A T I O N S C R E E N S Options Configuration Options Configuration Introduction Access the Options Configuration screen by selecting Configure > Options from the menu bar at the top of the screen. The Programmable Output Relays and the Light Tower are both accessed for configuration through the Options Configuration Screen. -
Page 107: Miscellaneous
C O N F I G U R A T I O N S C R E E N S Options Configuration Miscellaneous UPS is the Uninterruptable Power Supply. It provides power to the machine when a power failure occurs. SMEMA is the communications protocol standardized by the industry. -
Page 108: Programmable Output Relay Configuration
C O N F I G U R A T I O N S C R E E N S Programmable Output Relay Configuration Programmable Output Relay Configuration Introduction The Programmable Output Relay Option is configured in Configure > Options by selecting the “Configure Relay”... -
Page 109: Programmable Events Continued
C O N F I G U R A T I O N S C R E E N S Programmable Output Relay Configuration Programmable Events Machine in Manual Continued The relay state changes when the machine is operating in Manual Mode. Auto–Start in Progress The machine is in the process of a controlled start up. -
Page 110: Light Tower Configuration
C O N F I G U R A T I O N S C R E E N S Light Tower Configuration Light Tower Configuration Introduction The Light Tower is selected in Configure > Options. Select the “Configure Light Tower”... -
Page 111: Light Tower Conditions Continued
C O N F I G U R A T I O N S C R E E N S Light Tower Configuration Light Tower Conditions Manual at Temp – No PCBs Continued The machine is at Ready state but is not yet processing boards. Manual at Temp –... -
Page 112: Tc Offsets Configuration
C O N F I G U R A T I O N S C R E E N S TC Offsets Configuration TC Offsets Configuration Introduction When reflow ovens are built, although they may appear to be identical products, each displays minor variations in thermocouple response and feedback, heater response, and heater watt density. -
Page 113: Using Tc Offsets
C O N F I G U R A T I O N S C R E E N S TC Offsets Configuration Using TC Offsets To set the TC offset so that it increases the actual heater temperature, enter a negative value. -
Page 114: Conveyor Parameters Configuration
C O N F I G U R A T I O N S C R E E N S Conveyor Parameters Configuration Conveyor Parameters Configuration Introduction The Conveyor Parameters are configured at the factory and should not be altered. Refer to the following to verify the factory settings or to restore default values. -
Page 115: Conveyor Parameters Continued
C O N F I G U R A T I O N S C R E E N S Conveyor Parameters Configuration Conveyor Parameters IPC to OPC Length CM Continued Used by the optional Exit Photocell to track boards. It is the distance in centimeters between the Load End Photocell and the Unload End (Exit) Photocell. -
Page 116: Miscellaneous Timers Configuration
C O N F I G U R A T I O N S C R E E N S Miscellaneous Timers Configuration Miscellaneous Timers Configuration Introduction The timers are preset at the factory and should not be changed. If “fine–tuning” is necessary, it should be performed by qualified Speedline Field Service Personnel. -
Page 117: Timers Parameters Continued
C O N F I G U R A T I O N S C R E E N S Miscellaneous Timers Configuration Timers Parameters Alarm Latch (De Bounce) Continued Time required for an alarm condition to exist (prevents false alarms) Dev Alarm Inhibit on SP Change –... -
Page 118: Miscellaneous Parameters Configuration
C O N F I G U R A T I O N S C R E E N S Miscellaneous Parameters Configuration Miscellaneous Parameters Configuration Software Screen Figure 9–10 Parameters Width Adjust DeadBand AutoAdjust STOP The automatic Width Adjust measurement allows a variance of this amount when coming to a setpoint. -
Page 119: Chapter 10: Maint/Diag Screens
Maint/Diag Screens ........Overview Introduction The Maintenance and Diagnostics Screens should only be used by trained maintenance personnel. -
Page 120: Thermal Shutdown
M A I N T / D I A G S C R E E N S Thermal Shutdown Thermal Shutdown Introduction Thermal Runaway High Temperature Safety Circuit hardware is located in the Electrical Cabinet. If a thermal runaway occurs, an alarm generates and the monitor indicates that the circuit activated by displaying the Current Alarms Screen. -
Page 121: Pid Tuning
M A I N T / D I A G S C R E E N S PID Tuning Note that the Bravo™ cannot operate until the Thermal Runaway High Temperature Safety circuit is Reset. Photograph Figure 10–3 PID Tuning Closed Loop Feedback PID is an acronym for Proportional–Integral–Derivative. -
Page 122: Run Time Timers
M A I N T / D I A G S C R E E N S Run Time Timers Run Time Timers Introduction The Run Time Timers track the run time for six (6) different functions. Access the window by selecting Maint/Diag > Run Time Timers from the menu bar at the top of the screen. -
Page 123: Maintenance Timers
M A I N T / D I A G S C R E E N S Maintenance Timers Maintenance Timers Introduction The Maintenance Timers are two (2) timers that are configurable to alarm at a user– entered parameter in hours. It is possible to monitor four (4) functions: Conveyor, Heaters, Cooling (Blowers) and Convection (Blowers) Setting Desired •... -
Page 124: Buzzer / Lamp Test
M A I N T / D I A G S C R E E N S Buzzer / Lamp Test Buzzer / Lamp Test Description The Buzzer / Lamp Test confirms that the Buzzer and Light Tower work properly. Access the test window by selecting Maint / Diag >... -
Page 125: Plc Status
M A I N T / D I A G S C R E E N S PLC Status PLC Status Description The PLC Status Window monitors the status of the PLC hardware, communication and operation. Access the window by selecting Maint / Diag > PLC Status from the menu bar at the top of the screen. - Page 126 M A I N T / D I A G S C R E E N S PLC Status 10-112 Bravo™ 8105 Programming and Operations Guide Rev. 2...
-
Page 127: Chapter 11: Accomplishing The Reflow Process
Accomplishing the Reflow Process ........Section A: Introduction to Process . -
Page 128: Board Design, Stencils And Solder Paste
A C C O M P L I S H I N G T H E R E F L O W P R O C E S S Understanding Process Board Design, Stencils Experience shows that evenly–populated boards are easier to profile and reflow and Solder Paste than complex boards with diverse components because the thermal mass is more uniform on a board that’s evenly populated. -
Page 129: Solder Paste Considerations
A C C O M P L I S H I N G T H E R E F L O W P R O C E S S Solder Paste Considerations Solder Paste Considerations Factors to Consider When considering a solder paste, there are five (5) factors to take into consideration: •... -
Page 130: Inspection Before Reflow
A C C O M P L I S H I N G T H E R E F L O W P R O C E S S Inspection before Reflow Inspection before Reflow After Printing It is helpful to have a sample of a known good board or photographs of an ideal production board to assist in inspection. -
Page 131: Throughput
A C C O M P L I S H I N G T H E R E F L O W P R O C E S S Section B: Reflow Process Considerations Throughput Determining One of the primary factors that contributes to yield is throughput. A 7–zone Throughput machine has 40% greater throughput than a 5–zone machine, and a 10–zone machine has 43% greater throughput than a 7–zone machine. -
Page 132: The Reflow Profile
A C C O M P L I S H I N G T H E R E F L O W P R O C E S S The Reflow Profile The Reflow Profile Introduction A recipe profile consists of time and temperature parameters that dictate how long the assembly is processed and at what temperature. -
Page 133: Process Zones
A C C O M P L I S H I N G T H E R E F L O W P R O C E S S Process Zones Process Zones Introduction The goal of the reflow process is to melt the powder particles in the solder paste, wet the surfaces being joined together, and solidify the solder to create a strong metallurgical bond. -
Page 134: Cooling Zone
A C C O M P L I S H I N G T H E R E F L O W P R O C E S S Process Zones It is important to monitor the maximum temperature. Temperatures above 230° C may cause damage to the internal dies of SMT components as well as foster intermetallic growth. -
Page 135: Process Troubleshooting Table
0 0 0 0 0 0 0 0 0 0 Section C: Reflow Process Troubleshooting Table Problem Possible Cause(s) Uneven Soldering, Localized Cold Large temperature differential Joints Insufficient heat; raising the maximum reflow temperature may resolve the problem. Inadequate cleaning of the PCB prior to soldering may not allow fluxing action sufficient for the soldering process If a higher mass part does not solder, there may be insufficient time/temperature in the soak zone. - Page 136 Problem Possible Cause(s) Solder Beading (cont.) Over–printing of leading contact area causes the paste to squeeze out under the compo- nent. Use “home plate” aperture design to reduce the leading contact area of the paste. Solder mask problems due to the thickness of the mask causing a different capillary action.
- Page 137 “Solder Beading,” <http://www.aimsolder.com/Troubleshooting%20guide/beading.htm> (May 12, 1999) o. ibid. p. ibid. q. Sonora Manufacturing Group. r. Hwang, 158. s. Hwang. t. Ray Chartrand, “Reflow Solder Workshop,” presented to Speedline Electrovert, Camdenton, MO, October 30, 1998. u. Hwang. 2-9317-372-00-0 Bravo™ 8105 Programming and Operations Guide 8-123...
- Page 138 v. Graham Collins, <Collins.Graham@LITTONLSL.COM>”[TN] Can adhesive go thru reflow soldering?”, April 4, 1999, TechNet distribution list, accessed April 12, 1999. w. Chartrand x. Scheiner. y. Bob Willis, “Solder Paste Printing Fundamentals”. Circuits Assembly Online, Online Exclusive, <http:// www.cassembly.com/online/9811paste.htm> (Feb 16, 1999) z.
- Page 139 Index ........Requirements Exhaust Alarms Requirements Acknowledging an Alarm Ventilation Alarm History...
- Page 140 I N D E X Remove Machine Device Board Design, Stencils and Solder Shift Change Steps Paste 13, 14, 16 Log File Cooling Zone Determining Content Inspection before Reflow Preheat Zone Process Zones Reflow Profile Machine Reflow Zone Clearance Solder Paste Considerations Noise Levels Thermal Soak Zone Machine Warning Label...
- Page 141 I N D E X Logging On Manual Mode Safety Navigation Access Clearance Process Graphic Screen Breathing Speedline Breathing Hazard International Service Centers Chemical Precautions Main Offices Electrical Hazard Regional Service Centers Electrical Hazards Starting the Machine Entanglement Fire and Smoke Hazard Fire Extinguisher Flammables TC Offsets Configuration...
Need help?
Do you have a question about the Bravo 8105 and is the answer not in the manual?
Questions and answers