Advertisement
Quick Links
Step 2 - Hang Unit
Hang the unit on the wall mounting plates (3).
Ÿ
Level the unit using your spirit level and adjusting the screw on the bottom
Ÿ
of the hanging bracket (4).
Once level screw on the front of the hanging bracket to tighten the unit to
Ÿ
the wall (5).
Note: Full height vanity units stand on the floor so will come complete with
fitted legs. To adjust the legs, unclip the plinth from the legs and adjust the
legs to the desired height (6). Replace the plinth.
3
5
Care and Maintenance
Ÿ
This furniture is made of wood and has a water resistant finish. It should not be left wet.
Ÿ
The quality of the finish is best maintained if it is wiped with a dry cloth after use.
Ÿ
It should only be cleaned using a soft damp cloth followed by a dry cloth.
Ÿ
Do not use bleach or any abrasive cleaner.
We have taken great care to ensure that this product reaches you in perfect
condition. However should any parts be damaged or missing, please contact your
point of purchase. This does not affect your statutory rights.
In addition, if you require replacement parts your point of purchase will be happy
4
6
to assist.
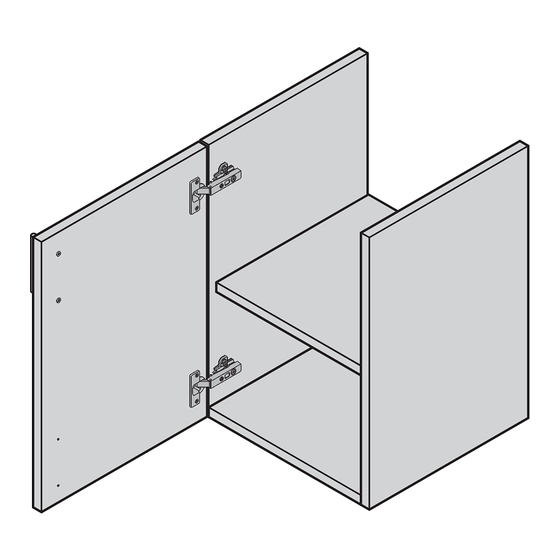
Vanity Unit
Installation Instructions
Important: Ensure all cutouts for plumbing are carried out prior to
installation.
Install the unit first before fitting the door following the instructions
supplied with the unit.
to the door/drawer front.
Please note: Images are for illustration purposes only.
Advertisement

Related Manuals for iflo Trapini 2

Summary of Contents for iflo Trapini 2
- Page 1 Vanity Unit Step 2 - Hang Unit Installation Instructions Hang the unit on the wall mounting plates (3). Ÿ Level the unit using your spirit level and adjusting the screw on the bottom Ÿ of the hanging bracket (4). Once level screw on the front of the hanging bracket to tighten the unit to Ÿ...
- Page 2 Please read this leaflet carefully before attempting to fit the doors to the unit. Step 1 - Wall Fixings This leaflet contains information which must be made available to the end user. Decide on the height of the vanity unit and use a spirit level to draw a horizontal Ÿ...
- Page 3 Step 4 - Adjustments Ÿ Fit the drawer box into the unit by placing on the runners and pushing back until it Drawer Front clicks into place. Ÿ If the drawer front needs adjustment, remove the cover and alter as shown in the Installation Instructions illustrations (6).
- Page 4 Please read this leaflet carefully before starting to fit the drawer fronts to the unit. Step 2 - Deep Drawers only- Fit Drawer Rails This leaflet contains information which must be made available to the end user. Ÿ Push the plastic dowel on the drawer rails into the drawer front and bring the rail Please check the product for imperfections before fitting the drawer fronts.
Need help?
Do you have a question about the Trapini 2 and is the answer not in the manual?
Questions and answers