Table of Contents
Advertisement
Quick Links
Advertisement
Table of Contents

Subscribe to Our Youtube Channel
Related Manuals for Kenmore 796.4158 Series


Summary of Contents for Kenmore 796.4158 Series
- Page 1 796.4158* MFL68639705...
-
Page 2: Table Of Contents
Master Protection Agreements IMPORTANT SAFETY INSTRUCTIONS ......3-5 Congratulations on making a smart purchase. Your new GROUNDING REQUIREMENTS ..........5 Kenmore Elite ® product is designed and manufactured FEATURES AND BENEFITS for years of dependable operation. But like all products, Key Parts and Components ..........6... -
Page 3: Important Safety Instructions
SAFETY MESSAGES IMPORTANT SAFETY INSTRUCTIONS WARNING WARNING persons when using this appliance, follow basic precautions, including the following. WARNING: Wash hands after handling. - Page 4 IMPORTANT SAFETY INSTRUCTIONS WARNING WARNING appliance from the power supply. persons when using this appliance, follow basic precautions, including the following. Do not combine detergents, fabric softeners, and/or other Never use harsh chemicals, abrasive cleaners, or solvents to clean the washer. Do not mix chlorine bleach with ammonia or acids such as vinegar.
-
Page 5: Grounding Requirements
IMPORTANT SAFETY INSTRUCTIONS WARNING WARNING: RISK TO CHILDREN GROUNDING REQUIREMENTS IMPORTANT: Please read carefully. GROUNDING INSTRUCTIONS TO CONNECT ELECTRICITY ARNING grounding... -
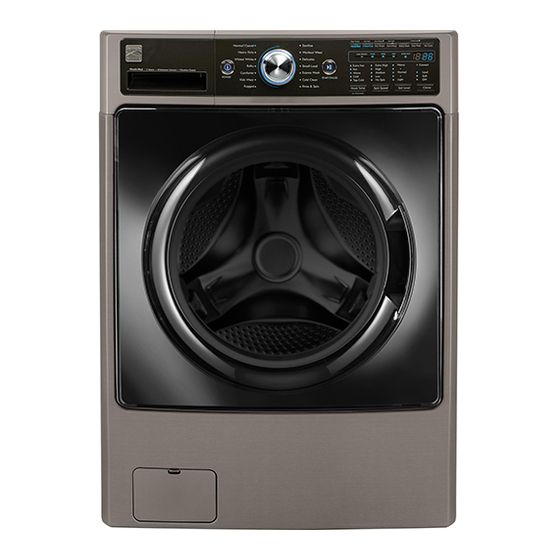
Page 6: Features And Benefits Key Parts And Components
Safely and conveniently keeps the door ajar when the washer is not in use, to promote air circulation and allow the interior of the drum to dry. To use this feature, close the door gently until it just contacts the door magnet. -
Page 7: Choose The Proper Location
120 VAC, 60 Hz 14.5 – 142 PSI (100 – 980 kpa) 27" (W) x 29 " (D) x 38 " (H). 51" (D with door open) 68.6 cm (W) X 75.6 cm (D) X 98.3 cm (H), 129.5 cm (D with door open) 205 lbs (93 kg) 1,300 RPM "... -
Page 8: Installation Instructions
INSTALLATION INSTRUCTIONS UNPACKING AND REMOVING SHIPPING BOLTS DO NOT Shipping Bolts Power IMPORTANT: Cord MUST NOT MUST NOTE: Shipping Bolts Hole Cap Carton NOTE: Base Foam Tub Support... -
Page 9: Connecting The Water Lines
INSTALLATION INSTRUCTIONS CONNECTING THE WATER LINES IMPORTANT: Use new hoses when installing the washer. Do NOT reuse old hoses. Water supply pressure must be between 14.5 psi and 142 psi (100 – 980 kPa) . If the water supply pressure is more than 142 psi, a pressure reducing valve must be installed. -
Page 10: Connecting The Drain Hose
hose lower than 29 in. (73.7 cm) or higher than 96 in. (243.8 cm) If the water valves and drain are built into the wall, fasten the drain hose to one of the water hoses with the tie strap (ribbed side on inside). Tie Strap... -
Page 12: How To Use
HOW TO USE WARNING: To reduce the risk of electric shock, or injury to persons, read and follow this entire Use & Care Guide, including the Important Safety Instructions, before operating this washer. CONTROL PANEL FEATURES POWER (ON/OFF) BUTTON CYCLE MODIFIER BUTTONS Press to turn the washer ON or OFF. -
Page 13: Operating The Washer
HOW TO USE OPERATING THE WASHER SORT LAUNDRY AND LOAD WASHER Sort laundry by fabric type, soil level, color and load size, as needed. Open the door and load selected items into the washer. TURN ON THE WASHER Press the POWER button to turn ON the washer. The lights around the cycle selector knob will illuminate and a chime will sound. - Page 14 Extra Hot 26-53 Cold Tap Cold 74-131 66-76 86-96 99-132 *CERTIFIED BY NSF: NSF International (formerly the National Sanitation Protocol P172 Sanitization Performance of Residential and Commercial, Family Sized Clothes Washers...
-
Page 15: Cycle Guide
HOW TO USE CYCLE GUIDE (continued) = Available Option The cycle guide below shows the default settings, available options and recommended fabric types = Default Setting Display Load Fabric or Wash Wash Soil Accela- Steam Pre- Extra Delay Stay Auto Save Cycle Time... -
Page 17: About The Dispenser Drawer
HOW TO USE ABOUT THE DISPENSER DRAWER Liquid Chlorine Liquid Fabric Bleach Softener The automatic dispenser consists of four compartments Compartment Compartment which hold: Liquid Detergent Liquid chlorine bleach. Liquid fabric softener. Liquid or powdered detergent for prewash. Liquid or powdered detergent and color-safe bleach Prewash for main wash. -
Page 18: Detergent And Dispenser Use
HOW TO USE DETERGENT AND DISPENSER USE Filling the Dispenser To add detergent and fabric softener to the A Word About Detergents automatic dispenser: Open the dispenser drawer. performance, and help to keep the interior of your washer clean. Using detergent that is not HE may cause Load the laundry products into the oversudsing and unsatisfactory performance which appropriate compartments. -
Page 19: Time And Status Display
HOW TO USE TIME AND STATUS DISPLAY ESTIMATED TIME REMAINING CYCLE STATUS INDICATOR DOOR LOCK INDICATOR NOTE: NOTE: LOAD-SENSING INDICATOR... - Page 20 HOW TO USE CYCLE MODIFIER BUTTONS NOTE: To protect your garments, not every wash Each cycle has default settings that are selected temperature, spin speed, soil level, or option is available automatically. You may also customize these settings with every cycle. A chime will sound and the LED will not light if a selection is not allowed.
-
Page 21: Steam Cycles And Options
three three... -
Page 22: Special Functions
and the Control Lock must be POWER three Control Lock. three three three 30-minute three three NORMAL - Hot becomes Warm NORMAL – Warm becomes Cold HEAVY DUTY – Hot becomes Warm HEAVY DUTY – Warm becomes Cold... -
Page 23: Regular Cleaning
CARE AND CLEANING WARNING: To reduce the risk of electric shock, or injury to persons, read and follow this entire Use & Care Guide, including the Important Safety Instructions, before operating this washer. Unplug the washer before cleaning to avoid the risk of electric shock. Failure to follow this warning can Never use harsh chemicals, abrasive cleaners, or solvents to clean the washer. -
Page 24: Care And Cleaning Regular Cleaning
CARE AND CLEANING REGULAR CLEANING (continued) Press the POWER button, then press the SPIN SPEED Storing the Washer button without selecting a cycle. Press the START/PAUSE If the washer will not be used for an extended period of time button to activate the drain pump. This will expel some and is in an area that could be exposed to freezing of the antifreeze, leaving enough to protect the washer temperatures, perform the following steps to protect the... -
Page 25: Maintenance
CARE AND CLEANING MAINTENANCE NOTE: Inlet Filter... -
Page 26: Cleaning The Drain Pump Filter
CARE AND CLEANING MAINTENANCE (continued) Cleaning the Drain Pump Filter washer lint and foreign objects like buttons, keys, and coins from causing damage to the pump. If the washer fails to drain properly, unplug the washer and allow the water to cool, if necessary, before proceeding. -
Page 27: Kenmore Connect ™ System
™ First, call 1-800-4-MY-HOME ® with your washer, you will be quickly relayed to a Kenmore Connect(TM) Team agent. Only use the Kenmore Connect(TM) feature when instructed to do so by the Kenmore Connect(TM) Team agent. HOLD the mouthpiece of your phone over the POWER button, when instructed to do so by the call center, no more than one inch from (but not touching) the machine. -
Page 28: Troubleshooting Guide
TROUBLESHOOTING GUIDE NORMAL SOUNDS YOU MAY HEAR Clicking: Humming or gurgling: Spraying or hissing Splashing: BEFORE CALLING FOR SERVICE Problem Possible Cause Solutions Rattling and clanking noise Thumping sound Vibrating noise Water leaking around washer Excessive sudsing... - Page 29 TROUBLESHOOTING GUIDE BEFORE CALLING FOR SERVICE (continued) Problem Possible Cause Solutions Staining Washer will not turn ON Door will not unlock when cycle is stopped or paused Wash cycle time is longer than usual Musty or mildewy odor in washer Wrinkling...
- Page 30 TROUBLESHOOTING GUIDE BEFORE CALLING FOR SERVICE (continued) Problem Possible Cause Solutions Water in the washer drains slowly or not at all, or the display shows: slowly or not at all, or the display shows: Cycle won’t start, or the display shows: The display shows: The display shows: The display shows:...
- Page 32 Get it fixed, at your home or ours! Your Home For troubleshooting, product manuals and expert advice: www.managemylife.com For repair – in your home – of all major brand appliances, lawn and garden equipment, or heating and cooling systems, no matter who made it, no matter who sold it! For the replacement parts, accessories and owner’s manuals that you need to do-it-yourself.
Need help?
Do you have a question about the 796.4158 Series and is the answer not in the manual?
Questions and answers