Table of Contents
Advertisement
R
C
US
Please keep this instruction manual for future reference
WARNING:
Questions, problems, missing parts? Before returning to the store,
Assembly Instructions
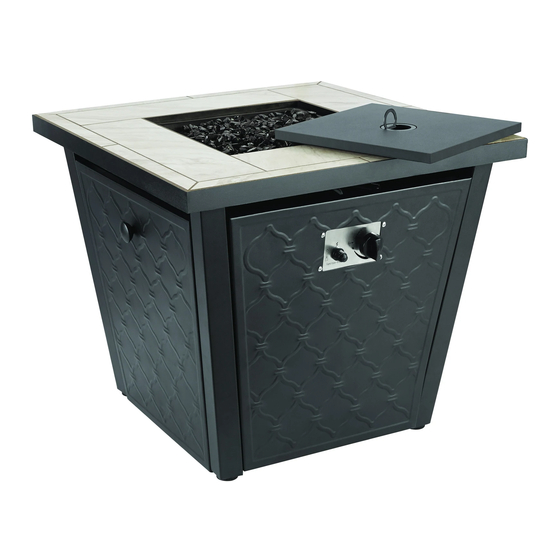
30 Inch Square Gas-Burning Fire Pit
VSN# BH10-093-999-04
READ INSTRUCTION MANUAL BEFORE ATTEMPTING TO
ASSEMBLE OR OPERATE THIS PRODUCT.
call Yayi Customer Care at 855-600-9294
From 9 a.m. - 5 p.m., EST, Monday - Friday or email at
customercare@china-yayi.com
DANGER
LEAKING LP-GAS MAY CAUSE A FIRE OR EXPLOSION IF IGNITED
CAUSING SERIOUS BODILY INJURY OR DEATH.
CONTACT LP GAS SUPPLIER FOR REPAIRS, OR DISPOSAL OF THIS
WARNING
DO NOT USE OR STORE CYLINDER IN A BUILDING,
GARAGE OR ENCLOSED AREA.
WARNING:
・
Know the odor of LP-gas. If you hear, see or smell
leaking LP-gas, immediately get everyone away
from the cylinder and call the Fire Department.
Do not attempt repairs.
・
Caution your LP-gas supplier to:
Be certain cylinder is purged of trapped air prior
to first filling.
Be certain not to over fill the cylinder.
Be certain cylinder requalification date is checked.
・
LP-gas is heavier than air and may settle in low
places when dissipating.
・
Contact with the liquid contents of cylinder will
cause freeze burns to the skin.
・
Do not allow children to tamper or play with cylinder.
・
When not connected for use, keep cylinder valve
turned off. Self contained appliances shall be limited
to a cylinder of 30 lb capacity or less.
・
Do not use, store or transport cylinder where it would
be exposed to high temperatures. Relief valve may
open allowing a large amount of flammable gas to
escape.
・
When transporting, keep cylinder secured in
an upright position which cylinder valve turned off.
DO NOT REMOVE, DEFACE, OR OBLITERATE THIS LABEL
*EXCEPT AS AUTHORIZED BY ANSI/NFPA 58.
DANGER. Do not store a spare LP cylinder under or near a barbecue grill, or other
heat sources. NEVER fill an LP cylinder beyond 80% full: a fire causing death or
serious injury may occour.
·
FLAMMABLE GAS UNDER PRESSURE.
CYLINDER OR UNUSED LP-GAS.
·
FOR OUTDOOR USE ONLY.*
WHEN CONNECTING FOR USE:
・
Use only in compliance with appliable codes.
・
Read and follow manufacturer's instructions.
・
Consult manufacturer's instructions
concerning the cylinder connection provided
with your appliance.
・
Be sure regulator vent is not pointing up.
・
Turn off all valves on the appliance.
・
Do not check for gas leaks with a match or
open flame. Apply soapy water at areas
marked "X". Open cylinder valve. If bubble
appears, close valve and have LP-gas
service person make needed repairs. Also,
check appliance valves and connections to
make sure they do not leak before lighting
appliance.
・
Light appliance(s) following manufacturer's
instructions.
・
When appliance is not is use, keep the
cylinder valve closed.
X
Pressure relief valve
X
Cylinder
X
Cylinder valve hand wheel
Point of connection
X
X
Liquid level indicator
(optional)
Advertisement
Table of Contents

Related Manuals for Better Homes and Gardens BH10-093-999-04


Summary of Contents for Better Homes and Gardens BH10-093-999-04
-
Page 1: Assembly Instructions
Assembly Instructions 30 Inch Square Gas-Burning Fire Pit VSN# BH10-093-999-04 · DANGER FLAMMABLE GAS UNDER PRESSURE. LEAKING LP-GAS MAY CAUSE A FIRE OR EXPLOSION IF IGNITED CAUSING SERIOUS BODILY INJURY OR DEATH. CONTACT LP GAS SUPPLIER FOR REPAIRS, OR DISPOSAL OF THIS CYLINDER OR UNUSED LP-GAS. -
Page 2: Table Of Contents
Table of Contents Assembly..………………………………………..…7-11 Table of Contents ............2 Operating Instructions .........12-14 Safety Information............2-4 Maintenance............15 Warranty.................5 Pre-Assembly...……………………...……………………. 5 Care and Cleaning ..........15 Troubleshooting ............16 ..………………...……………………. 6 Package Contents Service Parts ..........17 Safety Information Read the instruction before use. This appliance must be installed in accordance with such regulations as are enforced. -
Page 3: Safety Information
Safety Information (continued) WARNING: You must provide propane gas and propane cylinder. Use a standard 20 lb. propane cylinder only. Use this heater only with a propane vapor withdrawal supply system. See Chapter 5 of the Standard for Storage and Handling of Liquefied Petroleum Gas, ANS/NFPA 58. - Page 4 Safety Information (continued) WARNING: Solid fuels shall not be burned in this appliance. The installation must conform with local codes or, in the absence of local codes, ANSIZ223. 1/NFPA54, NFPA58 Natural Gas and Propane Installation Code, CSA B149.1, or Propane Storage and Handling Code, B149.2. This appliace must be isolated from the gas supply piping system by closing its individual manual shutoff valve during any pressure testing of the gas supply piping system at test pressures equal to or less than 1/2 psi (3.5 kPa).
-
Page 5: Warranty
Warranty 2 YEAR LIMITED WARRANTY • We warrant the metal frame and burner to be free of manufacturing defects to the original purchaser for two years. • Proof of purchase (dated register receipt) is required for warranty claims. WHAT IS NOT COVER It remains the customer’s responsibility for freight and packaging charges to and from our service center. -
Page 6: Package Contents
Package Contents Part Description Quantity Part Description Quantity Front Leg A Side Panel with Window Door Panel Front Leg B Protective Bars Back Leg C Back Leg D Gas tank support Metal Lid Handle AAA battery Fire Glass (11 lbs) Cover Table Top with Burner Fix Buckle... -
Page 7: Assembly
Assembly Assembling the legs □ Attach the Legs (A,B,C,D) to the Table Top with Burner (G) using eight (8) M6 x 10 mm Bolts (AA) □ Do not tighten the bolts at this step. Assembling the side panels □ Attach each side panel (H) to the legs (A,D,C) using eight (8) M6 x 10 mm bolts (AA). - Page 8 Assembly (continued) Assembling the side panel with window □ Attach the side panel with window (I) to the legs (B,C) using four (4) M6 x10 mm bolts (AA). □ Attach the Hose with fix buckle (P), then attach the fix buckle and control panel to side panel with window (I) using four (4) M5 x10 mm bolts (CC) and four (4) M5 Nut (DD).
- Page 9 Assembly (continued) Assembling the handle □ Attach the Handle (M) to the Door Panel (J) using one (1) M6 x 10 mm bolts (AA), □ Tighten the bolt with a Phillips screwdriver (not included) Assembling the door □ Pull out the Tank Plate from Gas Tank Support (L). □...
- Page 10 Assembly (continued) Assembling the protective bars □ Push in the assembled Tank Plate with Door Panel. □ Orient the unit so that table top with burner is facing up. Fix the Tank Plate and Door Panel (J) with Protective Bars (K) using four (4) M6 x 10 mm bolts (AA) and (4) M6 Spring Washer (EE) Tank Plate...
- Page 11 Assembly (continued) Assembling the cylinder □ Put the cylinder into the gas tank support (L), make sure the open side of cylinder face the leg (B), secure the cylinder by tightening the screw in the gas tank support. Connect the hose and regulator to the cylinder. NOTE: The propane cylinder is sold separately.
- Page 12 Operating WARNING: Never use this appliance for other than the intended use. DO NOT use this appliance to prepare food. Initial Lighting: When lit for the first time, the appliance emits a slight odor. This is a normal temporary condition caused by the “burn-in ”...
-
Page 13: Operating Instructions
Operating (continued) LEAK TESTING OPERATION WARNING: A leak test must be performed annually or if a part of the gas system is replaced. WARNING: Never use an open flame to check for gas leaks. Be certain no sparks or open flames are in the area while you check for leaks. - Page 14 Operating (continued) LIGHTING CAUTION: Keep the outdoor gas appliance area clear and free from combustible materials, gasoline and other flammable vapors and liquids. CAUTION: Do NOT obstruct the flow of combustion and ventilation air. CAUTION: Check and clean burner/venturi tubes for insects and insect nests. A clogged tube can lead to a fire.
-
Page 15: Maintenance
Maintenance Storage between uses: □ Turn the control knob to “OFF” position. □ Disconnect LP source. □ Store heater upright in an area sheltered from direct contact with inclement weather (such as rain, sleet, hail, snow, dust and debris). □ If desired, cover heater to protect exterior surfaces and to help prevent build up in air passages. NOTE: Wait until heater is cool before covering. -
Page 16: Troubleshooting
Troubleshooting PROBLEM PROBLEM CAUSE SOLUTION The flame and heat are The propane lighting Ensure lighting procedure is followed carefully. The valve low when the valve is procedure was not followed must be in the off position when the tank valve is turned on. turned to high. -
Page 17: Service Parts
Service Parts Parts List Part Description Quantity Part Description Quantity Front Leg A Side Panel with Window Door Panel Front Leg B Protective Bars Back Leg C Gas tank support Back Leg D Metal Lid Handle AAA battery Fire Glass (11 lbs) Cover Table Top with Burner Fix Buckle...
Need help?
Do you have a question about the BH10-093-999-04 and is the answer not in the manual?
Questions and answers