
Summary of Contents for MSB Technology Network Renderer
- Page 1 Network Renderer Module Analog DAC, DAC V, Select DAC User Manual Revision 1.3 (12/5/2015) This manual applies to all the MSB Renderer products but illustrates its operation using the Analog DAC.
-
Page 2: Table Of Contents
Table of Contents Table of Contents......................2 1. Introduction ......................4 1.1 Overview ......................5 1.2 Features ......................6 1.3 In the Box ......................6 2. Quick Start ......................7 3. Module Installation ....................13 4. UPnP / DLNA Guide ....................19 3.1 UPnP (Universal Plug and Play) ................ -
Page 3: Table Of Contents
6. Computer Based Setup Example ................27 6.1 Macintosh Based Computer System Example ............. 28 6.2 Windows Based Computer System Example ............29 6.3 Examples Afterthought ..................30 6.4 Jriver Media Center Setup .................. 31 6.5 Jremote Installation ................... 38 6.6 Internet Radio on JRMC .................. -
Page 4: Introduction
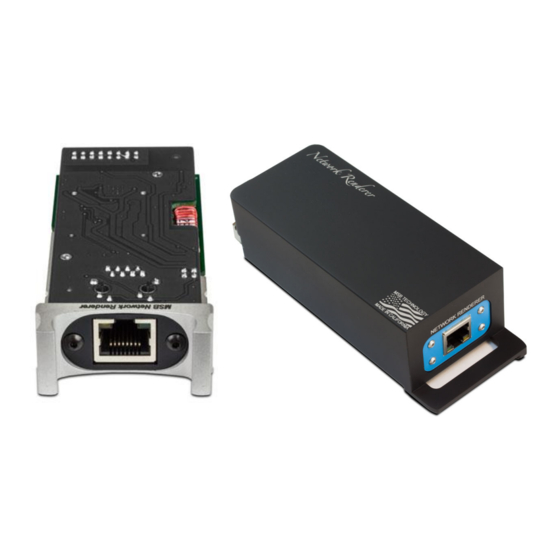
The MSB Network Renderer is a small input module for the Analog DAC, the DAC IV or the DAC V line, but it contains some very complex technology. The most important part of the design is a passionate attention to audio quality, but at the same time it provides you with the ability to enjoy network based audio. -
Page 5: Overview
In this manual we will show you a few examples to get you started with enjoying the MSB Network Renderer, but is by no means the only way of setting up your Networked Audio system. -
Page 6: Features
3. MP3 (Mpeg Audio Layer 3) 4. ALAC (Apple Lossless Audio Codec) 5. AAC (Advanced Audio Coding) 6. AIFF (Audio Interchange File Format) 7. DSF and DFF (DSD stream file) 1.3 In the Box 1. MSB Network Renderer 2. User Manual... -
Page 7: Quick Start
Quick Start Although the MSB Renderer module is physically small, it is a key part of a networked audio system, which can be quite complicated and multi-faceted. This manual allows an absolute beginner to follow all the steps and examples to become more comfortable with networked audio. - Page 8 DAC For a typical networked audio system setup, the following is required: MSB Network Renderer module installed in the DAC iPad connected via WiFi to your Home Network and running an UPnP controller such as the AudioNet IMM, Lightning DS or Linn Kinsky Application ...
- Page 9 Step 1: Install the MSB Renderer Install the MSB Renderer module into the desired slot within the DAC. Connect your DAC to your pre-amplifier or amplifier. Step 2: Connect to your Home Network Connect the MSB Renderer and your Music Library Computer or NAS to your Home Network router with WiFi capability, using Ethernet cables...
- Page 10 Step 3: Turn on the MSB Renderer Turn on the DAC and select the STR (Streamer) input for the MSB Renderer Step 4: Connect your iPad Connect your iPad to your Home Network using WiFi...
- Page 11 Step 5: Turn on your UPnP Server Turn on your computer or NAS and start the UPnP Server of choice Using a NAS MinimServer is recommended Using a Computer Jriver Media Center (JRMC) or MinimServer is recommended Make sure you have music files loaded in the required music folder and library indexing is complete for the UPnP Server Step 6: Turn on your UPnP Controller Turn on the UPnP Controller App of choice on your iPad...
- Page 12 Step 7: Select your MSB Renderer on the iPad Select the MSB Renderer from your iPad UPnP Controller: Wait a few moments for the Audio Renderer –X to show up in your UPnP Controller and select it as the playback device. This is the default name for the MSB Renderer, where X is the last digit of the IP Address given to the MSB Renderer by your router Step 8: Select your UPnP Server on the iPad...
-
Page 13: Module Installation
Module Installation The installation of the MSB Network Renderer can be done by your dealer or, since it is quite simple to do, with a few steps shown below and a screwdriver you can complete it within 5-10 minutes. The modules are designed to be easily installed or replaced. Please follow these instructions. - Page 14 2. When swapping out a module that is already installed, first remove the installed module. To remove a module from the space you have selected for the Network Renderer module, first remove the Phillips head screw in the jack panel at the front of the input module if it...
- Page 15 2b. Next, remove the two screws on the bottom adjacent to the module. 2c. Next, remove the knurled screw from the base of the DAC, near the power input plug. This is your removal tool. Please note: If the module does not have a Phillips head screw in the jack panel at the front of the module, you can skip the next two steps and just gently remove the module from its slot.
- Page 16 2d. Screw it in hand tight into the back of the Input Module. Please note: Do not force it. Please double check that you have removed the necessary screws if it requires too much force. 2e. Pull firmly on the removal tool. Wiggle gently if needed. The module will slide out along the grooves within the DAC.
- Page 17 Step 4: Install the Network Renderer Module To install a new module, slide the new module into the grooves on both sides, and push firmly into place. There are handy metal ears on the front of the module that allows for ease of handling.
- Page 18 STR (Stands for Streamer, which is another term for Renderer) input and be functional. Please check the following MSB Tech Support website for the required firmware for your DAC and follow the instructions: http://www.msbtech.com/updates/updateHome.php Congratulations! Your MSB Network Renderer module is now ready for use.
-
Page 19: Upnp / Dlna Guide
If you are already familiar with the UPnP concepts and would like to start setting up your system you can skip to the next chapter. The MSB Network Renderer is UPnP AV 2.0 and DLNA compliant, but what does that mean? 3.1 UPnP (Universal Plug and Play) - Page 20 Diagram 2 below gives a quick overview of these 3 main components with some of their many different alternate labels shown in the table below, which are either elements of, or used interchangeably. Diagram 2: Network Audio Terminology Server Controller Renderer Media Server Control Point...
- Page 21 Some popular UPnP Media Server programs are: • Jriver Media Center (Not available on a NAS, but handles both PCM and DSD) • MinimServer (Handles both PCM and DSD playback) • Foobar (Uses Bubbleguuum component as the UPnP media server) •...
- Page 22 an alternative to the UPnP Control Point that is much better with gapless playback called Open Home Media (ohMedia) which will be covered briefly later in this chapter. Some popular UPnP Control Point programs are: • Jriver Media Center (In conjunction with its remote application JRemote) •...
-
Page 23: Dlna (Digital Living Network Alliance)
3. Media Renderer Now here is the heart of the network audio system. The Renderer receives the audio file from the Media Server and creates from it a digital music stream to be sent to and converted into analog audio by a DAC. It communicates with the Controller and acts on transport commands such as play, pause, skip forward or backward to another song, fast forwarding and rewinding within the song. -
Page 24: Openhome Media (Ohmedia)
Songcast, internet radio and Apple's AirPlay, as well as the ability to use a few very well designed ohMedia Controllers. Please note that at this point the MSB Network Renderer module is not Open Home Media certified, but there is an emulation program called Bubble UPnP Server which allows the MSB Network Renderer to be seen as an Open Home Media Renderer. -
Page 25: Conclusion
3.5 Conclusion Networked audio is a great way to enjoy music without necessarily having your computer or NAS in the same room as your listening equipment, potentially lowering your noise floor. With the variety of options to control your music library, and with the ability to easily browse and playback your complete library from the comfort of your listening chair, using the MSB Renderer is truly a joy. -
Page 26: Networked Audio Setup
Macintosh or Windows computer with Jriver Media Center as the UPnP Media Server and UPnP Control Point Jremote application as the remote control on an iPad MSB Network Renderer 2. NAS Based System Synology Network Attached Storage device (NAS) running on Linux ... -
Page 27: Computer Based Setup Example
Computer Based Setup Example The first decision is whether to use a Windows based or Macintosh based computer. Both work well and it really comes down to personal preference of computer hardware and operating system. One of the more stable and popular UPnP/DLNA programs, Jriver Media Center (JRMC), is available for both Mac and Win platforms. -
Page 28: Macintosh Based Computer System Example
Your wireless device (Pad, Phone, Tablet), which will run the Controller, has access to your network and the internet via WiFi The MSB Network Renderer is connected to the Macintosh computer via a Gigabit switch, and is hard-wired with quality Ethernet cables ... -
Page 29: Windows Based Computer System Example
Your wireless device (Pad, Phone, Tablet), which will run the Controller, has access to your network and the internet via WiFi The MSB Network Renderer is connected to the Windows computer via a Gigabit switch and is hard-wired with quality Ethernet cables ... -
Page 30: Examples Afterthought
6.3 Examples Afterthought A few additional thoughts with regards to the sample setups shown above in Diagram 3 and 4: An external WD Thunderbolt drive is optional for extra space depending on how large your audio library is or will be in the future. External Firewire and USB drives or even a large or second internal drive are other alternatives for extra audio library space. -
Page 31: Jriver Media Center Setup
6.4 Jriver Media Center Setup Step 1. Download Jriver Media Center Open up your Internet Browser and navigate to the following URL: http://www.jriver.com/download.html Download the correct version for your Operating System (OS): The Download (Windows) section has a Windows Download button for the EXE installation file ... - Page 32 Step 2. Install Jriver Media Center For Macintosh: Double click on the MediaCenterXX.dmg (XX denotes the JRMC version) installation package and follow the instructions for installing it on your Mac. This includes agreeing to the license and copying the Media Center XX.app into your Applications folder.
- Page 33 For Windows: On your desktop, double click on the shortcut that was installed initially in order to start Jriver Media Center. Step 4. Complete DLNA Setups for Jriver Media Center (JRMC) There is much functionality available within JRMC with many setup screens, but we will only focus on those needed for optimal playback with the MSB Renderer.
- Page 34 3. The following pop-up window will appear. Just click Next. 4. The following pop-up window will appear. Just click Next. 5. In order to provide a secure and easy way to link the remote controller application Jremote with JRMC, an Access Key is provided. Important: Please write down the code for the JRemote setup step later on.
- Page 35 6. Select Audiophile 24-bit DAC from the list in the following screen and click Finish 7. Once back at the Options screen, click on Add or configure DLNA servers… 8. In the DLNA Servers page that pops up, navigate to Audio Mode and change to Mode: Original.
- Page 36 9. Still in the DLNA Servers page, navigate to Audio Format and select to PCM 24 Bit for the highest quality. 10. Still in the DLNA Servers page, navigate to Advanced and make sure that the checkbox next to “Bitstream DSD (Requires DoPE compliant renderer)” is Unchecked. Click OK 11.
- Page 37 12. Click OK to save the Option setting changes and leave the Options screen. Congratulations, you have now completed the main JRMC DLNA setup for the MSB Renderer. Step 5. MSB Renderer Playback from Jriver Media Center (JRMC) The next step is to have JRMC find the MSB Renderer. When you start JRMC it might take a for JRMC to see the MSB Renderer, but it should show up in the list moments...
-
Page 38: Jremote Installation
6.5 Jremote Installation For the remote control we will be using the Jremote application on the iPad, which is an excellent way to access and command your music library. Important to note is that Jremote is not an UPnP Controller but it is purely a remote control program for Jriver Media Center only. JRMC can function as the UPnP Media Server and UPnP Controller at the same time, and it is because of this that gapless and playlist playback with JRMC and Jremote is so smooth. - Page 39 Note: For more details on the Jremote control program for JRMC you can go their help website: http://www.jremote.net/ Step 2. Open the JRemote App and Setup 1. Open the Jremote app on the iPad Note: Make sure your DAC is turned on, JRMC is running and sees the MSB Renderer before starting 2.
- Page 40 3. Tap on Add a new server. We need to have JRemote find and link securely to the Jriver Media Center server. 4. There are two ways to add a JRMC server, either using the Access Key which you noted down earlier in the JRMC installation, or using an IP address.
- Page 41 5. Enter the JRMC Access Key provided by JRMC in the allocated field 6. Enter the Username and Password of the computer running the JRMC server. This is the Username and Password that you entered during the JRMC install earlier 7.
- Page 42 8. Tap on the Current Zone button in the bottom left of the screen to view and select the Renderer. It will show as Audio Renderer X (Where X is the last digit of the IP Address given to the MSB Renderer) or the name you had changed it to within JRMC. In this example the MSB Renderer was renamed to MSB, and your current zone will be the renderer currently selected for playback.
- Page 43 11. Scroll down to Transcode audio settings and unselect this option. This is to make sure you are not accidentally transcoding audio. If you are using the iPad as the playback device, you might need to change this setting back. 12.
-
Page 44: Internet Radio On Jrmc
6.6 Internet Radio on JRMC Internet Radio is a great way to listen to streaming audio. Using JRMC it is relatively easy to access an internet radio station and set it up as a Playlist for future use. Below are the steps to follow once you know the URL of your radio station. - Page 45 3. Enter or Copy-Paste the URL of the internet radio station in the pop-up screen. Click OK 4. In this example the KCRW radio station will start playing in JRMC through the MSB Renderer. 5. You can always rename the radio station to something more user friendly by Right-clicking and selecting Rename.
- Page 46 7. Rename the Playlist. In this example the Playlist is called Internet Radio. Your radio station will be added to this Playlist. 8. Any additional radio station you can now add to this playlist as well in the same manner, by ...
-
Page 47: Nas Based Setup Example
NAS Based Setup Example A NAS is a Network Attached Storage device, a specialized but easy to use, often Linux based, file sharing computer. The main benefits are that you can place it anywhere in your house, easily expand storage space, is highly reliable, easily maintained, and provides storage that is available to your entire network. -
Page 48: Nas Based System Example
WiFi You have a computer or laptop on the network that can function in setup tasks The MSB Network Renderer is connected to the NAS via a Gigabit switch and is hard- wired with quality Ethernet cables ... -
Page 49: Nas And Upnp Server Installation
7.2 NAS and UPnP Server Installation Step 1. Install the NAS Your NAS will come with an installation manual and a program to access the NAS through a web browser on your computer or laptop for setup and maintenance purposes. Follow the instructions closely and install the software on your computer or laptop. - Page 50 2. Double click on the Server name: DiskStation412 (the DS412+ NAS). The log in screen will show. 3. Enter the NAS user name and password. Consult the manual for the initial admin user name and password. You can always change it later. 4.
- Page 51 Step 2. Setup File Sharing The setup is important in being able to access the files on the NAS via the Windows Explorer on your laptop, easily allowing copying, dragging and dropping of files and managing your audio library. 1. Click on the Control Panel icon. 2.
- Page 52 5. Enable Windows File Service by clicking on File Services in the Control Panel. Check the box for Enable Windows file service 6. Navigate back to the Synology Assistant main screen. Click on the Map Drive button on the Management tab.
- Page 53 7. A setup wizard will ask for the user name and password to the Synology NAS. After entering them click Next Select the Music folder from the list. This is where your music files will be stored. It will be preceded with the IP Address given to your NAS. Click Next...
- Page 54 Select your choice of Drive letter for the Mapped Drive. This is how it will show in Windows Explorer on your laptop. Click Next. Confirm the Mapped Drive setup information. Click Finish.
- Page 55 The Mapped Drive to your Audio folder on the NAS will now show in Windows Explorer on your laptop. Now you can easily copy your music library into the NAS Music folder and maintain it. Copy a few albums to your NAS for initial testing purposes. On the NAS a similar tool to the Windows Explorer used to browse and update the file structure is called the File Explorer.
- Page 56 Step 3. Update the Synology Operating System DSM to the latest version Since you purchased the NAS updates may have been made by Synology for additional functionality, security or bug fixes. 1. On the NAS Desktop Click on the Control Panel icon. 2.
- Page 57 4. If there is an update available, follow the prompts to install Once you are up to date the following up-to-date Status will show.
- Page 58 Step 4. Install Java MinimServer UPnP server requires Java to be running in order to function. The Synology operating system currently only supports version 7 of Java, so do not install the absolute latest from Oracle. On the NAS desktop click on the Package Center and select Utilities from the Package Center screen.
- Page 59 Click on the Open button. Click on the Install Java button in the Java Manager screen...
- Page 60 Click on the Java SE Downloads hyperlink. This will open up your internet browser on your computer, not the NAS, and automatically navigate to the following Oracle website to download Java SE Development Kit 7. http://www.oracle.com/technetwork/java/javase/downloads/jdk7-downloads- 1880260.html 6. Be sure to check which version you need for your specific NAS, click on the Accept License Agreement radio button and click on the download link.
- Page 61 8. Back on the NAS Install Java screen, click on Browse button and select the installation file that you had just saved to a folder on your computer. Click OK. 9. Wait a few moments for the installation is complete and you will see the following message.
- Page 62 Step 5. Install the UPnP Media Server MinimServer The Synology NAS comes with the MinimServer package, but it needs to be installed. On the NAS desktop click on the Package Center and select Multimedia from the Package Center screen. Click on the Install button for the MinimServer package. Wait for the Downloading and Installation process to complete.
- Page 63 Click the checkbox to accept the license. Click Next. Click the checkbox to run after installation checkbox. Click Next.
- Page 64 Back in the Package Center, if you click on Installed you will now see MinimServer Installed and with the Status of Running Back in the NAS Desktop, click on the Main Menu button Click on the MinimServer program button...
- Page 65 8. The MinimServer Status webpage will open up in your internet browser on your laptop. This page shows a few important elements of the MinimServer UPnP Server. a. It will show the UPnP Server status: Started is when it is up and running b.
- Page 66 Step 6. Update the NAS Firewall Setting Depending on your firewall setting, UPnP activity can sometimes be blocked on certain ports. The following steps update the firewall on the NAS to allow UPnP traffic. 1. Navigate to the Control Panel on the NAS. Click on the Security button. 2.
- Page 67 3. Check the Enabled checkboxes for MinimServer TCP, MinimServer UDP and UPnP Services. Click OK. Back in the firewall page click on the Save button.
- Page 68 The following message will show. Click OK. Note: The NAS firewall setting shown above is just one option and specific to UPnP playback. As you can see there are many settings that you can use to change the firewall settings further if that is required for your use.
-
Page 69: Minimwatch Installation
7.3 MinimWatch Installation MinimWatch is not necessary to start enjoying your MSB Renderer with MinimServer, but it is a separate program which will be run on your laptop. It is used to make further setting changes and updates to the way the MinimServer UPnP server functions. It is MinimServer’s optional administrator monitor and control program. - Page 70 4. Run the installation file by double clicking on the executable installation program. Click Next on the Setup screen 5. Accept the agreement by clicking the radio button. Click Next.
- Page 71 6. Leave the default installation folder, or change if your desire. Click Next. 7. Click Next.
- Page 72 8. Click Next. It will create a desktop shortcut for you by default. 9. Click Next.
- Page 73 10. Click Finish. MiminWatch will launch automatically in the background. 11. In the bottom right corner you will see an icon of a musical note for the MinimWatch program when it is running. It will try to connect with the MinimServer running on your NAS automatically.
- Page 74 12. Right-Click on the MinimWatch icon on the bottom right corner, and select from the pop-up menu. Various selection are available: Rescan – If you have recently added files or folders to your music library and you want them to become visible to your UPnP Server and Controller ...
-
Page 75: Upnp Controller Installation - Lightning Ds
7.4 UPnP Controller Installation - Lightning DS For the UPnP remote control we will be using the Lightning DS application on the iPad to access and command your music library in this example. It is free, and you can of course use any of the other UPnP Controller applications with MinimServer, but Lightning DS, although not perfect, is one of the few that handles gapless and has a user friendly look and feel. - Page 76 Step 2. Open the Lightning DS App and Setup 1. Open the Lightning app on the iPad Note: Make sure your DAC and NAS are turned on and MinimServer is running. 2. Tap on the Settings button in the bottom left-hand corner. Select Device. Make sure the MSB Renderer (default name is Audio or MSB Tech Renderer-X, where X is the last digit of the IP Address given to the MSB Renderer by your router) is showing and select it.
- Page 77 3. Tap on Music Library. Select the correct UPnP Server. In this example the MinimServer UPnP Server is running on the DiskStation412. A checkbox will appear next to the selected library. 4. The first time you choose the library, or when you Refresh the Cache if there is a library change, the application will update the album index and art on the iPad.
- Page 78 5. There are more setting changes you can make to personalize your experience. There is also a link to the User Guide from within the Settings screen. 6. You are now ready to enjoy your music library by accessing it remotely using the Lightning DS application on the iPad as the remote control.
- Page 79 7. Tap on the Audio button in the top left hand corner to access your library. Select the album to play. Use the icon on the right to add a complete album or individual song to the Queue for playback. Click on the Play Now.
-
Page 80: Internet Radio On A Nas
7.5 Internet Radio on a NAS Internet Radio is a great way to listen to streaming audio. Using MinimServer to access an internet radio station is simple once you know how, but is not intuitive. MinimServer supports network streams as http:// entries in .m3u playlist files via a small extension called MinimStream. - Page 81 2. Right-Click on the MinimWatch icon on the bottom right corner, and select Properties from the pop-up menu. 3. Navigate to the Packages tab. If the minimstreamer package already shows in the installed packages tab you can skip this step. If it has not been installed yet, select it from the Available packages tab and click Install.
- Page 82 Click OK to confirm Click Accept. Wait until the installation process is complete...
- Page 83 Once installation is complete the minimstreamer package will show in the Installed packages tab. Click Relaunch. In addition to the ability to play certain internet radio stations, when MinimStreamer is running, the stream.converter, stream.record and stream.transcode setup options will become available in the System tab as well.
- Page 84 Step 3. Create an Internet Radio Playlist UPnP Controllers and Servers are able to view and start playback on a playlist. You can create one playlist with multiple radio stations, or multiple playlists for each radio station. The example below will add two internet radio stations on one Playlist. 1.
- Page 85 2. Add the necessary text in the Notepad for all your desired radio stations 3. Save the notepad file as an .m3u file in your Audio Library folder on the NAS. Select File Save As Change the filename and extension to Internet Radio.m3u In this example a separate Internet Radio folder is created in the NAS Music Folder for easy maintenance.
- Page 86 4. Right-Click on the MinimWatch icon on the bottom right corner, and select Rescan from the pop-up menu. This will provide the UPnP server MinimServer with the added folder and playlist files for visibility and playback Open up the UPnP Controller. The Lightning DS Controller does not at this time handle Internet Radio, but another free UPnP Controller Linn Kinsky does.
-
Page 87: Open Home Media Emulation On A Nas
Linn Kazoo or Lumin, as well as a way to stream the CD quality Tidal streaming service. A few important notes before we get started: Note 1: At this point the MSB Network Renderer module is not Open Home Media certified, but there is an emulation program called Bubble UPnP Server which allows the MSB Network Renderer to be seen as an Open Home Media Renderer. - Page 88 The Synology Assistant will search for your NAS on the network in the Management tab. Just click on the Search button and wait for a few moments. Once found, the NAS will be listed and the status will show Ready when it is up and running. 5.
- Page 89 Before being able to install a third party package, you will need to change the Manual Install Settings to allow the Trust Level to Any publisher 8. Click on the Package Center icon 9. Click on the Settings button from within the Package Center screen and within the Trust Level section click on the Any Publisher radio button Note: If you do not complete this step, you will get the following error message when trying to install the Bubble UPnP Server...
- Page 90 10. Navigate to the following Bubblesoftapps developer website to download the correct installation file of Bubble UpnP Server for your NAS from the Downloads section. http://bubblesoftapps.com/bubbleupnpserver/ 11. In our example, from the NAS packages bullet, click on the Synology hyperlink. Right click on the Download Synology package and save the BubbleUPnPServer.spk file to your computer’s hard drive.
- Page 91 Step 2. Install Bubble UpnP Server 12. Click on the Package Center icon 13. Click on the Manual Install button from within the Package Center screen, and click on the Browse button Navigate to the folder where you saved the BubbleUPnP Server.spk installation file Select the BubbleUPnP Server.spk installation file and click Next...
- Page 92 Check the box to accept the license and click Next Check the box to select the Run after installation, and click Apply...
- Page 93 Wait a few minutes for the package to install. Please be patient. Once the installation is complete, click on the Installed section of the Package Center. You should now see 3 key packages running: BubbleUPnP Server – The ohMedia emulation server ...
- Page 94 If the Bubble UPnP Server setup screen did not automatically open, click on the Main Menu icon in the top left hand corner. Click on the Bubble UPnP Server icon to open the setup menu...
- Page 95 The BubbleUPnP Server menu will open on the status page. This is where you would be able to restart the Server if needed at a future time. No action is needed on this page. Click on the Media Servers tab. This will show your UPnP Media Server, MinimServer, or others if there are more available.
- Page 96 Click on the Media Renderers tab. This will show your UPnP Media Renderers on the network. MSB Network Renderer will show as its default name of Audio or MSB Tech Renderer-X, where X is the last digit of the IP Address given to the MSB Renderer by your router.
- Page 97 Click on the Settings Tab, followed by the Advanced sub tab. Uncheck the box with the selection Transcode high-res audio to 44.1/16 or 48/16 FLAC This is important, since we want to play back all our high resolution audio files at the high resolution.
-
Page 98: Tidal Streaming Service On A Nas
7.7 Tidal Streaming Service on a NAS Tidal (or WiMP in Europe) is a music streaming service based in Norway which provides high fidelity sound quality and is gaining popularity. It is a paid service with a monthly fee but it provides a limited free trial. - Page 99 Once you have installed all the pre-requisites shown above, open up Linn Kazoo on your pad. We are using an iPad in this example. Once Linn Kazoo is open, make sure that your MSB ohMedia emulation renderer is selected. Click on the Tidal tile.
- Page 100 Log into Tidal using your login and password, and click on the Login button Note: If you have just created a Tidal account and it is not being accepted. Please restart your MinimServer, Bubble UPnP Servers and Kazoo and try again. Search for music and enjoy listening to the selection from your MSB Tech Renderer.
-
Page 101: Support
Support Thank you for selecting the MSB Renderer Module. Please visit our support website for any additional information http://www.msbtech.com/support/supportHome.php For technical support with your MSB Product please contact: techsupport@msbtech.com Warranty All MSB products carry a one year warranty in the country of origin although extended warranties are offered in many countries. No returns accepted without an RMA.
Need help?
Do you have a question about the Network Renderer and is the answer not in the manual?
Questions and answers