Table of Contents
Advertisement
the team to trust
the team to trust
user manual
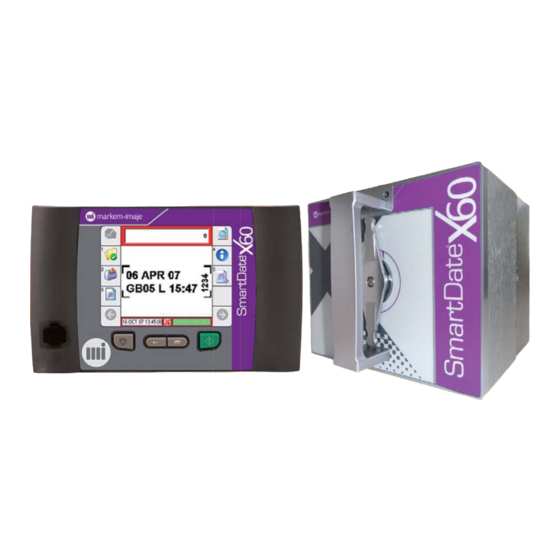
SmartDate X60
Colour user Interface
en
Revision AA
10056272
Markem-Imaje Limited
Nottingham Science Park
University Boulevard
for parts & service call QLC (800) 837-1309
Nottingham NG7 2QN
www.markem-imaje.com
Tel.: +44 (0)115 943 0055
Advertisement
Table of Contents

Related Manuals for Dover Markem Imaje SmartDate X60


Summary of Contents for Dover Markem Imaje SmartDate X60
- Page 1 the team to trust the team to trust user manual SmartDate X60 Colour user Interface Revision AA 10056272 Markem-Imaje Limited Nottingham Science Park University Boulevard for parts & service call QLC (800) 837-1309 Nottingham NG7 2QN www.markem-imaje.com Tel.: +44 (0)115 943 0055...
- Page 2 Contents General Introduction Copyright Notice Contact Related Documentation for parts & service call QLC (800) 837-1309 10056272-AA...
-
Page 3: Table Of Contents
Contents Description Introduction Overview SmartDate X60 Model Options Main Components Key Features Printer Types SmartDate X60 - Intermittent Mode SmartDate X60 - Continuous Mode SmartDate X60 Shuttle Continuous Printer Print Designs CoLOS Create pro Supported Field Types SmartDate X60 and Fonts ... - Page 4 Contents Interface Introduction The User Interface Panel LCD Screen Keypad Screen Icons Screen Types Example of Menu Screen Layout 1: Example of Menu Screen Layout 2: Example of Menu Screen Layout 3: Home Screen ...
- Page 5 Contents Menu Screens Data Entry Screens Prompted Data Alpha Data Entry Screens Numeric Data Entry Screens Language specific characters and symbols Date Entry Screens Literal Date Entry Fixed Format Date Entry Calendar Offset Date Entry Diagnostics Screens ...
- Page 6 Contents Operation Introduction Start the printer Home Screen Stop the printer Information Counts Supplies Health The Health Screen The Availability Log Screen The Printhead Information Screen Identity Usage Dot Check History Firmware History Job History Print Adjust Screen Print Darkness Offset Registration...
- Page 7 Contents Operating Principles Print Cycle SmartDate X60 - Intermittent Printer Print Cycle SmartDate X60 - Continuous Mode Printer Print Cycle SmartDate X60 - Shuttle Continuous Printer Operating Modes Non-Ribbon Save Modes Ribbon Save Modes Printer Specific Print Options SmartDate X60 - Intermittent mode SmartDate X60 - Continuous mode SmartDate X60 - Shuttle Continuous...
- Page 8 Contents Job selection Introduction Job Setup Screens Job Setup Menus Job Setup using the Default Print Design. Using CoLOS Create Pro Job Setup using the Local Database Filtering the list of Job names Job Setup using a Host PC Prompted Data ...
- Page 9 Contents Printer configuration Introduction Accessing the Menus Settings Constraints Settings Menus Machine Settings Machine Options Image Print Features Print Initiation Print Quality Encoder Print Position Ribbon Setup Ribbon Monitoring Communications Speed Profile Recorder NGPCL Master / Slave Logging SSCC External...
- Page 10 Contents Display Settings Adjust RTC (Real Time Clock) Language Security User accounts Time/Date Codes Flexible I/O Map Diagnostics Diagnostics Statistics Files Service Version Information for parts & service call QLC (800) 837-1309 10056272-AA...
- Page 11 Contents Diagnostics Introduction Diagnostics Diagnostics Printer Inputs Status Outputs Status Temperatures Print Timing Ribbon Internal Manual Control Ribbon Printhead Digital IO Control Select Test Pattern Speed Profile Interpreting the graph for parts & service call QLC (800) 837-1309 10056272-AA...
- Page 12 Contents History Statistics Statistical Information Printhead Life Ribbon Usage Printer Usage Throughput PackML State Times Maintenance Introduction Cleaning and Care Maintenance Scheme Quick/Regular Checks Monthly Checks Care of the Printhead Cleaning the Printhead Replacing the Printhead Removing the damaged printhead (Combined) Removing the damaged printhead (Shuttle) Setting the correct printhead resistance...
- Page 13 Contents External links Controller and Printer Connection Points Printer Printer Power and Control Signals Control I/O Connections Print Go Input Wiring Fault and Warning Outputs Encoders Quadrature Encoders Encoder Resolution Single Channel Encoders Fixed Speed settings Communication Links NGPCL Communication ...
- Page 14 General for parts & service call QLC (800) 837-1309 10056272-AA...
- Page 15 General for parts & service call QLC (800) 837-1309 10056272-AA...
- Page 16 General CAUTION : Before using this printer, please read and fully comply with these instructions, the material safety data sheet (MSDS) for consumables used. Introduction This Manual along with the SmartDate X60 Instruction Booklet, set out to explain how to safely install, operate and service your SmartDate X60 Overprinters.
-
Page 17: Related Documentation
General Contact Thank you for choosing Markem-Imaje to provide printing solutions. If questions should arise, please contact the local business centre that assisted with your purchase. Markem-Imaje LTD Nottingham Science Park University Boulevard Nottingham NG7 2QN United Kingdom Tél. : (44) 0115 943 0055 Fax : (44) 0115 968 3699 http://www.markem-imaje.com ... -
Page 18: Description
Description for parts & service call QLC (800) 837-1309 10056272-AA... - Page 19 Description for parts & service call QLC (800) 837-1309 10056272-AA...
-
Page 20: Introduction
Description Introduction This section provides an overview of the main features of the SmartDate X60. Topics covered in the section include: - Overview. - SmartDate X60 Model Options. - Main Components. - Key Features. - Printer types. - Print Designs. - CoLOS Create Pro. -
Page 21: Overview
Description Overview SmartDate X60 is a small easy to use electronic coder. The two models available are designed to be suitable as a direct replacement for many different methods of coding. SmartDate X60 consists of a printing device and a control device with an operator inter- face control panel. -
Page 22: Smartdate X60 Model Options
Description SmartDate X60 Model Options The SmartDate X60 is available in two printer types. - SmartDate X60 Combined-Intermittent / Continuous (No Shuttle) - SmartDate X60 Continuous.with shuttle The type of model required is dependent on the application. SmartDate X60 - Combined Intermittent / Continuous SmartDate X60 Continuous with shuttle for parts &... -
Page 23: Main Components
Description Main Components The main components of the SmartDate X60 are as follows: - Printer body unit containing drive system and thermal transfer printhead. - Printer body cassette with ribbon supply and waste take up. - Controller unit containing main operation PCBs and User Interface. - Connecting cable for printhead power and control. -
Page 24: Printer Types
Description Printer Types SmartDate X60 - Intermittent Mode This version is used with intermittent motion packaging machines and prints onto the material when it is stationary. The SmartDate X60 printer in this mode has a print area of 53mm x 75mm and print speed of 70 to 700 mm/s. -
Page 25: Smartdate X60 Shuttle Continuous Printer
Description SmartDate X60 Shuttle Continuous Printer This version of the SmartDate X60 printer is designed to print on to moving substrate. The SmartDate X60 has a print area of 53mm x 100mm and print speed of: 30 - 700 mm/s - High Pack Rate mode 30 - 1000 mm/s - High Speed mode 30 - 1800 mm/s - Digital Ribbon Save (DRS) mode. -
Page 26: Print Designs
Description Print Designs Basic designs can be created at the SmartDate X60 user interface using up to 4 lines of text. The size and type of font is limited to 8 point Arial Bold. The number of characters supported by the SmartDate X60 LCD screen is limited to approximately 104. -
Page 27: Colos Create Pro
Description CoLOS Create pro The designs printed by SmartDate X60 can be created using the Markem-Imaje CoLOS Create Pro software. N.B. Composer 5.XXX is not compatible with SmartDate X60, as these machines use Markem-Imaje NextGen Software for operation. CoLOS Create Pro allows text, bar codes and graphics to be placed onto the SmartDate X60 print area. -
Page 28: Supported Field Types
Description Supported Field Types SmartDate X60 and CoLOS Create Pro for SmartDate X60 currently support the follow- ing field types: - Text fields - Bar codes - Line fields - Box fields - Logo fields SmartDate X60 and CoLOS Create Pro for SmartDate X60 currently support the follow- ing field styles: - Static Text - User Input Text... -
Page 29: Image Template Files
Description Image Template Files Image Templates are created using Markem-Imaje CoLOS Create Pro Image Design Software package. When creating an Image Template the user can structure how the finished image will look. The style and size of Font, the Bar code type if being used and other details about the image are established when creating the Image Template. -
Page 30: Device Settings Files
Description Device Settings Files These are the specific parameter settings for the device. Settings files are normally attached to a Job file which is downloaded to a device. The settings may include information such as Print Darkness levels or Date offset rules for a particular product. -
Page 31: Jobs
Description Jobs SmartDate X60 uses Job Files. Jobs are a combination of a Product Code, Image Template and a Device Settings File. A Device Settings file is used to configure the device parameters to suit a particular set of conditions. For example: Job A may be printing onto a Polypropylene substrate at a relatively slow print speed. -
Page 32: Retrieving And Downloading Jobs
Description Retrieving and Downloading Jobs Job information can be downloaded by 3 methods: - Using CoLOS Create Pro software. - Using CoLOS Control software (for networking) and a direct link to a PC. - Using a USB Memory Stick Data Storage Capacity ... -
Page 33: Using A Usb Memory Stick
Description Using a USB Memory Stick After creating an Image for an SmartDate X60 printer using the CoLOS Create software package, use the “Print to File” option in the File menu. The file can then be copied onto a USB memory stick ready for transfer to the printer. For full details about Image creation please consult the CoLOS Create Pro Help Files. - Page 34 Description Select Copy Files. Files Files Copy Logs Copy Files to USB Save Delete Files Settings Clear Job Load Database Setings File Statis- Adjust tics Stored Job Select Copy Jobs from USB. Files Copy Files Copy Jobs to USB Copy Jobs from USB Advance Copy Copy Jobs from USB Select...
-
Page 35: Labels And Symbols
Description Labels and Symbols Serial/I.D./Rating Label This label is located on the rear of the controller unit and indicates the following: - CE mark - Markem-Imaje corporation Logo - Country of manufacture - Machine type - Patent information - Electrical specifications - Year of manufacture - Serial number - Fuse... -
Page 36: Beacon Light
Description Beacon Light The beacon light can be mounted in a fixed position on the production line. The beacon has a three light system: Red, Orange and Green. - When the red light is on, the SmartDate X60 has switched out of Run mode or there is a fault on the machine. - Page 37 Description for parts & service call QLC (800) 837-1309 10056272-AA...
-
Page 38: Interface
Interface for parts & service call QLC (800) 837-1309 10056272-AA... - Page 39 Interface for parts & service call QLC (800) 837-1309 10056272-AA...
-
Page 40: Introduction
Interface Introduction This section describes how to operate the SmartDate X60 unit once it has been suc- cessfully installed. Topics covered in this section include: - The User Interface - Keypad - Icons - Menu Icons - Screen Types - Menu Screens - Warning and Problem Alert Screens - Security Login Screens... -
Page 41: The User Interface Panel
Interface The User Interface Panel SmartDate X60 User Interface Screen The user interface screen comprises of a LCD touchscreen and a four button hot key interface. These four keys provide the following functionality: - Starting the machine - Stopping the machine - Selecting a job - Accessing the registration and offset functions. -
Page 42: Lcd Screen
Interface LCD Screen The interface is composed of a 256-color, 320 x 240 pixel touch screen. The screen supports graphics and Unicode characters. Dependant on the printer function at the time, the screen will normally display with 5 or 6 touch buttons aligned down both the left and right sides of the screen and 3 larger areas in the centre of the screen. -
Page 43: Keypad
Interface Keypad The Hot keys are positioned below the user interface screen, and consist of four rubber push buttons. These keys allow you to start and stop the printer, select a job for printing and adjust the registration value. 1- Stop producing 2- Registration 3- Select Job... -
Page 44: Screen Icons
Interface Screen Icons Icon Name Description Home This option will return you to the Home screen. This option allows you to preview the selected job. The image can be enlarged or re- Print Preview duced in size and the details of each field can be viewed by using the Information button. Folder OK This indicates that there are no faults or warnings active. - Page 45 Interface Display Settings This option allows you to calibrate the Touch Screen. Adjust RTC This option allows you to configure the Time and Date settings. Language This option allows you to select the required language for the Touch Screen. Enable Security This option allows you to Enable or Disable the Security function.
-
Page 46: Screen Types
Interface Screen Types The SmartDate X60 User Interface supports various Screen Types. The screen is generally divided into a main central screen with option buttons down either side. The four corner buttons are used for navigation, returning to the Home screen or ac- cessing the Print Preview. -
Page 47: Example Of Menu Screen Layout 1
Interface Example of Menu Screen Layout 1: In this example the Menu options are displayed in the central screen area. Where four or less menu options are displayed the central screen is split into a title pane and four option panes. The four corner buttons are used for navigation, returning to the Home screen or ac- cessing the Print Preview. -
Page 48: Example Of Menu Screen Layout 2
Interface Example of Menu Screen Layout 2: Where five or more menu options are displayed the central screen is split into a title pane and eight option panes. The four corner buttons are used for navigation, returning to the Home screen or ac- cessing the Print Preview. -
Page 49: Example Of Menu Screen Layout 3
Interface Example of Menu Screen Layout 3: Where a large amount of detail has to be displayed, the central screen is further divided into a list of options. You can then use the arrows to navigate up or down the list or move across the lists. The four corner buttons are used for navigation, returning to the Home screen or ac- cessing the Print Preview. - Page 50 Interface The screen types can be grouped as follows: Screen Type Description Home Screen The main screen from which the user starts Menu Screens Used to navigate between different menu options or screen types. Data Entry Screens Used to enter data for Job setup or printer settings. Reports Screens Used to display a large amount of textual information.
-
Page 51: Home Screen
Interface Home Screen The Home Screen is the main screen from which the user starts. This can either be the Ready Screen or the Producing Screen. The various menus can be accessed from both versions of this screen. Ready Screen: Ready Producing Screen: Producing... -
Page 52: Security Login Screen
Interface Security Login Screen This screen is displayed whenever a password is required. If you select one of the options you will then be prompted for a Login Password. If the Security level has been enabled the menu screen will display the numerical pass- word screen. -
Page 53: Security Options
Interface Security Options SmartDate X60 can be configured to prompt for a password before access to the vari- ous menu options is allowed. Two security level options are available to gain access to the menus. - Open - Medium If the security setting is Open no password prompt will be displayed. -
Page 54: Menu Screens
Interface Menu Screens Menus are navigated by selecting the required option button. After entering a menu, the top item in the list will be highlighted. From this point the you can only scroll down. You can scroll down through the menu topics by using the Red down arrow button. You can scroll up through the menu topics by using the Green up arrow button. -
Page 55: Data Entry Screens
Interface Data Entry Screens Data entry screens will vary dependant on the menu option that has been selected. These screens can be grouped as follows: - Prompted Data Entry Screens - Date Entry Screens - Settings Adjustment Screens - Job Setup Screens Prompted Data ... -
Page 56: Alpha Data Entry Screens
Interface Alpha Data Entry Screens From this screen alpha data can be entered. Once alpha characters have been entered, the screen cursor can be moved to individu- al characters by using the arrows to the left and right of the input pane. Individual characters can be deleted by using the back arrow button on the right of the screen. -
Page 57: Language Specific Characters And Symbols
Interface Language specific characters and symbols From this screen language specific characters or symbols can be entered. Display the appropriate option by using the two buttons on the right of the screen. Once data has been entered, the screen cursor can be moved to individual characters or symbols by using the arrows to the left and right of the input pane. -
Page 58: Date Entry Screens
Interface Date Entry Screens There are three types of “Date Entry” screens that the User Interface has to support: - Literal Date Entry - Fixed Format Prompted Date Entry - Offset Date Entry Literal Date Entry This screen is used to prompt the setting of a fixed date to be printed. There is no cal- culation made on this date, it is displayed (Prompted) in the format that it will be printed. -
Page 59: Fixed Format Date Entry
Interface Fixed Format Date Entry This screen is used to set a literal date to be printed, but this time the date is displayed in a fixed format. An example of where this option may be used is where the product is destined for another country. -
Page 60: Offset Date Entry
Interface Offset Date Entry This screen is used to set an offset from the SmartDate X60 internal clock and to pre- view what the resultant date would be. Home Select Job Print Preview This example shows an offset of seven days, so the actual date that the SmartDate X60 internal clock is set to is the 24th October 2007. -
Page 61: Diagnostics Screens
Interface Diagnostics Screens The Diagnostics screen displays the current status and dynamically changing data which give an aid to troubleshooting. The information is read only and can therefore not be altered. This screen allows access to the following information: - Printer configuration - Inputs status - Outputs status... -
Page 62: Reports Screens
Interface Reports Screens These screens are available under the menu and give full details of what is expressed in abbreviated form on the Home page. This includes full information about Warnings and Problems. Information such the Software version number, Hardware serial numbers etc. Are dis- played here. -
Page 63: Special Screens
Interface Special Screens There are a number of special screens that may occasionally appear. Examples of these may be if a print can not be completed or if a new type of ribbon is loaded. Ribbon Type Verification If SmartDate X60 detects that a new ribbon is loaded, it needs to confirm that the ribbon type is the same as the last type used. -
Page 64: Faults And Warnings Alert Screens
Interface Faults and Warnings Alert Screens These screens inform you of problems or potential problems. A description of the problem will be displayed on the screen. Fault 1300 Cassette Open Close Cassette to Clear Fault In the case of a Warning the SmartDate X60 will continue printing if in Producing mode. The Warning does not stop the print cycle. -
Page 65: Failed Prints
Interface Failed Prints With Continuous printers there may be occasions where SmartDate X60 can not com- plete a print because the production speed slows to a point where printing can not take place. If this happens you will be prompted with the option to manually discard the print or wait until the production speeds up again. -
Page 66: Dead Dot Detection
Interface Dead Dot Detection SmartDate X60 will automatically detect if any of the printhead dots have been damaged. A warning icon will be displayed in the Status box on the upper left hand side of the screen. Selecting this icon will display the warn- Home ing message Default Job... -
Page 67: Power Saved Mode
Interface Power saved mode If activated the printer will revert to power saved mode after 2min, 30min, 2h, or 6h as selected. for parts & service call QLC (800) 837-1309 10056272-AA... -
Page 68: Operation
Operation for parts & service call QLC (800) 837-1309 10056272-AA... - Page 69 Operation for parts & service call QLC (800) 837-1309 10056272-AA...
-
Page 70: Introduction
Operation Introduction This section describes how to operate the SmartDate X60 unit once it has been successfully installed. Topics covered in this section include: - Starting the SmartDate X60 - Stopping the SmartDate X60 - Print Adjustment screens - Changing the Ribbon - Principles of printing - Operating principles - Operating modes... -
Page 71: Start The Printer
Operation Start the printer Home Screen The Home Screen is the main screen from which the user starts. This can either be the Stopped Screen or the Run Screen. The various menus can be accessed from both versions of this screen. Ready Screen: To start the printer press the right hand button. -
Page 72: Stop The Printer
Operation Stop the printer Producing Screen To stop the printer press the right hand Producing button . This will put the printer into “Ready” mode and the SmartDate X60 will ignore any print signals form the Host machine. Ready for parts &... -
Page 73: Information
Operation Information The Information Screen provides details about the performance of the SmartDate X60. Home Information Job History Counts Supplies Health Printhead Information for parts & service call QLC (800) 837-1309 10056272-AA... -
Page 74: Counts
Operation Counts This screen displays the current status of the printer counters. Home Counts Batch Good Batch Spoiled Batch Missed Batch Discarded Batch Low Speed Batch Failed Total Good Total Spoiled Total Missed Batch Good Counts This is the number of successful prints with current selected image Batch Spoiled Counts This is printed image with part of the image missing e.g. -
Page 75: Supplies
Operation Supplies The Supplies Screen provides information about the available ribbon and number of prints that can be completed before a ribbon change is required. When the printer is in producing mode the remaining time will also be displayed with respect to the current print cycle time. -
Page 76: Health
Operation Health The Health screen displays metrics relating to the operational efficiency of your installation. In order to compute these metrics the SmartDate distinguishes between and measures, the time spent in different states. Uptime is the duration for which the SmartDate is available and ready to print if configured to do so. - Page 77 Operation Two machine efficiency measures are derived from these times: % Availability measures % uptime achieved by the system having excluded Ribbon Change Time from the calculation. % Availability = Uptime / (Uptime + Downtime) This gives a good overall measure of the SmartDate’s health. A low availability metric implies a configuration issue that is compromising the amount of time you can successfully use the machine.
-
Page 78: The Health Screen
Operation The Health Screen The Health screen displays four distinct metrics calculated from above. Information Health Currently: Available Lifetime Availabilty: 99.9% With Cassette Change: 99.9% Measured Over Daily Availability: 99.9% With Cassette Change: 99.9% Dead Printhead Dots: 0 Also displayed is the : Current state of the machine - either Available, Changing Ribbon or In Fault. -
Page 79: The Availability Log Screen
Operation The Availability Log Screen The SmartDate X60 provides an additional screen to help determine what is affecting the metrics reported. It displays up to 100 events that may lead to reduced uptime. Health Availability Log Ribbon Change: 10/03/2011, 36s Powering Up: 09/03/2011, 1m05s Ribbon Change: 09/03/2011, 45s Ribbon Change: 08/03/2011, 4m20s... -
Page 80: The Printhead Information Screen
Operation The Printhead Information Screen The printhead Information Screen displays details of information stored in Markem- Imaje Smart-chip thermal transfer printheads. This includes details of the printhead’s identity, usage and printhead dot check health. This screen also provides the option to save this information to a Printhead Data Log file. -
Page 81: Identity
Operation Identity This screen allows you to view information with regard to serial numbers, model numbers and dates of printhead changes. Identity Description Written once at Serial Number New printhead serial number manufacture Written once at Type Numeric model number manufacture Written once at Manufacture Date... -
Page 82: Usage
Operation Usage This screen allows you to view information with regard to the performance of the printer. Usage Description Print Count Number of print cycles performed Ribbon KM Amount of ribbon fed past the printhead Direct Thermal KM Amount of substrate fed past the printhead Last known printhead darkness setting value Darkness used to print... -
Page 83: Job History
Operation Job History The Job History screen provides information about changes to the work history of the SmartDate X60. This includes the Date and Time of any new job selected. Information Job History Job 1: 31/08/2011 - 08:45:35 Job 2: 31/08/2011 - 10:22:39 Job 1: 31/08/2011 - 14:55:238 for parts &... -
Page 84: Print Adjust Screen
Operation Print Adjust Screen This screen allows you to configure the print settings for the SmartDate X60. Five options are available for adjustment plus the Test Print function. Home Print Adjust Darkness Rotation Offset Print Adjust Registration Test Print ... -
Page 85: Offset
Operation Offset This is the position of the print relative to the Printhead. Increasing the offset will move the position of the print across the printhead. Print Adjust Offset Offset: 1 mm The black background represents the ribbon width. Print Adjust Offset Offset: 10 mm... -
Page 86: Registration
Operation Registration This is the position of the print relative to the direction of the substrate. Increasing the registration will move the position of the print further back on the substrate. Print Adjust Registration Registration Current Value: 0 mm Min = 0 mm;... -
Page 87: Rotation
Operation Rotation This screen allows you to rotate the selected image by 180o Print Adjust Rotation Rotation Current Value: 0o Adjust Image This screen allows you to adjust the position of specific fields on the image being printed. Print Adjust Adjust Image for parts &... - Page 88 Operation Increase the Image size to enable a better view of the image if required. Print Adjust Adjust Image Select the field that requires moving. Print Adjust Adjust Image Use the Arrow keys to move the field to the required position. Print Adjust Adjust Image Use the “A”...
-
Page 89: Removing The Cassette
Operation Removing the cassette Rotate the locking lever on the cassette to the OPEN position. Use the handle to withdraw the cassette. Remove the waste ribbon from the cassette. for parts & service call QLC (800) 837-1309 10056272-AA... -
Page 90: Loading Or Replacing The Ribbon
Operation Loading or Replacing the Ribbon Removing Waste Ribbon from the Waste Take up Core Pull the ribbon forward using the ribbon take up reel flange located below the ribbon. Push the flange back to its original position. Pull off the ribbon by hand. -
Page 91: Loading A New Ribbon
Operation Loading a New Ribbon Fit a new waste take up core and load a new ribbon following the web pattern shown inside the cassette. (New ribbon on the red reel) Remove sufficient ribbon from the new roll to make it unnecessary to pull additional ribbon while the cassette is partially loaded. - Page 92 Operation Full width ribbon. Narrow ribbon. Narrow ribbon with spacer. for parts & service call QLC (800) 837-1309 10056272-AA...
-
Page 93: Re- Connecting A Broken Ribbon
Operation Re- Connecting a Broken Ribbon If a ribbon break occurs the following procedure should be used: Do not tie a knot to re-connect the ribbon. Wind the remaining waste ribbon onto the waste core. Pull some of the unused ribbon from the ribbon supply and wind it onto the waste ribbon take up. -
Page 94: Cassette Webbing Diagrams
Operation Cassette Webbing Diagrams SmartDate X60 LH Cassette Ribbon Web Path SmartDate X60 RH Cassette Ribbon Web Path RH for parts & service call QLC (800) 837-1309 10056272-AA... -
Page 95: Replacing The Cassette
Operation Replacing the Cassette Check that the cassette locking lever is in the OPEN position. Insert the printer cassette by aligning the two guide pins (see the appropriate webbing diagram) and pressing the unit home. Check that the ribbon passes over the peel bar correctly. Lock the unit shut by turning the locking lever to the CLOSED position. -
Page 96: Principles Of Printing
Operation Principles of Printing Thermal Transfer Technology SmartDate X60 machines use Thermal Transfer printheads, similar to the ones used in Fax machines. Thermal Transfer printers can also operate without ribbon by using specially treated paper which turns black when heated. This is the way fax paper reacts. Overprinters however, almost always use ribbon. -
Page 97: Print Process
Operation Print Process With the Intermittent printers, the step rate of the printhead carriage motor is in direct relationship with the linear motion of the carriage. The length of time that the dots are energised for is determined by the linear speed of the printhead carriage. - Page 98 Operation For example: The above character is represented as 26 steps long, just over 2 mm. If the print speed were 100 mm/sec, this character would only take approximately 2/100 of a second to print. 12 dots = 1.5mm Step 1 Step 3 Step 4 Direction of...
-
Page 99: Operating Principles
Operation Operating Principles The two printer types use different methods of operation specifically designed to suit the running methods of the packaging machines being used. When the cassette is inserted into the printer body and secured, the ribbon supply shaft and ribbon waste rewind shaft, are connected to the ribbon drive motor couplings. -
Page 100: Print Cycle Smartdate X60 - Intermittent Printer
Operation Print Cycle SmartDate X60 - Intermittent Printer The SmartDate X60 in this mode has a print area of 53mm x 75mm and print speeds of 70 to 700mm/s. The SmartDate X60 Intermittent prints when the substrate or label is stationary. The printhead is moved out during the dwell time of the packaging /labelling machine, and then moved across the substrate / label while printing takes place. -
Page 101: Print Cycle Smartdate X60 - Continuous Mode Printer
Operation Print Cycle SmartDate X60 - Continuous Mode Printer The SmartDate X60 in this mode has a print area of 53 mm x 150 mm and print speeds of 30 to 1000 mm/s. TheSmartDate X60 Continuous prints while the substrate is moving. In this case the printhead only moves out to the print position and has no linear motion. -
Page 102: Print Cycle Smartdate X60 - Shuttle Continuous Printer
Operation Print Cycle SmartDate X60 - Shuttle Continuous Printer The SmartDate X60 Shuttle Continuous has a print area of 53 mm x 100 mm and print speeds of 30 to 1000 mm/s. High Speed mode 30 to 1200 mm/s Digital Ribbon Save mode 30 to 1800 mm/s The SmartDate X60 Shuttle Continuous prints while the substrate is moving. -
Page 103: Operating Modes
Operation Operating Modes SmartDate X60 has one standard mode of operation, with the option to select additional ribbon save modes if required These can be separated into two main groups: Non-Ribbon Save Modes Non-Ribbon Save Modes include: - High Pack Rate - speeds of up to 700 mm/sec - High speed mode - speeds of up to 1200 mm/sec ... -
Page 104: Printer Specific Print Options
Operation Printer Specific Print Options SmartDate X60 - Intermittent mode This SmartDate X60 can be set to: - High Pack Rate Operation - Radial Ribbon Save Mode - Interlace Mode SmartDate X60 - Continuous mode This SmartDate X60 can be set to: - High Pack Rate Operation - Radial Ribbon Save Mode - Interlace Mode... -
Page 105: High Pack Rate Mode
Operation High Pack Rate Mode SmartDate X60 transfers ink from the ribbon directly onto the substrate by means of a thermal transfer printhead. In this mode the ink removed from the ink ribbon will be equal in size to the printed image on the substrate. For example, a 2 mm long print will use 2 mm of ribbon. -
Page 106: High Speed Mode
Operation High Speed Mode Not available with the SmartDate X60 when it is in Cost Saving mode. The benefit of High Speed mode is that a print speed of up to 1000 mm/sec can be achieved. 1200 mm/sec with the SmartDate X60. This is accomplished by reducing the resolution of the print. -
Page 107: High Speed Options
Operation High Speed Options High Speed mode is a menu-selected option. When DISABLED, the printer runs as standard and produces the full density, high quality image as expected. When the mode is ENABLED, the user can set the threshold from which it begins to operate. -
Page 108: Materials And Applications
Operation Materials and Applications High Speed mode is designed for applications where a small reduction in perceived quality is acceptable so the customer may benefit from high running speeds. Primarily these applications are for simple Date & Lot type overprinting applications. High Speed mode can be used to print picket fence orientated barcodes, but must not be used to print Ladder format barcodes. -
Page 109: Limitations
Operation Limitations The use of High Speed mode has major speed benefits to the customer, however, ere are some points of this feature which must be considered when qualifying an application. • When High Speed mode is selected, the maximum print speed is 1000mm/ sec. •... -
Page 110: Interlace Mode
Operation Interlace Mode This is a SmartDate X60 printer function which is used to save ribbon. When Interlace Mode is being used the ribbon is only advanced every second print, effectively saving 50% of the ribbon being used. This method of printing does however decrease the contrast quality of the print, as only half the normal amount of ribbon is being used to print with. -
Page 111: Setting Up Interlace Mode
Operation Setting up Interlace Mode Once interlace mode is turned ON, settings such as background energy levels are automatically adjusted to optimise operation in interlace mode. The settings should be optimised for a wide range of materials however a reality of interlace mode is that the first and second prints will differ slightly in contrast. -
Page 112: Materials And Applications
Operation Materials and Applications Interlace mode is designed for applications where a small reduction in perceived quality (reduced contrast) is acceptable so the customer may benefit from halved running costs and increased uptime. Primarily these applications are for simple Date & Lot type overprinting applications. -
Page 113: Radial Ribbon Save Mode
Operation Radial Ribbon Save Mode In this mode, the ribbon is advanced only after the whole of the printable area of the ribbon has been used. For example, if the ribbon being used is 55 mm wide and each print is 10mm wide, SmartDate X60 can effectively print five times before advancing the ribbon. -
Page 114: Cost Saving Mode
Operation Digital Ribbon Save Mode Digital Ribbon Save mode is a feature of the SmartDate X60 printer that allows you to reduce the amount of ribbon used for each print. This is achieved by allowing the substrate to run at a faster speed than the ribbon. The difference between the ribbon speed and the substrate speed defines the amount of ribbon saving that can be achieved. - Page 115 Operation Three main points must be clearly understood: 1. The print in Cost Saving Mode mode will be fainter than with Normal or Hi Speed. 2. The higher the Cost Saving Mode setting the fainter the print will be as it is using less ribbon.
- Page 116 Operation Minimum and Maximum Print Speeds There is a minimum and maximum print speed at which a particular ribbon saving will occur. For SmartDate X60 the minimum and maximum speeds are calculated as follows: Minimum speed for selected ribbon save (mm/s) = 120 * substrate speed multiplier. Maximum speed for selected ribbon save (mm/s) = 800 * substrate speed multiplier.
- Page 117 Operation Absolute Maximum Speed The absolute maximum speed for Digital Ribbon Save Mode is specified as 1800mm/s. This speed can be achieved using a ribbon saving of 56%. The SmartDate X60 will allow ribbon saving above 56%, however the SmartDate X60 will only operate to a maximum speed of 1800mm/s.
-
Page 118: Relative Motion
Operation Relative Motion The Relative Motion option is available on the Combined versions of the SmartDate X60 only. It can be used with both the Intermittent and Continuous options of the Combined printers. Relative Motion allows the SmartDate X60 to finish off a print that has been interrupted during the normal printing process. - Page 119 Operation How does it work? Relative motion works in the following ways: Intermittent mode: When using Intermittent mode the printer must be fitted with an encoder to monitor the subtrate speed. A high resolution encoder is recommended. Example: • The printer is set to print at a print speed of 300mm/sec. •...
- Page 120 Operation Continuous mode: When using Continuous mode, the printer uses the encoder to determine if the substrate has stopped moving before the print is complete. The SmartDate X60 will then move the printhead carriage in the direction of the unfinished print while following the contour of the print roller before returning to the normal print carriage position.
-
Page 121: Low Speed Print Mode
Operation Low Speed Print Mode This is a Continuous printer option. SmartDate X60 Continuous can be set to react in several different ways, if the Host packaging machine stops during the print cycle. To access the Low Speed Print Mode setup menu, Printer Configuration - Machine. The options are: - None - Continue... - Page 122 Operation Continue Associated with this mode is the Discard Print Time. In this mode if the Host machine stops during a print cycle, the SmartDate X60 will lift the printhead, and wait for the Discard Print Time to elapse. During this time the option to Discard the print manually will be displayed on the screen.
- Page 123 Operation for parts & service call QLC (800) 837-1309 10056272-AA...
-
Page 124: Job Selection
Job selection for parts & service call QLC (800) 837-1309 10056272-AA... - Page 125 Job selection for parts & service call QLC (800) 837-1309 10056272-AA...
-
Page 126: Introduction
Job selection Introduction Topics covered in this section include: - Job Setup Screens - Data Entry Screens - Date Entry Screens Job Setup Screens Job setup can be performed with the SmartDate X60 in a Stopped condition or with it in Producing mode. -
Page 127: Job Setup Menus
Job selection Job Setup Menus SmartDate X60 provides several different ways of selecting a new Job. Job Setup depends if the Default Job is to be used, or where Job information is stored. e.g. In the SmartDate X60 Local database or at a Host PC running CoLOS Control. Job Setup using the Default Print Design. - Page 128 Job selection Enter any required data in the four avail- Select Job able fields. Default Job Field 1 Use the Alphanumeric keypad option After entering individual field data, confirm this by selecting the tick at the bottom right of the Alphanumeric screen and then use the right arrow to move to the next field.
-
Page 129: Using Colos Create Pro
Job selection Using CoLOS Create Pro These designs allow for much more functionality to be added to the Image such as: - Barcodes - Time Date fields - Date Offset fields - Machine ID fields - Shift Codes For full information about CoLOS Create Pro please consult the relevant documentation. -
Page 130: Job Setup Using The Local Database
Job selection Job Setup using the Local Database To select a Job by this method follow the procedure below: From the Home screen press the Select Ready Job button under the main screen or Default job use the Select Job option from the Menu screen. - Page 131 Job selection After entering individual field data, confirm this by selecting the tick at the bottom right of the Alphanumeric screen and then use the right arrow to move to the next field. When complete, confirm this by select- Confirm Job Select Default Job ing the tick at the bottom right of the...
-
Page 132: Filtering The List Of Job Names
Job selection Filtering the list of Job names There may be hundreds of Jobs in the local SmartDate X60 database. The filter option can be used to make searching for a specific job easier. Selecting the Filter option displays the Home Alphanumeric screen. -
Page 133: Job Setup Using A Host Pc
Job selection Job Setup using a Host PC To select a Job with this method follow the procedure below: From the Home screen press the Select Ready Job button under the main screen or Default job use the Select Job option from the Menu screen. - Page 134 Job selection When complete select the tick at the bottom right of the Alphanumeric screen. The Select Job screen is again dis- Home Select Job from Host played, press the right button to Confirm. Please Enter the Job Name The Job file will be retrieved from CoLOS Control and loaded into the SmartDate X60 printer memory ready for printing.
-
Page 135: Prompted Data
Job selection Prompted Data Prompted data entry screens collect input from the user as a result of Job designs that require variable data to be entered during the Job selection process. Because the Job design can prompt for different types of input, the screen types vary. Home Select Job Field 1... -
Page 136: Date Entry Screens
Job selection Date Entry Screens There are three types of “Date Entry” screens that the User Interface has to support: - Literal Date Entry - Fixed Format Prompted Date Entry - Offset Date Entry Literal Date Entry This screen is used to prompt the setting of a fixed date to be printed. There is no cal- culation made on this date, it is displayed (Prompted) in the format that it will be printed. -
Page 137: Fixed Format Date Entry
Job selection Fixed Format Date Entry This screen is used to set a literal date to be printed, but this time the date is displayed in a fixed format. An example of where this option may be used is where the product is destined for another country. -
Page 138: Offset Date Entry
Job selection Offset Date Entry This screen is used to set an offset from the SmartDate X60 internal clock and to pre- view what the resultant date would be. Home Select Job Print Preview This example shows an offset of seven days, so the actual date that the SmartDate X60 internal clock is set to is the 24th October 2007. -
Page 139: Print Preview
Job selection Print Preview This option allows you to preview the current selected job. From this screen you can zoom in on the details of the image or preview a detailed list of the image fields by selecting the button. -
Page 140: Master-Slave Function
Job selection Master-Slave Function This allows you to configure one Smartdate (Set as the Master) to control the current job on another Smartdate (Set as the Slave) When operating in this mode it is possible to: Determine the basic operational state of the Slave printer from the Master SmartDate. Determine if slaves are connected or not and if they are active printing. -
Page 141: Connecting Masters To Slaves
Job selection Connecting Masters to Slaves Master / Slave functionality uses Ethernet to support communication between units. When SmartDates need to be paired they can be connected to each other by using an Ethernet cross-over cable. Machines can also be Networked together using a Switch / Hub. This configuration also allows connection of the SmartDates to Host software (e.g. -
Page 142: Printer Configuration
Printer configuration for parts & service call QLC (800) 837-1309 10056272-AA... - Page 143 Printer configuration for parts & service call QLC (800) 837-1309 10056272-AA...
-
Page 144: Introduction
Printer configuration Introduction This section describes how to navigate the menus and the options available. Topics covered in this section include: - Menu Structure. - Printer Settings Menus - Diagnostics Menus - Statistics Menus - Files Menus - Service Menus - Information about the printer Menu Structure for parts &... -
Page 145: Accessing The Menus
Printer configuration Accessing the Menus From the Home screen select Menus. . Ready If an Access Code is prompted for enter the code. The Main Menu screen is displayed. Home Menu Settings Service Version Diagnostics Information Statistics Files The Main Menu screen allows you to: - Access the Settings Menus - Access the Diagnostics Menus - Access the Statistics Menus... - Page 146 Printer configuration Settings Diagnostics Statistics Files Service Status Menus Version Information Select job Home screen Counts Information Supplies Print adjust Health Printhead Information Job History Darkness Offset Registration Test print Rotation for parts & service call QLC (800) 837-1309 10056272-AA...
- Page 147 Printer configuration Settings Machine settings Diagnostics Display settings Statistics Adjust RTC Files Language Service Enable security Version Information Custom Codes Flex IO map Diagnostics Manual control Digital I/O control Select printhead test pattern Speed profile graph Setup wizards Installation setup Copy files Service login Delete files...
- Page 148 Printer configuration Machine Type Carriage position Prompt for Ribbon Low Speed Print Mode Discard Print Time Security Level Machine ID Machine Database Line ID Job Queueing Default Job Pack Rate Period Relative Year Offset Power Save Timer Date Rollover Hour Prompt for Allocation Date Rollover Minute Default Allocation...
- Page 149 Printer configuration Ribbon Grade Ribbon Colour (#) Ribbon Width New Ribbon Length New Outside Diameter Ribbon setup Core Outside Diameter Ribbon Advance Distance Ribbon Spacer Width Ribbon Extra Wind Ribbon Break Detection Low Ribbon Detect Ribbon Low Ribbon Size Monitoring Low Ribbon Action IP Address IP Subset Mask...
-
Page 150: Settings Constraints
Printer configuration Settings Constraints Some Settings menu items have constraints. i.e. They will only be displayed if certain settings conditions apply. The following list shows which menu items have constraints and the conditions that apply: All of the options are displayed with the top level password, some options are not displayed with lower level passwords. - Page 151 Printer configuration Encoder Encoder Type Continuous printer only. Encoder Direction Continuous printer and Encoder Type set to Quadrature. Continuous printer and Encoder Type set to Quadrature or Encoder Resolution Pulse Train. Continuous printer and Encoder Type set to Internal. Film Speed Printer Mode dependant.
-
Page 152: Settings Menus
Printer configuration Settings Menus From the Home screen select Menus. Ready If an Access Code is prompted for enter the code. From the Menus screen select Settings Home Menu Settings Service Version Diagnostics Information Statistics Files for parts & service call QLC (800) 837-1309 10056272-AA... - Page 153 Printer configuration The Settings Menu screen is displayed. Menu Settings Machine Enable Settings Security Display Custom Settings codes Adjust Flex I/O Language The Settings Menus allow you to: - Configure the Machine settings. - Configure the Display settings. - Configure the Real Time Clock (Set the Date and Time) - Select the User Interface language.
-
Page 154: Machine Settings
Printer configuration Machine Settings From the Settings screen select Machine Menu Settings. Settings Enable Machine Settings Security If an Access Code is prompted for enter the code. Display Custom Settings codes Adjust Flex I/O Language Settings Use the Left and Right Arrows Machine Settings... -
Page 155: Machine Options
Printer configuration Machine Options The Machine menu allows you to configure various settings that are specific to the particular printer. The following Machine options can be configured: Macine Type This allows you to configure the Smartdate X60 to Continuous or Intermittent Range: Continuous or Intermittent operating mode. - Page 156 Printer configuration This allows you to queue up to eight jobs to be printed in a sequence. For Job Queuing example: These jobs may have an allocation of 20 prints before the next job is Range: Off, On, Repeat or Binary selected.
-
Page 157: Image
Printer configuration Image The Image menu allows you to configure various settings that relate to the image being printed. The following Image options can be configured: This allows you to set a four character, unique identification for each SmartDate X60. The information is then printed in a specific field on the design. - Page 158 Printer configuration Date Rollover Direction Range: After Midnight or Before This allows you to set the period of the day that the rollover occurs. Midnight Default: After Midnight Offset Date Rollover Hour (Best Before End) Range: 0 to 11 Default: 0 This allows you to set the hour at which the next day starts.
-
Page 159: Print Features
Printer configuration Print Features The Print Features menu allows you to configure various settings that relate to the operation of the printer. The following Print Features options can be configured: This is a Continuous printer feature. Print Mode Range: High Pack Rate, High Speed This allows you to set the printing mode to suit the customers requirements. -
Page 160: Print Initiation
Printer configuration Print Initiation The Print Initiation menu allows you to configure the signal to start printing. The options available will depend upon which printer type is selected. (Intermittent or Continuous) The following Print Initiation options can be configured: Setting Description Print Trigger... -
Page 161: Print Quality
Printer configuration Print Quality The Print Quality menu allows you to configure settings that control the quality of the printed image. The following Print Quality options can be configured: Setting Description Print Darkness Range: 80 to 140% This allows you to set the Darkness level for the print. Default: 100% This allows you to set a printer specific darkness level for the printer. - Page 162 Printer configuration Start Border Range: This allows you to set the distance over which the printhead is allowed to settle 0 to 20.0 mm after it has moved out, but before it starts to print. Default: 2.0 mm Intermittent Default: 4.0 mm Continuous End Border Range: This allows you to set the distance the printhead or ribbon is allowed to travel after...
-
Page 163: Encoder
Printer configuration Encoder The Encoder menu allows you configure various settings related to the Continuous printer speed encoder. The following Encoder options can be configured: Setting Description Encoder Type Range: External Quadrature, Internal This allows your to set the Encoder type for Continuous printers. or External Pulse Train. -
Page 164: Print Position
Printer configuration Print Position The Print Position menu allows you to fine tune the position of the print on the target material. The following Print Position options can be configured: Setting Description This is Continuous printer feature. Registration Range: Continuous 0.0 - 600.0mm This allows you to set the start position of the print relative to the Print Go Intermittent 0.0 - 75.0mm position. -
Page 165: Ribbon Setup
Printer configuration Ribbon Setup The Ribbon Setup menu allows you to configure various ribbon specific settings. This enables the Controller to fine tune printer settings to suit individual ribbon types. The following Ribbon Setup options can be configured: Setting Description Ribbon Grade Range: 3100, 3410, 3510, 3810,... -
Page 166: Ribbon Monitoring
Printer configuration Ribbon Winding Range: Inside Winding or Outside Depending on which side of the ribbon the ink positioned, this allows you to Winding configure the Inside or Outside option. Default: Inside Winding Ribbon Advance Distance This allows you to set the distance the ribbon advances between prints (in Range: 1 - 10mm (1 - 1000 mm*100) addition to the length of the print) Default: 1mm... -
Page 167: Communications
Printer configuration Communications The Comms menu allows you to configure the communications options. The following Communication options can be configured: Setting Description IP Address This allows you to assign an IP address to the SmartDate X60. Range: LAN Specific Always consult your IT department before configuring an IP address. -
Page 168: Speed Profile Recorder
Printer configuration Speed Profile Recorder This is a Continuous printer feature. The Speed Profile Recorder allows you to configure the Speed Profile feature options. The following Speed Profile options can be configured: Setting Description Resolution Range: 1ms, 5ms, 10ms, 50ms or This allows you to define the resolution for the speed profile. -
Page 169: Ngpcl
Printer configuration NGPCL (Next Generation Print Communication Language) This is Markem-Imaje protocol for communicating with devices. This can be used select products from the local database, update variable data fields on the image etc. Where fields on the image template are updated on a regular basis, it may be necessary to limit the length of the field names and field data. -
Page 170: Master / Slave
Printer configuration Master / Slave The Master / Slave function allows up to four additional SmartDate X60 printers to be controlled from a single Master SmartDate X60. Once the Slave printers are configured, a Job selected on the Master will also be selected on the Slave printers. -
Page 171: Sscc
Printer configuration SSCC This feature allows you to configure the Serial Shipping Container Code parameters. Setting Description SSCC Company ID Range: 1 - 16 digits This allows you to enetr the allocated Company ID code. Default: 1 SSCC Current Reference Value Range: 1 - 16 digits This allows you to define the current serial number to be used. -
Page 172: Display Settings
Printer configuration Display Settings The Display Settings menu allows you to configure the settings of the User Interface Screen. From the Settings screen select Display Menu Settings. . Settings Machine Enable Settings Security If an Access Code is prompted for enter the code. -
Page 173: Adjust Rtc (Real Time Clock)
Printer configuration Adjust RTC (Real Time Clock) The Adjust RTC menu allows you to configure the machine internal clock Date and Time settings. The following Adjust RTC settings can be configured. From the Settings screen select Adjust Menu RTC. Settings Machine Enable... -
Page 174: Language
Printer configuration Language The Language menu allows you to select the User Interface screen language. The following Language options can be selected as standard: Setting English Français Dansk Deutsch Nederlands Español Italiano Additional languages are also available. For further information, please contact your local Markem-Imaje representative. -
Page 175: Security
Printer configuration Security The Security menu allows you to activate or deactivate the password option. User accounts The User Accounts menu allows you to configure Individual accounts. The following User Accounts options can be configured: Setting Description Operator Supervisor Installation engineer for parts &... -
Page 176: Time/Date Codes
Printer configuration Time/Date Codes The Time/Date Codes menus allow you to configure customer specific time and date settings. The following Time/Date code options can be configured: Setting Description Custom Codes Shift Codes Settings Custom Codes Day of Day of week month Sunday... -
Page 177: Diagnostics
Printer configuration Diagnostics Menu Settings Speed Diagnostics Profile Manual Supplies Control Digital IO UIHealth Control Select Print- head Test Pattern Diagnostics The Diagnostics menus allow you to view various information about the status of the printer. For full details see the Diagnostics section ... -
Page 178: Files
Printer configuration Files The Files menus allow you to organise your file structure. The following File options can be can accessed: State Description Copy Files Copy files to or from a USB memory stick. Delete Files Delete specific files from the job database. Clear Job Database Delete all files from the job database. -
Page 179: Version Information
Printer configuration Version Information The Version Information menu allows you to view information about the machine. The following Information can be can accessed: State Description Controller Software Version Controller Hardware Serial Number Language File Version Controller PLD Version Controller MAC Address Controller PCB Version Printer Software Version Printer Hardware Serial Number... -
Page 180: Diagnostics
Diagnostics for parts & service call QLC (800) 837-1309 10056272-AA... - Page 181 Diagnostics for parts & service call QLC (800) 837-1309 10056272-AA...
-
Page 182: Introduction
Diagnostics Introduction This section describes the Diagnostics features of the SmartDate X60. Topics covered in this section include: - Diagnostics - Manual control - Digital I/O control - The printhead test pattern - Speed profiles - Supplies - Health for parts &... -
Page 183: Diagnostics
Diagnostics Diagnostics Menu Diagnostics Speed Diagnostics Profile Manual Control Digital IO Control Select Printhead Test Pattern Diagnostics The Diagnostics menus allow you to view various information about the status of the printer. The following Diagnostics information can be viewed: Diagnostics Diagnostics Printer... -
Page 184: Printer
Diagnostics Printer The Printer Configuration menu allows you to view information that is specific to the individual printer. The following Printer Configuration information can be viewed: Setting Description Controller Serial Number Controller specific End of Ribbon Sensor Present or Not Present Flexible I/O Map Off.flex IO or name specific Printer Orientation... -
Page 185: Inputs Status
Diagnostics Inputs Status The Inputs Status menu allows you to view the current status of the printer Inputs. The following Input Status information can be viewed: Setting Description Print Go State Active or Inactive Input 1 State Active or Inactive Substrate Speed (Continuous) Substrate Speed Current Substrate Speed... -
Page 186: Temperatures
Diagnostics Temperatures The Temperatures menus allow you to the current temperatures of the machine. The following Temperatures information can be viewed: Setting Description Controller Temperature °C Printer Temperature °C Print head Temperature °C Print Timing The Print Timing menus allow you to view information about the individual timings for one print cycle of the currently selected image. -
Page 187: Ribbon
Diagnostics Ribbon The Ribbon menu allow you to view information about the ribbon currently being used on the printer. The following Ribbon information can be viewed: Setting Description Remaining prints hours / mins Remaining time hours / mins Ribbon thickness Supply diameter Take up diameter Ribbon core diameter... -
Page 188: Internal
Diagnostics Internal The Internal menus allow you to view information about the printer’s internal sensors and switches. The following Internal information can be viewed: Setting Description Printer hours on Hours Dead printhead dots Numeric value Tension Controller Position Numeric value Cassette Switch State Active or Inactive Encoder Input A State... - Page 189 Diagnostics Setting Description Left Limit Switch State Active or Inactive Motor Voltage Volts dc Print Head Voltage Volts dc Printer Board Links Numeric value Printer Internal Fuse OK or Fault Printer Supply Fuse OK or Fault Print Head Resistance Numeric value Movement Sensor Value Numeric value NOTE:...
-
Page 190: Manual Control
Diagnostics Manual Control The Manual Control menus allow you to test various functions of the printer. The following Manual functions can be tested: Diagnostics Manual Control Ribbon Printhead Calibrate Toggle Ribbon Feed Start Cycle Test Stop Cycle Test Print Printhead Test Pattern for parts &... -
Page 191: Ribbon
Diagnostics Ribbon Function Description Calibrate Activates the Calibration sequence. Toggle Ribbon Feed Activates or De-activates the Ribbon Feed sequence. Start Cycle Test Starts the Print Cycle Stop Cycle Test Stops the Print Cycle Print Markem-Imaje Test Pattern Selects and automatically prints the Test pattern Printhead ... -
Page 192: Digital Io Control
Diagnostics Digital IO Control The Digital IO Control menu allows you to Toggle this various Digital Outputs. The following Digital Outputs can be toggled: Function Description Toggle Fault Output Activates or De-activates the Output. Toggle Warning Output Activates or De-activates the Output. Toggle User Configurable Output 1 Activates or De-activates the Output. -
Page 193: Speed Profile
Diagnostics Speed Profile This function is used with Continuous printers. Speed profiles allow the user to assess if the print signal is being activated at the appropriate time. The running speed of Continuous motion packaging machines will increase and decrease as the substrate is being run through. - Page 194 Diagnostics Settings Settings Machine Settings Machine Settings Function Description 1) Start Speed Profile Activates the speed profile recorder. 2) Stop Speed Profile De-activates speed profile recorder. Start recording now: When pressed, the screen will open and display a please wait message.
-
Page 195: Interpreting The Graph
Diagnostics Interpreting the graph Assuming you decide to wait for the capture process to complete, a graph will be automatically displayed on screen. The following diagram shows how to interpret details within the graph. Printing Max print speed Substrate speed Ticks every 100 mm/s Low speed threshold... - Page 196 Diagnostics Zooming in on individual prints. In some cases, it may be necessary to zoom in and examine a single print in more detail. This can be achieved by pressing button 2. When pressed, the screen will zoom in on the leading edge of each print signal in turn. When focussed on the final print go signal, pressing the button will cause the screen to zoom back out to display the entire profile.
- Page 197 Diagnostics Viewing Information about the profile. An additional screen is provided to view information about the speed profile as text – accessed from button 5. Items related to the substrate speed are as follows: • Maximum print speed. This is the maximum speed recorded during actual printing; ie gray portions of the graph.
- Page 198 Maintenance for parts & service call QLC (800) 837-1309 10056272-AA...
- Page 199 Maintenance for parts & service call QLC (800) 837-1309 10056272-AA...
-
Page 200: Introduction
Maintenance Introduction The SmartDate series of Overprinters are extremely successful, however as with any machine, if it is not set up and maintained correctly, problems can occur. This section is designed to provide information about how to keep your SmartDate 5 in good working order. -
Page 201: Maintenance Scheme
Maintenance Maintenance Scheme These recommended actions will ensure consistent high quality from the Markem-Imaje SmartDate X60 technology for package identification. Quick/Regular Checks - Check and clean printhead (daily check). Use Isopropanol wipes. - Check that the ribbon is tracking through the cassette correctly. Pull the ribbon through by hand, and visually check to see if the ribbon is creasing across the width of the rib- bon. -
Page 202: Monthly Checks
Maintenance Monthly Checks - Check condition of peel roller: Remove roller and inspect internally for wear. Replace if necessary. - Check condition of the ribbon guide rollers: Check that bearings are smooth. - Check condition of ribbon sensor roller. Inspect the roller coating for wear and dam- age. -
Page 203: Cleaning The Printhead
Maintenance Cleaning the Printhead The printhead should be cleaned at regular intervals. These depend on machine use, operating environment, and choice of thermal ribbon. Turn off the power to the controller and remove the ribbon cassette. Allow the printhead to cool to normal room temperature before proceeding in order to pre- vent the possibility of thermal shock damage. -
Page 204: Maintenance
Maintenance Replacing the Printhead The SmartDate X60 printhead can be changed quickly and easily. Turn off the power to the controller and isolate the air supply to the printer body. Remove the ribbon cassette. Always ensure anti static precautions are used when handling new printheads. Removing the damaged printhead (Combined) ... - Page 205 Maintenance Swing the printhead out from the print module. Remove the printhead from the print module. Note the different connectors: X5 Smarthead X4 Standard Head for parts & service call QLC (800) 837-1309 10056272-AA...
-
Page 206: Removing The Damaged Printhead (Shuttle)
Maintenance Removing the damaged printhead (Shuttle) Remove the retaining screws from the printhead ribbon cable guide. Remove the ribbon cable guide. Remove the two retaining screws from the ribbon connector block. Disconnect the ribbon cable from the PCB. for parts & service call QLC (800) 837-1309 10056272-AA... - Page 207 Maintenance Remove the ribbon cable from the connector. Push the printhead forward towards the peel roller and rotate the rear of the printhead outwards as shown here. Swing the printhead out from the print module. Remove the printhead from the print module.
-
Page 208: Setting The Correct Printhead Resistance
Maintenance Setting the correct printhead resistance NOTE: with Smarthead printheads the resistance setting is automatic. NOTE: the resistance value is printed on the PCB side of the new Printhead. This value must be entered into the controller menu structure if a non Markem- Imaje printhead is used.. - Page 209 Maintenance Select Installation Setup. Menu Service Installation Setup Restore to Factory Select Printhead Resistance. Service Installation Setup Printhead Resistance Enter the new value. 1186 When finished press the tick symbol to accept the changes. for parts & service call QLC (800) 837-1309 10056272-AA...
- Page 210 Maintenance Replacing the Peel Roller The Peel Roller body is a wear part and should be checked for damage and changed if necessary.. Remove the retaining screw from the end of Peel roller. Remove the screw and washer. Lift off the roller body. for parts &...
- Page 211 Maintenance Fit a new Peel roller body over the shaft and add Loctite 222. Secure the screw. Clean off any excess fluid and ensure the roller is free to rotate. for parts & service call QLC (800) 837-1309 10056272-AA...
- Page 212 Maintenance If the peel roller shaft has been dam- aged, undo the retaining nut at the base and remove the complete assembly. Once the seal has been broken at the base of the screw, use an Allen key to unscrew the Peel roller. Remove the roller from the printer car- riage plate.
- Page 213 Maintenance Fit a new peel roller assembly and en- sure that it is secure and free to rotate. Secure with Loctite 222. Tighten the screw. Clean off any excess fluid and ensure the roller is free to rotate. for parts & service call QLC (800) 837-1309 10056272-AA...
-
Page 214: Replacing The Ribbon Guide Rollers
Maintenance Replacing the Ribbon Guide Rollers The ribbon guide rollers are vulnerable to damage through misuse and may have to be changed if they become bent or damaged. Remove the damaged roller by applying a spanner to the two flat surfaces at the base of the roller. - Page 215 Maintenance Place the new roller in position and tighten. Ensure that the Roller is free to rotate. Clean off any excess fluid and ensure the roller is free to rotate. for parts & service call QLC (800) 837-1309 10056272-AA...
-
Page 216: Replacing The Peel Roller
Maintenance Replacing the Ribbon Movement Roller Replacing the Roller Magnet If the magnet on the movement roller has been damaged it will have to be replaced. Remove the securing screw on the end of the roller. Remove the screw and securing washer. for parts &... - Page 217 Maintenance Remove the damaged magnet and rub- ber washer. Fit a new magnet and rubber washer. Replace the Securing washer and tighten the screw. for parts & service call QLC (800) 837-1309 10056272-AA...
-
Page 218: Replacing The Movement Roller
Maintenance Replacing the Movement Roller The procedure for replacing the ribbon movement roller is the same as for the ribbon guide rollers. Remove the damaged roller by applying a spanner to the two flat surfaces at the base of the roller. Before fitting a replacement roller, apply Loctite 222 to the screw thread at the base of the roller. - Page 219 Maintenance Place the new roller in position and tighten. Secure the roller in position. Clean off any excess fluid and ensure the roller is free to rotate. for parts & service call QLC (800) 837-1309 10056272-AA...
- Page 220 Maintenance Replacing the Ribbon Tension Roller If the tension roller becomes damaged the whole assembly will require changing. Dependant on the hand of the cassette the ribbon supply flange (red) may have to be removed to gain access to the securing screws. Remove the four retaining screws from the tension roller carriage.
- Page 221 Maintenance Replace with a new assembly. Ensure the spring is inserted correctly. Secure the screws with Loctite 222. for parts & service call QLC (800) 837-1309 10056272-AA...
- Page 222 History for parts & service call QLC (800) 837-1309 10056272-AA...
- Page 223 History for parts & service call QLC (800) 837-1309 10056272-AA...
- Page 224 History Statistics The Statistics Menus allow you to view information about the printers producing performance. To access the Statistics screen select Menus and Statistics. Home Menu Settings Service Version Diagnostics Information Statistics Files Menu Statistics Printhead Life Ribbon Usage Aging Rate 0 Metres/Day Average Life...
- Page 225 History Statistical Information Printhead Life The following Statistical information can be viewed: Function Description Aging Rate Metres/Day Average Life Estimated Replacement Date Dependant on usage Ribbon Usage Function Description Actual Prints on Current Ribbon Length in km Actual Prints on Previous Ribbon Length in km Ribbon Used for Current Printhead...
-
Page 226: Replacing The Ribbon Tension Roller
History Throughput Function Description Average Print Speed This is Continuous printer feature. Instant Average Pack Rate Packs per minute. Long Term Average Pack Rate Packs per minute Max Print Speed This is Continuous printer feature. PackML State Times The following PackML State Times information can be viewed: State Description... - Page 227 History for parts & service call QLC (800) 837-1309 10056272-AA...
-
Page 228: External Links
External links for parts & service call QLC (800) 837-1309 10056272-AA... - Page 229 External links for parts & service call QLC (800) 837-1309 10056272-AA...
-
Page 230: Controller And Printer Connection Points
External links Controller and Printer Connection Points The main connection points for the Controller unit are shown below: Controller Connection Points (Rear View) 1. USB-B Connector 2. Ethernet Connector. 3. USB-A Connector 4. RS-232 Comms Connector. 5. External I/O Connector. 6. -
Page 231: Printer
External links Printer The main connection points for the Printer unit are shown below: Printer Connection Points 1. Printer Power and Signals. 2. Encoder. 3. Air Inlet. 4. Air Exhaust. for parts & service call QLC (800) 837-1309 10056272-AA... -
Page 232: Printer Power And Control Signals
External links Printer Power and Control Signals A single cable connects the Controller and the Printer Body. This cable can be up to 10 metres in length. Both power and signals are present in the single multi-core cable. To ensure robust signal integrity, the Controller to Printer link is via a twisted-pair RS- 422 interface. -
Page 233: Control I/O Connections
External links Control I/O Connections A 15-way cable with a D-type plug connector on the rear of the Controller provides: – Connection to the PRINT GO input. – Access to the Fault and Warning Status outputs. – Access to the User configurable Digital I/O Description +24 VDC - I/O PRINT GO Input... -
Page 234: Print Go Input Wiring
External links Print Go Input Wiring Print Go Input using a voltage free contact If a voltage free contact is used it should be wired between terminals 1 (24 V DC) and 2 (PRINT GO). SmartDate 5 is edge triggered and prints whenever the contacts close, but will not print again until the contacts have opened and closed again after printing is complete. -
Page 235: Fault And Warning Outputs
External links Fault and Warning Outputs Fault - (Problem) Pins 7 and 8 on the 15-way connector are the open relay contacts for FAULT. Fault relay contacts open when SmartDate 5 is: – In READY mode. – Not in a position to print because of a PROBLEM READY mode: The Unit OK signal is switched off when the SmartDate 5 is switched out of PRODUCING mode and into READY mode. -
Page 236: Encoders
External links Encoders For continuous printers, an encoder is required to monitor the speed of the substrate. It is essential that the encoder measures the speed of the substrate at the point of printing. The encoder should be mounted so that the wheel of the encoder is running against the print roller. -
Page 237: Quadrature Encoders
External links Quadrature Encoders A quadrature encoder has two electrical channels that allow it to report distance / speed and direction. This is the preferred type of encoder in that it allows the SmartDate 5 to take care of any changes in direction. Encoder Direction When using a quadrature encoder it is important that the SmartDate 5 is aware of the normal operating direction. -
Page 238: Encoder Resolution
External links Encoder Resolution The encoder resolution is expressed in stripes (pulses) per mm and can be set to be- tween 2.8 stripes / mm and 150 stripes / mm. The standard SmartDate 5 encoder has an idler wheel of 52.5 mm mounted on a 500 stripes per revolution encoder. -
Page 239: Single Channel Encoders
External links Single Channel Encoders Single channel encoders can be used with SmartDate 5 continuous printers, but will not be as efficient as quadrature encoders. The substrate movement is recorded in one direction only, any drift backwards is not accounted for. -
Page 240: Communication Links
External links Communication Links The standard recommended Comms connection for SmartDate 5 is Ethernet. The method of communication is via Markem.Imaje Device Communication Protocol (DCP) RS-232 communication is also available but only for use with Markem.Imaje Next Generation Printer Control Language (NGPCL) This is used for remote selection of Jobs in the local database, updating field data on the image etc. -
Page 241: Communication Options
External links Communication Options Several communication options are available: These include the following: – Ethernet from a PC or Server to a SmartDate 5. – Ethernet Network from a PC or Server to a series of SmartDate 5 printers. Controlling SmartDate 5 from a PC By using CoLOS Control all SmartDate 5 printers can be controlled from a single PC. -
Page 242: Technical Specifications
Technical specifications for parts & service call QLC (800) 837-1309 10056272-AA... - Page 243 Technical specifications for parts & service call QLC (800) 837-1309 10056272-AA...
-
Page 244: Machine Specification
Technical specifications Machine Specification SmartDate X60 Specification SmartDate X60 - Combined Intermittent Mode 53 mm x 75 mm SmartDate X60 - Combined Continuous Mode Print Area 53 mm x 150 mm SmartDate X60 Shuttle Continuous 53 mm x 100 mm Substrate Area Unlimited. - Page 245 Technical specifications Test Standard BS EN ISO 3746:1996 SmartDate X60 Intermittent printer 199 ppm with a 10 mm Image Noise Levels (700 mm/s) <70 dB (A) SmartDate X60 Continuous printer 299 ppm with a 10 mm Image (160 mm bag) (800 mm/s) 70 dB (A) 6 bar / 90 psi (maximum) dry, Air Supply...
- Page 246 Technical specifications Graphics Lines, Boxes and Logos (*.bmp format) Automatic Real Time, Date, Batch and Shift Information. Automatic ‘Best Special Functions Before End’ offset calculation and coding. Incremental alphanumeric text and barcodes. Local SmartDate X60 Memory 20Mb. Inputs: ‘Print’ input signal status. Machine Interface Outputs: Interlock Output User Configurable I/O...
- Page 247 Technical specifications for parts & service call QLC (800) 837-1309 10056272-AA...
- Page 248 SmartDate X60 User Manual - Revision . The revision AA index corresponds to the first edition of this manual. . The revision index changes with each update. Date published Revision index documentation Software index 11-2011 For Marking & Coding Equipment. Photographs and drawings are not binding in detail. This document was originally written in English.
- Page 249 for parts & service call QLC (800) 837-1309 10056272-AA...
Need help?
Do you have a question about the Markem Imaje SmartDate X60 and is the answer not in the manual?
Questions and answers
MY QUESTION HAS BEEN IN FOR WEEKS AND WE ARE STILL DOWN.....WAITING!!!!!!!!!!!!!!!!!!!!!!!!!!!!!!!!!!!!!!!!!!!!!!!!!!!!!!!!!!!!!!!!!
@Christopher Mosher
NEED TO HAVE IMAGE PRINT MIRRORED
To mirror an image using the Dover SmartDate X60, use the Rotation function to rotate the selected image by 180°. This effectively mirrors the image. Access this option from the Print Adjust menu, then select Rotation and choose 180°.
This answer is automatically generated