Advertisement
Quick Links
FLYING LINE INSTRUCTIONS
THE LINE PACKAGE
2 Line Set
LINE SAFETY
!
Flexifoil strongly recommend that you abide by ALL safety guidelines and
conduct yourself in a safe manner at all times
-
ALWAYS check your equipment for wear and tear before flying. DO NOT
fly with worn or damaged equipment. Repair or replace accordingly.
-
Flying lines and bridles under tension can cut like a knife. Always keep
your lines away from people and animals. NEVER attempt to catch or
hold a kite by the lines or bridle.
-
ALWAYS use the Flexifoil recommended line strength for your chosen
activity. See www.flexifoil.com for details.
!
Remember, YOU are responsible for the safe operation of your kite and
equipment at all times
THE LARKS-HEAD KNOT
All line to kite connections are made using the larks-head knot. The diagrams below show you how to make one in the loops at the ends of your flying lines.
Connect the lines to your control gear before attaching the lines to your kite.
1
Larks-head knots can pull very tight during use. However, by pulling on the tag, they will come undone easily.
CONNECTING THE LINES TO THE CONTROL GEAR
1
2
3
Wrist Straps
OR
4 Line Set
2
wind
4 line Handles
ESSENTIAL INFORMATION
!
Make sure you have the right lines
-
Before using this line set ensure that it is of the correct type, length and
strength for your kite. Please refer to your kite instruction manual or
contact the manufacturer for advice.
-
DO NOT fly your kite without reading and understanding the instruction
manual. If you are unsure about any aspect, please consult your dealer
or the kite manufacturer.
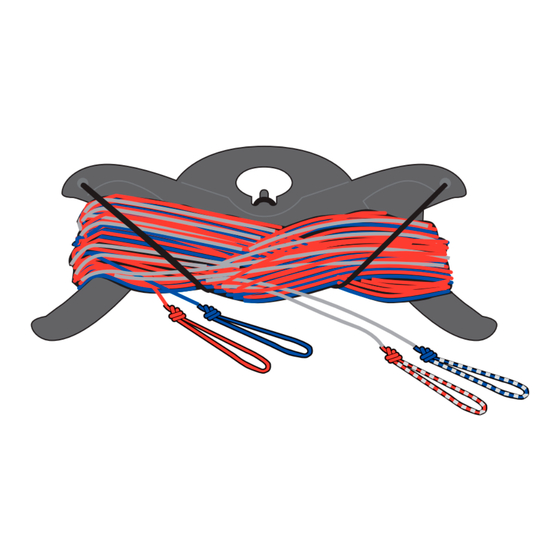
UNWINDING YOUR LINES
Unwind all of your lines and separate them on the ground. Ensure there
are no tangles before connecting.
3
1
2
2 Line
Wind
4 Line
Wind
4
wind
4 line Control Bar
Advertisement

Related Manuals for Flexifoil FLYING LINE


Summary of Contents for Flexifoil FLYING LINE
- Page 1 LINE SAFETY UNWINDING YOUR LINES 2 Line Flexifoil strongly recommend that you abide by ALL safety guidelines and conduct yourself in a safe manner at all times Wind ALWAYS check your equipment for wear and tear before flying. DO NOT fly with worn or damaged equipment.
- Page 2 This is in addition to your statutory rights. Flexifoil will not replace flying lines that have been improperly used, have become worn through normal use or have failed as a result of knots in the line. If kites are flown on flying lines of insufficient breaking strain, the lines will break. Always follow Flexifoil recommendations to ensure that flying lines of an appropriate breaking strain are used when flying one or more kites.
Need help?
Do you have a question about the FLYING LINE and is the answer not in the manual?
Questions and answers