
Subscribe to Our Youtube Channel
Related Manuals for Kaiser EH 6318 KA

Summary of Contents for Kaiser EH 6318 KA
- Page 1 EH 6318 KA BUILT-IN FULLY AUTOMATIC COFFEE MACHINE EINBAU-KAFFEEVOLLAUTOMAT ВСТРАИВАЕМАЯ ПОЛНОСТЬЮ АВТОМАТИЧЕСКАЯ КОФЕМАШИНА USER MANUAL GEBRAUCHSANWEISUNG ИНСТРУКЦИЯ ПО ОБСЛУЖИВАНИЮ И ЭКСПЛУАТАЦИИ...
- Page 2 DEAR CUSTOMERS, we thank to you for the acquisition of our technology. We are convinced that you have made a right choice. This product which satisfies the high quality demands and corresponds to world comprehensive standards realizes your cookeries, and his modern appearance which has been developed by the best European designers will decorate your kitchen splendidly.
- Page 3 УВАЖАЕМЫЙ ПОКУПАТЕЛЬ, LIEBE KUNDIN, LIEBER KUNDE, благодарим Вас за приобретение нашей техники. wir danken Ihnen für den Erwerb unserer Technik. Мы уверены, что Вы сделали правильный выбор. Wir sind überzeug, dass Sie eine richtige Wahl getroffen Данный продукт, удовлетворяющий самым высоким haben.
-
Page 4: Table Of Contents
CONTENTS SAFETY INSTRUCTIONS INSTALLATION INSTRUCTIONS Electrical connection Installation of the coffee machine Preparation BRIEF DESCRIPTION Location drawing Control panel EQUIPMENT Multifunction automatic coffee machine control 22 Operation functions USAGE Digital clock timer with sensor Intelligent System of the coffee machines La Perle CARE AND ATTENDANCE RESPECT FOR THE ENVIROMENT... - Page 5 ОГЛАВЛЕНИЕ INHALTSVERZEICHNIS ТЕХНИКА БЕЗОПАСНОСТИ SICHERHEITSHINWEISE ИНСТРУКЦИЯ ПО МОНТАЖУ FÜR DEN INSTALLATEUR Подключение к электросети Stromanschluss Установка кофемашины Einbau des Kaffeevollautomaten Подготовка Vorbereitung КРАТКОЕ ОПИСАНИЕ KURZBESCHREIBUNG Внешний вид Gesamtansicht Панель управления Bedienblende ОБОРУДОВАНИЕ AUSSTATUNG Управление работой Steuerung von Multifunktion- многофункциональной кофемашины Kaffeevollautomaten Рабочие...
-
Page 6: Safety Instructions
SAFETY INSTRUCTIONS This appliance complies with statutory safety requirements. Inappropriate use can, however, lead to personal injury and damage to property. Please read this instruction carefully before using the appliance for the first time, to avoid the risk of accidents and damage of the appliance. The instruction contains important... -
Page 7: Sicherheitshinweise
ТЕХНИКА БЕЗОПАСНОСТИ SICHERHEITSHINWEISE Данный прибор соответствует всем Dieses Gerät entspricht den vorgeschriebenen действующим нормам безопасности. Sicherheitsbestimmungen. Неправильное использование прибора и Ein unsachgemäßer Gebrauch kann jedoch zu несоблюдение даной инструкции могут Schäden an Personen und Sachen führen. привести к ущербу как человеческому так и к материальному. - Page 8 TECHNICAL SAFETY • Installation of this appliance must be performed only by a licensed specialist The installer is responsible for connecting the appliance to the mains power supply in observance relevant safety recommendations. • Check the appliance for visible signs of damage before using it.
- Page 9 ТЕХНИЧЕСКАЯ БЕЗОПАСНОСТЬ TECHNISCHE SICHERHEIT • • Подключение и установка устройства Das Gerät darf nur von einer qualifizierten должны быть выполнены Fachperson eingebaut und angeschlossen квалифицированным специалистом. werden. Проверьте устройство на предмет • • Kontrollieren Sie das Gerät auf sichtbare видимых повреждений.
- Page 10 TERMS OF USE • This appliance is intended for use in domestic households and it is not intended for outdoor use. • coffee machine only temperatures between + 10 ° C and + 38 ° • Danger burning. During use, appliance interior surface becomes hot enough to cause burns.
- Page 11 ПРАВИЛА ЭКСПЛУАТАЦИИ NUTZUNGSBEDINGUNGEN Данное устройство предназначено • • Dieses Gerät ist nur für den privaten исключительно для домашнего Haushalt häusliche Umfeld использования. bestimmt. • • Используйте кафемашину только при Benutzen Sie den Kaffeevollautomaten nur температурах от +10 °C до +38 °C. bei Temperaturen der Umgebung zwischen +10 °C und +38 °C.
- Page 12 CHILD SAFETY • This appliance is not intended for use by persons (including children) with reduced physical, sensory or mental capabilities, or lack of experience and knowledge, unless they have been given supervision or instruction concerning use of the appliance by a person slide for their safety.
- Page 13 БЕЗОПАСНОСТЬ ДЕТЕЙ KINDERSICHERHEIT Данный прибор не предназначен для • • Die Kinder oder Personen, die wegen использования детьми или лицами чьи geistigen, physischen und motorischen физические, сенсорные или ментальные Fähigkeiten oder wegen des Fehlens der способности, либо отсутствие notwendigen Erfahrungen oder Kenntnisse необходимого...
-
Page 14: Installation Instructions
INSTALLATION INSTRUCTIONS ELECTRICAL CONNECTION Before connecting the appliance to the mains power supply, make sure that: • The supply voltage corresponds to the specifications on the data plate on the front of the appliance. • The mains supply has an efficient ground connection complying with all applicable laws and regulations. -
Page 15: Für Den Installateur
ИНСТРУКЦИЯ ПО МОНТАЖУ FÜR DEN INSTALLATEUR ПОДКЛЮЧЕНИЕ К ЭЛЕКТРОСЕТИ STROMANSCHLUSS Перед подключением кофемашины к эл. сети, Vor der Durchführung des Stromanschlusses muss необходимо убедиться, что: sichergestellt werden, dass: • • параметры сети соответствуют данным в die Eigenschaften des Stromnetzes mit den табличке... -
Page 16: Installation Of The Coffee Machine
INSTALLATION OF THE COFFEE MACHINE The coffee machine can be installed in a cooking column. Figure shows the installation dimensions. Make sure that surrounding materials are heat resistant. Align the appliance centrally with respect to the side walls of the units surrounding it and fix it in place with the screws and Allen screws provided. -
Page 17: Einbau Des Kaffeevollautomaten
УСТАНОВКА КОФЕМАШИНЫ EINBAU DES KAFFEEVOLLAUTOMATEN Кофемашина предназначена для встройки в Der Kaffeevollautomat kann in einen Schrank шкаф. Размеры, которыми необходимо eingebaut werden. Die Einbaumaße müssen den руководствоваться при встройке, указаны на Abbildung dargestellten Maßen рисунке. Мебель должна быть изготовлена из entsprechen. -
Page 18: Brief Description
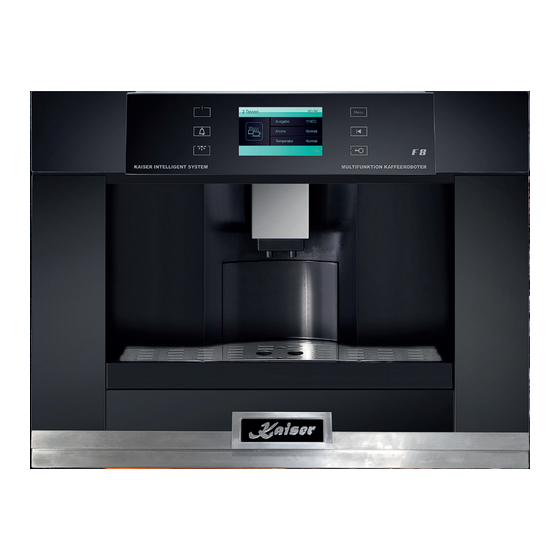
BRIEF DESCRIPTION LOCATION DRAWING BUILT-IN AUTOMATIC COFFEE MACHINES Functional assemblies 1. Control panel 2. Touch screen TFT display 3. Coffee and milk foam nozzles Touch the lighted part of the display and then the ON/ OFF key 4 to switch on the appliance. Only lighted buttons react on your touch. -
Page 19: Kurzbeschreibung
КРАТКОЕ ОПИСАНИЕ KURZBESCHREIBUNG ВНЕШНИЙ ВИД GESAMTANSICHT ВСТРАИВАЕМЫЕ КОФЕМАШИНЫ EINBAU- KAFFEEVOLLAUTOMATEN Размещение функциональных узлов Anordnung von Funktionsbaugruppen 1. Пaнeль управления 1. Bedienblende 2. Touch screen TFT-Display 2. Touch screen TFT-дисплей 3. Сопла для кофе и молочной пены 3. Kaffee- und Milchschaumdüsen Нажмите... - Page 20 Description of the appliance: Touch screen TFT display Milk cream unit Cream nozzle Coffee nozzle Main switch Adjustable mill knob to select fineness of ground coffee Waste container Load tray Drip tray 10. Grid of the drip tray 11. Water tank 12.
- Page 21 Описание устройства: Gerätebeschreibung: 1. Touch screen TFT-Display 1. Touch screen TFT-дисплей 2. Регулятор молочной пены 2. Milchcreme-Einheit 3. Сопло для молочной пены 3. Milchschaumdüse 4. Сопло для кофе 4. Kaffeedüse 5. Главный выключатель 5. Hauptschalter 6. Регулирующая ручка мельницы 6. Einstellbarer Drehknopf der Mühle, для...
-
Page 22: Equipment
EQUIPMENT MULTIFUNCTION AUTOMATIC COFFEE MACHINE CONTROL To switch the appliance on: • Slide it out of the niche, as shown on the picture • Push the button Slide the appliance back. • The switching on of the control panel is performed by the simple touching of the sensor display 3 and then by touching of the ON/ OFF key 4. -
Page 23: Ausstatung
ОБОРУДОВАНИЕ AUSSTATUNG УПРАВЛЕНИЕ РАБОТОЙ STEUERUNG MULTIFUNKTION- МНОГОФУНКЦИОНАЛЬНОЙ KAFFEEVOLLAUTOMATEN КОФЕМАШИНЫ Чтобы включить устройство: Um das Gerät einzuschalten: Выдвинете его из ниши, как показано на • • Schieben Sie es aus der Nische heraus, рисунке 1 wie es auf dem Bild gezeichnet ist 1 •... -
Page 24: Operation Functions
OPERATION FUNCTIONS 40°C - 100°C Steam – 104°F - 212°F use this function to prepare hot milk or hot foam Rinsing – cleans automatically the pipework, brew unit and the nozzles of the coffee machine to remove any residual coffee. The machine also will be rinsed to remove all traces of the descaling liquid. -
Page 25: Betriebsfunktionen
РАБОЧИЕ ФУНКЦИИ BETRIEBSFUNKTIONEN Пар – Dampf – используйте эту функцию для приготовления verwenden Sie diese Funktion, um heiße Milch горячего молока или горячей молочной пены. oder heißen Milchschaum zu machen Промывание- Spülung – автоматически очищает систему труб, reinigt automatisch Rohrleitungen, варочный... -
Page 26: Usage
APLIANCE LIGHT The appliance is equipped with the light. The Lighting key 1 will be lighted more intense, while the appliance is illuminated. Touch this key to switch off the lighting. If you want to control your drink after preparing it, touch this key again 1. USAGE You can start the process of preparing of your drink with a few easy steps. -
Page 27: Benutzung
ОСВЕЩЕНИЕ УСТРОЙСТВА BELEUCHTUNG Кофемашина оснащена системой подсветки. Во Das Gerät ist mit der Beleuchtung ausgestattet. время подсветки кнопка освещения 1 будет Die Beleuchtung-Taste 1 wird intensiver leuchten, гореть более ярко. Нажмите на неё снова для während das Gerät beleuchtet wird. Tippen Sie auf отключения... - Page 28 Rinsing starts automatically after switching of the appliance and also after other coffee machine functions. • 1 minute later on the display appears information, which signalizes about the readiness of the appliance • Touch the display to enter the menu of the appliance 1 •...
- Page 29 Промывание запускается автоматически при Die Spülung startet automatisch nach jedem включении устройства, а также после окончания Einschalten des Gerätes. Sie wird auch nach dem рабочих функций кофемашины. Ablauf der Betribsfunktionen ausgeführt. Ещё через минуту на дисплее появится • • 1 Minute später erscheint auf dem Display сообщение, сигнализирующее...
-
Page 30: Digital Clock Timer With Sensor
• The pre programmed Out put, Aroma, Temperature temperature will be shown on the display 1, 2, 3 • If necessary, you can change these options by their activating (See Digital clock timer with sensor). Touch the key Return, 4 to return to the previous menu level. -
Page 31: Сенсорное Электронное Программирующе
На дисплее появятся • • Display erscheinen запрограммированные Объём, Аромат и vorprogrammierte Ausgabe, Aroma, und Температура 1, 2, 3 die Temperatur der Zubereitung 1, 2, 3 • • При необходимости Вы можете изменить Sie können diese Daten auf Ihrer Wahl данные... - Page 32 WATER TANK The water tank is located behind the control panel of the appliance on the left. To remove the water tank: • Slide the appliance out of the niche, as shown on the picture 1 • Remove water tank 2 The maximum level of the water container 2 is 1.8 liter.
- Page 33 КОНТЕЙНЕР ДЛЯ ВОДЫ WASSERBEHÄLTER Контейнер для воды находится слева за Der Wassertank befindet sich im Inneren des панелью управления устройства слева. Чтобы Gerätes links hinter der Bedienblende. Um den достать контейнер: Wassertank herauszunehmen: • • выдвинете устройство из ниши, как Schieben Sie das Gerät aus der Nische показано...
- Page 34 DIGITAL CLOCK TIMER WITH SENSOR COFFEE Intelligent System MACHINES La Perle LANGUAGE SETTING • Touch the field “Other settings”, 1 in the main menu. • Touch the field Language, 2 in the “Other settings” menu level. • Choose the necessary language. The default language is English.
-
Page 35: Стройство Intelligent System Кофемашин La Perle
СЕНСОРНОЕ ЭЛЕКТРОННОЕ ELEKTRONISCHE ZEITSCHALUHR ПРОГРАММИРУЮЩЕЕ УСТРОЙСТВО SENSOR-BEDIENUNG Intelligent System Intelligent System КОФЕМАШИН La Perle VON KAFFEEVOLLAUTOMATEN La Perle ВЫБОР ЯЗЫКА SPRACHE EINSTELLUNG Нажмите пункт «Другие установки», 1 в • • Tippen Feld „Andere главном меню. Einstellungen“, 1 im Hauptmenü. Нажмите пункт Язык, 2 в меню «Другие •... - Page 36 DATE SETTING • Touch the field Date, 1 in the “Other settings” menu. • Through the keyboard 2 set the actual date. The input sequence is: (year), (month), (day). • Touch OK, 3 to save the date and to return to the interface of “Other settings”.
- Page 37 УСТАНОВКА ДАТЫ DATUM EINTELLUNG • Нажмите пункт Дата, 1 в меню «Другие • Tippen Sie auf das Feld Datum, 1 in dem установки». Menü „Andere Einstellungen“. С помощью клавиатуры 2 установите • • Durch die Tastatur 2 stellen Sie das текущую...
- Page 38 TIME SETTING • Touch the field Time, 1 in the “Other settings” menu level. • Through the keyboard 2 set the actual hour and minutes. • Touch OK, 3 to save the time and to return to the “Other settings” menu. •...
- Page 39 УСТАНОВКА ВРЕМЕНИ ZEITEINTELLUNG • Нажмите на пункт Время, 1 в меню • Tippen Sie auf das Feld Zeit, 1 in dem «Другие установки». Menü „Andere Einstellungen“. • Durch die Tastatur 2 stellen Sie die aktuelle С помощью клавиатуры 2 установите •...
- Page 40 CLOCK FORMAT SELECTION • Touch the field Clock format in the „Other settings” menu. • Choose the necessary clock format: 12 or 24 hours, 1. The selected setting will be marked with symbol , • Touch OK, 3 to save the clock format and to return to the “Other settings”...
- Page 41 ВЫБОР ЧАСОВОГО ФОРМАТА AUSWAHL DES UHRZEITFORMATES Выберите пункт Часовой формат в меню • • Tippen Sie auf das Feld Uhrzeitformat in «Другие установки». dem Menü „Andere Einstellungen“. Выберите желаемый формат: 12 или 24 • • Wählen Sie das gewünschte Uhrzeitformat часа, 1.
- Page 42 BUZZER TONE SETTING • Touch Buzzer tone “Other settings” menu. • Through the slider 1 set the necessary buzzer tone. • Touch OK, 2 to save the buzzer tone and to return to the “Other settings” menu. FACTORY DEFAULT SETTING •...
- Page 43 НАСТРОЙКА ГРОМКОСТИ ЗВОНКА LAUTSTÄRKE-EINTELLUNG Выберите Громкость звонка в меню • • Tippen Sie auf Summerton im Menü «Другие установки». „Andere Einstellungen“. Передвигая слайдер выберите • • Anhand von Slider 1 stellen Sie den необходимую громкость. gewünschten Summerton (Lautstärke) ein. Нажмите чтобы...
- Page 44 FILTER SETTING * • Touch the field “Settings”, 1 in the main menu. • Touch the field Filter, 2 in the “Settings” menu level. • Choose the necessary setting 3: No if you do not want to activate the factory default settings and Yes if you want do it.
- Page 45 ВЫБОР ФИЛЬТРА * FILTER EINSTELLUNG * Нажмите пункт «Настройки», 1 в главном • • Tippen Sie auf das Feld „Einstellungen“, 1 меню. im Hauptmenü. Нажмите пункт Фильтр, 2 в меню • • Tippen Sie auf das Feld Filter, 2 im Menu „Einstellungen“...
- Page 46 • It is recommended to change the filter every 2 months • Touch "OK" 6 to save changes and to return to the “Settings” menu. WATER HARDNESS SELECTION • Touch Hardness in the “Setting” menu. • Choose the necessary Waterhardness 1: From soft- Level 1 to hard- Level 4 The selected setting will be marked with symbol , •...
- Page 47 • Es ist empfohlen den Filter alle 2 Monate zu Рекомендуется менять фильтр раз в 2 • wechseln месяца • Tippen "OK", Нажмите "OK", чтобы сохранить • Änderungen zu speichern und zum Menü изменения и вернуться в меню „Einstellungen“ zurückzukehren. «Настройки».
- Page 48 UNIT ON SETTING • Touch Unit on in the “Settings” menu, to set the switch on time of the appliance • Through the keyboard 1 set the switch on time of the appliance • Touch OK, 2 to save the time and to return to the interface of “Settings”.
- Page 49 УСТАНОВКА ВРЕМЕНИ ВКЛЮЧЕНИЯ ZEIT DER EINSCHALTUNG Нажмите на Включить, в меню • • Tippen Sie auf Gerät einschalten, in dem Menü „Einstellungen“. «Настройки». • С помощью клавиатуры 1 установите • Durch die Tastatur 1 stellen Sie die Zeit der желаемое время включения устройства. Einschaltung des Gerätes ein.
- Page 50 ESPRESSO OR COFFEE PREPARING • Touch Espresso or Coffee in the main menu: • Touch the Out put, 1, to set the volume of your drink • Use the slider 5 to choose between 30 and and 240 CC. The Out put control, 6 has a professional 5CC adjustment step.
- Page 51 ПРИГОТОВЛЕНИЕ ЭСПРЕССО ИЛИ КОФЕ ESPRESSO ODER KAFFEE ZUBEREITEN Выберете Эспрессо или Кофе в • • Tippen Sie auf Espresso oder Kaffee in главном меню dem Hauptmenü • • Нажмите на Объём, 1, чтобы определить Tippen Sie auf Ausgabe, 1, um das объём...
- Page 52 • Select between Mild, Normal or Strong, 9 • Touch OK, 4 to save the strength and to return to the menu of the preparing drink. • Touch the Temperature 3 and choose between Normal and High. Then touch OK. •...
- Page 53 Выберете Слабый, Нормальный или • • Wählen Sie zwischen Mild, Normal oder Крепкий, 9 Stark, 9 • • Нажмите чтобы сохранить Tippen Sie auf OK, 4, um die Änderungen изменения и вернуться к меню speichern Menü приготавливаемого напитка zubereitenden Getränkes zurückzukehren. Нажмите...
- Page 54 CAPPUCCINO OR LATTE PREPARING • Touch Cappucino oder Latte in the main menu. • Select 1 to grind the beans for coffee or 2 to use pre ground coffee • Touch the Cream, 3, to to set the duration of pouring of the cream •...
- Page 55 ПРИГОТОВЛЕНИЕ КАПУЧИНО ИЛИ ЛАТТЕ CAPPUCCINO ODER LATTE MACCHIATO ZUBEREITEN Выберете Капучино или Латте в • • Tippen Sie auf Cappuccino oder Latte главном меню Macchiato in dem Hauptmenü • • Выберите 1, чтобы молоть зерна для Wählen Sie 1, um die Bohnen für Kaffee zu кофе...
- Page 56 STEAM FUNCTION Use this function to prepare hot milk or hot foam. • Touch Steam in the main menu. • On the display appears “Steam heating”. Before the preparation starts, fill a container 9 with the milk and place it under the hose, as shown on the picture (see the chapter „CAPPUCCINO OR LATTE PREPARING“).
- Page 57 ФУНКЦИЯ ПАР DAMPF-FUNKTION Используйте эту функцию для приготовления Verwenden Sie diese Funktion, um heiße Milch горячего молока или горячей молочной пены. oder heißen Milchschaum zu machen. Нажмите на Пар в главном меню. • • Tippen Sie Dampf im Hauptmenü. • •...
- Page 58 Child lock An important planning aspect is to prevent inadvertent shift or unintentional turning on. You can activate the child lock any time. Activating the child lock • Touch the lighted part of the display to switch on the appliance 1 (if it is off) •...
- Page 59 Блокировка от детей Kindersicherung Данное устройство имеет функцию блокировки Ein wichtiger Planungsaspekt Ihres neuen Gerätes от детей, которая предотвращает их besteht darin, versehentliche Verstellungen oder вмешательство и случайное включение ungewolltes Einschalten zu verhindern. Sie können устройства. Вы можете активировать эту die Kindersicherung jederzeit aktivieren.
- Page 60 DESCALE FUNCTION ensure coffee machine functions correctly, the descaling program will run after a certain number of appliance uses. The coffee machine proposes to perform descaling. • The following message appears on the display: "Decalcify ready" Touch OK. • Slide the appliance out of the niche. •...
- Page 61 УДАЛЕНИЕ НАКИПИ ENTKALKEN Для обеспечения правильной работы einwandfreien Betrieb функций кофемашины, переодически Kaffeevollautomaten zu gewährleisten, muss nach запускается программа удаления накипи. einer bestimmten Anzahl der Anwendungen das Кофемашина сама предлагает осуществить Entkalken durchgeführt werden. удаление накипи. Kaffeevollautomat schlägt vor, Entkalken auszuführen.
- Page 62 CLEAN BREW FUNCTION ensure coffee machine functions correctly, the clean brew program will run automatically after a certain number of appliance uses. • The following message appears on the display: "Clean brew" Touch „OK”. • Then on the display appears: “Extract this machine.
- Page 63 ПРОЦЕСС ОЧИСТКИ REINIGUNGSVORGANG Для обеспечения правильной работы einwandfreien Betrieb функций кофемашины, переодически Kaffeevollautomaten zu gewährleisten, muss nach запускается процесс очистки. Кофемашина einer bestimmten Anzahl der Anwendungen der сама предлагает осуществить этот процесс Reinigungsvorgang durchgeführt werden. • • На дисплее появится оповещение: Display erscheint Meldung:...
-
Page 64: Care And Attendance
CARE AND ATTENDANCE IMPORTANT!!! As a safety precaution, before care attendance appliance, always disconnect the plug from the power socket or the power cable from the coffee machine. Make sure that the appliance is cool before cleaning. Do not clean the appliance while it is still hot. -
Page 65: Pflege Und Wartung
ОБСЛУЖИВАНИЕ И УХОД PFLEGE UND WARTUNG ВАЖНО!!! В качестве меры предосторожности WICHTIG!!! Als Sicherheitsvorkehrung soll vor необходимо перед обслуживанием и уходом за jeder Pflege- und Wartungarbeit des Gerätes кофемашиной отключать ее от сети. immer das Stromnetz abgeschaltet werden. Перед чисткой убедитесь что устройство не Vergewissern Sie sich, dass das Gerät vor dem является... - Page 66 Front surface Normally you just need to clean the appliance with a damp cloth. If it is very dirty, add a few drops of dishwashing liquid cleaning water. Afterwards, wipe the appliance with a dry cloth. Immediately remove lime, fat, starch or egg white stains.
- Page 67 Внешняя поверхность Außenfläche Достаточно очищать устройство влажной Es reicht, das Gerät mit einem feuchten Lappen zu reinigen. Geben Sie, falls es sehr verschmutzt sein тканью. Добавьте, если загрязнение очень sollte, einige Tropfen Geschirrspülmittel сильное, несколько капель средства для мытья Waschwasser. Wischen Sie danach das Gerät mit посуды...
- Page 68 Alternate inspection Besides the current maintenance the user is dutybound to the following actions: • alternate check maintenance appliance elements and assemblies, • let the appliance be checked by the customer service after expiration of the warranty once in two years. •...
- Page 69 Периодический осмотр Periodische Besichtigung Кроме операций связанных с текущим уходом, Außer den laufenden Wartungsarbeiten ist der следует: Benutzer zu folgenden Tätigkeiten verpflichtet: производить периодические проверки • • Periodische Überprüfung und Wartung von исправности органов управления и Elementen und Baugruppen des gerätes, рабочих...
- Page 70 You do not need to contact Technical Assistance to resolve the following questions. Nothing happens when a key has been touched. Check if: • the Child Lock is active. The appliance does not work. Check if: • whether the plug is correctly fitted in the socket, •...
- Page 71 Следующие проблемы могут устраняться без Folgende Probleme können behoben werden, уведомления сервисной службы. ohne den Kundendienst zu benachrichtigen. Ничего не происходит во время касания к Es geschieht nichts, wenn die Tasten berührt кнопкам. Проверьте: werden. Überprüfen, ob: не активирована ли блокировка от детей. •...
- Page 72 RESPECT FOR THE ENVIRONMENT The documentation provided with this appliance has been printed on chlorine free bleached paper or recycled paper to show respect for the environment. The packaging has also been designed to avoid environmental impact. Packaging material ecological and can be re-used or recycled. By recycling the packaging, you will help save raw materials as well as reducing the bulk of domestic and industrial waste.
-
Page 73: Umweltverträglichkeit
ОХРАНА ОКРУЖАЮЩЕЙ СРЕДЫ UMWELTVERTRÄGLICHKEIT В качестве вклада в охрану окружающей среды, Beitrag Umweltschutz wurde вся документация к этому устройству была Dokumentation zum diesen Geräts auf einem напечатана на отбеленной, не содержащей chlorfrein und gebleichten oder Recycling-Papier хлора или на пригодной ко... - Page 74 GARANTIEBEDINGUNGEN FÜR HAUSHALTSGERÄTE: 1. Die Garantie für das einwandfreie Funktionieren des Geräts ist für die Dauer von 24 Monaten gültig, gerechnet von dem Tag des Kaufs (es ist jeweils die Rechnung und der Kaufbeleg mit Kauf- und/oder Lieferdatum vorzulegen). Bei Nichtvorlage ist die Reparatur kostenpflichtig.
- Page 75 1. In the event of our products being damaged or experiencing some kind of fault from transport damage, due to incorrect installation by other than trained Kaiser technician or taking improper care of the products, connecting to the wrong power supply, the use of non-recommended cleaning agents and detergents.
- Page 76 CONDITIONS DE GARANTIE POUR LES APPAREILS ÉLECTROMÉNAGERS 1. La garantie pour le bon fonctionnement de l'appareil est valable pour une période de 24 mois à compter de la date d'achat (la facture et la preuve d'achat avec la date d'achat et / ou de livraison doivent être présentées). S'il n'est pas présent, la réparation est susceptible de payer.
- Page 77 УСЛОВИЯ ГАРАНТИИ 1. Гарантия на исправное действие прибора на территории России действительна на период 12 месяцев со дня покупки прибора (подтверждена оттиском печати пункта розничной продажи и подписью продавца). 2. Фирма-изготовитель обеспечивает безвозмездный ремонт в случае обнаружения в гарантийный период заводских...
- Page 78 ГАРАНТІЙНІ УМОВИ 1. Гарантія на справну роботу пристрою є дійсною на період 12 місяців з дня придбання приладу (підтверджена відбитком печатки пункту роздрібної торгівлі ті підписом продавця). 2. Фірма-виробник забезпечує безкоштовний ремонт в разі виявлення у гарантійний період заводського дефекту (невідповідна...
- Page 79 VERKAUFSVERMERK :: PURCHASE MARK :: MARQUE D'ACHAT :: ОТМЕТКА О ПРОДАЖЕ :: ВІДМІТКА ЩОДО ПРОДАЖУ PRODUKT :: PRODUCT :: PRODUIT :: ИЗДЕЛИЕ :: ВИРІБ Elektroherd • Electric cooker • Cuisinière électrique Kühl- Gefriergerät • Fridge/ Freezer • Réfrigérateur/ Электрическая плита • Електрична плита Congélateur •...
- Page 80 в России по сервисному обслуживанию и работе с потребителями Почтовый адрес: 127238, г. Москва, АЯ 46 Тел.: 8 (495) 482-55-74, 8 (499) 488-75-10, 8 (499) 488-76-10 E-Mail: service@kaiser.ru Internet: http://kaiser.ru Представництво в Україні по сервісному обслуговуванню та роботі зі споживачами Тел.: (044) 331-50-77, 331-50-78, 496-55-44 Факс:...
-
Page 81: Warranty Card
GARANTIEKARTE (Nr. entspricht der Nummer des Geräts, siehe auf der Rückseite dieser Bedienungsanleitung) Die oben angegebenen Garantieverpflichtungen beeinträchtigen nicht die gesetzlichen Verbraucherrechte Wir gratulieren Ihnen zur Anschaffung der Haushaltsgeräte von ausgezeichneter Qualität! Bitte machen Sie sich mit der vorliegenden Garantiekarte vertraut und überprüfen, ob sie richtig ausgefüllt und mit dem Stempel des Verkäufers versehen ist. - Page 82 ГАРАНТИЙНЫЙ ТАЛОН (№. соответствует номеру аппарата, смотри на задней странице обложки настоящей инструкции) Данные гарантийные обязательства не ограничивают определенные законом права потребителей Поздравляем Вас с приобретением бытовой техники отличного качества! Пожалуйста ознакомьтесь с настоящим гарантийным свидетельством и проследите, чтобы оно было правильно...
- Page 83 Die Herstellerfirma übernimmt keinerlei Verantwortung für die eventuellen Irrtümer und Druckfehler und behält sich das Recht vor ohne Ankündigung im Design und bei der Einrichtung die notwendigen Änderungen, die keinen negativen Einfluss auf die Qualität und Produkteigenschaften haben, vorzunehmen. The manufacturer declines all responsibility for possible mistakes and typing errors and reserves the right to make in design and construction of our own products those changes which do not touch negative influence upon the qualities and properties without a preliminary notification.
- Page 84 OLAN-Haushaltsgeräte • Berlin • Germany www.kaiser-olan.de...
Need help?
Do you have a question about the EH 6318 KA and is the answer not in the manual?
Questions and answers