Advertisement
Quick Links
BEFORE YOU BEGIN
BEFORE YOU BEGIN
·
Please read these instructions carefully to
familiarize yourself with the required tools, materials,
and installation sequences. Follow the sections that
pertain to your particular installation. This will help
you avoid costly mistakes. In addition to proper
installation, read all operating and safety instructions.
·
All information is based on the latest product
information available at the time of publication.
Kohler China Ltd. Reserves the right to make
changes in product characteristics, packaging, or
availability at any time without notice.
·
These instructions contain important care, cleaning,
and warranty information-
instructions for the consumer.
·
We appreciate your commitment to Kohler quality.
Please take a few minutes to review this manual
before you start installation. If you encounter any
installation or performance problems, please don
hesitate tocontact us. Our phone numbers and
website are listed on the back cover. Thanks again
for choosing KohlerCompany.
NOTES
!
Observe all local plumbing and building codes.
CAUTION: Risk of personal injury.
baths are extremely heavy. Obtain sufficient help
to carefully lift or move the bath.
CAUTION: Risk of product or property
damage.
Do not support the bath by the rim.
Provide adequate support under the feet.
NOTICE: Make sure the floor will support 2000 lbs.
(907kg).
This is the combined weight of the bath, water,
and two bathers.
!
Carefully plan the moving of the bath into the
installation area. This bath is heavy and will not
easily fit through doorways.
!
Unpack and inspect the bath for damage. Return the
bath to the carton until you are ready to install.
!
Provide properly dimensioned framing.
!
Install the bath to an adequately supported, level
subfloor.
!
These instructions are for both freestanding and
drop-in installations. Follow only the instructions that
apply to your particular installation.
!
Before installation, ensure proper access to the final
plumbing connections.
!
This bath conforms to ANSI Standard A112.19.1. All
dimensions are nominal.
1023725-T01-A
please leave these
Cast iron
DROP-IN OR FREESTANDING CAST IRON BATH
·
!
!
!
,
t
!
!
!
!
!
!
!
!
ANSI
368
ã
1
INSTALLATION INSTRUCTIONS
.
2000
A112.19.1
201419
Copyright Kohler China Ltd., 2004
C
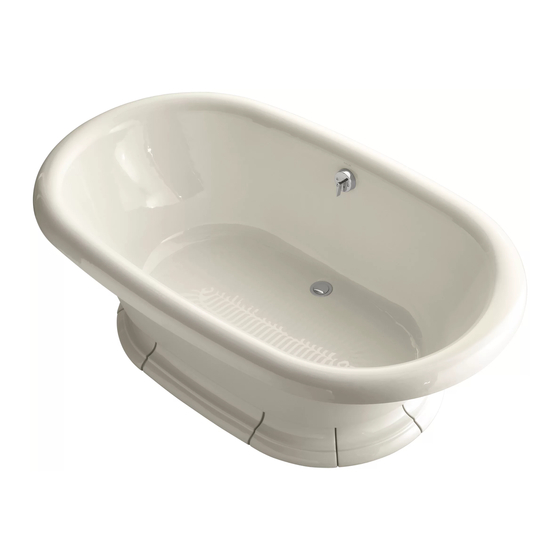
VINTAGE
K-700T
.
(907
)
, 2004
Advertisement

Related Manuals for Kohler Vintage K-700T


Summary of Contents for Kohler Vintage K-700T
- Page 1 · All information is based on the latest product information available at the time of publication. Kohler China Ltd. Reserves the right to make changes in product characteristics, packaging, or availability at any time without notice. ·...
- Page 2 TOOLS AND MATERIALS REQUIRED (Not Supplied) Safety glasses Tape measure Pencil Level Blade screwdriver Phillips screwdriver Pliers Sealant Square Knife Conventional woodworking tools and materials · Drop cloth 2 4 s or · Water-resistant wall material · Metal shims · 7/16 rachet or combination wrench "...
-
Page 3: Prepare The Unit
PREPARE THE UNIT PREPARE THE UNIT A. Prepare the Site NOTICE: Make sure the floor will support 2000lbs. 2000 (907 (907kg). This is the combined weight of the bath, water, and two bathers. · · Make sure the flooring offers adequate support for your bath, and verify that the subfloor is flat and level. -
Page 4: Install Drain
INSTALL DRAIN A. Install the Strainer Overflow Tube · Apply a ring of plumbers putty or other sealant to the Coupling Nuts underside of the strainer according to the putty Gaskets manufacturer s instructions. · Place the gasket between the drain elbow and the bottom of the bath. - Page 5 C. Install Overflow Elbow · Remove the O-rings and lubricant from the package. Apply lubricant to the O-rings. · Assemble the O-rings into the grooves of the overflow elbow. · Apply more lubricant to the O-rings and overflow elbow. · Insert the overflow elbow into the overflow tube.
- Page 6 D. Install Lift Rod and Stopper Stopper · Insert the lift rod assembly into the overflow. Jam Nut · Tighten the overflow hood to the overflow elbow with the screws provided. · If necessary, assemble the lever to the overflow hood with the Phillips screw provided.
- Page 7 G. Install the Wood Floor Rail - Freestanding Installations Only NOTE: A ceramic base is also available for this bath; see the instructions packed with the base for this option. · Make sure that all the rough plumbing and finished flooring are installed.
- Page 8 H. Install the Towel Bar - Freestanding Installations Only · · Attach the two end brackets to the bath rim with the washers and bolts. · · Carefully slide the two support brackets onto the towel bar. · · Slide one end of the towel bar into an end bracket, and attach the support brackets to the bath rim with the washers and bolts.
- Page 9 B. Install Ceramic Floor Rail The Vintage Ceramic Floor Rail is for use with a free- Vintage Vintage standing Vintage Bath. However, the bath must be installed before the ceramic floor rails. CAUTION: The bath must be supported by the cast iron legs, not the ceramic floor rails. Please see Installation Instructions for properleg adjustment procedure.
- Page 10 C. Bath And Whirlpool Leg ABOVE THE FLOOR INSTALLATION OF THE BATH/WHIRLPOOL USING THE OPTIONAL K-1172T BATH LEGS. It is possible to install some models above the floor with the use of the optional K-1172T legs. The legs can be adjusted to increase the height of the tub a minimum of 2-3/4 and a maximum of 3-1/2 .
-
Page 11: Complete The Installation
D. Install the Plumbing CAUTION: Risk of property damage. Make sure a watertight seal exists on all bath drain connections. NOTE: Provide access to all plumbing connections to simplify future maintenance. · Connect the trap to the drain according to the faucet manufacturers instructions. -
Page 12: Limited One-Year Warranty
This product is warranted for one year from date of purchase. Kohler China will be responsible for any problems caused by manufacturing defects provided with the invoice. Kohler China will, at its election, repair, replace or make appropriate adjustment where Kohler China inspection discloses any such defects occurring in normal usage within one year after purchase.
Need help?
Do you have a question about the Vintage K-700T and is the answer not in the manual?
Questions and answers