Advertisement
Quick Links
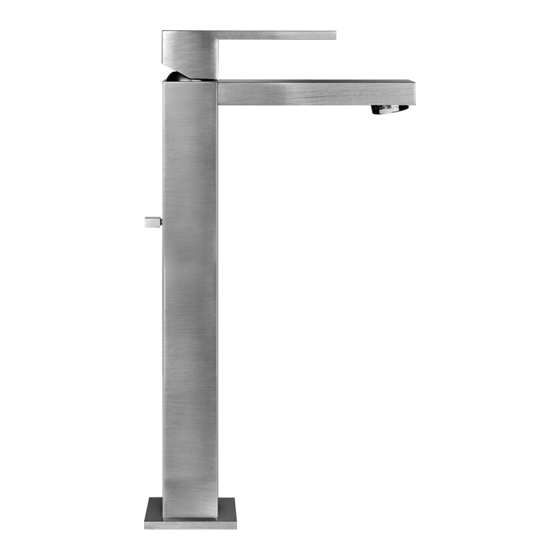
BATH MIXING PROGRAM
PROGRAMME DU MITIGEUR POUR LA SALLE DE BAIN
PROGRAMA MEZCLADORES BAÑO
RETTANGOLO
Art. 26501
Art. 11971
Art. 11955
Advertisement

Related Manuals for Gessi RETTANGOLO 26501


Summary of Contents for Gessi RETTANGOLO 26501
- Page 1 BATH MIXING PROGRAM PROGRAMME DU MITIGEUR POUR LA SALLE DE BAIN PROGRAMA MEZCLADORES BAÑO RETTANGOLO Art. 26501 Art. 11971 Art. 11955 ...
-
Page 2: Caution - Warning
Following are the technical data with respect to the installation of Gessi plumbing products. ► Working pressure should not be lower than 0,5 bar (7,25 psi) and not be higher than 5 bar (72 Psi). - Page 3 ►La température maximum de service pour les produits Gessi est 70°C (158 °F). 2 - ATTENTION!! NOUS VOUS PRIONS DE TENIR COMPTE QUE le produit ne doit jamais être utilisé...
- Page 4 ►La temperatura máxima de ejercicio para los productos Gessi es 70°C (158 °F). 2 - ¡CUIDADO!! LES ROGAMOS QUE TENGAN EN CUENTA QUE nunca el producto no tiene que ser utilizado como en lugar de herramienta, martillos o para finalidades diferentes de aquellas para las cuales ha sido diseñado.
- Page 5 PRE-INSTALLATION INFORMATIONS - PRÉALABLES - PRELIMINARES 6-11/16" [170mm] Art. 26501 1-3/8" 5-1/16" [35mm] [129mm] 10° 1-7/8" 2-5/16" [58mm] [48mm] 1-9/16" MAX 1-5/16" D. 2-3/8" D. [40mm] [33.5mm] [60mm] ÷ 11-13/16" MAX 1-9/16" 2-9/16" [300mm] ÷ 65mm] 1-1/4" D. [32mm] 9/16" - 24 UNEF 6-11/16"...
- Page 6 PRE-INSTALLATION INFORMATIONS - PRÉALABLES - PRELIMINARES Art. 11955 10-1/8" 1-3/8" [257mm] [35mm] 8-3/8" [213mm] 1-7/8" 2-5/16" [48mm] [48mm] 1-9/16" MAX 1-5/16" D. 2-3/8" D. [40mm] [33.5mm] [60mm] ÷2-9/16" 1-9/16" 11-13/16" MAX ÷ 65mm] [300mm] 1-1/4" D. [32mm] 9/16" - 24 UNEF Before installation and setting to work Attention! The feeding pipes have to be rinsed thoroughly before the installation of the mixer, so that no shavin- gs, welding or hemp residual or other dirt can be found in the pipes.
- Page 7 PRE-INSTALLATION INFORMATIONS - PRÉALABLES - PRELIMINARES - Respecting this indications, will mantain the warranty rights, ensures the declared properties of the products and warrant the complete reliability. - Le respect de ces indications, assure les droits de garantie, garantit les caractéristiques déclarées des produits et il en assure la complète fiabilité.
- Page 8 PRE-INSTALLATION INFORMATIONS - PRÉALABLES - PRELIMINARES - Prolonged contact wit any substance, even scarcely aggressive, can cause external braid damage and subsquent flexible burst. - Le contact prolongé avec des substances, même peu agressives, il peut déterminer l’endommage- ment de la tresse et l’éclat conséquent du flexible. - El contacto prolongado con sustancias, aun si poco agresivas, puede causar daño a la trenza y la consecuente ruptura del flexible.
- Page 9 PRE-INSTALLATION INFORMATIONS - PRÉALABLES - PRELIMINARES Art. 25601 Art. 11971 Art. 11955 Package content: 1 - Art. 25601 - Art. 11971 - Art. 11955 2 - Fastening set 3 - Pin + popup rod 4 - Supply hoses 5 - Threaded stem 6 - Drain device Contenu de l’emballage: 1 - Art.
- Page 10 TOOLS FOR INSTALLATION - OUTILS NÉCESSAIRES POUR L’INSTALLATION - HERRAMIENTA NECESARIA PARA LA INSTALACIÓN 7/16” 1-1/2” 5/8” [11 mm] [37 mm] [16 mm]...
-
Page 11: Installation - Installation - Instalación
INSTALLATION - INSTALLATION - INSTALACIÓN Fig. 1 Fig. 2 Fig. 3... - Page 12 1-5/16" D. 1-9/16" MAX [33.5mm] [40mm]...
- Page 13 Fig. 9 Fig. 11...
- Page 14 INSTALLATION - INSTALLATION - INSTALACIÓN Fig. 12 Blue 5/8” [16 mm] Cold SINK INSTALLATION Before installation assemble on the mixer the complements: - screw on the body the threaded stem until the mechanical stop; - screw on the body the supply hoses paying attention not to damage tightness o-rings; - screw on the pin inside the body the control rod of the drain orienting it properly;...
- Page 15 INSTALLATION - INSTALLATION - INSTALACIÓN INSTALLATION DU DISPOSITIF DE VIDANGE Séparer le tube inférieur du corps du dispositif et enlever le bouchon de protection de ce dernier. Installer le dispositif de vidange dans le trou du lavabo insérant les composants dans la séquence indiquée et serrant à...
- Page 16 USE - USAGE - USO Fig. 13 Fig. 14 Fig. 15 Fig. 16 COLD...
- Page 17 USE - USAGE - USO - Open the handle upwards to start the supply of the water; if you open more and more the handle it will be more the supply of the water too. - To turn the handle towards the left to supply the hot water, to turn the handle to the right to supply the cold water.
- Page 18 SPARE PARTS - PIÈCES DE RECHANGE - PIEZAS DE REPUESTO Art. 25601 Art. 11971...
- Page 19 SPARE PARTS - PIÈCES DE RECHANGE - PIEZAS DE REPUESTO Art. 11955 Spare parts: Pièces de rechange: Piezas de repuesto: 1 - Complete lever 1 - Levier complet 1 - Palanca completa 2 - Cartridge fastening ring nut 2 - Virole de fixation cartouche 2 - Virola de fijación del 3 - Cartridge 3 - Cartouche...
- Page 20 CARTRIDGE REPLACEMENT - RECHANGE DE LA CARTOUCHE - SUBSTITUCIÓN DEL CARTUCHO Fig. 1 1/8” [2,5 mm]...
- Page 21 MAINTENANCE - MANUTENTIÓN - MANTENIMIENTO MIXER CLEANING Water contains limestone in different qualities, which remains kept on the surfaces of the product, leaving deposits after the water has been evaporated. It is possible to prevent the forming of limestone deposits and to keep your product clean by drying it always with a soft cloth immediately after use.
- Page 22 NOTES - NOTES - NOTAS: ..........................................................................................................................................................................................................................................................................................................................................................................................................................................................................................................................................................................................................................................................................................................................................................................................................................................................................................................................
- Page 23 NOTES - NOTES - NOTAS: ..........................................................................................................................................................................................................................................................................................................................................................................................................................................................................................................................................................................................................................................................................................................................................................................................................................................................................................................................
- Page 24 ET39578 - R0...
Need help?
Do you have a question about the RETTANGOLO 26501 and is the answer not in the manual?
Questions and answers