
Subscribe to Our Youtube Channel
Related Manuals for Snap Appliance Snap Server 510


Summary of Contents for Snap Appliance Snap Server 510
- Page 1 Quick Start Guide and User CD Kurzanleitung und Benutzer-CD Guía de iniciación rápida y CD del usuario Guide de mise en route rapide et CD de l’utilisateur...
-
Page 2: About This Guide
About This Guide This guide shows you how to install your Snap Server 510, 520, or 550 in a rack and connect the server to your network. The instructions consist of 5 steps: • Step 1: Verify the contents of your shipping package. -
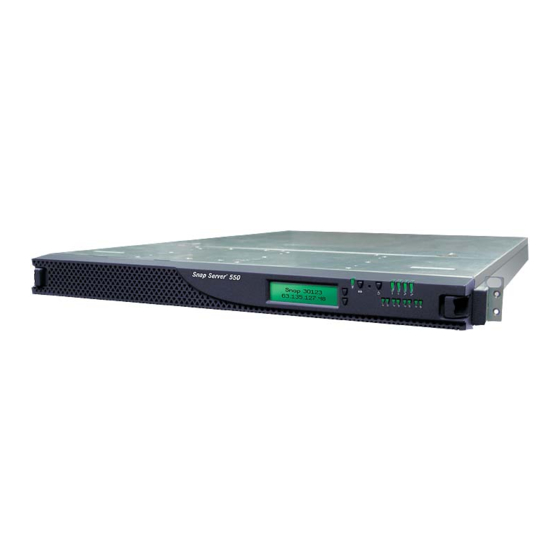
Page 3: Hardware Features
Quick Start Guides and User CDs (3) * 550 model has dual power supplies and 3 extra power cables ** Not available on the Snap Server 510 Note The USB connectors on the back of the Snap Server are disabled and cannot be used for administrative... - Page 4 Step 2: Install the Server in a Rack Note The Snap Server 510, 520, and 550 can only be mounted in a four-post, 32-inch depth, EIA-compliant rack. A two-post telco-style rack or a rack less than 32-inches in depth will not support the server.
- Page 5 (LAN 1 and LAN 2) are green. Connecting the Power Cord Note Snap Server 510/520 (shown) uses a single power supply. The Snap Server 550 (not shown) has dual power supplies and will require a second UPS and/or electrical outlet for installation.
- Page 6 Step 5: Connect to the Snap Server for the First Time Snap Servers are preset to acquire an IP address from a DHCP server. If no DHCP server is found on the network, the Snap Server defaults to an IP address of 10.10.10.10, and you may not be able to see the server on your network.
- Page 7 Snap Appliance 691 Milpitas Blvd., Milpitas, CA 95035 USA 1-408-934-7274 Copyright © 2005 Snap Appliance, Inc. All rights reserved worldwide. www.snapappliance.com All other product names or company names are the property of their respective owners. Copyright © 2005 Snap Appliance, Inc. Alle Rechte weltweit vorbehalten.
Need help?
Do you have a question about the Snap Server 510 and is the answer not in the manual?
Questions and answers