
Related Manuals for Martec FORTRESS II Series


Summary of Contents for Martec FORTRESS II Series
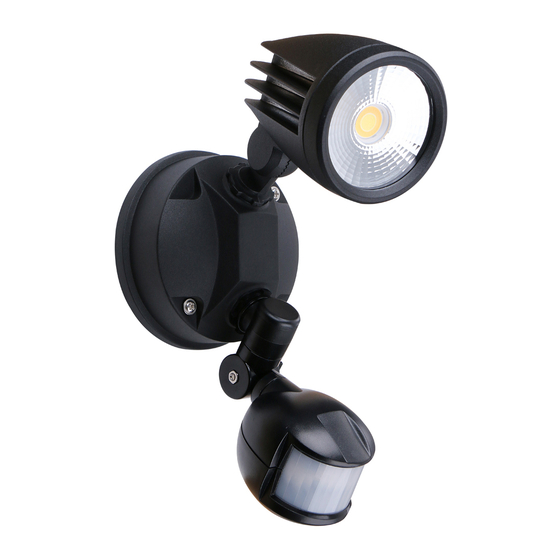
- Page 1 FORTRESS II Instruction Manual 15W SINGLE HEAD SECURITY LIGHT WITH PIR SENSOR Model No.: MLXF3451MS / MLXF3451WS...
-
Page 2: Table Of Contents
Contents Warranty Page General Information Warnings Installation Instructions Motion Sensor Control Settings Switching color temperature Cleaning and Maintenance Troubleshooting Product Disposal www.martecaustralia.com.au | 02 8778 7500 | sales@martecltd.com.au Page 2... -
Page 3: Warranty Page
15W SINGLE HEAD SECURITY LIGHT WITH PIR SENSOR The product is guaranteed to be free from defects in workmanship and parts for a period of 2 years from the date of purchase. Defects that occur within this warranty period, under normal this warranty are in addition to all rights and remedies in respect of the product that the consumer has under the Competition and Consumer Act 2010 and similar state and territory laws. -
Page 4: General Information
General Information Congratulations on choosing to buy a Martec product. All products brought to you by Martec are manufactured to the highest standards of performance and safety, and, as part of our philosophy of customer service and satisfaction, are backed by our warranty. -
Page 5: Warnings
Warnings • Do not direct the heads upwards above horizontal. • Always operate the sensor with sensor knobs facing downwards. • • This is an outdoor domestic product and should not be used for commercial, trade or industrial purposes. • To avoid false activation, the sensor should be directed away from heat sources such as •... - Page 6 Parts List Wall mount base Main body Sensor lens Sensor time control Sensor sensitivity control Sensor Lux control Front screws Wall mount screws Model No.: MLXF3451MS / MLXF3451WS Material:Die cast + Glass + PC Color: Black or white Voltage:220-240VAC~50/60Hz LED : 1xCOB Chip;3000K-5000K Output lumen : 5000K - 1250lm;...
-
Page 7: Installation Instructions
Installation Instructions Introduction • Do not direct the heads upwards above horizontal. • Always operate the sensor with sensor knobs facing downwards. The security light with sensor continuously scans the detection area and switches the light ‘ON’ when it detects movement. This means that whenever movement is detected within the range of the sensor the light will be switched ‘ON’... - Page 8 Product Installation NOTE: This product must be installed by a licensed electrician. NOTE: For best performance install at a height between 2 and 2.5 metres. Ensure the Mains Supply is switched ‘OFF’ . wired to its own wall switch. Remove the mounting plate ‘A’ from light body ‘B’ by unscrewing the front screws ‘C’ . Drill two holes in the wall using the mounting holes ‘D’...
-
Page 9: Motion Sensor Control Settings
Motion Sensor Settings The PIR motion sensor has three adjusting knobs: SENSITIVITY, TIME and LUX. SENS (Sensitivity Adjustment) • The sensitivity can be increased by turning the knob towards (+) and decreased by turning the knob towards (–). • Note: temperature. -
Page 10: Switching Color Temperature
Switching color temperature • On the back of the LED light body, there is CCT switch which allows you to switch the color temperature of the light among 3000K (WW), 4000K(CW), 5000K(NW). • Each time you when want to switch the color temperatures please remember to turn o the mains supply rst, and then take down the light body. -
Page 11: Cleaning And Maintenance
Cleaning and Maintenance with a soft cloth approximately every 3 months. Do not use chemicals. Troubleshooting PROBLEM POSSIBLE CAUSE SUGGESTED SOLUTION Light does not switch ON 1. NO mains power. Check connections, fuses and switches. when movement is present 2. Sensor positioned in wrong direction. Readjust/redirect the sensor. -
Page 12: Product Disposal
Opening Hours: Monday to Friday Warehouse hours: 7.30am – 3.30pm Office hours: 8.00am – 5.00pm EST WWW.MARTECAUSTRALIA.COM.AU ( For Warranty Conditions please refer to the Martec Warranty Terms and Conditions ) www.martecaustralia.com.au | 02 8778 7500 | sales@martecltd.com.au Page 8... - Page 13 I, the Customer, acknowledge that I will be liable for this charge should the authorised Martec Service Agent determine this to be the case. Failure to pay warranty recovery charges issued by Martec Pty Ltd will result in the termination of any remaining warranty, in addition to possible debt collection procedures.
Need help?
Do you have a question about the FORTRESS II Series and is the answer not in the manual?
Questions and answers