Advertisement
Available languages
Available languages
Quick Links
Advertisement

Related Manuals for osann LUPO ISOFIX


Summary of Contents for osann LUPO ISOFIX
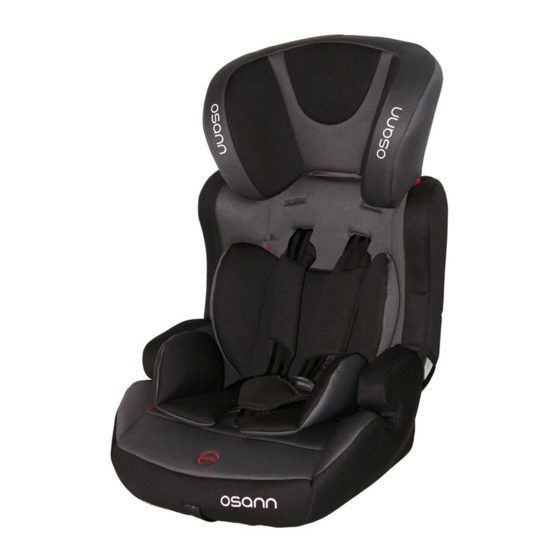
- Page 1 LUPO ISOFIX ECE R44/04 Gr. 1/2/3 - 9-36 kg...
- Page 2 Vielen Dank, dass Sie unseren Kindersitz der Gruppe 1/2/3 gekauft haben. Sollten Sie Hilfe zu die- sem Produkt benötigen, wenden Sie sich bitte an unseren Kundendienst. SICHERHEITSHINWEISE • ACHTUNG: Lesen Sie diese Anleitung vor dem Gebrauch des Sitzes sorgfältig durch und bewah- ren Sie sie als Referenz auf.
- Page 3 Einbauhinweise • Dieser Kindersitz ist ein Kinderrückhaltesystem der Kategorie „Semi-Universal“ und passt in alle Fahrzeuge, die für den Einbau eines „Semi-Universalen“ Kinderrückhaltesystems geeignet sind. • Dieses Kinderrückhaltesystem wurde nach strengeren Zulassungskriterien in die Kategorie „Semi-Uni- versal“ eingestuft als frühere Modelle, die diese neuen Besti mmungen nicht mehr erfüllen. •...
-
Page 4: Anpassen Der Schultergurte
Richti ge Höhe der Schultergurte Gurte zu niedrig Gurte zu hoch Richti ge Gurthöhe Prüfen Sie in regelmäßigen Abständen den Sitz der Schultergurte – ihr Kind wächst. Anpassen der Schultergurte Um die Höhe der Gurte anzupassen, öff nen Sie zunächst auf der Rückseite des Sitzes den Sitzbezug, um Zugriff auf das Gurtsystem zu bekommen. -
Page 5: Anschnallen Des Kindes
Anschnallen des Kindes 1. Schieben Sie die beiden Metallteile des Gurtes zusammen. 2. Schieben Sie die beiden Metallteile zusammen in das Gurtschloss, bis diese mit einem hörbaren „Klick“ einrasten. 3. Prüfen Sie den Sitz des Schlosses mit einem kurzen Zug am Schultergurt nach oben. 4. - Page 6 Entf ernung des Gurtsystems 1. Entf ernung der Schultergurte Öff nen Sie zunächst den Sitzbezug auf der Rückseite des Sitzes, um Zugriff auf das Gurtsystem zu bekommen. Lösen Sie beide Gurte vom Gurtverbinder und ziehen Sie die Schultergurte von der Vorderseite des Sitzes aus den Gurtschlitzen heraus.
- Page 7 ACHTUNG Nur geeignet für Fahrzeuge mit Dreipunktgurt, die nach ECE-Regelung Nr. 16 oder einem vergleich- baren Standard geprüft und zugelassen sind. NICHT AUF BEIFAHRERSITZEN MIT (nicht abschaltbaren) FRONTAIRBAG EINSETZEN! Schultergurt Becken- gurt Rückbank außen Frontsitz ohne Airbag (bzw. abschaltbar) Mitt elsitz auf Sitzbank mit 3-Punkt-Gurt Rückwärti ge Sitzpositi on NEIN Seitliche Sitzpositi on...
- Page 8 Isofi x System Isofi x System Isofi x Verankerungspunkte Ziehen Sie das schwarze off en: ROT Gehäuse der Isofi x-Halte- rung nach hinten, um die Haken zu öff nen. Lassen Sie das Gehäuse zu: GRÜN los, sodass die Haken einrasten. Das Kontroll- fenster wird grün.
- Page 9 Einsatz für 9-18 kg Off en: Grün Off en: Grün Klick Off en: Grün...
-
Page 10: Kopfstütze Verstellen
Einsatz für 9-18 kg 1. Klappen Sie die Isofi x-Halterung heraus, bis Sie ein „Klick“ hören. Die Isofi x-Halterung darf sich nun nur noch um ca. 15° bewegen, jedoch darf sie sich nicht mehr einklappen lassen. 2. Ziehen Sie am schwarzen Gehäuse der Isofi x-Halterung bis im Kontrollfenster „rot“ erscheint. 3. - Page 11 Einsatz für 15-36 kg mit Isofi x-Halterung 1. Klappen Sie die Isofi x-Halterung heraus, bis Sie ein „Klick“ hören. Die Isofi x-Halterung darf sich nun nur noch um ca. 15° bewegen, jedoch darf sie sich nicht mehr einklappen lassen. 2. Ziehen Sie am schwarzen Gehäuse der Isofi x-Halterung bis im Kontrollfenster „rot“ erscheint. 3.
- Page 12 Einsatz für 15-36 kg ohne Isofi x-Halterung 1. Setzen Sie nun den Autositz auf den Fahrzeugsitz. 2. Setzen Sie nun das Kind in den Sitz und legen Sie den Fahrzeuggurt über das Kind an. Prüfen Sie, dass a) der Schultergurt über der Armlehne verläuft . b) der Beckengurt unter den Armlehnen angelegt ist.
- Page 13 We would like to congratulate you on your purchase of a group 1/2/3 car seat. If you would like to obtain any help regarding this product, you can contact our customer service. SAFETY INSTRUCTIONS • Please read these instructions carefully before using the seat and keep this guide in a safe place for future reference.
- Page 14 Fitti ng instructi ons • This child restraint is classifi ed for ”Semi-Universal” use and it fi ts in all cars which are suitable for ”Semi-Universal” child restraints. • This child restraint has been declared ”Semi-Universal” under more stringent conditi ons than those applied to earlier designs.
- Page 15 Correct shoulder strap height Belt too low Belt too high Correct Always check the shoulder straps are at the correct height for you child. The child‘s shoulders should always be below the slot for the harness. Changing the shoulder strap height Firstly, release the strap holding the backrest cover on to gain access to the harness.
-
Page 16: Tightening The Harness
Fastening the safety seat buckle 1. Slot the two metals secti ons of the buckle connectors together. 2. Slot the two buckle connectors into the slot in the top of the buckle unti l they ”click” into place. 3. Always check the harness is correctly locked by pulling the shoulder straps upwards. 4. - Page 17 Removing all straps 1. Removing the safety harness shoulder straps Release the strap at the bott om of the backrest cover to gain access to the harness. Slide both of the harness straps off the harness connector at the back of the backrest and pull the webbing through the slots in the seat‘s backrest and fabric cover.
- Page 18 WARNING This car seat is only suitable if the vehicle is fi tt ed with 3-point- stati c, 3-point retractor safety belts, approved to UN/ECE Regulati on No. 16 or other equivalent standards. • Do not use this child seat in passenger seats equipped with airbags. Diagonal belt Lap belt On outer rear seat...
- Page 19 Retaining system Retaining system Isofi x anchorage points Push the butt on backwards, the lock Unlock: RED will be released. Lock it when you push at the end, the window Lock: GREEN appears to be color Green. Push the butt on backwards, the lock will be released.
- Page 20 Fitti ng the car seat for 9-18 kg Lock: Unlock: Green Unlock: Lock: Green Click Unlock: Lock: Green...
- Page 21 Fitti ng the car seat for 9-18 kg 1. Rotate out the Isofi x connectors unti l you hear ”Click”. Check that the Isofi x connector is moving within the angle of 15°, and cannot turn around. 2. Pull aft erwards the black plasti c coat of Isofi x connectors unti l red appears in the window. 3.
- Page 22 Fitti ng the car seat for 15-36 kg with Isofi x 1. Rotate out the Isofi x connectors unti l you hear ”Click”. Check that the Isofi x connector is moving within the angle of 15°, and cannot turn around. 2.
-
Page 23: Cleaning The Seat Cover
Fitti ng the car seat for 15-36 kg without Isofi x 1. Place the child safety seat on the vehicle‘s seat. 2. Place the child in the child safety seat and fasten it into buckle. Fasten the seat belt, make sure that a) the diagonal secti ons of the seat belt webbing goes over the armrest. - Page 24 Merci d‘avoir acheté notre siège auto du groupe 1/2/3. Si vous avez besoin d‘aide concernant ce produit, veuillez vous adresser à notre service clients. CONSIGNES DE SÉCURITÉ • ATTENTION ! Veuillez lire attentivement et entièrement la notice avant l‘utilisation du siège et conservez-la pour une consultation ultérieure.
- Page 25 Consignes de montage • Ce siège auto pour enfant est un système de retenue de la catégorie « semi-universel » et convient à tous les véhicules qui sont adaptés à l‘installati on d‘un système de retenue « semi-universel ». • Ce système de retenue a été classé selon des critères d‘autorisati on stricts dans la catégorie «...
- Page 26 Hauteur correcte des sangles d‘épaule Sangles trop basses Sangles trop hautes Hauteur de sangles correcte Comme votre enfant grandit, vérifi ez régulièrement le bon positi onnement des sangles d‘épaule. Ajustage des sangles d‘épaule Pour ajuster la hauteur des sangles, ouvrez d‘abord la housse de siège au dos du siège pour accéder au harnais.
- Page 27 Att acher l‘enfant 1. Rapprochez les deux éléments métalliques de la sangle. 2. Introduisez les deux éléments métalliques dans la boucle de ceinture jusqu‘à ce qu‘un « clic » se fasse entendre. 3. Vérifi ez que la boucle est stable en ti rant brièvement sur la sangle d‘épaule vers le haut. 4.
- Page 28 Reti rer le harnais 1. Reti rer les sangles d‘épaule Ouvrez d‘abord la housse de siège au dos du siège pour accéder au harnais. Détachez les deux sangles du passant simple et sortez les sangles d‘épaule de la parti e avant du siège par les fentes de la sangle.
- Page 29 ATTENTION ! Ne convient qu‘aux véhicules ayant une ceinture trois points et qui ont été contrôlés et autorisés en vertu du règlement CEE n° 16 ou d‘une norme équivalente. NE PAS PLACER SUR LE SIÈGE PASSAGER AVEC AIRBAG FRONTAL (non amovible) ! Sangle d‘épaule Sangle de bassin...
- Page 30 Système Isofi x Système Isofi x Points d‘ancrage Isofi x Tirez le logement noir Ouvert : ROUGE du support Isofi x vers l‘arrière pour ouvrir les crochets. Lâchez le logement pour Fermé : VERT que les crochets s‘encli- quett ent. La fenêtre de contrôle devient verte.
- Page 31 Uti lisati on pour 9-18 kg Fermé : Ouvert : vert rouge Ouvert : Fermé : rouge vert Click Ouvert : Fermé : rouge vert...
- Page 32 Uti lisati on 9-18 kg 1. Sortez le support Isofi x jusqu‘à ce que vous entendiez un « clic ». Le support Isofi x ne doit pouvoir se déplacer qu‘à 15 ° environ, mais ne doit plus pouvoir se replier. 2.
- Page 33 Uti lisati on pour 15-36 kg avec support Isofi x 1. Sortez le support Isofi x jusqu‘à ce que vous entendiez un « clic ». Le support Isofi x ne doit pouvoir se déplacer qu‘à 15 ° environ, mais ne doit plus pouvoir se replier. 2.
- Page 34 Uti lisati on pour 15-36 kg sans support Isofi x 1. Placez alors le siège auto sur le siège du véhicule. 2. Placez alors l‘enfant dans le siège et posez la ceinture de sécurité du véhicule sur l‘enfant. Vérifi ez que a) la sangle d‘épaule passe sur l‘accoudoir.
- Page 35 Grazie per aver acquistato il nostro seggiolino per bambini del gruppo 1/2/3. Se doveste avere bisog- no di aiuto per questo prodotto, rivolgetevi al nostro centro di assistenza clienti. AVVERTENZE DI SICUREZZA • ATTENZIONE: leggere attentamente le presenti istruzioni prima dell’utilizzo e conservarle per po- terle consultare anche in futuro.
-
Page 36: Avvertenze Per Il Montaggio
Avvertenze per il montaggio • Questo seggiolino per bambini è un sistema di ritenuta della categoria ”semi-universale“ ed è impiegabile in tutti i veicoli adatti al montaggio di un sistema di ritenuta “semi-universale” per bambini. • Questo sistema di ritenuta per bambini è stato classifi cato nella categoria ”semi-universale“ secondo criteri di omologazione più... - Page 37 Altezza corrett a delle cinture per le spalle cinture troppo basse cinture troppo alte altezza corrett a delle cinture Verifi care regolarmente la posizione delle cinture delle spalle – il vostro bambino cresce. Regolare le cinture per le spalle Per regolare l’altezza delle cinture, aprire dapprima il rivesti mento del sedile sul lato posteriore per poter accedere al sistema di cinture.
- Page 38 Allacciare le cinture del bambino 1. Avvicinare i due pezzi in metallo della cintura. 2. Inserire i due pezzi in metallo nella chiusura, fi no a quando essi si incastrano producendo un rumore “click” ben udibile. 3. Verifi care la posizione della chiusura ti rando un po‘ la cintura per le spalle verso l‘alto. 4.
- Page 39 Togliere il sistema di cinture 1. Togliere le cinture per le spalle Aprire dapprima il rivesti mento del sedile sul lato posteriore per accedere al sistema di cinture. Staccare entrambe le cinture dall’elemento di raccordo ed estrarre dal lato anteriore le cinture per le spalle att raverso le fessure.
- Page 40 ATTENZIONE Adatt o solo a veicoli con cinture a tre punti , testati e omologati ai sensi del regola- mento ECE nr. 16 oppure di uno standard paragonabile. NON UTILIZZARE SUL SEDILE ANTERIORE DEL PASSEGGERO CON AIRBAG FRONTALE (non disatti vabile)! cintura per le spalle cintura per il bacino...
- Page 41 Sistema Isofix Sistema Isofix Punti di ancoraggio Isofi x Spostare la strutt ura esterna nera del sostegno aperto: ROSSO Isofi x all’indietro per aprire il gancio. Lasciare andare la strutt ura esterna in modo che i ganci chiuso: VERDE si incastrino. La fi nestrella di controllo diventa verde.
- Page 42 Impiego per 9-18 kg chiuso: aperto: verde rosso aperto: chiuso: rosso verde Click aperto: chiuso: rosso verde...
- Page 43 Impiego per 9-18 kg 1. Aprire il sostegno Isofi x fi no a quando si sente un ”click“. Il sostegno Isofi x si può muovere solo di 15° circa, ma non deve più potersi chiudere. 2. Tirare la strutt ura esterna nera del sostegno Isofi x fi no a quando appare ”rosso“ nella fi nestrella di controllo.
- Page 44 Impiego per 15-36 kg con sostegno Isofi x 1. Aprire il sostegno Isofi x fi no a quando si sente un ”click“. Il sostegno Isofi x si può muovere solo di 15° circa, ma non deve più potersi chiudere. 2. Tirare la strutt ura esterna nera del sostegno Isofi x fi no a quando appare “rosso“ nella fi nestrella di controllo.
- Page 45 Impiego per 15-36 kg senza sostengo Isofi x 1. Mett ere il seggiolino sul sedile del veicolo. 2. Mett ere il bambino nel seggiolino e mett ere la cintura del veicolo sopra al bambino. Verifi care che a) la cintura per la spalla passi sopra al bracciolo. b) la cintura per il bacino scorra sott o ai braccioli.
- Page 48 Find us on Facebook! www.facebook.com/Osann.de Osann GmbH Gewerbestr. 22 D-78244 Gottmadingen Tel.: +49 (0)7731 / 97 00 77 Fax: +49 (0)7731 / 97 00 55 E-Mail: info@osann.de Web: www.osann.de...
Need help?
Do you have a question about the LUPO ISOFIX and is the answer not in the manual?
Questions and answers