Table of Contents

Related Manuals for SystemAir villavent V20

Summary of Contents for SystemAir villavent V20
- Page 1 08.08.2012/RD/KMB Villavent ® sentralstøvsuger Modell V20 og V30 Montasje, bruk og vedlikehold side Installation, user and maintenance instructions page Installations-, Benutzer- und Wartungsanleitung Seite 11...
-
Page 2: Illustrations
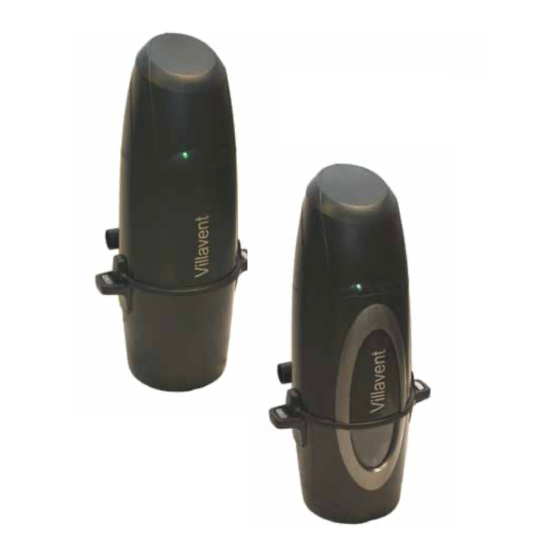
10 cm 38 cm 103,2 cm 65 cm Maksimum 1,8 m fra veggkontakt Maximum 1,8 m (6’) from 38.5 cm outlet Maximal 1,8 m von der Min. 20 cm Steckdose 48,6 cm Max. 5 m... - Page 3 INNHOLD Bilder .................2 Din sentralstøvsugerpakke inneholder følgende elementer. Viktige sikkerhetsregler ..........3 Generell informasjon ..........4 Elektrisk tilkobling ............4 Serviceinformasjon ............4 Dataskilt ..............4 Produktdimensjoner...........4 Elektrisk og elektronisk avfall ........4 1- Posefilter Installasjon..............4 Poseadapter ..............4 Ekstra sugekontakt ............5 Sluttkontroll ..............5 90° Poseadapter Eksternt Bruk ................5 utblåsningsadapter Lampesignal ..............5 Feilmeldinger .............5...
- Page 4 GENERELL INFORMASJON INSTALLASJON Sentralstøvsugeren er beregnet på normalt renhold og Sentralstøvsugeren er beregnet på tilkobling til røranlegg med støvsuging av tørt husholdningssmuss og støv. Ikke benytt sugekontakter (ref. egen montasjeanvisning for dette). støvsugersystemet for å fjerne skarpe gjenstander. Dette for å Maskinen anbefales montert i bod, vaskerom/grovkjøkken, unngå skader eller tilstopping av slange og røranlegg. kjellerrom, garasje el.l.
- Page 5 EKSTRA SUGEKONTAKT 1. Motorfeil: AV/PÅ-indikatoren lyser konstant GRØNT Medlevert sugekontakt kan monteres direkte i grenrør på røranlegget ved sentralstøvsugeren. 2. Driftsstans pga. overspenning: AV/PÅ-indikatoren blinker RØDT, GRØNN lampe blinker raskt og indikator for Ved valg av syklonutskilling kan sugekontakten alternativt motorfeil blinker raskt med gult lys. Denne feilen vil resettes monteres direkte i den ledige stussen på maskinen. (tilbakestilles) automatisk etter 15 sekunder dersom NB: Ledig sugestuss på...
- Page 6 FEILSØKING / SERVICE Dersom det oppstår driftsforstyrrelser, bør følgende undersøkes/ utføres før evt. service tilkalles: FJERNING AV GJENSTANDER SOM BLOKKERER Årsak Kontroll/ Feil STØVSUGERSLANGE/RØRNETT Tiltak 1. Tett støvsugerslange Støvsugeren Støpsel ikke riktig Koble støpsel til starter ikke. Ikke tilkoblet stikkontakt stikkontakt Dersom maskinen starter uten at det oppnås sugeeffekt når sugeeffekt i noen støvsugerslangen kobles til sugekontakten på...
-
Page 7: Table Of Contents
CONTENTS Illustrations ..............2 Your vacuum kit contains:. Important safety instructions........7 General information ...........8 Electrical connection..........8 Service information ............8 Rating plate ...............8 Product dimensions ...........8 Waste of electric and electronic equipment ....8 1- Bag filter Installation ..............8 Dust bag adapter ............8 Extra inlet valve ............9 System test ..............9 90° Dust bag External discharge Use ................9 adapter adapter LED-indicators ............9... -
Page 8: General Information
GENERAL INFORMATION INSTALLATION The central vacuum cleaner is designed for pick-up of normal This central vacuum cleaner is designed for connection to pipe household dust and dirt. Avoid picking up hard or sharp objects system with wall outlets (see separate installation instructions to prevent damage on hose and pipe work or plugging of hose for the pipe system). or pipe runs. The power unit is recommended installed in store room, laundry This manual will cover the final steps of installation of the room, basement, garage or similar. -
Page 9: Extra Inlet Valve
EXTRA INLET VALVE 5. Voltage is to high: OFF/ON indicator alternate between RED and GREEN light 3 times – short pause – alternate The provided inlet valve can be installed directly in T-piece on between RED and GREEN 3 times - long pause. This will be pipe system close to the power unit. repeated until the voltage is back to normal. If cyclonic separation is chosen, the inlet valve can alternatively be mounted directly into the free suction connector on the power 1. Motor fault: OFF/ON indicator gives a constant GREEN unit. -
Page 10: Trouble Shooting/Service
REMOVAL OF OBSTRUCTIONS IN THE PIPE SySTEM / TROUBLESHOOTING / SERVICE HOSE If operation failure should occur, the following should be checked/performed before calling your service representative/ If the power unit starts, but there is no suction through the hose supplier: when connecting to the inlet valve mounted on the power unit, the blockage is in the hose. - Page 11 INHALT Abbildungen..............2 Lieferumfang:. Wichtige Sicherheitshinweise ........11 Allgemeine Informationen ........... 12 Elektrischer Anschluss..........12 Wartungsinformationen ..........12 Typenschild..............12 Produktabmessungen..........12 Entsorgung von Elektro- und Elektronik-Altgeräten..12 1- Beutelfilter Installation ..............12 Staubbeutelanschluss ..........12 Zusätzliche Wanddose ..........13 Systemtest ..............13 90°-Staubbeutelan- Abluftanschluss Gebrauch ..............13 schluss LED-Anzeigen ............
- Page 12 ALLGEMEINE INFORMATIONEN INSTALLATION Der Zentralstaubsauger wird an ein Rohrnetz mit Wanddosen Der Zentralstaubsauger ist für die Beseitigung von normalem angeschlossen (die Installation des Rohrsystems ist in einer Hausstaub und Hausschmutz bestimmt. Nehmen Sie mit dem separaten Anleitung beschrieben). Staubsauger keine festen oder scharfkantigen Gegenstände auf, da diese die Schläuche und Rohre beschädigen oder Das Gerät sollte vorzugsweise in Lagerraum, Waschküche, verstopfen können. Keller, Garage oder dgl. installiert werden. Wichtig ist, dass das Gerät zur Inspektion und Wartung sowie zum Filterwechsel und Diese Anleitung beschreibt die Endmontage des Geräts und zum Entleeren des Staubbehälters zugänglich ist.
- Page 13 ZUSÄTZLICHE WANDDOSE Zentralstaubsauger startet nicht, AUS/EIN-Anzeige leuchtet ROT. Die mitgelieferte Saugdose kann direkt in ein T-Stück nahe des Staubsaugers installiert werden. 5. Spannung zu hoch: AUS/EIN-Anzeige wechselt 3 Mal zwischen ROT und GRÜN – kurze Pause – 3 Mal Wenn die Ausstattung mit einem Abscheidefilter (Zyklonfilter) abwechselnd ROT und GRÜN – lange Pause. Dieses ausgewählt wurde kann die Saugdose auch direkt in den am Muster wird wiederholt, bis sich die Spannung wieder Sauger vorgesehenen Anschluss installiert werden. normalisiert hat. Achtung: Wenn Sie die extra Dose nicht verwenden möchten, muss der beiliegende Blindstopfen in den freien Anschluss am Sauger gesteckt werden.
- Page 14 Schlauch nicht Den Schlauch KUNDENDIENST richtig in die richtig einschieben. Wanddose Notieren Sie sich bitte zur Kontaktaufnahme mit Ihrem eingesteckt Kundendienst die Angaben auf dem Typenschild des Geräts. Schalter am Handgriff Handgriff defekt austauschen oder Systemair GmbH reparieren. Tel : 7930 9272-0 Fax: 7930 9272-92 Fehlende Mikroschalter in der Die Wanddose Saugleistung Wanddose defekt austauschen. an einer der Niederspannungs- Das Nieder-...
- Page 16 Rett til endringer forbeholdes. Specifications may be changed without notice. Änderungen vorbehalten. www.systemair.com For UK: www.villavent.co.uk 460523-R3...
Need help?
Do you have a question about the villavent V20 and is the answer not in the manual?
Questions and answers