Table of Contents
Advertisement
Quick Links
Advertisement
Table of Contents

Related Manuals for BIOMET VANGUARD XP


Summary of Contents for BIOMET VANGUARD XP
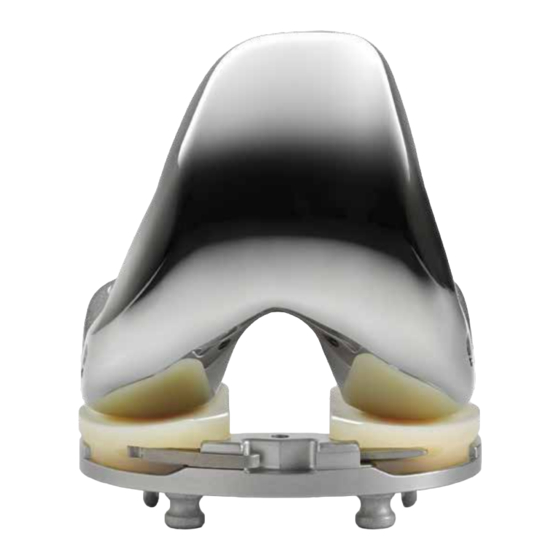
- Page 1 Surgical Technique...
- Page 2 At Biomet, we strive to view our work through the eyes of one surgeon and one patient. We treat every solution we provide as if it’s meant for a family member.
-
Page 3: Table Of Contents
Vanguard XP developing surgeons’ recommended approach. This material is intended for health care professionals and the Biomet sales force. Distribution to any other recipient is prohibited. All content herein is protected by copyright, trademarks and other intellectual property rights owned by or licensed to Biomet Inc. -
Page 4: Surgical Technique Summary
VANGUARD XP Total Knee System Surgical Technique Summary Patella Preparation Femoral Preparation Femoral Preparation: 4-in-1 cuts Initial Island Alignment Tibial Posterior Slope Tibial Resection Tibial Resection Depth Tibial Island Alignment Tibial Vertical Resection... - Page 5 Tibial Horizontal Resection Tibial Medial Gap Check Anterior Rongeur Tibial Slope Gauge Flexion/Extension Gap Check Tibial Sizing and Floating Tibial Trial Final Trialing Tibial Preparation Component Implantation...
-
Page 6: Overview
• The Vanguard XP Knee System offers the flexibility to change from an ACL/PCL retaining (XP) to a PCL retaining (CR), or non-functional PCL (AS) within a single system. - Page 7 Dr. Jorge Galante Dr. Adolph Lombardi Dr. Chris Peters For complete product information, including warnings, precautions, and potential adverse effects, see the package insert and www.Biomet.com (where available). Check for country product clearances and reference product specific instructions for use.
-
Page 8: Preoperative Planning
Preoperative Planning Incision • Assess bone stock and potential ligament instability and • The Vanguard XP Total Knee Instrumentation is the anatomical axis with 36" long standing A/P X-rays. designed for a standard surgical technique (Figure 2). • Measure valgus angle (angle between anatomic and •... -
Page 9: Patella Preparation
Patella Preparation Figure 3 Figure 4 Patella Resection eXPert Advice: Preparation of the patella at this time • Use the patella clamp surface cut guide to perform the frees up the joint capsule and facilitates exposure for the initial, flat patellar resection. remainder of the case. - Page 10 VANGUARD XP Total Knee System Patella Preparation Figure 5 Figure 6 Patella Resection (cont.) Option 2: Patella Milling • Single peg patellar component • Tilt the patella for patella preparation. - Use single patellar drill guide • Remove the osteophytes and peripatellar tissues down (32-486520–32-486525) to locate the placement of...
- Page 11 Patella Preparation Figure 7 Patella Resection (cont.) Note: The patella size and thickness will determine if a Note: The magnetic spacer bit includes the depth of standard or thin patella should be used. the peg. Do not sink the drill bit prior to setting the adjustable stop.
-
Page 12: Femoral Preparation
VANGUARD XP Total Knee System Femoral Preparation 1 mm 11 mm Figure 8 Figure 9 Option 1: Adjustable Distal Femoral Distal Femoral Resection Resection Guide eXPert Advice: It is strongly recommended to utilize a femur • Set the adjustable distal cut guide (32-487000) to... - Page 13 Femoral Preparation Figure 10 Figure 11 Distal Femoral Resection (cont.) • Assemble the IM rod (32-485030) and adjustable distal • Continue sliding the adjustable distal adaptor until the cut guide (32-487000) by inserting the IM rod through block is sitting against the anterior cortex. the central hole of the adjustable distal cut guide.
- Page 14 VANGUARD XP Total Knee System Femoral Preparation 9 mm Figure 12 Figure 13 Distal Femoral Resection (cont.) Option 2: Fixed Distal Femoral Resection Guide • Choose the appropriate left or right valgus wing (from Note: To confirm the valgus angle, the alignment handle 32-485004 to 32-485007) and assemble it onto the can be inserted into the adjustable distal adaptor and a 1/4"...
-
Page 15: Femoral Sizing
Femoral Preparation Fixed ^ 00 Figure 15 Figure 14 Figure 16 Femoral Sizing • Assemble the selected right or left A/P sizer feet to the Note: Assessing the A/P femoral axis, the epicondylar axis, A/P sizer body (32-485050). flexion gap and the tibial shaft axis can further optimize femoral rotation. -
Page 16: 4-In-1 Femoral Cuts
Figure 17 Figure 18 4-in-1 Femoral Cuts • Choose the Vanguard XP femoral 4-in-1 block that eXPert Advice: A narrow (approximately 12–13 mm) saw matches the selected size (from 32-700000 to 32- blade should be used for the posterior and posterior 700010) (Figure 17A). -
Page 17: Tibial Preparation
Tibial Preparation Figure 20 Figure 19 Figure 21 Tibial Resection with Intact/ Functional ACL • Select appropriate tibial island template eXPert Advice: The three critical measurements in the (from 32-700421 to 32-700425) by placing the guide on tibial resection are resection depth, slope and varus/valgus. the native tibia to size and set a preliminary rotation for Care must be taken to resect adequate tibial bone and to match the tibial component (Figure 19). -
Page 18: Tibial Resection Without Intact/Functional Acl
VANGUARD XP Total Knee System Tibial Preparation Figure 22 Figure 23 Tibial Resection with Intact/ Functional ACL (cont.) • Adjust the initial guide height accordingly by placing • Secure the EM tibial guide body to the tibia with one the universal tibial cutting block against the proximal pin (headed threaded, 32-700380) placed in either the tibia at the estimated resection level. - Page 19 Tibial Preparation Figure 25A Fine-tune Adjustment Figure 24 Figure 25B Tibial Resection with Intact/ Functional ACL (cont.) Fine Tuning Tibial Resection Height • Fine-tune the tibial resection level by using the height • Repeat previous step at 90 degrees of flexion to ensure adjustment thumb wheel (Figure 24).
- Page 20 VANGUARD XP Total Knee System Tibial Preparation Figure 27 Headed/Threaded Pin Standard Pin Non-headed Threaded Pin Figure 26 Figure 28 Tibial Resection with Intact/ Functional ACL (cont.) Vertical Resection • Remove the tibial resection spacer. eXPert Advice: To allow for larger tibial tray sizing, the vertical cuts should be as far lateral as possible without •...
- Page 21 Tibial Preparation Figure 29 Figure 30 Tibial Resection with Intact/ Functional ACL (cont.) Horizontal Resection - Medial Side Only • Remove the vertical resection block by unlocking the • The cut block may be used as a surface block by not cam lever and sliding the guide from the two threaded attaching the tibial cutting block insert.
- Page 22 VANGUARD XP Total Knee System Tibial Preparation Figure 31 Figure 32 Tibial Resection with Intact/ Functional ACL (cont.) Horizontal Resection (cont.) • Check the flexion gap at 90 degrees and full extension • If the medial gap checker is too tight, resect additional...
- Page 23 Tibial Preparation Figure 34 Figure 33 Figure 35 Tibial Resection with Intact/ Functional ACL (cont.) Anterior Bone Island Resection • Identify the insertion of the ACL fibers and mark the Note: While cutting the bone section, place a hand over anterior edge with a marking pen.
- Page 24 VANGUARD XP Total Knee System Tibial Preparation Figure 37 Figure 36 Figure 38 Tibial Resection with Intact/ Functional ACL (cont.) Slope Check • Use the tibial slope gauge (32-700041) to ensure the tibial • The marks on the gauge indicate a slope difference of slope on both the medial and lateral plateaus is coplanar 1 degree increments.
- Page 25 Tibial Preparation Figure 39 Figure 40 Tibial Resection with Intact/ Functional ACL (cont.) Flexion/Extension Gap Check Tibial Sizing • Check the flexion and extension gaps with the tibial • Place the knee in maximum flexion with a Z-retractor spacer (32-700040) to ensure that there is adequate medially and laterally to provide maximum exposure.
- Page 26 Advice: When trialing range-of-motion, if the medial tibial trial and the appropriate medial and lateral and lateral bearings rise up in flexion: Vanguard XP-XP bearing trials. a. confirm the tibial tray is not undersized. • Free float the tibial trial and assembled trial bearing on b.
- Page 27 Figure 42 Figure 43 Tibial Preparation • Align the appropriate sized tibial template with • With the tibial template pinned and secured in proper position, place the tibial template keel mask the anterior marks on the tibia and pin through the anterior holes using 2 quick release drill pins (32-700038) onto the template.
- Page 28 VANGUARD XP Total Knee System Tibial Preparation Figure 45 Figure 44 Figure 46 Tibial Resection with Intact/ Functional ACL (cont.) Tibial Preparation Cont. Note: A tibial bearing trial handle (32-700076) is available • Prepare both medial and lateral tibial tray posterior keels...
- Page 29 Trial Reduction Figure 47 Femur eXPert Advice: If the ACL touches the femoral component With all bone surfaces and soft tissues prepared, complete a trial reduction. during range-of-motion, it is strongly recommended the ACL be sacrificed and the knee be converted to a posterior •...
- Page 30 Make sure the trials are in proper alignment to fully seat onto the peg. Note: If the ACL and bone island are removed and the PCL is retained, the Vanguard XP tibial bearing trials can be used as the CR option. Patella •...
- Page 31 Tibial Preparation Figure 49 Tibial Sizing without Intact/Functional ACL If the ACL or tibial bone island is compromised, follow • Select the primary tibial tray trial that provides the these listed steps: appropriate coverage in both the A/P and M/L planes using the tibial template (Figure 49).
-
Page 32: Stem Preparation Without The Acl
VANGUARD XP Total Knee System Tibial Preparation Figure 50 Figure 51 Stem Preparation without the ACL • Assemble the tibial punch mask (32-485511) onto the • Assemble the appropriate tibial tray trial cruciate stem tibial template and pin in place using 1/8" medium insert (32-700069 or 32-700070) to the primary tibial tray bone nails. -
Page 33: Implant Reduction
Implant Reduction Figure 52 Tibial Tray Implantation with Intact/Functioning ACL • If a tourniquet above the knee is not already in use, • Avoid contamination of the implant-cement interface. place and/or inflate throughout preparation of bone for • The cement should just overfill the pockets on cementation, as well as mixing, application and hardening underside of the tray, up to 1 mm proud posteriorly and of bone cement. - Page 34 VANGUARD XP Total Knee System Implant Reduction Figure 53 Tibial Tray Implantation with Intact/Functioning ACL (cont.) • After pressurization, all cement that remains proud • The angled elevator can also be used to remove residual cement from the anterior aspect of the tibial tray, as of the bone should be removed.
-
Page 35: Tibial Tray Implantation Without Intact/Functioning Acl
If the ACL and bone island are removed and the PCL is • Mix and apply cement to implants and bone according retained, prepare the tibia to receive the Vanguard XP CR to principles described above (Figure 54). tibial tray with cruciate stem. -
Page 36: Femoral Component Implantation
VANGUARD XP Total Knee System Implant Reduction Figure 56 Femoral Component Implantation • While mixing another 40g unit of cement, pulse lavage • Place the femoral component onto the end of the and dry the femoral side again. femoral impactor and insert it manually as far as possible. -
Page 37: Patellar Component Implantation
• Pulse lavage and dry patella. • Remove the tibial bearings and select the appropriate Vanguard XP tibial bearings and insert onto the tibial tray • With the knee in full extension, apply a 2 to 3 mm thick (Figure 58). - Page 38 (32-486125) (Figure 60). bar. The end etched “tray” should be placed in the notch on the lateral side of the Vanguard XP tibial tray anterior - The tool end inserts into the middle of the tibial tray post (Figure 60).
- Page 40 All content herein is protected by copyright, trademarks and other intellectual property rights owned by or licensed to Biomet Inc. or its affiliates unless otherwise indicated, and must not be redistributed, duplicated or disclosed, in whole or in part, without the express written consent of Biomet.
Need help?
Do you have a question about the VANGUARD XP and is the answer not in the manual?
Questions and answers