
Related Manuals for Moeller WINbloc eco PROFIBUS-DP Series


Summary of Contents for Moeller WINbloc eco PROFIBUS-DP Series
- Page 1 Building Automation Industrial Automation Systems Hardware and Engineering WINbloc eco PROFIBUS-DP 05/01 AWB2700-1384GB...
- Page 2 No part of this manual may be reproduced in any form (printed, photocopy, microfilm or any other process) or processed, duplicated or distributed by means of electronic systems without written permission of Moeller GmbH, Bonn Subject to alterations without notice. Printed on bleached cellulose.
- Page 3 Warning! Dangerous electrical voltage! Before commencing the installation • Disconnect the power supply of the device. • Suitable safety hardware and software measures should be implemented for the • Ensure that devices cannot be accidentally I/O interface so that a line or wire breakage restarted.
- Page 4 • Measures should be taken to ensure the • Installations fitted with frequency inverters proper restart of programs interrupted must be provided with additional after a voltage dip or failure. This should monitoring and protective devices in not cause dangerous operating states even accordance with the relevant safety for a short time.
-
Page 5: Table Of Contents
05/01 AWB2700-1384GB Contents General Safety Instructions Intended Usage Notes Concerning Planning /Installation of this Product Technical Safety Description of Used Symbols WIN bloc eco-Philosophy Overview WIN bloc eco puts I/O Right on Track – Project Planning Introduction Module Overview WIN bloc eco Dimensions Maximum System Extension –... - Page 6 05/01 AWB2700-1384GB Contents Mounting Variants Switching Cabinet Installation – Mounting Rail – Location Requirements – Installation Guidelines – Switching Cabinet Configuration Console Installation Terminal Housing Installation Installation Potential Relationships – System Description Scope of Configuration EMC Suitable Wiring – Coupling Mechanisms –...
- Page 7 05/01 AWB2700-1384GB Contents Digital Output Status Indicators – 16-Channel Digital Output, Positive Switching, Short-circuit Proof – 32-Channel Digital Output, Positive Switching, Short-circuit Proof Combi Module Status Indicators – 16-Channel DI, 16-Channel DO, Digital Input/Output, Positive Switching, Short-circuit Proof Master Operation Mode Introduction Connectable Module Groups Device Data Sets and...
- Page 8 05/01 AWB2700-1384GB – Combi Module – Labeling Input Modules – 16-Channel Digital Input, Positive Switching – 32-Channel Digital Input, Positive Switching Output Modules – 16-Channel Digital Output, Positive Switching, Short-circuit Proof, Byte-by-Byte Field Voltage Supply 126 – 32-Channel Digital Output, Positive Switching, Short-circuit Proof, Byte-by-Byte Field Voltage Supply 129 Combi Modules –...
-
Page 9: General Safety Instructions
The equipment described in this manual and technical description are only to be operated as laid down in this manual and connection to third party devices must be certified by Moeller. Appropriate transport, storage, deployment and mounting as well as careful operating and thorough maintenance guarantee the... -
Page 10: Notes Concerning Planning /Installation Of This Product
05/01 AWB2700-1384GB About this Manual Notes Concerning Planning / Installation of this Product Warning! All specific safety measures and accident protection guidelines have to be considered carefully without exception. If the equipment is to be permanently installed and it has no power isolation switch/circuit breaker, then a power isolation switch/circuit breaker must be installed into the building. -
Page 11: Description Of Used Symbols
05/01 AWB2700-1384GB Description of Used Symbols Description of Used Symbols Warning! This sign can be found next to all notes which indicate potential hazards. This can refer to hazards to personnel and damages to the system (hardware and software). This means that the operator must work with extreme caution. - Page 12 05/01 AWB2700-1384GB...
-
Page 13: Win Bloc Eco-Philosophy
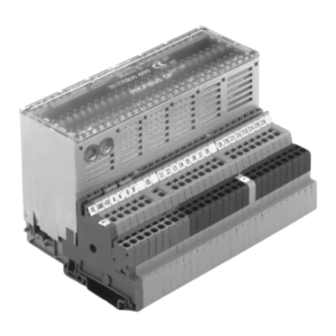
05/01 AWB2700-1384GB WIN bloc eco-Philosophy WIN bloc eco puts I/O Right on Track Overview WIN bloc eco modules offer, as I/O-components, the highest standard in assembly and usage. A variety of base elements provides the best conditions for a broad range of usages. This goes together with a modular and compact construction which enables universal installation possibilities for terminal cabinets, consoles or WIN bloc eco modules have been... - Page 14 05/01 AWB2700-1384GB WINbloc eco-Philosophy The continuous trend in the automated industry towards decentralised functionality requires serial data transmission. Process and system engineers demand the possibility to build in components from various manufacturers in a single plant. The solution is to network all the different components via a common bus.
- Page 15 05/01 AWB2700-1384GB Overview Cost-Saving and Service Friendly The fast and low-key wiring, during assembly and installation of WIN bloc eco modules, reduces material and labour costs to a minimum. Diagnostic LEDs on the modules make error detection very easy. WIN bloc eco system will be answered All questions concerning your at any time by our competent support service, which will quickly provide solutions to your problems.
- Page 16 05/01 AWB2700-1384GB...
-
Page 17: Project Planning
05/01 AWB2700-1384GB 2 Project Planning Introduction The chapter „Project Planning" contains information that is WIN bloc eco necessary prior to planning control systems with modules. This information includes details about available electronics modules, as well as information that helps you to order modules for a planned system. -
Page 18: Win Bloc Eco Dimensions
05/01 AWB2700-1384GB Project Planning WIN bloc eco Dimensions 142 mm 90 mm complete 340 g - 550 g G 15%... -
Page 19: Maximum System Extension
05/01 AWB2700-1384GB Maximum System Extension Maximum System Extension Each bus line consists of at least one PLC or a PC, and one I/O- module. Incoming and outgoing lines are connected via tension clamp connections. In PROFIBUS DP each I/O-module is a passive station (slave) and occupies one address on the bus. -
Page 20: Maximum Distances/Length Of Bus Cables Without Repeater
05/01 AWB2700-1384GB Project Planning Maximum Distances/Length of Bus Cables without Repeater The following tables show the maximum distances between 2 stations of a PROFIBUS DP, dependent on cable types and repeater connection, in relation to the Baud rate (in kBit/s). Table 2: Maximum distance between two stations/length of bus cable, cable type A (DIN 19245 Part 3), without repeater Baud rate (kBit/s) -
Page 21: Maximum System Extension With Repeater
05/01 AWB2700-1384GB Maximum System Extension Maximum System Extension with Repeater With the help of repeaters a PROFIBUS-system can consist of a maximum of 30 modules, 1 repeater, 30 modules, etc. The maximum number of bus stations (when 3 repeaters are used) is WIN bloc eco modules (address range 122. -
Page 22: Maximum Distance/Bus Cable Lengths With Repeaters
05/01 AWB2700-1384GB Project Planning Maximum Distance/Bus Cable Lengths with Repeaters Table 3: Maximum distance between 2 stations/length of bus cables, cable type A (DIN 19245 Part 3), with 3 repeaters Baud rate (kBit/s) Max. distance between 2 Max. cable length with stations/cable type A (m) 3 repeaters (m) 1200... -
Page 23: Ordering Information
05/01 AWB2700-1384GB Ordering Information Ordering Information Win bloc eco PROFIBUS DP Base modules 2-wire ZSBE-1.5/25-S/PE-+ ZSBE-1.5/25-S/S+-+/PE+ ZSBE-1.5-S/PE- ZSBE-1.5/25-S/S+-/PE- ZSBE-1.5/25-S/S/-/PE-/+ 3-wire ZSBE-1.5/25-S/-/PE+ ZSBE-1.5/25-2S/-/PE-/2+... - Page 24 05/01 AWB2700-1384GB...
-
Page 25: Mounting/Dismounting
Moeller. Correct and safe operation of this equipment can be only assured if transportation, storage, assembly and operation are carried out correctly. -
Page 26: General Information
05/01 AWB2700-1384GB Mounting/Dismounting General Information TS 35 Mounting Rail WIN bloc eco modules are mounted The mounting rail on which the should be installed on a mounting plate (thickness at least 2 mm) to create a reference potential for the ground connection and shield. - Page 27 05/01 AWB2700-1384GB General Information Tension Clamp Distribution Rails Each distribution rail element consists of the insulation body and the connecting element for the supply connection. The cross connection is already built into the connecting element. On one side there is a socket contact, on the other a pin. This ensures that the cross connection for supply distribution is connected automatically when the connection elements are joined together.
- Page 28 05/01 AWB2700-1384GB Mounting/Dismounting Installation/Removal of Distribution Rails Distribution rail elements are easily mounted by hand on the terminal carriers. Removal can be carried out with the help of a screwdriver. Colour Coding All distribution rails are colour-coded. Their red-brown, blue and green-yellow colouring clearly indicates the correct supply connections.
-
Page 29: Mounting Of Modules
05/01 AWB2700-1384GB Mounting Mounting Mounting of Modules Mounting of WINbloc eco modules is very easy, just mount the modules on top of the pre-installed TS 35 mounting rails (see DIN / EN 50 022). Step 1 Mount the first base element by tilting it slightly towards you and placing it on the mounting rail. - Page 30 05/01 AWB2700-1384GB Mounting/Dismounting Step 4 Code the modules according to the electronics module to be installed. The coding prevents mistakes being made when assigning inputs and outputs. It can be safe to assume that only input to input and output to output are connected. The coding is performed decimally.
- Page 31 05/01 AWB2700-1384GB Mounting Figure 8: Inserting of coding comb into the base element Plug the row with short pins into the central opening row of the electronics module. Figure 9: Coding on the electronics module Bend up the plugged-in comb through 90° in order to break off the pins.
- Page 32 05/01 AWB2700-1384GB Mounting/Dismounting Suggestion 1 Coding of digital input/output modules and the combi module according to module type. Use only for a string of varying modules. Table 4: Suggestion for coding Base element Digital input 16 Digital input 32 Digital Output 16 Digital Output 32 Digital Combi 16/16 Electronics module...
- Page 33 05/01 AWB2700-1384GB Mounting Suggestion 2 Coding of digital input/output modules and the combi module according to the position of the module in a string. Use only in a string of simular modules. Table 5: Suggestion for coding Base element Electronics module Label white...
- Page 34 05/01 AWB2700-1384GB Mounting/Dismounting Additional misfitment security can be achieved by labelling the base elements and electronics modules with the corresponding station address, e.g. using hinged labels on the base elements. Step 5 Plug the electronics module onto the base element by pushing the rails on the housing into the guide channels on the base element.
- Page 35 05/01 AWB2700-1384GB Mounting Step 6 The electronics module must be secured onto the base element using the locking clips. To perform this, place a screwdriver in the middle of the right-hand locking clip, and push the slide to the left. Push the slide of the left-hand locking clip to the right.
- Page 36 05/01 AWB2700-1384GB Mounting/Dismounting Step 8 The bus connection is also carried out using direct wiring. There are two bus connection points available: A/B and A’/B’. The bus shield can be connected using either direct wiring to the PE base element or using a shield set.
- Page 37 05/01 AWB2700-1384GB Mounting Step 9 The module supply is connected to the base element. Note that the positive pole (+24 V DC) of the supply must be connected to U the negative pole to the blue distribution block. The supply must on no account be connected to the +5 V and GND terminals.
- Page 38 05/01 AWB2700-1384GB Mounting/Dismounting Potential Distribution WIN bloc eco modules, it is sometimes necessary to duplicate With supplies. This can be performed using either direct wiring or cross connections (ZQVs). The connection assignment for each module can be found in the corresponding wiring diagram in this chapter. Figure 14: Cross-connection for potential duplication This photo shows how a cross connection is used for potential duplication.
- Page 39 05/01 AWB2700-1384GB Mounting Figure 15: Direct wiring for potential duplication In this case (16-channel digital output module), only one power supply is connected to the + red-brown distribution rail on the base element. The other supplies (U and U ) are looped from the + red-brown distribution rail to the corresponding terminal using direct wiring.
-
Page 40: Mounting The Terminating Resistor
05/01 AWB2700-1384GB Mounting/Dismounting Mounting the Terminating Resistor Step 1 The end module in a bus must be fitted with a terminating resistor (DP ASW). For this purpose, use the mounting tool (ZBW 6) as follows. Insert the outer pin of the mounting tool in the square opening, marked GND, and push the mounting tool into the opening until it comes up against a stop. - Page 41 05/01 AWB2700-1384GB Mounting Step 2 Tilt the mounting tool gently to the rear and insert the terminating resistor in the now open openings. The bus terminating resistor is correctly mounted when the openings A’ and B’ are free. Figure 17: Inserting the bus terminating resistor...
- Page 42 05/01 AWB2700-1384GB Mounting/Dismounting Step 3 Remove the mounting tool. The tension clamps are now closed and the terminating resistor is mounted. Figure 18: Bus terminating resistor inserted Ensure that the terminating resistor is seated correctly; the connections A' and B' for the connection of the bus cable must be free.
-
Page 43: Wiring Guide
05/01 AWB2700-1384GB Wiring Guide Wiring Guide This chapter is designed to help when wiring the base element. The connection diagrams show how the individual sensors and actuators are connected, how the power supply is fed in, and how the bus is wired to the base element. Input Modules 16-Channel Digital Input ZSBE-1.5/25-S/PE-+... - Page 44 05/01 AWB2700-1384GB Mounting/Dismounting ZSBE-1.5/25-S/PE-+ The supplies of both groups, each with 8 inputs, can be cross- connected...
- Page 45 05/01 AWB2700-1384GB Wiring Guide ZSBE-1.5/25-S/-/PE+ With one supply for each group of 8 inputs...
- Page 46 05/01 AWB2700-1384GB Mounting/Dismounting ZSBE-1.5/25-S/-/+ The supplies of both groups, each with 8 inputs, can be cross- connected...
- Page 47 05/01 AWB2700-1384GB Wiring Guide 32-Channel Digital Input ZSBE-1.5/25-S/S/+-+/PE+ With one supply for each group of 8 inputs...
- Page 48 05/01 AWB2700-1384GB Mounting/Dismounting ZSBE-1.5/25-S/S/+-+/PE+ The supplies of the four groups, each with 8 inputs, can be cross- connected...
- Page 49 05/01 AWB2700-1384GB Wiring Guide ZSBE-1.5/25-2S/-/PE-/2+ With one supply for each group of 8 inputs...
- Page 50 05/01 AWB2700-1384GB Mounting/Dismounting ZSBE-1.5/25-2S/-/PE-/2+ The supplies of the four groups, each with 8 inputs, can be cross- connected...
-
Page 51: Output Modules
05/01 AWB2700-1384GB Wiring Guide Output Modules 16-Channel Digital Output ZSBE-1.5/25-S/PE- With one supply for each group of 8 outputs... - Page 52 05/01 AWB2700-1384GB Mounting/Dismounting ZSBE-1.5/25-S/PE- The supplies can be cross-connected using a ZQV...
- Page 53 05/01 AWB2700-1384GB Wiring Guide 32-Channel Digital Output ZSBE-1.5/25-S/S/+-/PE- With one supply for each group of 8 outputs...
- Page 54 05/01 AWB2700-1384GB ZSBE-1.5/25-S/S/+-/PE- The supplies of the four groups, each with 8 outputs, can be cross- connected...
-
Page 55: Combi Modules
05/01 AWB2700-1384GB Wiring Guide Combi Modules 16 Channel DI / 16 Channel DO ZSBE-1.5/25-S/S/-/PE/+ With one 24 Vdc supply per input/output group (each with 8 channels) - Page 56 05/01 AWB2700-1384GB Mounting/Dismounting ZSBE-1.5/25-S/S/-/PE/+ The supplies of the output groups can be cross-connected (via ZQV). The supply connection of the input groups is performed via direct wiring...
-
Page 57: Dismounting A Single Base Element
05/01 AWB2700-1384GB Dismounting Dismounting Dismounting a Single Base Element Step 1: Ensure that modules and bridge are disconnected from the power supply. Step 2: Before the electronics module can be removed, the locking clip must be unlocked. To perform this, place a screwdriver to the left of the locking clip, and push the slide to the right. - Page 58 05/01 AWB2700-1384GB Mounting/Dismounting Step 3: The electronics module can now be removed from the base element. Push a screwdriver between the electronics module and the spring clip on the base element. Unlock the spring clip by lightly bending it upwards with the screwdriver. Pull the module off the base element.
-
Page 59: Mounting Variants
05/01 AWB2700-1384GB 4 Mounting Variants Switching Cabinet Mounting Rail Installation WIN bloc eco modules must be mounted on 35 mm mounting rails DIN/EN 50 022 35 x 15. Mounting rails should be installed on a mounting plate (thickness at least 2 mm) to create a reference potential for the ground connection and screen. -
Page 60: Installation Guidelines
05/01 AWB2700-1384GB Mounting Variants Installation Guidelines For cabinet installation sufficient protection and other precautionary measures have to be chosen (according to VDE with degree of contamination 2) to counteract: • Access from unauthorized persons • Splashing and dripping water • Environment with aggressive gases and vapours or high dust fall Switching Cabinet Configuration This example shows a multiple-line switching cabinet installation: WIN bloc eco modules... -
Page 61: Console Installation
05/01 AWB2700-1384GB Console Installation Console Installation The same guidelines for the positioning and installation of WIN bloc switching cabinets also apply to the console installation of eco modules. In principle, a console installation means a reduced switching cabinet configuration. In addition to the guidelines concerning the switching cabinet installation, the specified guidelines for the chosen type of console have to be considered. - Page 62 05/01 AWB2700-1384GB...
-
Page 63: Installation
05/01 AWB2700-1384GB 5 Installation Potential Relationships WIN bloc eco Potential relationships of a PROFIBUS DP-system with modules are characterised by the following features: The bus connection is isolated from the power supply. All I/O-modules can have their own supply. The I/O module supply (US) can be fed in individually or looped from another module. -
Page 64: System Description
05/01 AWB2700-1384GB Installation System Description The following block diagram shows the typical composition of a combi module. WIN bloc eco system Figure 23: block diagram of a A B und A' B = Bus connection = Supply voltage (+) for external bus termination = Module supply voltage = Byte-by-byte supply for output Q1 - Q16... -
Page 65: Scope Of Configuration
05/01 AWB2700-1384GB Scope of Configuration Scope of Configuration WIN bloc eco modules can be installed and operated in the most confined places. The minimum distance to other modules is 10 mm in all directions in the case of passive components. If the adjacent components are active (e.g. -
Page 66: Emc Suitable Wiring
All Moeller products completely fulfil these high EMC requirements. However, before the actual installation is carried out, an EMC plan should be carried out, including all potential error sources. -
Page 67: Guarantee Of Emc
05/01 AWB2700-1384GB EMC Suitable Wiring Radiation Coupling: A radiation coupling occurs if an electromagnetic wave hits a conductive structure. Each wave-hit induces currents and voltages. Typical sources are, e.g., spark gaps (ignition plugs, electro-motor commutators) and transmitters (e.g. walkie-talkies), that are used near the concerned conductive structure. - Page 68 05/01 AWB2700-1384GB Installation Connect all free moving groundable components (e.g. cabinet doors) with short bonding straps with large surface areas. If possible, aluminium components should not be used, because aluminium oxidises easily and is therefore unsuitable for grounding. PE Connection (Ground) Between ground and PE connection (ground) a central connection has to be established.
- Page 69 05/01 AWB2700-1384GB EMC Suitable Wiring EMC Suitable Cabinet Installation The following figure shows an EMC suitable cabinet installation with all necessary measures. Figure 25: EMC suitable cabinet installation...
-
Page 70: Shielding Of Conductors And Devices
05/01 AWB2700-1384GB Installation a Bonding straps To connect inactive metal components, bonding straps must be used if a large surface contact (metal to metal) is not possible. Use only short bonding straps with large surface areas.Schirmung von Leitungen und Geräten b Supporting bars All supporting bars that hold control components must have a large- surface area contact with the cabinet housing. -
Page 71: Potential Compensation
05/01 AWB2700-1384GB EMC Suitable Wiring Wiring: Conductors should always be laid on both sides to assure good attenuation of disturbances in the high frequency range. The conductors should be laid on one side if only attenuation of the low frequency range is necessary. One-sided installation is advantageous if •... - Page 72 05/01 AWB2700-1384GB Installation Table 6: Potential compensation between two connections Connection Connection 1 RxD/TxD-P B RxD/TxD-P DGND DGND RxD/TxD-N A RxD/TxD-N Shield Protective Ground Protective Ground A potential compensation line must have the following features: Low impedance. The lower the impedance, the more effective is the potential compensation.
- Page 73 05/01 AWB2700-1384GB EMC Suitable Wiring Figure 26: Routing of potential compensation line and signal line...
-
Page 74: Special Emc Measures For Particular Applications
05/01 AWB2700-1384GB Installation Special EMC Measures for Switching of Inductive Loads Particular Applications Recommendation: In the case of inductive loads, a protective circuit should be fitted on the load. Protection against Electrostatic Discharge (ESD) In a disassembled condition electronics modules and base elements are prone to damage caused by ESD. - Page 75 05/01 AWB2700-1384GB General Wiring Notes Cable Routing Inside and Outside of Cabinets: The cables should be divided into the following groups to guarantee a routing suitable for EMC: Group 1: shielded bus and data lines, shielded analogue lines, unshielded DC-voltage lines F 60 V, unshielded AC-voltage lines F 25 V, coax cables for monitors.
- Page 76 05/01 AWB2700-1384GB Installation Cable Routing Outside Buildings: Routing outside buildings should be carried out using metal cable ducts. Where the cable ducts meet, they are to be galvanically joined and the cable ducts have to be grounded When routing cables outside of buildings, all the valid guidelines of internal and external lightning protection and grounding have to be considered.
-
Page 77: Bus Connection
05/01 AWB2700-1384GB Bus Connection Figure 27: Transmission cable for the connection of bus subscribers Cable Types For the transmission line the following cables can be used (e.g.): Cable Type „A": FA. Moeller ZB4-900-KB1 (for inhouse installation) 1x2x0,64 ® SIEMENS, Type „SINEC L2 Bus Cable",... -
Page 78: Wiring
05/01 AWB2700-1384GB Installation Wiring The figure below shows the minimum wiring with shielding between two bus subscribers using D-type connectors. The column containing 3, 5, 6 and 8 shows the pin assignment when the next WIN bloc bus station is to be connected via D-Type connector, e.g. DP modules, repeater, etc. -
Page 79: Labelling
WIN bloc eco modules are delivered partially labelled. A user- and application-specific labelling can be carried out easily, quickly and permanently with Moeller’s labelling materials. For a detailed description of these materials refer to chapter 11. Accessories. The lids of electronics modules are delivered fully labelled. -
Page 80: Base Elements
05/01 AWB2700-1384GB Labelling Base Elements The channel numbering of the base element is supplied by Moeller. Figure 31: Labelling of a base element The base elements are supplied with the potential indicator and the power supply indicator, all pre-labelled. The following materials can be used for labelling and marking: •... -
Page 81: Adressing
05/01 AWB2700-1384GB 7 Adressing Address Switches WIN bloc eco modules is performed on the electronics Addressing of module using two decimal address switches. These switches are positioned on the front side of a fitted electronics module. Figure 32: Switch position on electronics module a adress switches Address Setting The switches are marked with H for HIGH (tens) and L for LOW... -
Page 82: Address Range
05/01 AWB2700-1384GB Adressing Address Range WIN bloc eco modules must lie within the range The addresses for 01-99, i.e. a maximum of 99 addresses can be assigned to the bus subscribers (from address 01 to address 99). Each address can only be allocated once. Example The following example shows the switch position for address 90. -
Page 83: Diagnosis
05/01 AWB2700-1384GB 8 Diagnosis Digital Input 16-Channel Digital Input, Positive Switching Status Indicators This module has a lower LED row with the LEDs RUN, BF and 1 to 16. Stade Description RUN (green) Module supply voltage present (U not lit Module supply voltage missing (U BF (red) Bus-error. -
Page 84: 32-Channel Digital Input, Positive Switching
05/01 AWB2700-1384GB Diagnosis 32-Channel Digital Input, Positive Switching This module has a lower LED row with the LEDs RUN, BF and 1 to 16 and a middle LED row 17 to 32. State Description RUN (green) Module supply voltage present (U not lit Module supply voltage missing (U BF (red) -
Page 85: Digital Output Status Indicators
05/01 AWB2700-1384GB Digital Output Status Indicators Digital Output 16-Channel Digital Output, Positive Switching, Status Indicators Short-circuit Proof This module with short-circuit proof outputs has a lower LED row with the LEDs RUN, BF, DIA, U und 1 to16. State Description RUN (green) Module supply voltage present (U not lit... -
Page 86: 32-Channel Digital Output, Positive Switching, Short-Circuit Proof
05/01 AWB2700-1384GB Diagnosis 32-Channel Digital Output, Positive Switching, Short-circuit Proof This module with short-circuit proof outputs has a lower LED row with the LEDs RUN, BF, DIA, U and 1 to 16. The above row has the LEDs U and U as well as the LEDs 17 to 32 which indicate the appropriate channel status. -
Page 87: Combi Module Status Indicators
05/01 AWB2700-1384GB Combi Module Status Indicators Combi Module 16-Channel DI, 16-Channel DO, Digital Input/Output, Status Indicators Positive Switching, Short-circuit Proof The combi module with short-circuit proof outputs has a lower LED row with the LEDs RUN, BF, DIA, U and 1 to 16, that indicate the appropriate output channel status. - Page 88 05/01 AWB2700-1384GB Diagnosis State Description LED DIA (red) Diagnosis: Short circuit in output or diagnosis: field voltage or U ) missing not lit No error...
-
Page 89: Master Operation Mode
05/01 AWB2700-1384GB 9 Master Operation Mode Introduction The chapter „Master Operation Mode" includes all necessary WIN bloc eco modules to higher ranking information to connect automated devices, e.g. memory-programmable controllers. More information about the individual control systems can be found in the corresponding manufacturer manuals, e.g.: Siemens, Bosch and Allen Bradley Connectable Module Groups Control system manufacturers have master-module groups... -
Page 90: Device Data Sets And Type Files
05/01 AWB2700-1384GB Master Operation Mode Device Data Sets and The device data set includes all specific data of a particular I/O Type Files module. With help of this device data set it is possible to connect WIN bloc eco modules to higher ranking automated devices. The I/O modules are exactly described by the data in the device data sets, however, the interpretation by the master is not always the same. - Page 91 05/01 AWB2700-1384GB Device Data Sets and Type Files...
-
Page 92: Type Files
05/01 AWB2700-1384GB Master Operation Mode The only exception is Siemens control systems, whereby the connection cannot be performed with the basic device data (an example of this special case is explained in chapter 9.5). The WIN bloc eco following is a list of the device files of the individual module types. -
Page 93: Siemens-Control System (Dos)
05/01 AWB2700-1384GB Siemens-Control System (DOS) Siemens-Control Example for Coupling with a Siemens Control System (IM System (DOS) 308 B and COM ET 200 DOS-Software) In order to use the type-specific COM files, they must be placed in the main directory of the PU (e.g. C:\COMET200). See also the Siemens Product Information for COM ET 200 from V 4.0 MS-DOS. - Page 94 05/01 AWB2700-1384GB Master Operation Mode Parameter Settings The settings of all necessary parameters are shown in the following screen figures. 16 DI eco Program file selected C:ECOBSPET.200 SIMATIC S5 / COM ET 200 Configuring ------------------------------------------------------------------------------- Station number: Area: P Station type: WINbloc 16DI eco Station name: ECO 16 DI Next available address...
- Page 95 05/01 AWB2700-1384GB Siemens-Control System (DOS) 32 DI eco Program file selected C:ECOBSPET.200 SIMATIC S5 / COM ET 200 Configuring ------------------------------------------------------------------------------- Station number: Area: P Station type: WINbloc 32DI eco Station name: ECO 32 DI Next available address Configuration: Area address (Shift F6: DP-Slave - Parameterization frame) ¦...
- Page 96 05/01 AWB2700-1384GB Master Operation Mode 16 DO eco Program file selected C:ECOBSPET.200 SIMATIC S5 / COM ET 200 Configuring ------------------------------------------------------------------------------- Station number: Area: P Station type: WINbloc 16DO eco Station name: ECO 16 DO Next available address Configuration: Area address (Shift F6: DP-Slave - Parameterization frame) ¦...
- Page 97 05/01 AWB2700-1384GB Siemens-Control System (DOS) 32 DO eco Program file selected C:ECOBSPET.200 SIMATIC S5 / COM ET 200 Configuring ------------------------------------------------------------------------------- Station number: Area: P Station type: WINbloc 32DO eco Station name: ECO 32 DO Next available address Configuration: Area address (Shift F6: DP-Slave - Parameterization frame) ¦...
- Page 98 05/01 AWB2700-1384GB Master Operation Mode 16 DI/16 DO eco Program file selected C:ECOBSPET.200 SIMATIC S5 / COM ET 200 Configuring ------------------------------------------------------------------------------- Station number: Area: P Station type: WINbloc 16 I/O eco Station name: ECO 16 DI 16 DO Next available address Configuration: Area address (Shift F6: DP-Slave - Parameterization frame)
-
Page 99: Siemens-Control System (Windows)
05/01 AWB2700-1384GB Siemens-Control System (Windows) Siemens-Control System Example for Coupling with a Siemens Control System (Windows) (IM 308 C and COM ET 200 Windows-Software) To use the type-specific COM files for the S5 IM308C Comet V2.x, they must be located in the TYPDAT5X directory of the PU (e.g. C:\COMWIN21\TYPDAT5X). -
Page 100: Example Configuration
05/01 AWB2700-1384GB Master Operation Mode Example Configuration The diagnostic functions are also described in the Siemens manual for the software package COM ET 200 Windows. For more precise information about the slave-specific diagnostics of WIN bloc eco manual, chapter 8. the individual modules, see Diagnosis. -
Page 101: Error Diagnosis Im 308-B/C
05/01 AWB2700-1384GB Error Diagnosis IM 308-B/C Error Diagnosis IM 308-B/C Error Diagnosis (Station Diagnosis) for Operation with IM 308-B/C Composition: Station Diagnosis station diagnosis, 16 bytes are reserved for each slave station. The 16 bytes are organised in 8 words. To avoid misunderstandings, the 2 diagnosis bytes of the diagnosis word are labelled below with „Diagnosis address"... -
Page 102: Error Diagnosis Im 308-B
05/01 AWB2700-1384GB Master Operation Mode Error Diagnosis IM 308-B Error Diagnosis (Station Diagnosis) for Operation with IM 308-B Composition: Diagnosis-word header and device diagnosis The diagnosis word has the following composition after the device diagnosis (code = 3) has been requested by digital modules: Figure 35: Composition of the diagnosis-word „header and device diagnosis"... - Page 103 05/01 AWB2700-1384GB Error Diagnosis IM 308-B In an installation a PLC start-up problem occured when the installation was switched off via the main switch. The PLC did not restart because an acknowledge delay occured that is programmed by the master interface module IM 308B. This acknowledge delay is important in order to avoid a certain state in the installation when a slave fails when no cyclic monitoring of the IM 308B has been programmed.
-
Page 104: Coupling With A Siemens S7 Controller
05/01 AWB2700-1384GB Master Operation Mode Coupling with a Siemens S7 To use the type-specific com files for the S7 from Version 2.0 Controller onwards, they must be copied into the following directory: STEP7_V2\S7DATA\TYPDATEI. S7 Version 1.x and the NCM for the communication processor CP 342-5 DP use GSD files. -
Page 105: Diagnostic Possibilities With S7 And Pb Dp
05/01 AWB2700-1384GB Diagnostic Possibilities with S7 and PB DP Diagnostic Possibilities with On-line Diagnosis Using Step 7 Version 3.1 S7 and PB DP From Step 7 Version 3.1 onwards, it is possible to perform on-line diagnosis on the decentralised periphery via the PB master (see the following example of a S7 300 with the CPU 315-2 DP. - Page 106 05/01 AWB2700-1384GB Master Operation Mode With the selected project planning, two of the five available WINbloc slaves report a diagnosis error. By double-clicking on the red error icon, the module information of the relevant slave is displayed with the error message in plain text: WIN bloc 8 DO: Field Voltage missing WIN bloc PT100:...
- Page 107 The slave address and the catalogue number are displayed in the GENERAL folder so that the slave can be clearly identified. A pre-condition for the plain-text diagnosis of the Moeller DP slaves is that the GSD files are located in the STEP7\S7DATA\GSD\ directory.
-
Page 108: Diagnosis In The Step 7 Program Using The Dp Diagnosis Module Sfc
05/01 AWB2700-1384GB Master Operation Mode If the type files 6.0 are used, the following diagnosis is displayed: Diagnosis in the Step 7 Program Using the DP Diagnosis Module SFC 13 Sample Program The following represents a sample program that is used to call the SFC 13 (DPNRM_DG) and to store the diagnostic data of a DP slave in data block 100 from data word 2 onwards. - Page 109 05/01 AWB2700-1384GB Diagnostic Possibilities with S7 and PB DP...
- Page 110 05/01 AWB2700-1384GB Master Operation Mode The address for the diagnosis of the slave that is to be entered in data block 100 in data word 0 as in the example, can be taken from the hardware configuration: In the example, this is the diagnostic address 1018. Variable table for reading out the diagnostic data and entering the diagnostic address A variable table can be used to display the contents of DB 100 and...
- Page 111 05/01 AWB2700-1384GB Diagnostic Possibilities with S7 and PB DP Example of a variable table for the DP diagnosis with output via the DB 100...
-
Page 112: The Step7 On-Line Help Software
05/01 AWB2700-1384GB Master Operation Mode The Step7 On-line Help Software The Step7 online help software describes the SFC (DP NRM_DG). Description With SFC 13 „DPNRM_DG" (read diagnosis data of a DP slave), you can read the current diagnostic data of a DP slave in the form that is defined in EN 50 170 Volume 2, Profibus. - Page 113 05/01 AWB2700-1384GB Diagnostic Possibilities with S7 and PB DP Parameter Declaration Data Type Memory Description Location INPUT INPUT E, A, M, D, L, REQ = 1: reading request Konst LADDR INPUT WORD E, A, M, D, L, Configured diagnostic address of Konst the DP slave RET_VAL...
- Page 114 05/01 AWB2700-1384GB Master Operation Mode RECORD Input Parameter The CPU evaluates the actual length of the read diagnostic data: If the length of RECORD is ess than the number of returned data sets, the data is rejected and the associated error code is entered in RET_VAL. greater than or equal to the number of the returned data sets, the data is loaded into the target area and the actual length is entered as a positive value in RET_VAL.
- Page 115 05/01 AWB2700-1384GB Diagnostic Possibilities with S7 and PB DP System Resources for S7-400 When SFC 13 „DPNRM_DG" is called for a task that has not yet been processed, S7 reserves the resources (memory space) of the CPU. The SFC 13 can be called for several DP slaves one after the other, as long as the maximum number of simultaneously active SFC 13 tasks for your CPU is not exceeded.
- Page 116 05/01 AWB2700-1384GB Master Operation Mode The following table contains all specific error information for SFCs 65 to 74 Error code Explanations (general) Explanations (SFC-specific) (W#16#) 0000 Processing was completed SFC 69 „X_ABORT" and SFC 74 correctetly. „I_ABORT":REQ = 1, and the specified connection is not established.
- Page 117 05/01 AWB2700-1384GB Diagnostic Possibilities with S7 and PB DP Error code Explanations (general) Explanations (SFC-specific) 8092 Error at SD or RD, z.g. the SFC 65 „X_SEND", z.g. adressing of the local data area is * invalid length of SD not valid * SD = NIL is invalid SFC 66 „X_RCV", z.g.
- Page 118 05/01 AWB2700-1384GB Master Operation Mode Error code Explanations (general) Explanations (SFC-specific) 80B2 HW-error: module not available This is possible with SFC 67 „X_GET“ and * the configured slot is not SFC 68 allocated. „X_PUT“ and SFC 72 „I_GET“ and SFC 73 * actual module type is not the „I_PUT“...
- Page 119 05/01 AWB2700-1384GB Diagnostic Possibilities with S7 and PB DP Error code Explanations (general) Explanations (SFC-specific) 80C0 The specified connection is already allocated by another task. 80C1 Resource bottleneck at the CPU on which the SFC is running, e.g. * the maximum number of different send requests is already being processed.
- Page 120 05/01 AWB2700-1384GB...
-
Page 121: 10 Technical Data
05/01 AWB2700-1384GB 10 Technical Data The Modules Input Modules WIN bloc eco is available as a 16- channel or 32-channel input module with positive switching input. The base element is available in various connection levels. 2- and 3-wire can be chosen, so that 3-wire initiators can be connected potential-bound. -
Page 122: Labeling
05/01 AWB2700-1384GB Technical Data Labeling WIN bloc eco modules can be individually labelled. Labelling is achieved by pushing a label into the lid. Input Modules 16-Channel Digital Input, Positive Switching ZSBE-1.5/25-S/PE-+ ZSBE-1.5/25-S/PE-+ With one supply for each group of 8 inputs The supplies of both groups, each with 8 inputs, can be cross-connected... - Page 123 05/01 AWB2700-1384GB Input Modules ZSBE-1.5/25-S/-/PE+ ZSBE-1.5/25-S/-/PE+ With one supply for each group of 8 inputs The supplies of both groups, each with 8 inputs, can be cross-connected...
- Page 124 05/01 AWB2700-1384GB Technical Data Technical Data Electronics module DP16DI/P-ECO Operating voltage (U 24 V DC Permissible range 18 to 30 V DC Indication LED green „RUN“ Operating current (I 70 mA Potential separation to field bus 500 V /min Inputs (Number) Status ’1’...
- Page 125 05/01 AWB2700-1384GB Input Modules Base element Measurement data VDE 0611 Part 1/8.92/IEC 947-7-1/ 1989 Rated voltage/current/cross section 250 V/17,5 A/1,5 mm Rated surge voltage/contamination class 4 kV/3 Connection technology in TOP construction tension clamp Connection technology 2-, 3-wire Wire strip length 8 mm Crimpable wire -max.
-
Page 126: 32-Channel Digital Input, Positive Switching
05/01 AWB2700-1384GB Technical Data 32-Channel Digital Input, Positive Switching ZSBE-1.5/25-S/S/+-+/PE+ ZSBE-1.5/25-S/S/+-+/PE+ With one supply for each group of 8 inputs The supplies of the four groups, each with 8 inputs,... - Page 127 05/01 AWB2700-1384GB Input Modules ZSBE-1.5/25-2S/-/PE-/2+ ZSBE-1.5/25-2S/-/PE-/2+ With one supply for each group of 8 inputs The supplies of the four groups, each with 8 inputs,...
- Page 128 05/01 AWB2700-1384GB Technical Data Technical Data Electronics module DP-32DI/P-ECO Operating voltage (U 24 V DC Permissible range 18 to 30 V DC Indication LED green „RUN“ Operating current (I 70 mA Potential separation to field bus 500 V /min Inputs (Number) 32 (4x8) Status ’1’...
- Page 129 05/01 AWB2700-1384GB Input Modules Base element Measurement data VDE 0611 Part 1/8.92/IEC 947-7-1/ 1989 Rated voltage/current/cross section 250 V/17,5 A/1,5 mm Rated surge voltage/contamination class 4 kV/3 Connection technology in TOP construction tension clamp Connection technology 2-, 3-wire Wire strip length 8 mm Crimpable wire -max.
-
Page 130: Output Modules
05/01 AWB2700-1384GB Technical Data Output Modules 16-Channel Digital Output, Positive Switching, Short-circuit Proof, Byte-by-Byte Field Voltage Supply ZSBE-1.5/25-S/PE- ZSBE-1.5/25-S/PE- With one supply for each group of 8 outputs The supplies can be cross-connected using a ZQV... - Page 131 05/01 AWB2700-1384GB Output Modules Technical Data Electronics module DP-16DO/0.5A-PK-ECO Operating voltage (U 24 V DC Permissible range 18 to 30 V DC Indication LED green „RUN" Operating current (I 70 mA Field voltage 24 V DC Permissible range 18 to 30 V DC Indication LEDs green „U ", „U...
- Page 132 05/01 AWB2700-1384GB Technical Data Burst 2 kV acc. to EN 61000-4-4 communication interfaces 2 kV, acc. to IEC 801-4 HF unsymmetrical 10 V acc. to ENV 50141, interference output acc. to EN 50081-2, requirements acc. to EN 55011, group 1, class A. For use in living areas (living, business and commercial areas, small business) an individual authorization is required...
-
Page 133: 32-Channel Digital Output, Positive Switching, Short-Circuit Proof, Byte-By-Byte Field Voltage Supply
05/01 AWB2700-1384GB Output Modules 32-Channel Digital Output, Positive Switching, Short-circuit Proof, Byte-by-Byte Field Voltage Supply ZSBE-1.5/25-S/S/+-/PE- ZSBE-1.5/25-S/S/+-/PE- With one supply for each group of 8 outputs The supplies of the four groups, each with 8 outputs, can be cross-connected... - Page 134 05/01 AWB2700-1384GB Technical Data Technical Data Electronics module DP-32DO/0.5A-PK-ECO Operating voltage (U 24 V DC Permissible range 18 to 30 V DC Indication LED green „RUN“ Operating current (I 70 mA Field voltage 24 V DC Permissible range 18 to 30 V DC Indication LEDs green „U ", „U...
- Page 135 05/01 AWB2700-1384GB Output Modules HF unsymmetrical 10 V acc. to ENV 50141, interference output acc. to EN 50081-2, requirements acc. to EN 55011, group 1, class A. For use in living areas (living, business and commercial areas, small business) an individual authorization is required International protection class IP 20 (DIN 40050/IEC 144)
-
Page 136: Combi Modules
05/01 AWB2700-1384GB Technical Data Combi Modules Combi Modul 16-Channel DI, 16-Channel DO, Digital Input/ Output, Positive Switching, Short-circuit Proof, Byte-by- Byte Field Voltage Supply ZSBE-1.5/25-S/S/-/PE-/+ ZSBE-1.5/25-S/S/-/PE-/+ With one 24 Vdc supply per input/output group The supplies of the output groups can be cross- (each with 8 channels) connected (via ZQV). - Page 137 05/01 AWB2700-1384GB Combi Modules Technical Data Electronics module DP-16DI-P/16DO/0.5A-PK-ECO Operating voltage (U 24 V DC Permissible range 18 to 30 V DC Indication LED green „RUN“ Operating current (I 70 mA Field voltage 24 V DC Permissible range 18 to 30 V DC Indication LEDs green „U ", „U...
- Page 138 05/01 AWB2700-1384GB Technical Data Static electricity 8 kV air discharge, 6 kV relay discharge acc. to EN 61000-4-2 Electromagnetic fields 10 V/m acc. to ENV 50140 Burst 2 kV acc. to EN 61000-4-4 communication interfaces 2 kV, acc. to IEC 801-4 HF unsymmetrical 10 V acc.
-
Page 139: Win Bloc Accessories
05/01 AWB2700-1384GB WIN bloc Accessories Designation Type Polyester label for ZSZE Electronics WIN BLOC-ECO-16- WS-LED-LR 16/32 DI/P 2x16 white 16/32 DO 0.5 A PK WIN BLOC-ECO-16-RT-LED-OR WIN BLOC-ECO-16 GR-LED-LR 16 DI 16 DO 0.5 A PK grey Potential distributor KSW-2,5-(1-16) KSW-2,5-(17-32) KSW-2,5-(33-48) Cross connection... - Page 140 05/01 AWB2700-1384GB Designation Type PROFIBUS DP Repeater for PROFIBUS DP and PB-EG4-REPEATER FMS to 1,5 MBit PROFIBUS LWL-Converter DP-OZD-PROFI-3 DP-OZD-PROFI-P4 Installation material Screwdriver for tension-clamp connection XN-ZBW2 Screwdriver for address setting SCRW-DRIVER/ADR. Insulation stripping tool for data cable (additional accessories are available in the Main Catalogue) Sheath stripping tool AM12...
-
Page 141: 12 Appendix
05/01 AWB2700-1384GB 12 Appendix Glossary acknowledge Acknowledge of a received signal. active metal component Conductor or conducting component that has a voltage during operation. address Number to identify, e.g. a memory position, a system, a module within a network. addressing Allocation or setting of an address, e.g. - Page 142 05/01 AWB2700-1384GB Appendix bus system All units together that communicate with each other via the bus. Central Processing Unit -Calculation and control unit. D-type connector 9-pin connector for connecting the field bus to the I/O-stations. digital A value (e.g. a voltage) that is represented by a state normally „0“...
- Page 143 05/01 AWB2700-1384GB Glossary ground reference Potential of ground in a neutral grounding device. Unlike earth whose potential is always zero, it may have any potential except zero. Input/output. inactive metal components Conductive components that cannot be touched and are electrically separated from active metal components by insulation but can adopt voltage in the event of a fault.
- Page 144 05/01 AWB2700-1384GB Appendix external conductive bodies via an electrical connection. potential linked Electrical connection of the reference potential of control and load circuits in I/O-modules. protective conductor A necessary conductor for the protection against dangerous currents, connection is made by the PE (protective earth).
- Page 145 Connection of an electricity- conducting component with the grounding connection via a grounding installation. uni-directional Working in one way. WIN bloc Range of Moeller intelligent modular field bus terminals.
- Page 146 05/01 AWB2700-1384GB...
- Page 147 05/01 AWB2700-1384GB Index Numerics 16 DI / 16 DO ............51 16-channel digital input ........39 16-channel digital output ........47 32-channel digital input ........43 32-channel digital output ........49 address range ............78 address switches ..........77 addressing ............77 base modules ............19 baud rate ............18 block diagram .............60 bus connection ........24, 32, 73 cable lengths ............18...
- Page 148 05/01 AWB2700-1384GB Index digital output ............13 dimensions ............14 direct wiring ............35 direct wiring ............32 dismounting ............53 electronics modules ..........75 electronics modules ..........19 EMC ..............63 EMC suitable cabinet installation ......65 EMC suitable wiring ..........62 galvanic coupling ..........62 general safety instructions ........5 general wiring notes ...........70 grounding of inactive metal components .....63 GSD file ...............86...
- Page 149 05/01 AWB2700-1384GB PE connection (ground) .........24, 64 potential compensation ........67 potential distribution ...........34 potential error sources .........62 potential relationships .........59 power supply ............24 project planning ..........13 radiation coupling ..........63 scope of configuration .........61 shielding of cables ..........66 status indicators ..........79 suggestion for coding ..........28 switching cabinet installation ......55 system description ..........60...
- Page 150 05/01 AWB2700-1384GB...
- Page 151 Moeller GmbH Industrial Automation Hein-Moeller-Str. 7 –11 D-53115 Bonn E-Mail: info @ moeller.net Internet: www.moeller.net © 2001 by Moeller GmbH Subject to alteration. AWB2700-1384GB MEX/Ki 05/01 Printed in the Federal Republic of Germany (05/01) Article No.: 223164...
Need help?
Do you have a question about the WINbloc eco PROFIBUS-DP Series and is the answer not in the manual?
Questions and answers