Table of Contents
Advertisement
Available languages
Available languages
3.35 M / 11 FT Solar LED
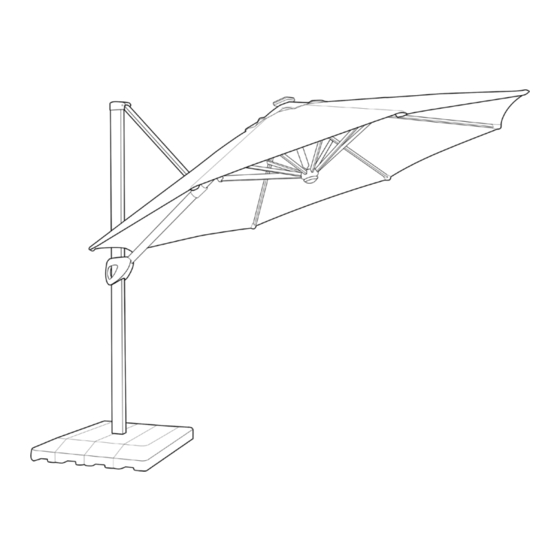
Cantilever Umbrella
with Base
Assembly, Care & Use Manual
ITM. / ART. 1900675, 1237133, 1900766, 9636963
Model: # UMB-956815, UMB-956815OC
IMPORTANT: RETAIN FOR FUTURE REFERENCE
READ CAREFULLY
For assistance with use, parts, or customer service, please contact:
ATLeisure, LLC
US Toll Free 1-855-880-7205 (English)
Canada Toll Free 1-888-692-1033 (French)
8:00am - 5:00pm, Monday through Friday, Eastern Standard Time
www.atleisure.com · Email: customerservice@atleisure.com
DO NOT RETURN TO STORE
For outdoor domestic use only. Not for commercial use.
Designed in USA
Made in China
E
Advertisement
Chapters
Table of Contents

Related Manuals for Seasons Sentry UMB-956815


Summary of Contents for Seasons Sentry UMB-956815
- Page 1 3.35 M / 11 FT Solar LED Cantilever Umbrella with Base Assembly, Care & Use Manual ITM. / ART. 1900675, 1237133, 1900766, 9636963 Model: # UMB-956815, UMB-956815OC IMPORTANT: RETAIN FOR FUTURE REFERENCE READ CAREFULLY For assistance with use, parts, or customer service, please contact: ATLeisure, LLC...
-
Page 2: Table Of Contents
Contents Preparation . . . . . . . . . . . . . . . . . . . . . . . . . . . . . . . . . . . . 2 Tools Required for Assembly (not included) . -
Page 3: Tools Required For Assembly (Not Included)
Tools Required for Assembly (not included) Picture Description Quantity Adjustable Wrench Hardware Contents Part Picture Description Quantity Outer Hex Bolt M10-1.5x20 A2-70 Flat Washer M10 A2-70 Inner Hex Bolt M8 A2-70 Inner Hexagon Wrench M8 Package Contents Part Description Quantity Blow Molded Base Outside Blow Molded Base Inside Lower Cross Leg... -
Page 4: Assembly Instructions
Assembly Instructions CAUTION: Do not use sharp tools or equipment such as a knife or scissors when removing the protective material, as it may damage the product. Be careful not to throw away small parts such as bolts, washers, etc. that may be wrapped in the protective materials. - Page 5 Assembly Instructions (cont.) Step 4: Insert plug into socket under solar panel as shown above. Step 5. Put solar panel on top of umbrella and hide the plug and wire inside the cavity at top. Then turn the solar panel clockwise.
-
Page 6: Operation Instructions
Assembly Instructions (cont.) CAUTION: An additional person is suggested to assist with inserting the umbrella into the pole holder. Step 7: Insert Umbrella Frame with Canopy (N) onto Holder Pole (F). At the same time, slide holder pole collar onto holder pole. Tighten two Hex Bolts (JJ) into holder pole to secure the umbrella using the hexagon wrench. - Page 7 Operation Instructions (cont.) 360° Step 3: The canopy can be rotated 360˚. To rotate umbrella, insert crank handle (E) onto holder pole (F) and turn the crank handle to the desired position. Example of Canopy Movement Using 360˚ Rotation...
- Page 8 Operation Instructions (cont.) Crank Close Open Glide Handle L ever clamp Grip Step 4: To close umbrella, turn crank handle counter-clockwise until canopy is fully closed. Squeeze glide handle and grip together, then slide it down pole and release grip to lock it in place.
-
Page 9: Lighting Operation & Battery Replacement
Lighting Operation & Battery Replacement (cont.) CAUTION: YOU MUST CHARGE THE BATTERY BEFORE FIRST USE. Please note that battery can lose charge if left unused or uncharged for a long period of time. Failure to charge the battery will result in premature dimming of the lights in your new solar umbrella. Make sure the light switch is in the off position when charging the solar panel. -
Page 10: Battery Disposal
Battery Disposal • Battery should be recycled or disposed of as per state and local guidelines. • Do not open battery or try to replace battery by yourself. • Do not dispose of batteries in fire. • Keep battery (batteries) out of reach of children Care and Maintenance See the enclosed Sunbrella®... -
Page 11: Warranty
Warranty This product is covered under a manufacturer’s 2-year warranty from date of purchase against defects in materials and workmanship. This warranty does not cover damage due to neglect, abuse or weather related damage. For full warranty disclosure, email us at customerservice@atleisure.com, call toll free at 1-855-880-7205 English) or 1-888-692-1033 (French) or send mail to: Atleisure, LLC... -
Page 12: Replacement Parts
Replacement Parts For replacement parts, call our customer service department at 1-855-880-7205 English) or 1-888-692-1033 (French) 8:00am to 5:00pm., EST, Monday through Friday. Part Description Quantity Re-order No. Blow Molded Base Outside BSE-ABMP-11-BWN-T-C2 Blow Molded Base Inside BSE-BBMP-11-BWN-T-C2 Lower Cross Leg CSL-C78RX-BWN-T-C2 Canopy CAN-1108RBS-T-T2-C2... - Page 13 Imported by / Importé par : Importado por : Distributed by: Imported by : Costco Wholesale Canada Ltd.* Importadora Primex S.A. de C.V. Costco Wholesale Corporation Costco Wholesale Australia Pty Ltd 415 W. Hunt Club Road Blvd. Magnocentro No. 4 P .O.
- Page 14 DEL, et base Manuel d’assemblage, d’entretien et d’utilisation ART. 1900675, 1237133, 1900766, 9636963 No de modèle: # UMB-956815, UMB-956815OC IMPORTANT : LIRE ATTENTIVEMENT ET CONSERVER POUR CONSULTATION ULTÉRIEURE. Pour obtenir de l’aide concernant l’utilisation et les pièces ou pour joindre le service à la clientèle :...
-
Page 15: Préparation
Table des matières Préparation . . . . . . . . . . . . . . . . . . . . . . . . . . . . . . . . . . . 15 Outils requis pour l’assemblage (non fournis) . -
Page 16: Outils Requis Pour L'assemblage (Non Fournis)
Outils requis pour l’assemblage (non fournis) Image Description Quantité Clé à molette Quincaillerie Pièce Image Description Quantité Extérieur vis hexagonale M10, 1,5 x 20 mm, A2-70 Rondelle plate M10, A2-70 Intérieur vis hexagonale M8, A2-70 Intérieur clé hexagonale M8 Contenu de l’emballage Pièce Description Quantité... -
Page 17: Instructions D'assemblage
Instructions d’assemblage ATTENTION : Pour éviter d’abîmer le produit, ne pas utiliser d’outils ou d’objets tranchants tels qu’un couteau ou des ciseaux pour retirer le matériel de protection. De plus, avant de jeter le matériel de protection, s’assurer qu’aucune petite pièce comme les vis ou les rondelles ne s’y trouvent. - Page 18 Instructions d’assemblage (suite) Étape 4 : Brancher la fiche dans la prise sous le panneau solaire, comme illustré ci-dessus. Étape 5 : Placer le panneau solaire au sommet du parasol, puis dissimuler la fiche et le fil dans la cavité. Visser le panneau dans le sens horaire, sans trop serrer. Étape 6 : Retirer la batterie (G) de la boîte d’accessoires.
-
Page 19: Instructions D'utilisation
Instructions d’assemblage (suite) MISE EN GARDE : Il est recommandé de demander l’aide d’une autre personne pour insérer le parasol dans le socle. Étape 7 : Insérer le châssis du parasol (N) dans le socle (F) tout en faisant glisser la bague sur le mât. - Page 20 Instructions d’utilisation (suite) 360° Étape 3 : La toile peut pivoter sur 360°. Pour ce faire, insérer la manivelle (E) dans le socle (F), puis tourner à la position désirée. Exemple de rotation sur 360° de la toile...
- Page 21 Instructions d’utilisation (suite) Manivelle Fermer Ouvrir Poignée coulissante Prise Étape 4 : Pour fermer le parasol, tourner la manivelle dans le sens antihoraire jusqu’à ce que la toile soit complètement repliée. Serrer la poignée et la prise, faire glisser jusqu’au bas du mât, puis relâcher la prise pour bloquer la position. Attacher les cour- roies de rangement autour de la toile.
-
Page 22: Utilisation De L'éclairage Et Remplacement De La Batterie
Utilisation de l’éclairage et remplacement de la batterie (suite) ATTENTION : CHARGER LA BATTERIE AVANT LA PREMIÈRE UTILISATION. La batterie peut se décharger si elle n’est pas utilisée ou chargée pendant une longue période. Si la batterie n’est pas chargée, l’intensité de l’éclairage pourrait faiblir prématurément. -
Page 23: Mise Au Rebut De La Batterie
Mise au rebut de la batterie • Jeter la batterie conformément aux règlements de recyclage ou d’élimination applicables. • Ne pas ouvrir la batterie ni la remplacer soi-même. • Ne pas démonter ou écraser la batterie ni la jeter au feu. •... -
Page 24: Garantie
Garantie Ce produit est assorti d’une garantie du fabricant de deux ans à compter de la date d’achat. Elle couvre tout défaut de matériaux et de fabrication, mais exclut les dommages causés par une négligence, une utilisation abusive ou les conditions météorologiques. -
Page 25: Pièces De Rechange
Pièces de rechange Pour obtenir des pièces de rechange, appeler le service à la clientèle au 1-855-880-7205 (en anglais) ou au 1-888-692-1033 (en français), entre 8 h et 17 h (HE), du lundi au vendre- Pièce Description Quantité No de commande Cadre de la base moulée par soufflage BSE-ABMP-11-BWN-T-C2 Intérieur de la base moulée par soufflage... - Page 26 Imported by / Importé par : Importado por : Distributed by: Imported by : Costco Wholesale Canada Ltd.* Importadora Primex S.A. de C.V. Costco Wholesale Corporation Costco Wholesale Australia Pty Ltd 415 W. Hunt Club Road Blvd. Magnocentro No. 4 P .O.
- Page 27 LED solar Manual de montaje, mantenimiento y uso ART. 1900675, 1237133, 1900766, 9636963 Modelo: # UMB-956815, UMB-956815OC IMPORTANTE: CONSERVAR PARA CONSULTA POSTERIOR. LEER ATENTAMENTE. Para asistencia sobre el uso o las piezas o para comunicarse con el servicio de atención al...
-
Page 28: Preparación
Índice Preparación . . . . . . . . . . . . . . . . . . . . . . . . . . . . . . . . . . . 28 Herramientas necesarias para el montaje (no incluidas) 29 Materiales y contenido del paquete . -
Page 29: Herramientas Necesarias Para El Montaje (No Incluidas)
Herramientas necesarias para el montaje (no incluidas): Imagen Descripción Cantidad Llave inglesa Materiales incluidos Pieza Imagen Descripción Cantidad Exterior pernos hexagonales M10- 1.5x20 A2-70 Arandelas planas M10 A2-70 Interior pernos hexagonales M8 A2-70 Interior llave hexagonal M8 Contenido del paquete Pieza Descripción Cantidad... -
Page 30: Instrucciones De Montaje
Instrucciones de montaje ATENCIÓN: No use herramientas punzantes u objetos como un cuchillo o tijeras para retirar el material protector, porque podría dañar el producto. Tenga cuidado de no desechar las piezas pequeñas como los pernos, arandelas, etc. que podrían estar envueltas en el material protector. - Page 31 Instrucciones de montaje (cont.) Paso 4: Introduzca el enchufe en la toma que se encuentra debajo del panel solar, como se muestra arriba. Paso 5: Coloque el panel solar en la parte superior de la sombrilla e inserte el enchufe y el cable a través del orificio de la parte superior. Gire el panel solar hacia la derecha sin apretar demasiado.
-
Page 32: Instrucciones De Uso
Instrucciones de montaje (cont.) ATENCIÓN: Se recomienda insertar la som-brilla en el soporte del poste entre dos perso-nas. Paso 7: Inserte el marco de la sombrilla con toldo (N) en el poste de sostén (F). Al mismo tiempo, deslice la abrazadera del poste de sostén en el poste de sostén. Usando una llave hexagonal, apriete los dos pernos hexagonales (JJ) en el poste de sostén para afianzar la sombrilla. - Page 33 Instrucciones de uso (cont.) 360° Paso 3: El toldo puede ser girado en 360º. Para girar la sombrilla, inserte la manive- la (E) en el poste de sostén (F) y gírela hasta obtener la posición deseada. Ejemplo de movimien- to del toldo usando la rotación de 360˚...
- Page 34 Instrucciones de uso (cont.) Manivela Cerrar Abrir Mango deslizante Empuñadura Paso 4: Para cerrar la sombrilla, gire la manivela hacia la izquierda hasta que el toldo esté completamente cerrado. Apriete el mango deslizante junto con la empuñadora, deslice el poste hacia abajo y suelte la empuñadora para fijarla en su lugar. Ajuste las correas de almacenamiento alrededor del toldo.
-
Page 35: Operación De Las Luces Y Reemplazo De La Batería
Operación de las luces y reemplazo de la batería (cont.) PRECAUCIÓN: USTED DEBE CARGAR LA BATERÍA ANTES DEL PRIMER USO. Tenga en cuenta que la batería puede descargarse si se deja sin usar o sin cargar durante un largo periodo de tiempo. El no cargar la batería ocasionará la atenuación prematura de las luces en su sombrilla solar nueva. -
Page 36: Eliminación De La Batería
Eliminación de la batería • Deseche la(s) batería(s) de acuerdo a las regulaciones locales y estatales de reciclaje o residuos. • No desarme, aplaste o deseche la(s) batería(s) en el fuego. • No abra la batería. No abra la batería ni la reemplace usted mismo. •... -
Page 37: Garantía
Garantía Este producto está cubierto por una garantía del fabricante de 2 años, a partir de la fecha de compra, contra defectos en los materiales y la mano de obra. Esta garantía no cubre los daños causados por la negligencia, el maltrato o el mal tiempo. Para la versión completa de la garantía, envíe un correo electrónico a customerservice@atle- isure.com, llame de manera gratuita al 1 855-880-7205 (inglés) o al 1-888-692-1033 (francés) o envíe un correo postal a:... -
Page 38: Piezas De Repuesto
Piezas de repuesto Para solicitar piezas de repuesto, llame a nuestro servicio de atención al cliente al 1-855-880-7205 (inglés) o al 1-888-692-1033 (francés), de lunes a viernes de 8:00 a.m. a 5:00 p.m. hora del Este. Pieza Descripción Cantidad N.o de referencia Exterior de la base moldeada por soplado BSE-ABMP-11-BWN-T-C2 Interior de la base moldeada por soplado... - Page 39 Imported by / Importé par : Importado por : Distributed by: Imported by : Costco Wholesale Canada Ltd.* Importadora Primex S.A. de C.V. Costco Wholesale Corporation Costco Wholesale Australia Pty Ltd 415 W. Hunt Club Road Blvd. Magnocentro No. 4 P .O.
Need help?
Do you have a question about the UMB-956815 and is the answer not in the manual?
Questions and answers
Need molded screw caps for umbrella base by sentry season’s cantilever umbrella
The manual does not provide specific information about where to find molded screw caps for the Seasons Sentry UMB-956815 cantilever umbrella base. For assistance with parts, you should contact ATLeisure customer service.
This answer is automatically generated
Need replacement for both crank handles E and N2
To find replacement crank handles E and N2 for Seasons Sentry part number UMB-956815, refer to the part numbers:
- Crank Handle E (360˚ Crank Handle): Part No. CRK-E78RHP-BWN-T-C2
- Crank Handle N2 is not listed in the provided context.
You can contact the customer service department at 1-855-880-7205 (English) or 1-888-692-1033 (French), Monday to Friday, 8:00 am to 5:00 pm EST, to order available replacement parts.
This answer is automatically generated
how to order replacement parts
@WADE KEMPTON
Hi Team, my umbrella lights are no longer working, and I think the battery has gone bad. Can you advise how I can order a new one? (SOL-G-RBP-11-T-C2). Thanks!
Which direction does the pole holder sleeve go? does the small internal edge point down towards the base or up the pole?
The cap for the center light is missing can I get a replacement