Advertisement
Quick Links
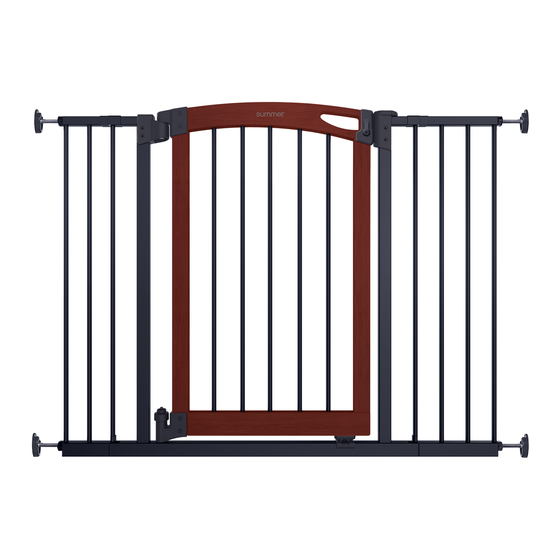
33200
Please read the following instructions carefully.
Keep this instruction manual and
save for future reference.
For technical support, contact us at 1-401-671-6551
or www.summerinfant.com/contact
Tools required: Phillips-head screwdriver,
measuring tape (not included),
and wrench (included).
For use with children from 6 - 24 months.
Keep small parts away from children.
Adult assembly required.
Fits openings from 28" - 42" wide.
Essex Craft™ Safety Gate
USER MANUAL
Advertisement

Related Manuals for Summer Essex Craft 33200


Summary of Contents for Summer Essex Craft 33200
- Page 1 33200 Please read the following instructions carefully. Keep this instruction manual and save for future reference. For technical support, contact us at 1-401-671-6551 or www.summerinfant.com/contact Tools required: Phillips-head screwdriver, measuring tape (not included), and wrench (included). For use with children from 6 - 24 months. Keep small parts away from children.
- Page 2 WARNING Children have died or been seriously injured when gates are not securely installed. • ALWAYS install and use gate as directed using all required parts. • Install according to manufacturer’s instructions. • Stop using when a child can climb over or dislodge the gate. •...
- Page 3 gate configurations (choose which best fits your scenario) WARNING Measure the width of the opening where you intend to install the gate. Refer to the following illustrations to determine the correct installation con guration. Baseboard molding may change which con guration is NEVER install two extension appropriate.
-
Page 4: Installation
installation • If choosing gate con guration A, skip this step. • If choosing gate con guration B or C, add the desired extension frame to either side of the gate frame. • If choosing gate con guration D, add both extensions to the gate frame. Connect the extension frames to gate frame by inserting extension... - Page 5 installation (continued) A. Stand the gate in the center of the opening. Make sure the bottom of the gate is completely flush to the floor. B. Slide tension bolts out until they contact the door frame or wall on both sides. IMPORTANT Check distances A &...
- Page 6 installation (continued) Use the tension nuts to tighten both of the bottom tension bolts. Use the tension nuts to tighten both of the top tension bolts.
- Page 7 STOP! wall cup/top of stairs installation WARNING Follow these wall cup installation instructions when using gate at TOP OF STAIRS (MANDATORY), or if using wall cups for a standard opening (optional). If opting not to use wall cups for a standard opening, skip ahead to step 9. For use at top of stairs, wall cup installation is MANDATORY.
- Page 8 wall cup/top of stairs installation (continued) Place a wall cup over the center of each circular outline on the wall. Mark drill holes with a pencil through the center of each wall cup. Note: If mounting directly into wood, skip this step.
- Page 9 wall cup/top of stairs installation (continued) Remove backing Remove backing. from one side of each adhesive mounting pad. Attach one pad to the back of each wall cup. Align the wall cups so the center hole is placed directly over the wall anchor.
- Page 10 wall cup/top of stairs installation (continued) Screw wall cups into wall. Repeat "installation" steps on page 5. The 4 tension bolts will rest within each wall cup.
- Page 11 wall cup/top of stairs installation (continued) Tighten all 4 tension nuts with the provided wrench. FINISHED!
- Page 12 gate stopper Note: This gate includes a gate stopper which prevents the gate door from swinging open in one direction when used at the top of the stairs. When mounting this product at the top of the stairs, locate the door stopper that is on the opposite side of the stairs.
-
Page 13: Testing The Installation
testing the installation Push the gate and frame to check stability. Close the gate. Make sure the upper and lower latches lock securely. operation to unlock gate: hold-open feature: To activate, open First, slide locking tab gate door at least back to release. - Page 14 NOTES Lorem ipsum...
- Page 15 NOTES Lorem ipsum...
-
Page 16: Troubleshooting
If you have any questions or need assistance, contact our Consumer Relations Team at 1-401-671-6551 or www.summerinfant.com/contact Summer Infant (USA), Inc. 1275 Park East Drive Woonsocket, RI 02895 USA Colors and styles may vary. 1-401-671-6551 MADE IN CHINA. © 2019 Summer Infant (USA), Inc. 8/19...
Need help?
Do you have a question about the Essex Craft 33200 and is the answer not in the manual?
Questions and answers