Table of Contents
Advertisement
Quick Links
Advertisement
Table of Contents

Related Manuals for Special Tomato Out & About Seat


Summary of Contents for Special Tomato Out & About Seat
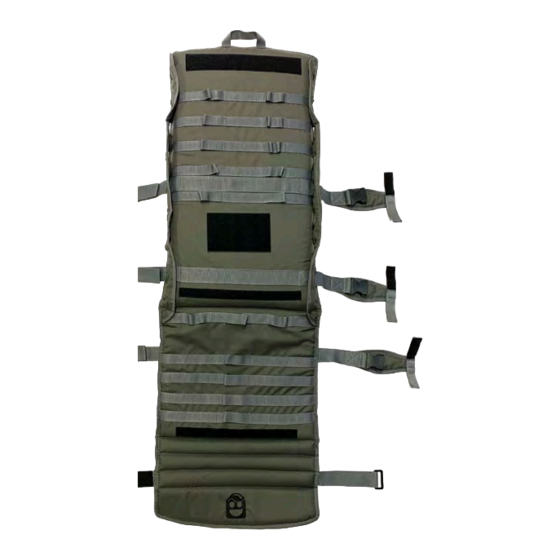
- Page 1 Out & About Seat User Manual Model# Series 66XXXXXX UMOAS01-20LIT...
-
Page 2: Table Of Contents
Table of Contents Intended Use ........................3 Unpacking Your Out & About Seat .................. 5 Assembly........................... 7 Base Fabric and Seat Bight Strap .................. 7 8-Point Positioning Harness System ................8 Fabric Pad ........................10 Optional Seat Liner Cushion ..................11 Optional Back Liner Cushion .................. -
Page 3: Intended Use
Intended Use • The Out & About Seat (OAS) is intended to provide limited upper body postural support for children with disabilities who have the capacity to maintain their own head support. The OAS attaches to a structurally stable seating surface that does not already possess or contain an integrated safety belting system. •... - Page 4 Please read these warnings before using your Out & About Seat. WARNING: AVOID SERIOUS INJURY FROM FALLING OR SLIDING OUT. ALWAYS USE THE OUT & ABOUT SEAT 8-POINT HARNESS. NEVER LEAVE OCCUPANT UNATTENDED. IMPORTANT: READ THESE INSTRUCTIONS CAREFULLY BEFORE USE AND KEEP THEM FOR FUTURE REFERENCE.
-
Page 5: Unpacking Your Out & About Seat
Unpacking Your Out & About Seat Your Out & About Seat should include the following: Base Fabric Back Front Backrest Chair Back Strap Section Seat Bight Strap Chair Seat Strap Seat Section Calf Panel Strap Calf Panel Fabric Pad Winged Headrest Headrest Support Padding Headrest Pad... - Page 6 Unpacking Your Out & About Seat 8-Point Positioning Harness System Shoulder Strap (40” Long) Shoulder Pads (2x) 5-Point Chest Harness Chest Pad (Large & Small) Lower Chest Strap (52” Long) Waist Pads (2x) 3-Point Waist Strap Pelvic Crotch Pad Harness Crotch Strap Optional: Seat and Back Liners NOTE:...
-
Page 7: Assembly
Base Fabric and Seat Bight Strap Assembly What you’ll need for this page: Base Fabric 2. Buckle 1. Place Chair Back Base Fabric on chair. Strap and Seat Bight Strap around back of chair, then tighten. Tip: Coil excess strap and secure with hook- and-loop... -
Page 8: 8-Point Positioning Harness System
8-Point Positioning Harness System Assembly What you’ll need for this page: 3-Pt. Pelvic Harness 5-Pt. Chest Harness 5. Unpack 8-Pt. Harness System. Next, remove Crotch and Waist Pads from 3-Pt. Pelvic Harness and remove Shoulder Pads from 5-Pt Chest Harness as shown. - Page 9 Assembly 8-Point Positioning Harness System What you’ll need for this page: Shoulder Strap (40” Long) Waist Strap Lower Chest Strap (52” Long) 9. Feed Waist Strap through side Harness 10. Continue feeding Waist Strap through the Loop on the Base Fabric Seat Section. Harness Loop on the opposite side of the Base Fabric Seat Section as shown here.
-
Page 10: Fabric Pad
Fabric Pad Assembly What you’ll need for this page: Fabric Pad 14. Feed ends 13. Align hook-and-loop panel at the top of of Shoulder the Fabric Pad with the panel at the top of the Strap, Lower Base Fabric Backrest Section. Chest Strap, Waist Strap, and Crotch... -
Page 11: Optional Seat Liner Cushion
Optional Seat Liner Cushion Assembly What you’ll need for this page: Seat Liner Attachment Strap Seat Liner Cushion If you are not installing the optional Seat and Back Liners, skip to Page 13. 16. First, remove the factory-installed 3-Point Harness from Seat Liner cushion. -
Page 12: Optional Back Liner Cushion
Optional Back Liner Cushion Assembly What you’ll need for this page: Back Liner Cushion Back Liner Attachment Strap 20. Ensure that your Back Liner Attachment Strap is at least 52” long in order to be compatible with the Out & About Seat. 21. -
Page 13: Shoulder, Chest, Waist, & Crotch Pads
Assembly Shoulder, Chest, Waist, & Crotch Pads What you’ll need for this page: Chest Pad Waist Pads (2x) Crotch Pad Shoulder Pads (2x) 23. Slide Shoulder Pads onto Shoulder Straps. 24. Buckle 25. Install Waist Pads and Crotch Pad as Chest Pad shown. -
Page 14: Winged Headrest
Winged Headrest Assembly What you’ll need for this page: Headrest Cushion Headrest Support Pads 26. If desired, attach Headrest Support Pads to Headrest Cushion to adjust depth of Headrest Cushion. Note: Top or bottom Headrest Support Pad can be removed to achieve head extension or head flexion as needed. -
Page 15: 8-Point Positioning Harness Adjustment
8-Point Positioning Harness Adjustment Use this guide to fit the harness to the occupant in order to optimize comfort and safety. Always use shoulder pads to prevent buckles or webbing from contacting the occupant's neck or face. To ensure proper placement of the chest harness, make sure the chest strap lies in the middle of the occupant's chest (armpit level). -
Page 16: Folding For Storage And Transport
Folding for Storage and Transport 1. Unbuckle 2. Drape Chair Back unbuckled Strap, Seat Chair Back Bight Strap, Strap, Seat Chair Seat Bight Strap, Strap, and and Chair Chair Back Calf Panel Seat Strap as Strap Strap. shown. Leave Calf Panel Seat Bight Strap loose. - Page 17 Folding for Storage and Transport (2) 6. Pass Calf Panel Strap through plastic ring as 5. Wrap Calf shown. Panel Strap around the back of Base Fabric. Note: Ensure Calf Panel Strap is fed underneath Backpack Straps, as shown here. 8.
-
Page 18: Washing Instructions
Washing Instructions To prepare Out & About Seat for machine washing, please follow these steps: 1. Remove 2. Remove all Harness Fabric Liner Pads. Pad. 3. Remove 4. Re-install Fabric Liner Pad to Base Fabric. 8-Point Harness from Base Fabric and clip all harness buckles... - Page 19 Washing Instructions (2) Plastic Support 5. Open zipper Frame compartment located at top Internal Foam of Base Fabric to reveal Cushion black Plastic Support Frame and Internal Foam Cushion. First remove the black Plastic Support Frame, then remove the Internal Foam Cushion.
-
Page 20: Warranty & Contact Information
Warranty & Contact Information LIMITED WARRANTY: The Out & About Seat is guaranteed to be free from manufacturing defects for a period of 2 years from the date of purchase. Normal wear-and-tear is not covered. This warranty extends only to the original retail purchaser and is only valid when supplied with proof of purchase.
Need help?
Do you have a question about the Out & About Seat and is the answer not in the manual?
Questions and answers