Table of Contents
Advertisement
Quick Links
IM-P486-05
3.696.5275.210
CH Issue 4
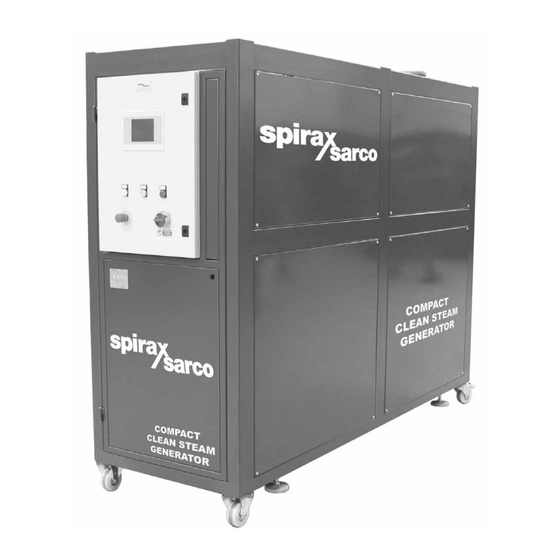
CSM-C (Steam-to-Steam) Compact Clean Steam Generator
Management Installation and Maintenance Instructions
HTM 2031 approved
The PED Directive 97/23/EC is repealed and replaced by the new
PED Directive 2014/68/EU with effect from 19 July 2016.
Printed in the UK
© Copyright 2012
Advertisement
Table of Contents

Related Manuals for Spirax Sarco CSM-C

Summary of Contents for Spirax Sarco CSM-C
- Page 1 IM-P486-05 3.696.5275.210 CH Issue 4 CSM-C (Steam-to-Steam) Compact Clean Steam Generator Management Installation and Maintenance Instructions HTM 2031 approved The PED Directive 97/23/EC is repealed and replaced by the new PED Directive 2014/68/EU with effect from 19 July 2016. Printed in the UK...
- Page 2 ATTENZIONE Lavorare in sicurezza con apparecchiature in ghisa e vapore Working safely with cast iron products on steam Informazioni di sicurezza supplementari - Additional Informations for safety Lavorare in sicurezza con prodotti Working safely with cast iron in ghisa per linee vapore products on steam I prodotti di ghisa sono comunemente presenti Cast iron products are commonly found on steam...
- Page 3 Prevenzione dai colpi d’ariete - Prevention of water hammer Scarico condensa nelle linee vapore - Steam trapping on steam mains: Intervalli di 30÷50 m. intervals Vapore Steam Gruppo di scarico Vapore Gruppo di scarico Trap set Steam Trap set Gruppo di scarico Trap set Condensa - Condasate Condensa - Condasate...
- Page 4 Prevenzione delle sollecitazioni di trazione Prevention of tensile stressing Evitare il disallineamento delle tubazioni - Pipe misalignment: Installazione dei prodotti o loro rimontaggio post-manutenzione: Installing products or re-assembling after maintenance: Evitare l’eccessivo serraggio. Per garantire l’uniformità del carico e dell'allineamento, Utilizzare le coppie di serraggio i bulloni delle flange devono essere serrati in modo raccomandate.
- Page 5 Dilatazioni termiche - Thermal expansion: Gli esempi mostrano l’uso corretto dei compensatori di dilatzione. Si consiglia di richiedere una consulenza specialistica ai tecnici dell’azienda che produce i compensatori di dilatazione. Examples showing the use of expansion bellows. It is highly recommended that expert advise is sought from the bellows manufacturer.
- Page 6 3.696.5275.210...
-
Page 7: Table Of Contents
Installation, Operation and Maintenance Manual Spirax Sarco Clean Steam Generators (CSM-C Series - Compact) Contents Page Contents Page Indices Emergency Shutdown Procedure Safety Information Daily Operation - Steam Generator Responsibility Bottom Blowdown Information Water Quality Controls Feed Water Construction Water Temperature in... -
Page 8: Safety Information
Determine the correct installation situation and direction of fluid flow. iv) Spirax Sarco products are not intended to withstand external stresses that may be induced by any system to which they are fitted. It is the responsibility of the installer to consider these stresses and take adequate precautions to minimise them. - Page 9 Pressure Equipment Directive Classification Spirax Sarco Clean steam generators are classified under table 5 of the pressure equipment directive. Product Group 2 Gases CSM-C 300 Cat 3 CSM-C 600 Cat 3 Other component parts within the package comply with the relevant European directives where necessary, please refer to component literature for further details.
- Page 10 Tools and consumables Before starting work ensure that you have suitable tools and / or consumables available. Use only genuine Spirax Sarco replacement parts. Protective clothing Consider whether you and /or others in the vicinity require any protective clothing to protect against the hazards of, for example, chemicals, high / low temperature, radiation, noise, falling objects, and dangers to eyes and face.
- Page 11 Returning products Customers and stockists are reminded that under EC Health, Safety and Environment Law, when returning products to Spirax Sarco they must provide information on any hazards and the precautions to be taken due to contamination residues or mechanical damage which may present a health, safety or environmental risk.
-
Page 12: Responsibility
Spirax Sarco uses only the highest quality components in building the Compact Series Steam Generators; only in the supply of a full clean steam package will Spirax Sarco assume responsibility for the unit and the clean steam produced. Alternately Spirax Sarco will only be responsible for the products directly supplied. -
Page 13: Controls
Energy and Power Sources for Generating Steam Spirax Sarco Compact Clean Steam Generators can be configured and manufactured to use one (1) of two (2) possible energy sources for generating clean steam: (HTM 2031). Steam: Electricity ∆ Note: Most Spirax Sarco Compact Clean Steam Generators use steam as the energy source for generating clean steam. -
Page 14: Nameplates
∆ These numbers should be included in all correspondence regarding the unit. Insulation All Spirax Sarco Compact Clean Steam Generators have insulation on the feedwater tank, generator shell and pipework. Heat Exchanger The U-Bundle heat exchanger is manufactured with stainless steel AISI 316L tubesheet, the connection piece used to mount the U-bundle in the generator body is also constructed from AISI 316L. -
Page 15: Components
All other components included in CSM-C Steam Generators have been specifically selected to meet the individual design specifications of each unit and HTM 2031. Spirax Sarco has all components to control the steam generators and they are judged to be of the highest quality. - Page 16 Listed on the following pages are specific warnings pertaining to Spirax Sarco Steam Generators. In addition, throughout this manual, warnings are restated when procedures are described pertaining to areas of potential danger. All warnings should be carefully read and understood. All precautions contained in the warnings should be carefully followed to reduce the chance of injury.
-
Page 17: Product Features And Specifications
Installation Transporting and Unpacking the Unit CSM-C Compact Steam Generators are usually shipped uncrated, the units can be lifted by means of a forklist truck, placing the forks on the underside of the frame structure, in a central position thus evenly distributing the units weight and providing a stable, balanced load, refer to Fig. -
Page 18: Mounting The Unit
Preliminary Procedures Spirax Sarco packaged Steam Generators are installed following this simple procedure: 1. Connect the feed water supply to the feed water inlet; 2. Connect the generated clean steam outlet to the clean steam outlet;... -
Page 19: Generated Clean Steam Outlet
Fig. 4 Cold feed water Generated Clean Steam Outlet The next step in the installation process is to connect the generated steam system pipework to the clean steam outlet port. The exact location of this port for the specific unit, as well as outlet pipe diameter or flange size, can be determined from drawings supplied with the unit (Fig. -
Page 20: Ancillary Service
Ancillary Service Spirax Sarco recommends the installation of sample point throughout the system. HTM 2031 also specifies that throughout the process of generation, system sample points should be located at the followings points as a minimum. These points will allow an easy sampling and testing system. -
Page 21: Connecting The Condensate Return Line
Fig. 7 Piping the Safety Valve to Vent and drain All Spirax Sarco Compact Steam Generators are equipped with a pressure safety valve. In most applications, the pressure safety valve should be vented to atmosphere (generally through the roof). The piping used in the vent system must be of adequate size to handle the capacity of the pressure safety valve. -
Page 22: Connecting Electro-Pneumatically Activated Controls
Connecting the Drain / Bottom Blowdown Line Spirax-Sarco CSM-C Compact Steam Generators are equipped with a drain / bottom blowdown line. Each generator has an automatic blowdown valve connected to the bottom of the vessel (Fig.10). - Page 23 Blowdown Fig. 10 ∆ Note: Blowdown connection should be performed in accordance to local codes, accepted practices, or the requirements of the installing contractor. 3.696.5275.210...
-
Page 24: Main Power Supply
Main Power Supply 1 KW supply, 400 Vac, 50 Hz three phases (verify the electrical drawings). Output contacts: Dry contacts NO/NC 220 Vac, 5 Ampere. Input contacts: Dry contacts NO/NC not powered, 5 Ampere. Ambient temperature: 0°C + 50°C (inside the control cabinet)* Humidity: 5% to 95% relative non condensing. -
Page 25: Installation Completion
Spirax Sarco engineer. Installation Inspection 1. Ensure that unit has been installed in line with Spirax Sarco recommendations. 2. Ensure the blow down line and safety valve line are piped away to a safe location. 3. Ensure All Isolation Valves are closed (Primary Steam supply, Clean steam outlet, Feed Water inlet, Pneumatic supply, Condensate). -
Page 26: Shutdown Operating Procedures
Timer, these procedures are automated and need not be carried out by operating personnel. Bottom Blowdown Spirax sarco Compact Steam Generators are equipped with a drain and bottom blowdown line. This valve can be automatic and it’s connected to the bottom of the vessel. -
Page 27: Water Quality
The blowdown from the Compact steam generator can flash to steam when introduced to atmospheric pressure. Spirax Sarco recommends the use of automatic blowdown valves with it’s generators. The buildup of scale and dirt within the unit can effect operation and the quality of the clean steam and shorten the life of the unit. -
Page 28: Feed Water
Feed Water (Fig. 13) CSM-C Compact Steam Generators are equipped with a PLC level controller which will activate the feedwater valve and complement the feedwater recirculation pump. The PLC level controller will feed water to the generator when the level falls under the setpoint level and will stop feeding when the water level reaches the set point. -
Page 29: Water Temperature In Pre-Heating/Degassing Tank
Water Temperature in Pre-Heating/Degassing Tank (Fig. 14) Water temperature is revealed in pre-heating tank by a three wire heat-resistant temperature probe, fitted with a measure transmitter which is installed in mid-tank on the primary steam supply side. The temperature probe sends the 0-10 V signal (equivalent to 0÷100°C range) to PLC control unit, which elaborate it and consequently transmits the modulanting control signal to the piston control valve on the primary supply line to inlet steam into the steam generator tank. -
Page 30: Fault Finding Procedure
Fault Finding Procedure: CSM-C Compact Clean Steam Generator Fault Finding The following table summarizes problems that may be encountered during the life of a CSM-C Compact Steam Generator, and the procedures to remedy those problems. Symptom Cause Remedy Water Level in tank is No feed water available. - Page 31 Manually operate valve via tank synoptic screen on controller. Water temperature Replace level transducer. transducer is damaged and giving a false reading. Contact Spirax Sarco Service Department. Tank Temperature is too Plant steam PAV has failed Isolate plant steam supply high. to close.
- Page 32 Steam from a second Check that non-return valve generator is back feeding into is operating correctly. generator shell and condensing. Contact Spirax Sarco Service Department. Generator Pressure is too Plant Steam is not reaching Check that plant steam low. the Control Valve.
- Page 33 Generator pressure Replace pressure transducer. low. Low pressure alarm has transducer is damaged and activated. giving a false reading. Contact Spirax Sarco Service Department. Generator pressure is too Steam inlet Control Valve Isolate plant steam supply high. Generator is in alarm has failed to close.
-
Page 34: Maintenance
Steam Generators. Remember, this manual may be general in some instances. If there are any questions concerning maintenance procedures that are not clearly explained in this manual, contact Spirax Sarco. Be sure to have the model and serial numbers of the unit and heat exchanger coil available before making contact. - Page 35 Heat Exchanger Coil and Gaskets - Inspection and Replacement The U-Bend heat exchanger coil is the heart of CSM-C Compact Steam Generators. It (they) should be removed and inspected every two (2) years, dependant upon insurance requirements. There are two (2) gaskets, one (1) between the tube face of the coil and the flange welded to the tank, and one (1) gasket with a divider to fit between the head and the tubesheet.
-
Page 36: Inlet, Outlet And Condensate / Water Return Line And Manual
∆ There may still be residual steam condensate (or boiler / high temperature water), this residual condensate / water could present a danger of injury in the coil that can run out during removal of the coil from the tank if sufficient time has not been allowed for cooling. -
Page 37: Pressure Gauge
2. Ensure that the primary supply, condensate / water return line, feed water inlet, and clean steam outlet have been shut off; that the pressure has been relieved from both the clean steam and energy source systems; that the tank has been completely drained; and that all components and surfaces have cooled. -
Page 38: Traps (Main And Auxiliary) - Replacement
Traps (Main and Auxiliary) - Replacement (Fig. 18) The main and auxiliary traps are installed upstream of the condensate shutoff valve on units that use steam as the energy source. If the traps are not functioning properly and must be replaced, follow the procedures outlined below. -
Page 39: Strainer - Inspection And Replacement
Strainer - Inspection and Replacement (Fig. 19) Strainers are installed on the unit. These strainers must be checked and cleaned periodically (approximately every three (3) to six (6) months) to prevent the build up of any sediment. ∆ The combination of electricity, steam, and water can pose a very dangerous situation. -
Page 40: Clean Steam Components
Turn off / disconnect all electric power before attempting any maintenance procedures. The safety pressure switch acts as a fail-safe for Spirax Sarco Compact Steam Generators. The alarm and shut down for high pressure is set at a value lower than the set of the safety valve. - Page 41 4. Loosening the connections until the pressure probe can be removed. 5. Examine the probes for damage or incorrect positioning. For the exact procedure for examination refer to the Spirax Sarco manual information included with the unit. 6. To install a new unit follow recommendations contained in the manufacturer’s documentation.
-
Page 42: Steam Pressure Transmitter
Turn off / disconnect all electric power before attempting any maintenance procedures. The steam pressure transmitter installed on the Spirax Sarco Compact Steam Generators supply the clean steam pressure to be used to control the primary steam valve position. -
Page 43: Pressure Safety Valve (Generator)
Pressure Safety Valve (Generator) - Replacement (Fig. 23) The pressure safety valve acts as a fail-safe for Spirax Sarco Compact Steam Generators. The valve will open for high pressure to protect the system from explosion. If the pressure safety valve mounted on the pressure vessel is not functioning correctly and must be replaced, follow the procedures outlined below. -
Page 44: Level Measurement
Level measurement - Inspection and Replacement (Fig. 25) The level measurement supplied on CSM-C Compact Steam Generators controls the level of the water within the unit, assuring that the unit will function safely and effectively. If the level controller must be removed for inspection, adjustment, or replacement, follow the steps detailed below: ∆... -
Page 45: Clean Feed Water Pump
7. Examine the level probes/gauge for damage or incorrect positioning. For the exact procedure for examination refer to the Spirax Sarco technical manual included with the unit. 8. To install the level probe/gauge, align with the feed lines and start the fittings. Follow recommendations contained in the documentation. - Page 46 7. Examine the pump for damage or incorrect positioning. For the exact procedure for examination refer to the Spirax Sarco manual information included with the unit. 8. To install a new pump, align with the feed lines and start the fittings. Follow recommendations contained in the documentation.
-
Page 47: Piston Valves
Continue loosening the connections until the valve can be removed. 7. Examine the Valve for damage or incorrect positioning. For the exact procedure for examination refer to the Spirax Sarco installation and maintenance manual included with the unit. 8. To install a new valve, align with the feed lines and start the fittings. Follow recommendations contained in the relevant IMI documentation. -
Page 48: Actuator Pn9000 Series
Actuator PN9000 Series - Inspection and Replacement (Fig. 28) The Actuators are installed on the primary steam inlet side. The documentation included with the unit gives specifics for operation and maintenance of the Actuator. The drawing included with the unit will give the exact location, as well as the relation with other components. This information should be reviewed before removal / replacement of the valve. -
Page 49: Modulating Control Valve
Modulating Control Valve (Primary Side) - Inspection and Replacement (Fig. 29) Valve Fig. 29 The Modulating Valves are installed on the primary steam inlet side. The documentation included with the unit gives specifics for operation and maintenance of the control valve. The drawing included with the unit will give the exact location, as well as the relation with other components. -
Page 50: Electric Pneumatic Positioner
Electric Pneumatic Positioner - Inspection and Replacement (Fig. 30) Positioner Fig. 30 The SP500 is installed on the primary steam inlet side (Valve/Actuator assembly). The documentation included with the unit gives specifics for operation and maintenance of the Actuator. The drawing included with the unit will give the exact location, as well as the relation with other components. -
Page 51: Control Cabinet
1. Follow the shutdown procedure (page 22) to take the unit off-line before attempting to change any part of the system. 2. Refer to Spirax Sarco technical department for repair or substitution. 3. Follow the start-up procedures (page 21) to put the unit back on-line. Carefully check all connections for any sign of leakage. -
Page 52: Recommended Maintenance Schedule
Recommended Maintenance Schedule Description Month Month Month Month Month Feed Tank Remove and inspect temperature probe. √ Refit and check calibration. Remove and inspect level pressure transducer. √ Refit with new gasket and check calibration. Remove, strip and inspect, steam inlet control valve. √... -
Page 53: Parts List
If there are questions concerning the replaceable parts for the unit, refer to the original design specifications, or contact Spirax Sarco. Please have the unit’s model and serial number available when contacting Spirax Sarco. -
Page 54: Appendix A - Bolt Torque Procedure
Appendix A Bolt Torque Procedure 12 bolts 8 bolts Sequential Rotational Sequential Rotational Order Order Order Order 1 - 2 1 - 2 3 - 4 3 - 4 5 - 6 5 - 6 7 - 8 7 - 8 9 - 10 11 - 12 3.696.5275.210... - Page 55 Bolt Torque Procedure 20 bolts 16 bolts Sequential Rotational Sequential Rotational Order Order Order Order 1 - 2 1 - 2 3 - 4 3 - 4 5 - 6 5 - 6 7 - 8 7 - 8 9 - 10 9 - 10 11 - 12 11 - 12...
- Page 56 Total or partial disregard of the above instructions Involves loss of any right to a guarantee. Spirax Sarco S.r.l. - Via per Cinisello, 18 - 20834 Nova Milanese (MB) - Tel.: 0362 49 17.1 - Fax: 0362 49 17 307...
Need help?
Do you have a question about the CSM-C and is the answer not in the manual?
Questions and answers