Table of Contents
Advertisement
Advertisement
Table of Contents

Subscribe to Our Youtube Channel
Related Manuals for Lumedica OQ LabScope

Summary of Contents for Lumedica OQ LabScope
- Page 1 User Manual Version 1.2...
-
Page 2: Table Of Contents
System Specifications ..........................18 Mechanical Drawings ..........................19 Customized OCT System Configuration ....................20 Regulatory ..............................22 Warranty ..............................23 Customer Support ............................ 24 Certifications and Compliance ........................ 25 Original Instructions Lumedica OQ LabScope 1.2 | Page 1 of 26... -
Page 3: Introduction
Contact: Lumedica, Inc., 701 West Main Street, Suite 200, Durham, NC 27701 USA Email: support@lumedicasystems.com Phone: 1-919-590-5693 The version number of this manual is 1.2 and it covers the OQ LabScope hardware version 1.1 with software version 1.2. Original Instructions... -
Page 4: Safety
The system has a degree of ingress protection of IP32. The acceptable environment use conditions for this equipment are: Indoor use only. Altitude up to 2000 m. Temperature range of 5C to 40C. Original Instructions Lumedica OQ LabScope 1.2 | Page 3 of 26... -
Page 5: Residual Risk
Possibility of ergonomic injury when moving the equipment. The main unit (or system chassis) weighs 4.0 kg, the scanner weighs 0.5 kg, and the optional scanner stand weighs 3.0 kg. Service Only trained and approved Lumedica personnel are allowed to service the system. Please contact Lumedica support for more information. Original Instructions... -
Page 6: Components
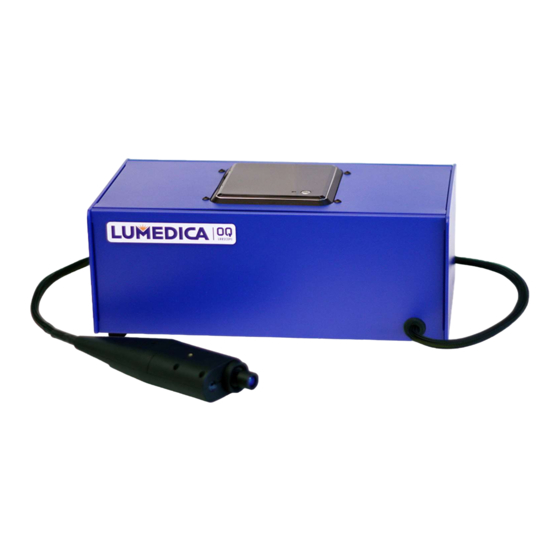
Components These are your OQ LabScope system hardware components. Embedded Computer Power Cable Scanner System Chassis Original Instructions Lumedica OQ LabScope 1.2 | Page 5 of 26... -
Page 7: Quick Start (Basic System Only)
8. Make sure scanner is in secure location and will not fall off of lab bench. 9. Power up OQ LabScope by pushing the button on top of the box. 10. Windows 10 OS will boot up and take you to the login screen. - Page 8 18. Place Scotch™ tape under handheld scanner and position scanner and tape so that top of tape is near to the top of the OCT image. 19. Adjust the focus slider on the left side of the image to optimize. Original Instructions Lumedica OQ LabScope 1.2 | Page 7 of 26...
-
Page 9: Quick Start (With Workstation Package)
4. Plug 12Vdc power cord into back of OQ LabScope box. 5. Set up monitor. 6. Connect HDMI cable to back of monitor and then to back of OQ LabScope box. 7. Connect country power cord to monitor. 8. Plug power cord into mains outlet. - Page 10 15. Insert scanner with adapter into holder on scanner stand. 16. Power up monitor by pressing power switch. 17. Power up OQ LabScope by pushing the button on top of the box. 18. Windows 10 OS will boot up and take you to the login screen.
-
Page 11: Software
Software The software is started by clicking on the L icon on the taskbar. Original Instructions Lumedica OQ LabScope 1.2 | Page 10 of 26... -
Page 12: Main Tab
Scan is selectable on the Configuration tab. The images are stored in the image buffer and can be saved to disk using the “Save All Images” button on the Processing tab. Original Instructions Lumedica OQ LabScope 1.2 | Page 11 of 26... - Page 13 When the slider is at the top of the screen, the focus is closest to the scanner and when the slider is at the bottom of the screen the focus is farthest away from the scanner. Original Instructions Lumedica OQ LabScope 1.2 | Page 12 of 26...
- Page 14 OCT system is not scanning. That is, the Start/Stop button on the Main tab says “Start Scan.” The OQ LabScope software maintains a circular buffer of the last 30 images acquired by the system. This corresponds to about 3 seconds of imaging time.
- Page 15 The image buffer contains up to 30 images when capturing B-Scans and all of the B-Scans captured when acquiring a C-Scan. Original Instructions Lumedica OQ LabScope 1.2 | Page 14 of 26...
-
Page 16: Advanced Tab
Scans per C-Scan is selectable on the Configuration tab. The images are stored in the image buffer and can be saved to disk using the “Save All Images” button on the Processing tab. Original Instructions Lumedica OQ LabScope 1.2 | Page 15 of 26... - Page 17 Dispersion Compensation C — Sets the third order coefficient in the dispersion compensation. This may be adjusted while the system is running. Typically, the value of this coefficient is close to zero. Original Instructions Lumedica OQ LabScope 1.2 | Page 16 of 26...
-
Page 18: Configuration Tab
B-Scans Per C-Scan — Set the number of B-Scans captured in a C-Scan. Options are 32, 64, 128, 256, and 512. C-Scan capture time scales with the number of B-Scans and can be as long as 120 seconds for a C-scan with 512 B-Scans. Original Instructions Lumedica OQ LabScope 1.2 | Page 17 of 26... -
Page 19: Hardware
4.5w x 2.5d x 1.9h in. Center 840 nm Linear Scan 7 mm System 4.0 kg. Wavelength Range Weight Sensitivity 100 dB C-Scan 5mm x 5mm Scanner 0.5 kg. (OSNR) Range Weight Original Instructions Lumedica OQ LabScope 1.2 | Page 18 of 26... -
Page 20: Mechanical Drawings
Mechanical Drawings System Chassis Scanner Original Instructions Lumedica OQ LabScope 1.2 | Page 19 of 26... -
Page 21: Customized Oct System Configuration
Polarization control Inside the OQ LabScope are two sets of polarization paddles. Each set has two paddles. The set at the back is in the sample arm and the set closer to the front is in the reference arm. The amount of polarization rotation is set by the position of each of the two paddles in the two arms. - Page 22 Note that adjusting the power level also adjusts the pathlength. After adjusting power, it may be necessary to adjust pathlength as well. Hardware – inside the scanner There are no user adjustable or serviceable parts inside the scanner. Original Instructions Lumedica OQ LabScope 1.2 | Page 21 of 26...
-
Page 23: Regulatory
Please contact Lumedica for details on how to return end of life systems. If you do not return an end of life system to Lumedica, you must deliver it to a company that specializes in waste recovery. Do NOT dispose of the system in a litter bin or at a public waste disposal site. -
Page 24: Warranty
ESD sensitive items whose static protection has been opened or compromised, (3) repaired, modified or altered by any party other than Lumedica, (4) used in conjunction with equipment not provided by or acknowledged as compatible by Lumedica, (5) subjected to unusual physical, thermal, or electrical stress, (6) damaged due to improper installation, misuse, abuse, or storage, or (7) damaged due to accident or negligence in use, storage, transportation, or handling. -
Page 25: Customer Support
To facilitate customer support, TeamViewer has been installed on the computer inside of the OQ LabScope. Provided that the system has an internet connection, we can, with your permission, remotely control the OQ LabScope system to assist with any issues. Using TeamViewer requires the following steps: 1. -
Page 26: Certifications And Compliance
Certifications and Compliance Original Instructions Lumedica OQ LabScope 1.2 | Page 25 of 26... - Page 27 Copyright © 2017 by Lumedica, Inc. 701 W. Main St., Suite 200 Durham, NC 27701 U.S.A Original Instructions Lumedica OQ LabScope 1.2 | Page 26 of 26...
Need help?
Do you have a question about the OQ LabScope and is the answer not in the manual?
Questions and answers