Table of Contents
Advertisement
Available languages
Available languages
Quick Links
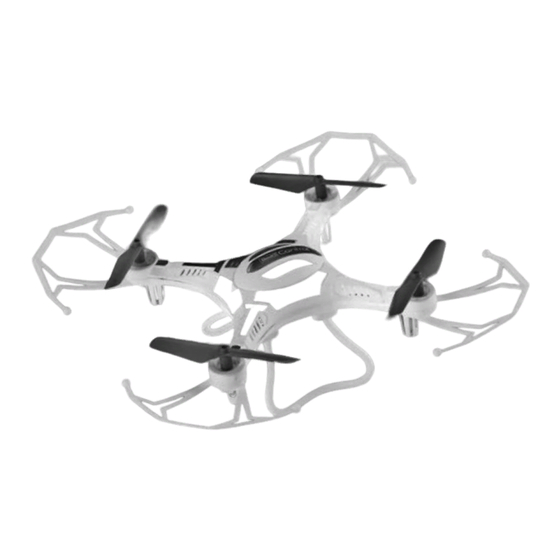
ERSATZTEILE / REPLACING SPARE PARTS / EPIÈCES DÉTACHÉES /
RESERVEONDERDELEN / PIEZAS DE REPUESTO / PEZZI DI RICAMBIO
45008
45009
Landekufen / Schutzbügel
Rumpf
landing skid /
Body
rotor protection
45013
45014
USB-Ladegerät
Akku
charger
battery
45019
45020
LED Lampen
Getriebeset
LED lights
gear set
01011
45012
Rotorset
rotor set
45018
Motorset
motor set
45022
Steuerungs-Platine
PCB
www.revell-control.de
© 2016 Revell GmbH,
Henschelstr. 20-30, D-32257
Bünde. A subsidiary of Hobbico,
Inc. REVELL IS THE REGISTERED
TRADEMARK OF REVELL GMBH,
GERMANY. Made in China.
2
HEADLESS
MODE
SPEED
LEVEL
Advertisement
Table of Contents

Related Manuals for REVELL Advents Calendar


Summary of Contents for REVELL Advents Calendar
- Page 1 RESERVEONDERDELEN / PIEZAS DE REPUESTO / PEZZI DI RICAMBIO www.revell-control.de 45008 45009 45012 © 2016 Revell GmbH, Henschelstr. 20-30, D-32257 Bünde. A subsidiary of Hobbico, Inc. REVELL IS THE REGISTERED TRADEMARK OF REVELL GMBH, GERMANY. Made in China. Landekufen / Schutzbügel Rumpf Rotorset landing skid / Body...
- Page 2 Table of Inhalt Contenu Inhoud Contenido Contenuto contents...
- Page 4 Aufsicht eines • Das Modell darf nur mit originalen • Nicht wiederaufladbare Batterien dürfen Erwachsenen angeleitet werden. Die Revell Control Ersatzteilen repariert • Für Modelle, die draußen geflogen nicht geladen werden. erste Inbetriebnahme und Anleitung aber nicht verändert werden. Andern- werden, besteht seit 2005 Versiche- •...
- Page 5 3 BATTERIEN EINSETZEN (FERNSTEUERUNG) einer dauerhaften Beschädigung des • Modell, Fernsteuerung und Ladegerät Akkus sowie benachbarter Teile führen niemals mit Wasser in Verbindung 3A Schraube 2L gegen 3B 4 x 1,5 V AA-Batterien 3C Die Batteriefach- und körperliche Schäden verursachen! bringen, da dadurch die Elektronik den Uhrzeigersinn einlegen und auf die...
-
Page 6: Allgemeine Flug-Tipps
Achtung: Bei jedem Einschalten „merkt“ sich das Modell die Ausrichtung nach vorne. 6 TRIMMEN DER STEUERUNG Das bedeutet, dass man sich beim Steuern nicht drehen darf, da man dann in Bezug zum Modell eine andere Auffassung von „Vorne“ sowie „rechts/links“ bekommt. Wechselt Die richtige Trimmung ist die Grundvoraussetzung für ein einwandfreies Flugverhalten man die Position und möchte den Headless Mode benutzen - oder die Steuer richtung des Modells. -
Page 7: Fehlerbehebung
Problem: Das Modell will keine Loopings fliegen. Ursache: • Akku zu schwach. Abhilfe: • Akku aufladen. Weitere Tipps und Tricks finden Sie im Internet unter www.revell-control.de. SERVICEHINWEISE Unter www.revell-control.de finden Sie unsere Telefon- Hotline, Bestellmöglichkeiten und Austausch-Tipps für Ersatzteile sowie weitere nützliche Informationen zu allen Modellen von Revell Control. -
Page 8: Important Features
• The model may only be repaired with the user must be instructed under the • This charging unit is not suitable for original Revell Control spare parts and direct supervision of an adult. The • Flying models outdoors has required people (including children) with may not be modified. -
Page 9: Remote Control
3 INSERTING BATTERIES (REMOTE CONTROL) and neighbouring parts, as well as • Never allow the remote control and physical injury! charging unit to come into contact 3A Turn screw 2L counter- 3B Insert 4 x 1.5 V AA batteries 3C Close the battery with water, because the electronics •... - Page 10 Button 2I: 6 TRIM ADJUSTMENT OF THE CONTROL Pressing button 2I switches to second speed. Pressing it again returns the model to first speed. The model must be switched on first in order to connect it to the remote control. Its adjustment is simple, but it requires some patience and a feel for it.
-
Page 11: Changing The Propellers
Problem: The model will no longer fly loops. Cause: • Battery too weak. Remedy: • Charge the battery. Additional tips and tricks can be found online at www.revell-control.de. SERVICE NOTES Go to www.revell-control.de for ordering information and tips on replacing spare parts, plus other useful information on all Revell Control models. -
Page 12: Caractéristiques Principales
01011 permettant un évitement rapide le cas toire depuis 2005. Veuillez contacter échéant. votre assureur pour qu‘il inclue vos anciens et nouveaux appareils dans votre assurance responsabilité civile. Consignes de sécurité pour maquet Demandez une confirmation écrite et CARACTÉRISTIQUES PRINCIPALES tes volantes : conservez-la en lieu sûr. - Page 13 1 MODÈLE Consignes de sécurité pour pôles non protégés de ruban adhésif le chargeur : afin d‘éviter les courts-circuits ! 1A Interrupteur ON/OFF 1C Diode d‘état (sous chaque poutre) • Ne pas recharger les piles jetables. 1B Port de charge •...
-
Page 14: État De La Batterie
7G Pour faire tourner le modèle vers la gauche, diriger légèrement le régulateur de poussée 5 PRÉPARATION AU DÉMARRAGE et de rotation 2A vers la gauche. 7H Pour faire tourner le modèle vers la droite, diriger légèrement le régulateur de Pour établir la connexion entre le modèle et la télécommande, mettez d‘abord le poussée et de rotation 2A vers la droite. -
Page 15: Dépannage
• La batterie est trop faible. Solution : • Charger la batterie. Vous trouverez d'autres conseils sur notre site Internet www.revell-control.de. INDICATIONS DE SERVICE Vous trouverez nos modalités de commande, nos conseils d’échange pour les pièces détachées et bien d’autres informations utiles concernant tous les modèles de... -
Page 16: Belangrijke Kenmerken
• Het model mag alleen met originele bij de vereniging voor onbemande strueerd. De eerste ingebruikneming gebruikt. Revell Control-reserveonderdelen luchtvaartsystemen: en instructie door een ervaren worden gerepareerd, maar mag niet “http://www.uavdach.org”. Veiligheidsaanwijzingen bij de lader: persoon wordt aanbevolen. - Page 17 3 BATTERIJEN PLAATSEN (ZENDER) Het model is uitgerust met een Onderhoud en verzorging: LiPo-accu. Neem de volgende • Neem het model alleen af met een 3A Schroef 2L tegen de 3B Plaats 4 AA-batterijen 3C Sluit de afdekking veiligheidsaanwijzingen in acht: schone, vochtige doek.
-
Page 18: Algemene Vliegtips
stand komt ten opzichte van het model. Als u van positie bent veranderd en de 6 TRIMMEN VAN DE BESTURING Headless Mode toch wilt gebruiken – of als de stuurrichting niet meer klopt door een botsing – moet het model opnieuw worden opgestart. Voor een goed vlieggedrag van het model is het noodzakelijk dat de besturing juist is getrimd. - Page 19 Oplossing: • Propellers of motoren monteren zoals in de handleiding is beschreven. Probleem: Het model wil geen loopings maken. Oorzaak: • Accu te zwak. Oplossing: • Accu opladen. Meer tips en trucs vindt u op www.revell-control.de. SERVICEAANWIJZINGEN Op www.revell-control.de vindt u bestelmogelijkheden en vervangingstips voor reserveonderdelen, alsmede andere nuttige informatie over alle modellen van Revell Control.
-
Page 20: Características Destacadas
Revell Control, pero no está permitido • Los niños no deben utilizar en ningún en materia de regulación del tráfico • Solo se permite usar este modelo modificarlo. - Page 21 3 COLOCACIÓN DE LAS BATERÍAS (EMISORA) El modelo está equipado con una Mantenimiento y cuidados: batería LiPo recargable. Es necesario • Utilice solo un paño limpio y suave 3B Coloque 4 baterías AA de 3A Desenrosque el tornillo 3C Cierre la tapa del para limpiar el modelo.
-
Page 22: Estado De Carga De La Batería
orientación de „delante“, así como de „derechas/izquierdas“ con respecto al modelo. 6 TRIMADO DEL CONTROL Si se cambia de posición y se quiere usar el modo Headless, o si la dirección de control ya no concuerda debido a una colisión, es necesario reiniciar el modelo. Para que las características de vuelo del modelo sean perfectas es imprescindible que el trimado esté... -
Page 23: Solución De Problemas
Problema: El modelo ha dejado de realizar loopings. Causa: • la carga de la batería es insuficiente. Solución: • cargue la batería. Encontrará más consejos en Internet en www.revell-control.de. INSTRUCCIONES DE SERVICIO En www.revell-control.de encontrará posibilidades de realizar pedidos y consejos para cambiar piezas de repuesto, así... -
Page 24: Caratteristiche Principali
• Il modellino può essere riparato solo • Il caricatore per le batterie LiPo è durante il primo utilizzo e le prime che all’ e stero si applicano probabilmente con i ricambi originali Revell Control studiato appositamente per ricaricare prove. regolamenti diversi. - Page 25 3 INSERIRE LE BATTERIE (RADIOCOMANDO) • Non utilizzare mai un caricabatterie Con riserva di modifiche tecniche e per batterie di tipo NiCd-/NiMH! dei colori utilizzati. 3A Svitare la vite 2L in 3B Inserire 4 x 1,5 V batterie 3C Chiudere il coperchio •...
-
Page 26: Stato Della Batteria
la concezione di „avanti“ e di „destra/sinistra“ è diversa. Se si cambia posizione e si 6 COMPENSAZIONE DEI COMANDI desidera utilizzare la modalità Headless, oppure se la direzione di guida non è più corretta a causa di una collisione, è necessario riavviare il modellino. Una corretta compensazione è... -
Page 27: Eliminazione Dei Guasti
Soluzione: • Ricaricare la batteria. Per ulteriori suggerimenti visitare il sito internet www.revell-control.de. ISTRUZIONI DI MANUTENZIONE Per informazioni sugli ordini e consigli su come sostituire i pezzi di ricambio, nonché altre informazioni utili su tutti i modelli Revell Control consultate il sito www.revell-control.de. www.revell-control.de... - Page 28 Réglementation sur les déchets d‘équipement électrique et électronique : À la fin de leur Revell GmbH déclare par la présente utilisation, retirer toutes les piles et les Attention : Lors de que ce produit est conforme aux éliminer séparément.
Need help?
Do you have a question about the Advents Calendar and is the answer not in the manual?
Questions and answers