Table of Contents
Advertisement
Advertisement
Table of Contents

Related Manuals for Brother MD-601


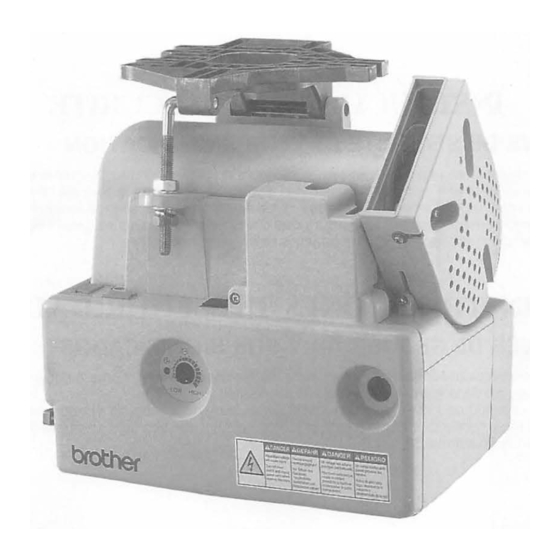
Summary of Contents for Brother MD-601
- Page 1 From the library of: Superior Sewing Machine & Supply LLC...
-
Page 2: Safety Instructions
From the library of: Superior Sewing Machine & Supply LLC... - Page 3 From the library of: Superior Sewing Machine & Supply LLC...
- Page 4 From the library of: Superior Sewing Machine & Supply LLC...
- Page 5 From the library of: Superior Sewing Machine & Supply LLC...
- Page 6 From the library of: Superior Sewing Machine & Supply LLC...
- Page 7 From the library of: Superior Sewing Machine & Supply LLC...
- Page 8 From the library of: Superior Sewing Machine & Supply LLC...
- Page 9 From the library of: Superior Sewing Machine & Supply LLC...
- Page 10 From the library of: Superior Sewing Machine & Supply LLC...
-
Page 11: Table Of Contents
From the library of: Superior Sewing Machine & Supply LLC... - Page 12 From the library of: Superior Sewing Machine & Supply LLC...
-
Page 13: Installation
From the library of: Superior Sewing Machine & Supply LLC... - Page 14 From the library of: Superior Sewing Machine & Supply LLC...
-
Page 15: Attaching The Belt
From the library of: Superior Sewing Machine & Supply LLC... - Page 16 From the library of: Superior Sewing Machine & Supply LLC...
-
Page 17: Installing The Belt Cover
From the library of: Superior Sewing Machine & Supply LLC... -
Page 18: Connecting The Cords
From the library of: Superior Sewing Machine & Supply LLC... -
Page 19: Branchement Des Cordons
From the library of: Superior Sewing Machine & Supply LLC... - Page 20 From the library of: Superior Sewing Machine & Supply LLC...
- Page 21 From the library of: Superior Sewing Machine & Supply LLC...
-
Page 22: Connecting The Operation Panel
From the library of: Superior Sewing Machine & Supply LLC... -
Page 23: Branchement Du Panneau De Commande
From the library of: Superior Sewing Machine & Supply LLC... - Page 24 From the library of: Superior Sewing Machine & Supply LLC...
- Page 25 From the library of: Superior Sewing Machine & Supply LLC...
-
Page 26: Installing The Head Lamp
From the library of: Superior Sewing Machine & Supply LLC... - Page 27 From the library of: Superior Sewing Machine & Supply LLC...
-
Page 28: Standard Adjustments
From the library of: Superior Sewing Machine & Supply LLC... -
Page 29: Reglages Standard
From the library of: Superior Sewing Machine & Supply LLC... -
Page 30: Adjusting The Treadle
From the library of: Superior Sewing Machine & Supply LLC... -
Page 31: Reglage De Ia Pedale
From the library of: Superior Sewing Machine & Supply LLC... -
Page 32: Correct Operation
From the library of: Superior Sewing Machine & Supply LLC... -
Page 33: Richtige Bedienung
From the library of: Superior Sewing Machine & Supply LLC... -
Page 34: Fonctionnement Correct
From the library of: Superior Sewing Machine & Supply LLC... -
Page 35: Funcionamiento Correcto
From the library of: Superior Sewing Machine & Supply LLC... -
Page 36: For Treadles With Two Forward And Two Rear Stages
From the library of: Superior Sewing Machine & Supply LLC... -
Page 37: Pedales Avec Deux Paliers Avant Et Deux Paliers Arriere
From the library of: Superior Sewing Machine & Supply LLC... -
Page 38: Using The Control Box
From the library of: Superior Sewing Machine & Supply LLC... -
Page 39: Utilisation Du Boitier De Commande
From the library of: Superior Sewing Machine & Supply LLC... -
Page 40: Setting The Dip Switches
From the library of: Superior Sewing Machine & Supply LLC... -
Page 41: Reglage Des Interrupteurs Dip
From the library of: Superior Sewing Machine & Supply LLC... -
Page 42: Daily Precautions
From the library of: Superior Sewing Machine & Supply LLC... -
Page 43: Tagliche Vorsichtsmabnahmen
From the library of: Superior Sewing Machine & Supply LLC... -
Page 44: Precautions Journalieres
From the library of: Superior Sewing Machine & Supply LLC... -
Page 45: Precauciones Diarias
From the library of: Superior Sewing Machine & Supply LLC... -
Page 46: Connecting Options
From the library of: Superior Sewing Machine & Supply LLC... -
Page 47: Options De Connexion
From the library of: Superior Sewing Machine & Supply LLC... - Page 48 From the library of: Superior Sewing Machine & Supply LLC...
-
Page 49: Connecting The Material Edge Sensor
From the library of: Superior Sewing Machine & Supply LLC... -
Page 50: Branchement Du Detecteur De Bords Du Tissu
From the library of: Superior Sewing Machine & Supply LLC... -
Page 51: Troubleshooting
From the library of: Superior Sewing Machine & Supply LLC... - Page 52 From the library of: Superior Sewing Machine & Supply LLC...
- Page 53 From the library of: Superior Sewing Machine & Supply LLC...
- Page 54 From the library of: Superior Sewing Machine & Supply LLC...
- Page 55 From the library of: Superior Sewing Machine & Supply LLC...
- Page 56 From the library of: Superior Sewing Machine & Supply LLC...
- Page 57 From the library of: Superior Sewing Machine & Supply LLC...
Need help?
Do you have a question about the MD-601 and is the answer not in the manual?
Questions and answers