
Related Manuals for Yota YotaPhone 2


Summary of Contents for Yota YotaPhone 2
- Page 1 2015/1/23 Introduction Introduction Getting started Get to know your YotaPhone Your YotaPhone has two displays: the colour display and the always-on display. http://yotaphone.com/help/yotaphone2/en/16445.htm 1/65...
-
Page 2: Install The Sim Card
2015/1/23 Introduction 1. Headset jack and microphone 2. Ear piece 3. Ambient light sensor and proximity sensor 4. Front camera 5. Volume buttons 6. Power button 7. Colour display 8. Loudspeaker 9. Micro USB connector 10. Main microphone 11. Camera LED flash 12. -
Page 3: Charge Your Phone
2015/1/23 Introduction 1. Insert the SIM eject tool into the SIM eject hole and push lightly until the SIM card tray releases. 2. Put the SIM card in the tray with the contact area facing down. 3. Place the SIM card tray carefully back into its slot, and push it until it locks. Charge your phone The battery of your YotaPhone is non-removable. - Page 4 2015/1/23 Introduction 1. Connect the USB cable to the USB power adapter. 2. Insert the micro USB end of the cable into the micro USB connector on your YotaPhone. http://yotaphone.com/help/yotaphone2/en/16445.htm 4/65...
-
Page 5: Switch Your Phone On/Off
2015/1/23 Introduction 3. Insert the power adapter into a wall socket to start charging. The charger has an LED light that switches on when the phone is charging. When the battery is full, the LED light switches off. Charge with a computer 1. -
Page 6: Lock Or Unlock The Screen
2015/1/23 Introduction To switch your phone off, press and hold the power button, tap Power off, and tap OK. Basics Get to know the basic functions of your YotaPhone. Lock or unlock the screen When you are holding your YotaPhone, it recognises which display is upwards. You can only lock or unlock the upwards-facing display. - Page 7 2015/1/23 Introduction Tap and hold Tap and hold an item on the screen to view a menu. Double tap Tap twice quickly on a picture, web page, or map to zoom in and out. Drag and drop To move an application on the home screen, tap and hold http://yotaphone.com/help/yotaphone2/en/16445.htm 7/65...
- Page 8 2015/1/23 Introduction an icon without releasing your finger, move the icon to another place, and release your finger. Swipe To swipe, move your finger across the surface of your screen. For example, you can swipe the home screen to the left or right to view other home screen panels.
-
Page 9: Nagivate The Colour Display
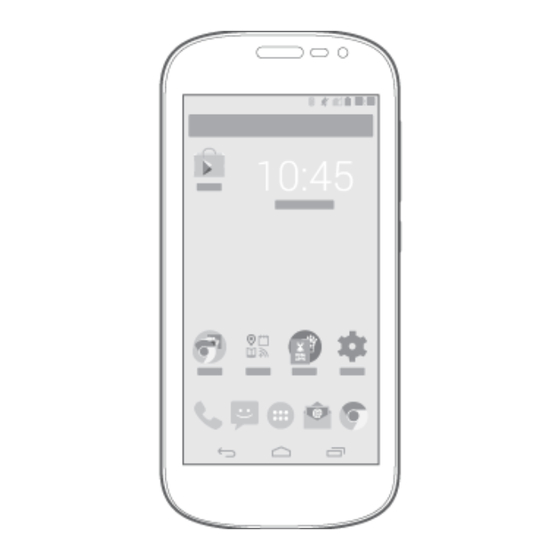
2015/1/23 Introduction Nagivate the colour display The Android™ navigation buttons are located at the bottom of the colour display: To go back to the previous screen, tap To go to the home screen, tap To open a list of recently used applications, tap To access more options, tap and hold To perform a Google search, drag your finger towards Google. -
Page 10: Personalise The Home Screen
2015/1/23 Introduction 1. On the home screen, tap > Settings > DEVICE > Sound. 2. Tap Volumes. 3. To adjust the volume of Music, video, games & other media, Ringtone & notifications, and Alarms, tap and drag the sliders. Switch between silent, vibration, and normal mode Your YotaPhone is in normal mode by default. -
Page 11: Change Date And Time
2015/1/23 Introduction 2. Tap and hold an application icon until the home screen appears. 3. Drag the icon onto the home screen. Add a widget shortcut to the home screen 1. Tap and hold an empty space on the home screen 2. - Page 12 2015/1/23 Introduction 2. Tap to choose a screen lock option: None - No screen lock. This option provides no protection. Slide - Swipe to unlock the phone. This option provides minimal protection. Face Unlock - Use facial recognition to unlock the phone. This option is less secure than a pattern, PIN, or password, and is not available for the always-on display.
-
Page 13: Get To Know The Indicators
2015/1/23 Introduction Get to know the indicators The indicators at the top of the screen give you information such as the current time, battery power level, and signal strength. No signal GPS activated Signal strength Call in progress Roaming (outside of normal service area) Missed call GPRS network connected Synced with the web... -
Page 14: Using Your Phone
2015/1/23 Introduction 2. Follow the instructions on the screen. You can also set up an account in Settings. On the home screen, tap > Settings > ACCOUNTS > Add account. Using your phone Calls Use your YotaPhone to call your contacts. Make a call 1. -
Page 15: Make A Conference Call
2015/1/23 Introduction You can also answer a call on the always-on display. Reject a call If you cannot answer a call, you can reject the call, and send a message to the caller. Reject a call Drag towards Reject a call with a message 1. -
Page 16: View The Call Log
2015/1/23 Introduction Make an emergency using a locked phone You can make an emergency call even if the screen is locked. If the phone is switched off, switch it on by pressing and holding the power button until the phone vibrates. To make an emergency call when your YotaPhone is locked, tap Emergency call on the lock screen. -
Page 17: Manage Call Settings
2015/1/23 Introduction Change the voicemail settings On the home screen, tap > > Settings > Voicemail. To set up a new voicemail number, tap Setup, and select the Voicemail number field. Enter a new voicemail number, and tap OK. To select a ringtone, tap Voicemail, and tap Sound. If you want your phone to vibrate when a new voicemail is received, tick Vibrate. -
Page 18: Always-On Display
2015/1/23 Introduction Change the PIN2 code 1. On the home screen, tap > > Settings > Fixed Dialling Numbers. 2. Tap Change PIN2. 3. Enter your old PIN2 code, and tap OK. 4. Enter a new PIN2 code, and tap OK. 5. -
Page 19: Navigation On The Always-On Display
2015/1/23 Introduction Play games Answer calls There are also many other applications and widgets available. You can find more widgets and applications in the YotaApps catalogue. Personalise the always-on display The applications and widgets on the always-on display are placed on YotaPanels. You can personalise the panels with your favourite widgets. - Page 20 2015/1/23 Introduction If you have a missed call, the calls notification appears in full-screen mode for five minutes. The calls widget on the YotaPanel shows the names or phone numbers of callers, the date and time of missed calls, and the number of missed calls from each caller. To view your missed calls on the always-on display, tap the Calls widget.
-
Page 21: Always-On Display Widgets
2015/1/23 Introduction 2. Tap Panels. 3. Swipe left or right to get to the YotaPanel you want to edit. 4. Tap an empty space on the panel, or tap a widget you want to replace. 5. Tap the widget you want to add. The selection of available widgets depends on the size of the empty space you want to place the widget into. - Page 22 2015/1/23 Introduction To forward an email, tap Calendar The calendar widget shows the current month. The current day is marked by a rectangle, and a day with event information is marked with a dot: To view the events of a specific day, tap the day. To view a list of events, tap the calendar widget.
- Page 23 2015/1/23 Introduction Three applications are set by default: Google Play Books, Maps, and Selfie. To add more applications, or change the defaults: 1. On the home screen, tap > YotaHub. 2. Tap Panels. 3. Swipe left or right to find the panel where you have placed the Apps launcher widget. 4.
-
Page 24: Small Notifications
2015/1/23 Introduction YotaCover to inform you about text messages, calls, and emails. 1. To set up notifications, on the home screen, tap > YotaHub. 2. Tap YotaCover. 3. Tap > Settings. 4. Tick the options you want to enable: To enable notifications on YotaCover, tick Enable notifications on YotaCover. To show notifications content, tick Show notification content on YotaCover. - Page 25 2015/1/23 Introduction 6. To choose a picture, tap a picture. To download the picture, tap the picture, and tap To toggle between your YotaCovers, on the always-on display, swipe left or right when YotaCover is on. You can also tap the arrows. To set your YotaCovers as a slideshow: 1.
-
Page 26: Send A Message
2015/1/23 Introduction YotaSnap With YotaSnap you can take a screenshot of the colour display and send it to the always-on display. The always-on display shows the image even after you switch the phone off. YotaSnap is convenient when you need to check some information at glance. With YotaSnap you do not have to unlock the display to check the information you need as it is displayed on the always-on display. -
Page 27: Forward A Message
2015/1/23 Introduction 7. To send the message, tap Only compatible phones can receive and show multimedia messages. Messages may look different on other phones. Read a message When you have received a message, you can see a notification icon on the top of the screen. Swipe the notification drawer down, and tap the message notification to read the message. -
Page 28: Customise The Message Settings
2015/1/23 Introduction Delete a conversation 1. On the home screen, tap 2. Tap and hold the thread you want to delete. 3. Tap You can also open the thread, and tap > Delete thread. Customise the message settings 1. On the home screen, tap 2. - Page 29 2015/1/23 Introduction 1. On the home screen, tap > Calendar. 2. Tap an appointment in Calendar. 3. To edit, tap , or to delete, tap Clock On the home screen, tap > Clock. Set an alarm 1. Tap 2. Tap 3.
-
Page 30: Add A New Contact
2015/1/23 Introduction 1. On the home screen, tap > Downloads. 2. To quickly sort your downloads, tap , and tap By name, By date modified, or By size. Delete your downloads 1. On the home screen, tap > Downloads. 2. Tap and hold the items to select them. 3. -
Page 31: Import Or Export Contacts
2015/1/23 Introduction Import or export contacts If you have contact information stored on a SIM card, for example, you can import them to your phone. You can also export contact information stored on your phone to your SIM card. Import contacts 1. -
Page 32: Take A Photo
2015/1/23 Introduction Delete a contact 1. On the home screen, tap > > 2. Select the contact, and tap > Delete > OK. If the contact is linked to an account, the contact is deleted from the online service where it is stored. Share a contact 1. -
Page 33: Change The Flash Mode
2015/1/23 Introduction Your photos are saved in Gallery > Camera. Change the flash mode To switch flash on or off, or to use the automatic flash mode, tap , and tap a flash option: Flash on Automatic Flash off Use special effects You can use your YotaPhone to take pictures with different settings. -
Page 34: Share Your Photos And Videos
2015/1/23 Introduction 5. To stop recording, tap Share your photos and videos 1. On the home screen, tap > Camera. 2. Take a photo or record a video. 3. Swipe left, and tap 4. Select the way you want to share your photo or video, and follow the instructions. You can also share a photo or video from Gallery. -
Page 35: Play A Video
2015/1/23 Introduction View the details of a picture 1. In Gallery, tap a picture in an album. 2. Tap , and tap Details. Edit a picture 1. In Gallery, tap a picture in an album. 2. Tap , and tap Edit. 3. -
Page 36: Play Music
2015/1/23 Introduction 1. On the home screen, tap > Gallery. 2. Tap an album that contains the video you want to watch. 3. Tap the video you want to watch. 4. To start watching the video, tap Multimedia Use your YotaPhone as a music player, listen to the radio, and create your own videos. Play music On the home screen, tap >... -
Page 37: Edit Videos
2015/1/23 Introduction 1. On the home screen, tap > FM radio. 2. To tune in to a station manually, tap To find the next or previous station, tap and hold 3. To switch the radio off, tap Scan for stations automatically 1. -
Page 38: Record Sounds
2015/1/23 Introduction 3. Change the project name, and tap OK. Delete your project 1. Tap 2. Tap Delete project. Add media to your movie To add media to your movie, tap You can add media by recording a video, taking a photo, or by importing a video clip, picture, or soundtrack. -
Page 39: Mobile Data Connection
2015/1/23 Introduction 5. To delete the recording, tap Discard. Your recordings are stored on your phone and you can listen to them in Play Music. Settings Connectivity You can use your YotaPhone to connect to other devices or share your internet connection. Sharing your connection consumes a lot of battery power, especially on LTE networks. -
Page 40: Switch Wi-Fi On/Off
2015/1/23 Introduction WIRELESS & NETWORKS> Data usage. Wi-Fi connection The first time you switch your YotaPhone on, it automatically searches for Wi-Fi networks, and displays their names and security settings on your screen. Tap the Wi-Fi network you would like to connect to, and enter the password, and then tap Connect. -
Page 41: Usb Tethering
2015/1/23 Introduction You can set your YotaPhone up as a Wi-Fi hotspot to share your mobile data connection with other devices. You can share your data connection with up to 5 devices at a time. You may need to pay extra mobile data connection fees if you turn your YotaPhone into a portable hotspot and share your mobile data connection with others. -
Page 42: Bluetooth Connection
2015/1/23 Introduction Tethering and Wi-Fi hotspot consume a lot of battery power, especially on LTE networks. Switch the features off when you do not need them. Bluetooth connection Bluetooth is a short-range wireless communications technology that enables you to connect your devices to a number of Bluetooth compatible devices, such as computers, headsets, printers, and hands free car sets. -
Page 43: Computer Connection Using Usb
2015/1/23 Introduction Use Bluetooth tethering With the Bluetooth tethering feature on, paired devices can access the internet using your YotaPhone. To use Bluetooth tethering: 1. On the home screen, tap > Settings > WIRELESS & NETWORKS > More..2. Tap Tethering & portable hotspot. 3. -
Page 44: Text Input
2015/1/23 Introduction Connecting your YotaPhone to a computer as a camera using the Picture Transfer Protocol (PTP) allows you to transfer photos using camera software and transfer files that are not supported by MTP (Media Transfer Protocol). 1. Insert the micro USB end of the cable into your phone and the other end into the USB port on the computer. -
Page 45: Switch Word Suggestions On/Off
2015/1/23 Introduction 1. Tap the text field you want to write into. 2. Tap the keys on the keyboard to write. The strip above the keyboard shows the characters you enter. 3. Select the desired word from the list of suggestions, or tap the space bar to accept the word you have written. -
Page 46: Change The Default Input Method
2015/1/23 Introduction 4. Select a language from the list, and tap Download. Change the default input method You can use the default Android keyboard or select any other input method as your default way of entering text. To set the default input method: 1. -
Page 47: Chrome Settings
2015/1/23 Introduction Browse with incognito tabs When you browse in private with incognito tabs, your viewed pages do not appear in your history or leave traces like cookies. 1. On the home screen, tap > Chrome. 2. Tap 3. Tap New incognito tab. 4. -
Page 48: Set Up An Email Account
2015/1/23 Introduction 3. To open the webpage, enter the target web address, and tap Go on the keyboard. 4. Tap 5. To open the Add Bookmark menu, tap 6. Choose a folder to store your bookmark in, and tap OK. 7. -
Page 49: Set Up A Corporate Email Account
2015/1/23 Introduction Set up an email account to send and receive emails. 1. On the home screen, tap > Email. 2. Enter your email address and password into the corresponding fields in the Account setup screen. 3. Tap Next. If you are setting up a Gmail account, you can skip to step 6 as Gmail accounts are configured automatically. -
Page 50: Read And Reply To An Email
2015/1/23 Introduction 7. To send the email, tap Read and reply to an email 1. On the home screen, tap > Email to access inbox. When a new email is received, appears in the notifications drawer. Tap the notification to view the Inbox of your email account. -
Page 51: Yotaphone Apps
2015/1/23 Introduction Read and reply to an email 1. On the home screen, tap > Gmail. 2. To view the content of the email, tap the email message. 3. To reply to the email, tap To reply to all or forward the email, tap , and select the corresponding option. - Page 52 2015/1/23 Introduction You can also create a new collection. To view your saved articles, tap Saved for later. To remove sources, tap Edit collections. Tick the sources or collections you want to remove, and tap DELETE. To read the article, tap the headline of the article. In the full-screen article view: To share the article with your friends, tap To save the article for later, tap...
- Page 53 On the colour display On the home screen, tap > YotaReader. Yota Reader opens the last book you were reading. To go to your collection of books, tap the screen, and tap To add books to your collection, tap To search for books, tap To sort your books, tap You can sort the books by name, by author, by genre, or by placing unfinished books first.
- Page 54 2015/1/23 Introduction To view the library, tap the name of the book. To sort your books, tap You can sort the books by name, by author, by genre, or by placing unfinished books first. You can also use your own reading application on the always-on display by mirroring Games 2048 2048 is a game where you slide the tiles across the screen to create tiles with bigger numbers.
-
Page 55: Google Apps
2015/1/23 Introduction 3. Flip the device. Your game opens on the always-on display. To restart the game, tap Replay, and then tap Yes. Google apps Google Drive™, Google+™, Hangouts™, Maps, Play Store, Voice Search™, and YouTube™ are Google-specific applications. To download more Google applications, visit the Play Store. Some services may prompt you to sign in with a Google account. -
Page 56: Play Store
2015/1/23 Introduction smartphone, computer, or tablet. Set up Hangouts 1. On the home screen, tap > Hangouts. 2. Confirm the phone number shown on the screen is correct, and tap Confirm. Start a new hangout 1. To start a new hangout, tap to open the New Hangout screen. -
Page 57: Troubleshooting
2015/1/23 Introduction To view your installed applications and games, tap > My apps. To search for new applications and games, tap To change your settings, tap > SETTINGS. To get more information about Play Store, tap > Help. Voice Search Use Voice Search to quickly search your phone, the web, and nearby locations by speaking instead of typing. -
Page 58: Backup And Reset
2015/1/23 Introduction To receive automatic system updates, tap Auto-update button into ON position. To check for system updates manually, tap Check now. Backup and reset You can back up your application data, Wi-FI passwords, and other settings to Google servers. Back up your data 1. - Page 59 2015/1/23 Introduction LTE (rel. 9, cat 4) bands 3, 7 and 20, VoLTE Maximum data speeds LTE: 150Mbps DL, 50Mbp UL WCDMA: HSDPA 42Mbps, HSUPA 11.5Mbps GSM: EGPRS 296 Kbits/s Memory 2GB RAM, 32GB eMMC Camera Main camera 8 MP AF, LED flash Front camera 2.1 MP Sensors Accelerometer, compass, gyroscope, proximity sensor, ambient light...
- Page 60 Repairing Do not attempt to open or repair YotaPhone yourself. It may cause injury to you or damage to YotaPhone. Only a service facility approved by Yota Devices may install or repair this device. Keep your device dry Keep the device dry. Water and other liquids may damage your device.
-
Page 61: Network Support
2015/1/23 Introduction people or animals at a close range. Keep a safe distance when using the camera flash. Network support You can use your YotaPhone on the LTE 800, 1800, and 2600 MHz networks, on UMTS 850, 900, 1900, and 2100 MHz networks, and on the GSM 850, 900, 1800, and 1900 MHz networks. To do this, you need a subscription with your service provider. -
Page 62: About Digital Rights Management (Drm)
2015/1/23 Introduction If the YotaPhone is switched off, switch the phone on by pressing and holding the power button until the phone vibrates. Make an emergency call When the phone is not locked, you can make an emergency call the same way as other calls. 1. -
Page 63: Medical Devices
2015/1/23 Introduction Medical devices Most modern medical equipment are shielded from radio frequency (RF) signals. Note that some medical devices, including implanted medical equipment, might not be shielded against the RF signals from the wireless device. Using radio transmitting equipment, including wireless devices, may interfere with inadequately shielded medical devices' functionality. -
Page 64: Manufacturer's Warranty For Yotaphone
Copyrights Copyright © Yota Devices Ltd. 2014. All rights reserved. YotaPhone is a trademark of Yota Devices. The Android logo, Google™, Android™, Google Mail™, Hangouts™, Chrome™ browser, Google Play™ store, Google+™ social service, Google Maps™, YouTube™ and other trademarks are property of Google, Inc. - Page 65 The contents of the quick guide and full user guide are subject to revision without notice due to any progress in design, methodology and manufacturing. Yota Devices shall have no liability for any error or damage of any kind resulting from the use of this manual.
Need help?
Do you have a question about the YotaPhone 2 and is the answer not in the manual?
Questions and answers