
Related Manuals for NewTeam NT 973-T

Summary of Contents for NewTeam NT 973-T
- Page 1 3rd Fold Affix Stamp NewTeam Ltd. Customer Service Dept. Brunel Road Earlstrees Industrial Estate Corby Northants NN17 4JW 2nd Fold...
- Page 2 Installation Instructions and User Guide NEWTEAM NT/973/T/S/CP & NT/974/T/R/CP THERMOSTATIC MIXER SHOWER IN THE EVENT OF ANY QUERY PLEASE CONTACT THE NEWTEAM CUSTOMER HELPLINE Tel : 01536 264 012 PLEASE KEEP THIS BOOKLET FOR FUTURE REFERENCE DEAR INSTALLER WHEN YOU HAVE READ THESE INSTRUCTIONS...
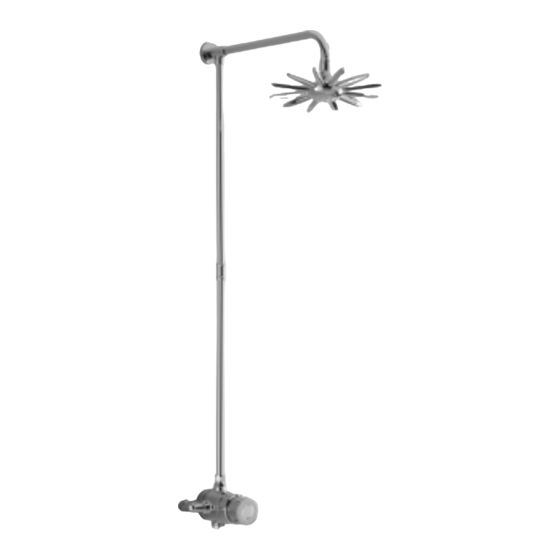
- Page 3 Product Features NewTeam 973-T/974-T NT 974-T NT 973-T NEWTEAM 973-T/974-T SHOWER VALVE...
-
Page 4: Table Of Contents
CLEANING & LUBRICATION GUARANTEE Refer to back cover for Guarantee, Customer Service and Replacement Parts Policy. In the event of any query regarding installation please contact the NewTeam Customer Service Department Tel: 01536 264 012 • Fax: 01536 409 201 E-mail: service@newteam.co.uk •... -
Page 5: Introduction
The cold water supply should be taken directly from the cold water storage tank positioned 60mm below the cold connection which feeds the hot water cylinder. The above installation is recommended for most showers, if however your cold supply is mains pressure then the following will be required. NEWTEAM 973-T/974-T SHOWER VALVE... -
Page 6: Installation
50 & 55°C from the heater. Flow Stabilisers should be fitted prior to the heater. PUMPED SHOWERS Your thermostatic shower is also ideal for power shower installation and can be matched to the NewTeam range of shower pumps. White Plastic O’Ring Orifice Disc... - Page 7 - exchange with the blanking plug for top outlet. 5) Connect the inlet pipes to the valve with compression fittings, please ensure the hot supply is connected to the inlet port ‘H’. NEWTEAM 973-T/974-T SHOWER VALVE...
- Page 8 You must ensure a minimum depth of 57mm from the back of the valve to the finished surface. Fig 2a – Pipe Position Recessed Valve NT-974 Valve NEWTEAM 973-T/974-T SHOWER VALVE...
- Page 9 Once everything is secure, screw the shower head onto the arm and the set up is complete. Fig 4 - Recessed Shower Arm – NT-974-T Fig 5 - Surface Mounted Shower Arm – NT-973-T NEWTEAM 973-T/974-T SHOWER VALVE...
-
Page 10: Service/Maintenance
4) Using a thin flat screwdriver through the centre of the spindle, turn the adjusting screw to alter the temperature. Turn the adjusting screw clockwise (-) for cooler temperature. Turn the adjusting screw anti-clockwise (+) for warmer temperature. Fig 6 - Temperature Setting NEWTEAM 973-T/974-T SHOWER VALVE... -
Page 11: Service/Maintenance
Ensure that you don’t damage the faces of the piston. Illustration Shows A Concealed Backplate Exposed Elbow Flow Assembly Limiter M5 GRUB SCREW Note :- Do Not Remove Indice To Remove Lever Concealed Elbow Assembly Concealing Plate & Seals Fig 7 - Service and Maintenance NEWTEAM 973-T/974-T SHOWER VALVE... -
Page 12: Cleaning & Lubrication
Part No. Description SKBQ1500-973S Seals Kit SKBQ1500-973C Cartridge Kit SK1500-3 Thermostat and Piston Assembly SK1500-12 Flow Limiter Kit CV1600CP Exposed Elbow Assembly SK INLET-4 Concealed Elbow Assembly SKBQ1503-973K Knob & Sleeve SKTS1501-5CP Concealed Plate & Seals NEWTEAM 973-T/974-T SHOWER VALVE... - Page 13 Installers Notes NEWTEAM 973-T/974-T SHOWER VALVE...
- Page 14 Installers Notes NEWTEAM 973-T/974-T SHOWER VALVE...
-
Page 15: Guarantee
NewTeam will repair or replace (at our option), free of charge, any faulty components during the guar- antee period, provided it has been maintained and operated in accordance with our instructions, and has not been misused or damaged. - Page 16 NewTeam Product Knowledge Product Features Product Styling Price Other (please specify) ____________________________________________________________ Please tick here if you do not require any further information or product updates from NewTeam POST BACK FOLD AND TAPE AS INSTRUCTED OVERLEAF NEWTEAM 973-T/974-T SHOWER VALVE...
Need help?
Do you have a question about the NT 973-T and is the answer not in the manual?
Questions and answers