Advertisement
Quick Links
CV MY FIRST TRAMPOLINE AND ENCLOSURE
Assembly & User Instructions -
Important
Age: 3-6 yrs.
Maximum user
weight: 25 kg
Important -
Please read these instructions fully before assembly or use.
These instructions contain important information which will help you get the best from your product
and ensure safe and correct assembly, use and maintenance.
If you need help or have damaged or missing parts, call
Please keep for future reference
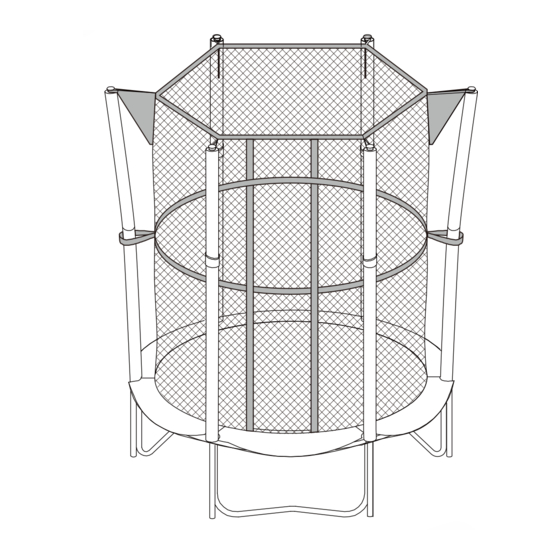
Assembly Size: Dia122 x H184cm
Tips: It will take 2 adults
around 30 minutes to
assemble.
the Customer Helpline: (+44) 0330 0904 420
167/8314
Advertisement

Subscribe to Our Youtube Channel
Related Manuals for Chad Valley CV MY FIRST TRAMPOLINE AND ENCLOSURE


Summary of Contents for Chad Valley CV MY FIRST TRAMPOLINE AND ENCLOSURE
- Page 1 CV MY FIRST TRAMPOLINE AND ENCLOSURE Assembly & User Instructions - 167/8314 Please keep for future reference Assembly Size: Dia122 x H184cm Important Tips: It will take 2 adults Age: 3-6 yrs. around 30 minutes to Maximum user assemble. weight: 25 kg Important - Please read these instructions fully before assembly or use.
-
Page 2: Table Of Contents
Contents WARNING CAREFULLY READ AND UNDERSTAND ALL OF THE INSTRUCTIONS AND SAFETY WARNINGS IN THIS MANUAL BEFORE ASSEMBLING AND USING THIS PRODUCT. IT IS THE RESPONSIBILITY OF THE OWNER OF THIS TRAMPOLINE TO ENSURE THAT ALL USERS OF THIS PRODUCT ARE FULLY INFORMED ON THE PROPER SAFE USE AND THE INHERENT RISKS OF JUMPING ON A TRAMPOLINE. -
Page 3: Safety Information
Safety Information Important –Please read these instructions fully before assembling or use. WARNING • Maintain clear space on all sides of the product. Make sure READ ALL INSTRUCTIONS BEFORE ASSEMBLING OR that there are no hazardous objects above, below or near the USING THIS EQUIPMENT trampoline. -
Page 4: Safety Information
Safety Information Important –Please read these instructions fully before assembling or use. • DO NOT place any objects on the trampoline while anyone is • The trampoline is several feet off the ground. Jumping off the jumping on it. Please be aware of your surroundings to trampoline to the ground or any other surface may result in ensure there are no objects that could cause harm when you injury. -
Page 5: Parts
Parts If you have damaged or missing parts, call the Customer Helpline: (+44) 0330 0904 420 Please Check you have all the parts fittings listed below. Note: The following lists the quantity of hardware needed to assemble this product. In some cases, more fittings may be supplied than are required. Top Rail with Leg Sockets x 6 Leg Base x 3 clamp parts x 6... -
Page 6: Assembly Instructions
Assembly Instructions Step 1 CONNECT 1 TOGETHER AS SHOWN Step 2 INSERT 2 INTO THE SOCKETS OF 1. MAKE SURE THE RETRACTABLE BUTTON ON 2 IS SECURED INTO THE HOLE ON 1. - Page 7 Assembly Instructions Step 3 TURN OVER THE TRAMPOLINE FRAME AND CONNECT 3 AND 4 TO ALL LEGS USING A,B,C,D AS SHOWN. THE HOLES MUST FACE OUTWARD Step 4 PLACE THE MAT ON THE GROUND IN THE CENTER OF THE ASSEMBLED FRAME.
- Page 8 Assembly Instructions Step 5 CONNECT THE MAT TO THE FRAME WITH THE BUNGEE CORDS (10). AS SHOWN IN THE ENLARGED DIAGRAM, STRAND THE BUNGEE CORD THROUGH THE LOOP ON THE MAT AND USE THE TOOL PROVIDED (F) TO PULL IT ALL THE WAY AROUND THE FRAME AND LATCH IT OVER THE PLASTIC CAP.
-
Page 9: Step
Assembly Instructions Step 6 COVER THE TRAMPOLINE FRAME WITH THE FRAME PAD AND TIE THE ELASTIC STRAPS AROUND THE FRAME. MAKE SURE ALL METAL PARTS ARE COVERED. FRAME PAD (IN LIFT-UP POSITION) ELASTIC STRAP Step 7 CONNECT SIX ENCLOSURE POLES (7) TO THE TRAMPOLINE FRAME AS SHOWN. - Page 10 Assembly Instructions Step 8 COVER THE TRAMPOLINE LOOP THE ENCLOSURE FRAME WITH THE FRAME NETTING THROUGH THE PAD. MAKE SURE ALL METAL ENCLOSURE POLES. PARTS ARE COVERED. Step 9 CONNECT SIX ENCLOSURE POLES (8) TO THE TRAMPOLINE FRAME AS SHOWN.
- Page 11 Assembly Instructions Step 10 PULL UP THE ENCLOSURE NET AND HOOK THE TOP TO THE ENCLOSURE POLE AS SHOWN.
- Page 12 Assembly Instructions Step 11 FASTEN THE BOTTOM OF THE ENCLOSURE NET TO THE TRAMPOLINE FRAME BY THREADING THE CORD THROUGH THE MAT AND THE NET AS SHOWN IN THE ENLARGED DIAGRAM.
- Page 13 Assembly Instructions Step 12 9 11 5 FASTENED THE VELCRO AND BUCKLES ON THE ENCLOSURE NETING DURING USE. FASTEN VELCRO CLOSE BUCKLES...
-
Page 14: Warranty
Learning The Fundamental Trampoline Skills Basic trampoline bounces THE BASIC BOUNCE • Start from the standing position, with your feet having shoulder width apart and with head up and eyes on mat. • Swing arms forward and up in a circular motion. •... -
Page 15: Care And Maintenance
If you need help or have damaged or missing parts,call the Customer Helpline: (+44) 0330 0904 420 Produced for Chad Valley Toys. Argos Ltd. Country of origin: China Address: 489 - 499 Avebury Boulevard, Central Milton Keynes, MK9 2NW. www.argos.co.uk...
Need help?
Do you have a question about the CV MY FIRST TRAMPOLINE AND ENCLOSURE and is the answer not in the manual?
Questions and answers