Advertisement
Available languages
Available languages
Quick Links
49 ■ 8B9 ■ 8J9 ■ 849 ■ J49 ■ 8A9 Series
Serie 49 ■ 8B9 ■ 8J9 ■ 849 ■ J49 ■ 8A9
Série 49 ■ 8B9 ■ 8J9 ■ 849 ■ J49 ■ 8A9
TwistPfit Spout
Surtidor TwistPfit
Bec TwistPfi t
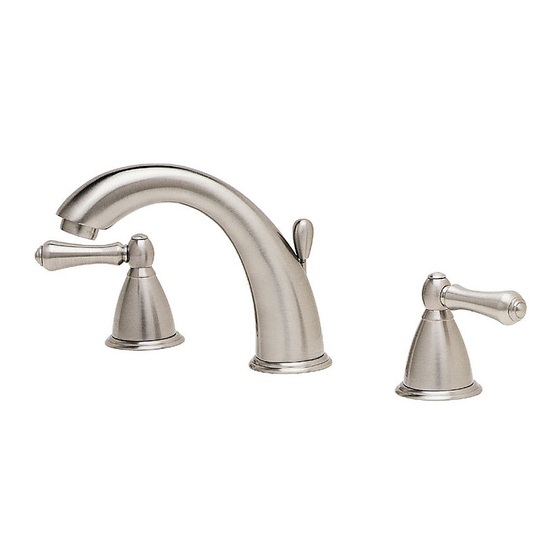
Bedford
Parisa
Carmel
Georgrtown
12-28-04 EO6622V
©
Copyright
2004, Price Pfi ster, Inc.
JUEGOS DE MOLDURAS DE LAS MANIJAS
Cross &
French
Lever
Handles
Handles
Manijas En Cruz
Manijas De
y Estilo Francés
Palanca
Croisillons et
Manettes simples
manettes à la
française
SUPPLY LINES AND FITTINGS NOT INCLUDED
LAS LÍNEAS DE SUMINISTRO Y LOS CONECTADORES NO ESTÁN INCLUIDAS
FLEXIBLES D'ARRIVÉE ET RACCORDS NON FOURNIS
HANDLE TRIM KITS
KITS DE MANETTES
Verve Handle
Manija Verve
Manette Verve
Lavatory Widespread Faucet
Grifo Extenso Para Baño
Robinet Pour Lavabo
Windsor
Acrilic
Handle
Handle
Manija Windsor
Manija De Acrílico
Manette Windsor
Manette acrylique
A
Rope Ring
Handle
Manija De Anilla
Tipo Cuerda
Manette à
anneau torsadé
29421-0100
COMPANY
Advertisement

Related Manuals for Price Pfister Bedford Series


Summary of Contents for Price Pfister Bedford Series
- Page 1 49 ■ 8B9 ■ 8J9 ■ 849 ■ J49 ■ 8A9 Series Lavatory Widespread Faucet Serie 49 ■ 8B9 ■ 8J9 ■ 849 ■ J49 ■ 8A9 Grifo Extenso Para Baño Série 49 ■ 8B9 ■ 8J9 ■ 849 ■ J49 ■ 8A9 Robinet Pour Lavabo HANDLE TRIM KITS JUEGOS DE MOLDURAS DE LAS MANIJAS...
- Page 2 OR BREACH OF WARRANTY HEREUNDER OR ANY OTHER LA LEY CONTRACTUAL O LA DE ANTECEDENTES (incluyendo Price Pfister se réserve le droit de discontinuer ou de modifier CAUSE, AND WHETHER ARISING IN CONTRACT OR IN TORT negligencia y responsabilidad estricta).
-
Page 3: Installation Steps
ENGLISH Thank you for purchasing this Price Pfi ster bathroom faucet. All Price Pfi ster products are carefully engineered, and factory tested to provide long trouble-free use under normal conditions. This bathroom faucet is easy to install using basic tools and our easy to follow illustrated instructions. - Page 4 ENGLISH 9 HOSE CONNECTION TO SPOUT 7 SECURING VALVE BODIES From underneath sink, push the Center Connector (9A) onto Receiving Tube From above fi xture, hold the Flat Shaped Flange (7A) and turn the Valve Body (9B), until unable to push any further. Pull down on the Quick Connect Housing (7B) by hand in a clockwise direction until the assembly is snug.
- Page 5 ENGLISH 11 SECURING HOSE CONNECTIONS Slide Clips (11A) onto End Bodies ( 11B), beneath the End Connectors (11C). 14 HANDLE INSTALLATION Before proceeding, Valve Stems (14A) are to set be in the closed position. A. Installing Round Handle: Attach Handle (14B) onto Valve Stem (14A). 12 FLANGE INSTALLATION Secure with Screw.
- Page 6 ENGLISH 16 LIFT ROD CONNECTION Insert Lift Rod (16A) into hole at top of Spout (16B). Gently, slide Lift Rod (16A) down the Spout (16B) hole. POP-UP DRAIN BODY INSTALLATION STEPS 18 POP-UP INSTALLATION The Flange (18A) can be installed with or without Rubber Seal (18B). If Flange (18A) is installed without Rubber Seal, apply a small bead of plumber’s putty Your faucet can be installed with a 50/50 Pop-Up or underneath the Flange (18A) and around Drain Opening (18C).
- Page 7 ENGLISH PTFE 22 POP-UP BALL ROD INSTALLATION Drop the Stopper (22A) into Drain Body (22B) with the Off-Set (22C) facing the 20 ALL METAL POP-UP INSTALLATION rear. Place Nut (22G) and the other Packing Ring (22H) onto Ball Rod (22D). The Flange (20A) can be installed with or without Rubber Seal (20B).
-
Page 8: Maintenance And Care
ENGLISH 24 UNIT START UP Turn on hot and cold water supplies, and check for leaks above and below the sink. MAINTENANCE & CARE 27 HOSE CONNECTION REMOVAL To detach Hose Assembly (27A), remove Clips (27B) from End Bodies (27C) and pull the End Connectors (27D) from End Bodies (27C). - Page 9 ESPAÑOL Le agradecemos su compra de este grifo para baño Price Pfi ster. Todos los productos Price Pfi ster se diseñan cuidadosamente y se prueban en fábrica para suministrar un uso sin problemas bajo condiciones normales. Este grifo para baño es fácil de instalar utilizando herramientas básicas y nuestras instrucciones con gráfi...
- Page 10 ESPAÑOL 9 CONEXIÓN DE LA MANGUERA AL SURTIDOR 7 SUJECIÓN DE LOS CUERPOS DE LAS VÁLVULAS Desde abajo del lavamanos, empuje el conectador central (9A) sobre el tubo Desde arriba del lavamanos, sujete la brida plana (7A) y gire el cuerpo de la de recibo (9B) hasta que ya no sea posible empujarlo más.
- Page 11 ESPAÑOL 11 AFIANZAMIENTO DE LAS CONEXIONES DE LAS MAN- GUERAS Deslice las presillas (11A) sobre los cuerpos de los extremos (11B), debajo de los conectadores de los extremos (11C). 14 INSTALACIÓN DE LA MANIJA Antes de proseguir, los vástagos de las válvulas (14A) deben estar en la posición cerrada.
- Page 12 ESPAÑOL 16 CONEXIÓN DE LA BARRA DE LEVANTAMIENTO Inserte la barra de levantamiento (16A) en el agujero en la parte posterior del surtidor (16B). Deslice suavemente la barra de levantamiento (16A) hacia abajo en el agujero del surtidor (16B). 18 INSTALACIÓN DEL MECANISMO DE VACIADO RÁPIDO La brida (18A) puede instalarse con o sin sello de hule (18B).
- Page 13 ESPAÑOL PTFE 20 INSTALACIÓN DEL MECANISMO DE VACIADO RÁPIDO 22 INSTALACIÓN DE LA BARRA DE RÓTULA DE VACIADO RÁPIDO Baje el tapón (22A) en el cuerpo del drenaje (22B) con el rebajo (22C) apuntando METÁLICO La brida (20A) puede instalarse con o sin sello de hule (20B). Si la brida (20A) hacia atrás.
-
Page 14: Mantenimiento Y Cuidado
ESPAÑOL 24 FUNCIONAMIENTO DE LA UNIDAD Abra los suministros de agua caliente y fría, y verifi que que no haya fugas arriba y debajo del lavamanos. MANTENIMIENTO Y CUIDADO 27 RETIRO DE LA CONEXIÓN DE LA MANGUERA Para desconectar el conjunto de la manguera (27A), retire las presillas (27B) de los cuerpos de los extremos (27C) y tire los conectadores de los extremos (27D) de los cuerpos de los extremos (27C). - Page 15 FRANÇAIS Merci d’avoir acheté ce robinet de salle de bain Price Pfi ster. Tous les produits Price Pfi ster sont fabriqués avec soin et contrôlés à l’usine pour offrir une longue durée de service sans problème dans des conditions d’utilisation normales. Il est facile de poser ce robinet de salle de bain à l’aide d’un outillage de base et de nos illustrations très claires.
- Page 16 FRANÇAIS 9 RACCORDEMENT DES FLEXIBLES AU BEC 7 FIXATION DES CORPS DE ROBINET Depuis le dessous du lavabo, enfoncer le raccord central (9A) à fond sur le Depuis le dessus du lavabo, maintenir la bride plate (7A) et tourner le corps de robinet tube récepteur (9B).
- Page 17 FRANÇAIS 11 ASSUJETTISSEMENT DES BRANCHEMENTS DE FLEXIBLES Glisser les attaches (11A) sur les corps d’extrémité (11B), en dessous des raccords d’extrémité (11C). 14 POSE DES MANETTES Avant de procéder à l’opération, régler les tiges de robinet (14A) en position de fermeture. A.
- Page 18 FRANÇAIS 16 RACCORDEMENT DE LA TIGE DE BONDE Introduire la tige de bonde (16A) dans le trou sur le dessus du bec (16B). Faire 18 POSE DE LA BONDE glisser doucement la tige (16A) dans le trou du bec (16B). La bride (18A) peut être posée avec ou sans joint en caoutchouc (18B).
- Page 19 FRANÇAIS PTFE 20 INSTALLATION DE LA BONDE ENTIÈREMENT MÉTA- 22 INSTALLATION DE LA TIGE À BOULE DE BONDE Faire descendre le tampon (22A) dans le corps de bonde (22B) en orientant LLIQUE La bride (20A) peut être posée avec ou sans joint en caoutchouc (20B). Si la la pièce angulaire (22C) vers l’arrière.
-
Page 20: Entretien Et Soins
FRANÇAIS 24 MISE EN SERVICE DU MÉLANGEUR Ouvrir les arrivées d’eau chaude et d’eau froide, puis contrôler l’étanchéité sur le dessus et le dessous du lavabo. ENTRETIEN ET SOINS 27 DÉBRANCHEMENT DES FLEXIBLES Pour débrancher les fl exibles (27A), retirer les attaches (27B) des corps d’extrémité... - Page 21 941-222A 941-920* 941-489* 941-489* 941-145* 941-270* Parisa Carmel 920-079* 920-080* Georgetown Bedford 941-540* 920-075* 920-076* 941-200* 941-146* 941-200* 941-200* 960-255* 949-006 960-490* 950-517 Go to Page 22 931-020 931-015 900-050 972-023* 972-023* 950-005 931-005 950-015 931-010 950-025 971-005 972-022* 972-021* All-Metal 50/50 Pop-Up Pop-up...
- Page 22 941-475A or V Cold, Fria, Froid 941-478A or V 941-476A or V 971-992 Hot, Caliente, Chaud 971-990 940-881* 940-975* 940-985 Brass Porcelain Bronce Porcelana Laiton Porcelaine 940-882* 941-900* 941-333 941-406* 971-703 Cold 941-015* 941-013* 949-336 Fria 940-995* Cold Froid Fria 941-403* 940-485* 949-021...
Need help?
Do you have a question about the Bedford Series and is the answer not in the manual?
Questions and answers