Table of Contents
Advertisement
PRECAUTIONS .................................................................................. 3
INSTALLATION .................................................................................. 4
FUNCTIONS
ZERO ........................................................................................... 10
TARE ........................................................................................... 11
PRE-TARE ................................................................................... 13
AUTO TARE ................................................................................ 15
SELECTION OF WEIGHING UNIT ............................................. 17
UNIT IN USE AND INITIAL WEIGHING UNIT SETTING ............ 17
ACCUMULATION ................................................................. .......18
ACCUMULATION MODE .......................................................... ..20
MAX ACCUMULATION SETTING ............................................ ..21
SIMPLE COUNTING ................................................................... 22
PERCENTAGE ............................................................................ 23
HI / LO CHECKING ..................................................................... 25
SERIAL NUMBER ....................................................................... 27
STARTING SERIAL NUMBER SETTING ................................... 28
MAX SERIAL NUMBER SETTING ............................................. 29
TIME AND DATA SETTING ......................................................... 30
PRINT .......................................................................................... 31
PRINT FORMAT SETTING ......................................................... 32
SPACE BETWEEN LINES WHEN PRINTING ............................ 33
PRINTING MODE SETTING ....................................................... 34
CONTENTS
V03
JIK-8 User Manual 1
Advertisement
Table of Contents

Related Manuals for Jadever JIK-8

Summary of Contents for Jadever JIK-8
-
Page 1: Table Of Contents
STARTING SERIAL NUMBER SETTING ........28 MAX SERIAL NUMBER SETTING ..........29 TIME AND DATA SETTING ............30 PRINT ..................31 PRINT FORMAT SETTING ............32 SPACE BETWEEN LINES WHEN PRINTING ......33 PRINTING MODE SETTING ............34 JIK-8 User Manual 1... - Page 2 SAMPLES OF SH-16 PRINTING FORMAT ........ 37 U-KEY Printing Format /PARAMETER SETTING ..... 38 PARAMETER ..................40 Connect JIK-8 to JOW and LED ............42 CAPACITY / RESOLUTION SETTING ..........43 DIVISION CONFIGURATION CHART ..........45 TESTING MODE ................. 46 ERROR MESSAGES ................
-
Page 3: Precautions
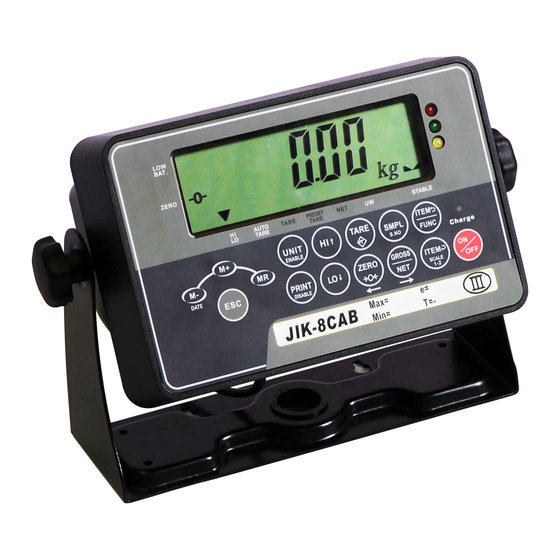
Charge the battery with the DC 9V / 1A adaptor supplied with the indicator. And when the battery is charging, the LED is red and when is fully charged the LED turns green. (it takes approximately 6 hours to charge battery completely) JIK-8 User Manual 3... - Page 5 2. Pull load cell cable through indicator supporter (4) to connect to the indicator. 3. Install Indicator supporter (4) and indicator stand (3) together. 4. Adjust the indicator to adequate viewing angle and tighten the screws located on each side of the Indicator. JIK-8 User Manual 5...
- Page 7 3. Setting of date & time 1. Change the digit when in parameter model (increased) 2. Change the number when in HI-LO checking mode Accumulation 3. Press this key to enter the testing mode 4. Change setting accumulation mode JIK-8 User Manual 7...
-
Page 10: Zero
(3). Now, the sign appear and the scale is in zero point. Remarks: The range of zero point is +/- 2% of the max capacity. Example : the zero range of 60kg is +/- 1.2kg JIK-8 User Manual 10... - Page 12 (9). Press key. (10). The NET and TARE signs will disappear and the scale now zero point. Remarks : Weighing Range = Maximum Range Tare Range JIK-8 User Manual 12...
-
Page 17: Selection Of Weighing Unit
(2). Press key for selection of different weighing unit , there are 4 weighing units:kg、lb、pcs、﹪. (3). Use key to select the weighing unit to be (ON)(in used ) or (OFF){not in used } . JIK-8 User Manual 17... -
Page 22: Accumulation Mode
【 SIMPLE COUNTING 】 (1). Press key to select the pcs as weighing unit. (2). Place the sampling quantity on the pan. (You can choose the sampling quantity as 10、25、50、 100pcs only!) JIK-8 User Manual 22... - Page 24 50 % for sampling quantity; 50 % (flashing) will be displayed on the screen. (5). Press key to complete the sampling procedures. Now the scale is ready for percentage weighing. Put object on the pan for percentage weighing JIK-8 User Manual 24...
-
Page 27: Hi / Lo Checking
HI LO checking limits. This function is valid even if the HI-LO checking function is disabled : Pause! No adding of serial number but display will still show the last serial number when there is nothing on the pan. JIK-8 User Manual 27... -
Page 29: Max Serial Number Setting
(3). Press key to move the cursor to the digit wish to change. ( default : 99999) (4). Use key to change number. example maximum serial number is 100 and key in " " JIK-8 User Manual 29... -
Page 30: Time And Data Setting
(1). Under normal weighing mode press key display will show the time. (2). Press key to enter to time setting mode. Last digit is flashing. (3). Press key to move the cursor and press key to change the setting. JIK-8 User Manual 30... -
Page 32: Print Format Setting
1. There are three options of printers available: SH-24 (dot-matrix printer), È SH-16 BP-443D (Label printer) or EZ-2P (Label printer). 2. U-KEY Connector used to connect scale and PC, and output the weighing data to PC in forms of Excel or Word and so on. JIK-8 User Manual 32... -
Page 33: Space Between Lines When Printing
(3). Press key, display show display will show (4). Press key to set the number of empty lines (space) when printing. {minimum =0,maximum=9} (5). Press key to complete the setting and return to normal weighing mode. JIK-8 User Manual 33... -
Page 34: Printing Mode Setting
: Print continuously when connecting to PC or large LED Display. : No action : Print after stable symbol appear : Print when weight is between HI-LO limits (this function is valid even if HI-LO checking function is disabled) JIK-8 User Manual 34... -
Page 36: Samples Of Sh-24 Printing Format
【 Samples of SH-24 Printing Formats 】 When appear under display of accumulation, press key the print-out will like as following. Remark: Without any commands, the printer are able to print format Prt00~Prt07 when connected to a parallel port printer. JIK-8 User Manual 36... - Page 39 (2). Press key to choose desired setting. (3). When setting is complete, press key and return to normal weighing mode. JIK-8 User Manual 39...
-
Page 40: Parameter
Excel or others, and it is Printer type compatible with WinXP/Win7. Setting of this Normal dot-matrix printer parameter determines the data format for the Label printer connected printer type Label printer Label printer Label printer LED big display JIK-8 User Manual 40... - Page 41 20d) P8 JOW switches Channel 2 for JOW Channel 2 for SCALE 2 ☆ P9 Channel Channel 1 Channel 2 Dual Channel Note: the default setting for A19 12C, when P4 is used. JIK-8 User Manual 41...
- Page 44 Maximum capacity to be set for this indicator is 400000kg. Minimum division to be set for this indicator is 0.01g. Whenever the capacity / resolution is set or changed, be sure to re-calibrate according to calibration procedure located in service manual. JIK-8 User Manual 44...
-
Page 47: Error Messages
Load cell read out always the connected correctly. same Optional RS-232(RTC) Replace the batteries batteries run out Press twice to clear all Unable to accumulate. Two objects are with different units. accumulation data or press and return to normal weighing mode. JIK-8 User Manual 47... -
Page 50: Relay Module Diagram
【RELAY MODULE DIAGRAM】 „ Relay Output: Alarm N.C. N.O. N.C. N.O. N.C. N.O. N.C. N.O. „ Relay Contact Spec 1A/24VDC,0.5A/125VAC,0.25A/250VDC (Reminder: suggest to add a ferrite core on the cables) JIK-8 User Manual 50... -
Page 51: Dual Platform Operation Ch1,Ch2
(2) Each platform has respectively 10 sets of Hi/Lo, 5 sets of Auto Tare and 5 sets of Pre Tare memories. (3) Printing format for two platforms can be set to different one at the same time. Accumulation: (1) Accumulation is only allow for either one platform. JIK-8 User Manual 51... -
Page 53: Assembly Manual Of Jik Indicator And Support Stand
2. Put M6 washer onto adjustable screw. (illustrator II) 3. Rotating the star turning button into adjustable screw. (illustrator III) 4. Adjust the indicator to the best view, and then rotate it tight via star turning button. (illustrator VI) JIK-8 User Manual 53... -
Page 55: Single Point Calibration For Weight
(it is recommended to adjust one segment each time), after confirmation, press key to save setting and the zero point calibration will be performed automatically. Or use to skip the zero point calibration, and use last zero point directly. JIK-8 User Manual 55...
Need help?
Do you have a question about the JIK-8 and is the answer not in the manual?
Questions and answers