Table of Contents
Advertisement
Advertisement
Table of Contents

Related Manuals for Bibene D3-1


Summary of Contents for Bibene D3-1
- Page 1 D3-1 Two-way Digital Keypad Alarm System User Manual...
- Page 2 Foreword I. Introduction Thanks for purchasing BIBENE D3-1 alarm system. Please read this user manual carefully before use, we will update this manual on a regular basis in accordance with the addition or upgrade of the product features. If you need any assistance, please contact our support team, we will contact you within 24 hours.
-
Page 3: Table Of Contents
Table of Contents 8.3 PIR Motion Sensor installation---------------- 9. Change Dis-arm Password ----------------------- 1.Product Features------------------------------------- 10.Low Battery Prompt-------------------------------- 2. Operating Principle--------------------------------- 11.Restore Factory Setting--------------------------- 3.Check Kit Accessory-------------------------------- 12. DIY Solution Q & A--------------------------------- 4. Button Introduction -------------------------------- 12.1 Tommy’s Office--------------------------------- 4.1 Main panel Button-------------------------------- 12.2 Jenny’s Cute Cafe------------------------------ 12.3 Molly’s Home------------------------------------... -
Page 4: Product Features
1. Product Features D3-1 Kit includes: 1)Main Panel works as stand alone alarm 1x Main Panel 2)Easy One-button Operation 4x Door/window Sensors 3)4 zones for DIY home security system 1x Remote Control 4 ) W h e n t r i g g e r a l a r m s , t h e L E D i n d i c a t o r o f 1x User Manual correspondent zone will flash to warn you the exact... -
Page 5: Disarm
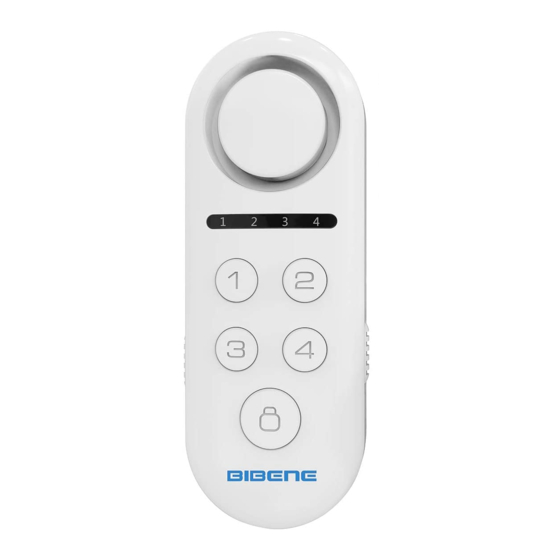
4.1.2 DISARM: Enter the default password 1234 on keypad, the 4 LED indicator of Panel will flash twice and beep twice. (3 beep sounds indicates entering wrong password) 4.1.5 Chime/alarm Switch (Only work for main panel) Choose Chime or alarm sound for main panel. 4.2 Remote Control Button 4.1.3 Away Home Mode: Arm delay &... -
Page 6: Pir Motion Sensor Button
4.4 Door/window Sensor Instruction A r m D e l a y ( A f t e r p r e s s , w i l l a r m a f t e r 30seconds) Disarm directly after press Arm Directly after press SOS: Alarm directly after press(4 LED indicator flash) -
Page 7: Zone Features Introduction
6. Zone Features Introduction 3) Press on main panel to ARM. 6.1 Features of 4 Mode Zones 4) Separate the transmitter and magnet over than 2CM, it will trigger alarm Please Note: 5 ) W h e n a l a r m i s t r i g g e r e d , t h e L E D i n d i c a t o r o f Zone Features &... -
Page 8: Zone Features Setting
5) Finally press button to quit setting process.Done. Arm Delay Zone Method Prompt Zone Mode Done or not Note: 1. Ordinary 1.No Arming LED indicator Long press 2. Emergency delay Same steps to set features for zone 2, zone 3, zone 4. of Zone 1 keeps Zone1 &... -
Page 9: Delete Remote Control
7.2 Delete Remote Control 2) Put the magnet tightly close to transmitter firstly,then move the magnet away (at least 2cm far away), then put it 1) Long press the button on main panel, till the 4 LED close to transmitter again.The No.1 LED indicator will indicator light on, indicates the main panel is under fl... -
Page 10: Add Pir Motion Sensor
7.5 Add PIR Motion Sensor 7.6 Delete PIR Motion Sensors 1)Long press 【1】 button, No.1 LED indicator of main 1) Long press 【1】 button on main panel, No.1 LED panel is on, indicates the main panel is under learning indicator of main panel will be on, means the main panel status. -
Page 11: Pir Motion Sensor Installation
and magnet.Make sure the triangle marks is close to each other. 5) Paste the transmitter and magnet separately on doors or windows or any other open/close places with provided double-sided tapes. 6) Done! Once the transmitter and magnet is separated around 2cm by intruder ,the LED light in transmitter will be on in Red. -
Page 12: Change Disarm Password
conditioner,microwave oven which may cause false triggering. -Avoid two PIR sensors placed in the same space. There will be interference phenomenon caused by trigger at the same time if several sensors install LED in same place -Avoid installing infrared detector at outside, and it’s only for indoor use. -
Page 13: Tommy's Office
1) Remove the battery of main panel 12.2 Jenny’s Cute Cafe 2) Keep Long pressing without release until battery are re-load & 10 times beep sounds firstly & 4 times beep Jenny: sounds emits again,Then release pressing. Done. I run a small caf downtown.There are 2 important place, Zone 1 is the warehouse back door which i never open,so Note: i hope it will alarm no matter i arm or disarm the system... -
Page 14: Main Panel
LOVLOY Answer: Easily monitor opening of doors and windows and any other open/close places.Once opened, the transmitter Set your Zone3 to be “ordinary mode” by : Long and magnet will be separated and triger alarm press & [3] + [1]+[2]+. Power Supply:23A 12V Alkaline(Included) Transmitting Distance: minimum 100m Set your zone4 to be doorbell mode by: Long press...
Need help?
Do you have a question about the D3-1 and is the answer not in the manual?
Questions and answers