Table of Contents
Advertisement
Quick Links
IMPORTANT! READ AND FOLLOW THESE INSTRUCTIONS
CAREFULLY AND KEEP FOR FUTURE REFERENCE
If you sell or give away this product, make sure you give this instruction to the new owner.
WARNING
WARNING — Incorrect installation can be dangerous;
WARNING — Do not use the safety barrier if any components are damaged or missing;
WARNING — The safety barrier must not be fitted across windows;
WARNING — Never use without mounting cups;
This safety gate is for domestic use only;
This safety gate has been designed for use with children up to 24 months of age;
Never use with a child able to climb over or dislodge/open the gate;
The surfaces that the gate is to be fixed to must be suitable for the purpose and must be structurally sound;
If the barrier is to be used at the top of the stairs, it should not be positioned
below top level;
If the gate is to be used at the top of the stairs to prevent the child falling down the stairs, it must not be placed
on any stair below the level of the top stair;
This gate has a manual close system;
This gate is intended for indoor use and is not to be exposed to outdoor elements;
Install this gate away from heaters and other sources of heat.
Caution: As part of the pressure-mounted gate engineering, there is a construction bar at the base of the gate
opening. To avoid tripping or falling, always use extra caution to step over this construction bar at the base of
the gate, particularly when gate is positioned at the top of a staircase.
Can be used in conjunction with a Dreambaby
INSTRUCTIONS
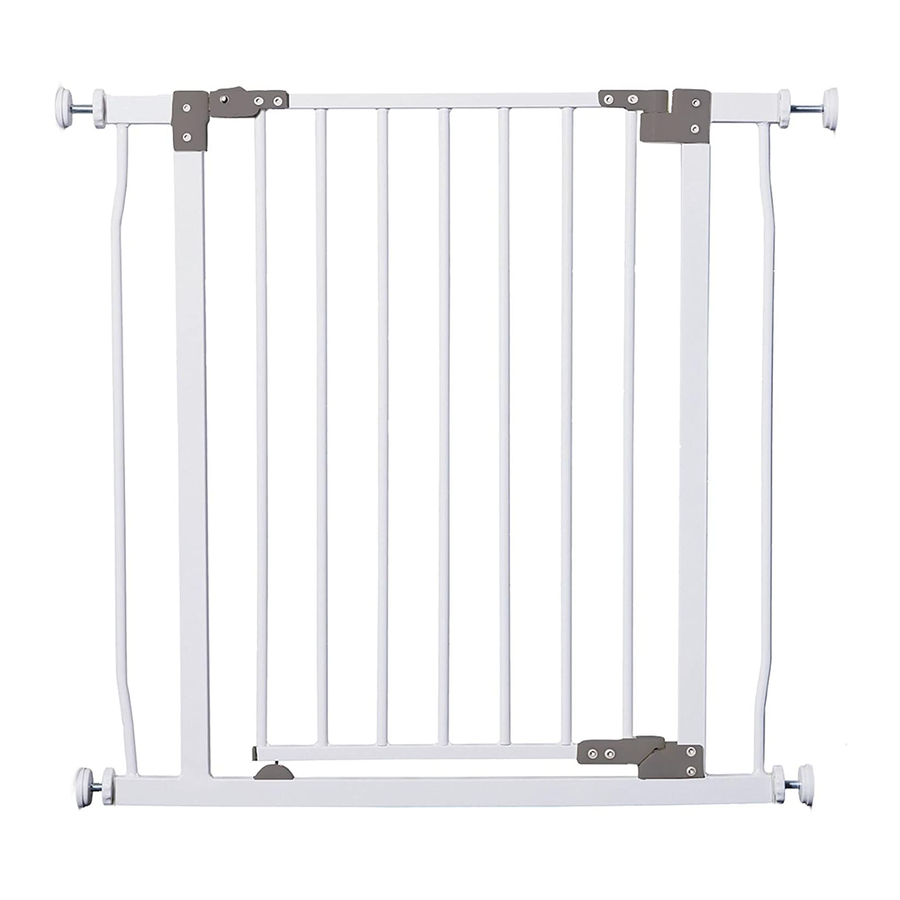
Liberty Security Gate Kit
With Stay-Open Feature & Additional
This safety gate complies with EN1930:2011
F776 fits openings 93cm.
Watch-the-Step
®
Gate Ramp (F837) to help avoid tripping.
®
1
F776 IM_v4_022016
F776
9cm
Extension
Advertisement
Table of Contents

Subscribe to Our Youtube Channel
Related Manuals for dreambaby Liberty Security Gate Kit F776


Summary of Contents for dreambaby Liberty Security Gate Kit F776
- Page 1 To avoid tripping or falling, always use extra caution to step over this construction bar at the base of the gate, particularly when gate is positioned at the top of a staircase. Can be used in conjunction with a Dreambaby Watch-the-Step Gate Ramp (F837) to help avoid tripping.
- Page 2 PARTS LIST NOTICE TO CUSTOMERS THE GAP IN THIS GATE IS NOT A FAULT. A - Gate Panel H - Mounting Cups THE GAP WILL DISAPPEAR WHEN THE GATE IS B - Upper Locking Set I - Double-sided Adhesive Tape CORRECTLY INSTALLED.
- Page 3 INSTALLATION Ensure the surface you are mount the gate is structurally sound such as solid timber, brick or masonry. For plaster / gyprock surface, locate the timber beam or stud behind and mount in this location (mounting on plaster / gyprock alone is not strong enough and not safe).
- Page 4 To use with Gate Extensions. Extension Frame Gate Frame NOTE: Wider gate extensions can Tension Knob with Rubber Pads Extension Pin be used on the F776 gate section. Replace the included 9cm gate extensions with larger options, Tension listed below under Gate Extensions Bolt (sold separately).
- Page 5 To Install, place the gate in the opening so that the bottom of the Gate Frame is completely flat on the floor (3A), and it is perpendicular to the openings and the floor (3B & 3C). Top view of gate Side view of gate floor floor...
- Page 6 Tighten both of the bottom Tension Knobs (7A) by turning them clockwise at the same time (7B & 7C). NOTE: Make sure the bottom of the gate frame Tighten remains completely flat on the floor. inward Next, tighten both of the Tension Knobs at the top at the same time by turning them clockwise (7C).
- Page 7 OPERATION To open the gate: Slide the Gate Release Switch (9A). Lift the Gate Panel upward (9B). Gate open in both directions (9C). Slide Lift Gate Panel up to open Gate Release Switch Gate opens in both directions Close the gate until it is fully locked with Upper (10A) and Lower Locking sets (10B) engaged. Gate Upper Panel...
- Page 8 Regularly check Tension Knobs, Rubber Pads and Mounting Cups to make sure the gate is securely in place and closes correctly. Adjust as required. • Only use Dreambaby spare parts. Any additional and replacement parts should ® be obtained from Tee-Zed Products.
Need help?
Do you have a question about the Liberty Security Gate Kit F776 and is the answer not in the manual?
Questions and answers