Table of Contents
Advertisement
Quick Links
Advertisement
Table of Contents

Related Manuals for FAAC PARQUBE LE

Summary of Contents for FAAC PARQUBE LE
- Page 1 PARQUBE LE Installation Ver. 1.0 21st Nov. 2014...
- Page 3 This page has been left blank intentionally Ver. 1.0 - 21st Nov. 2014 - ENG...
- Page 4 FAAC S.p.A. thanks you for having chosen our products! Copyright ©, 2014, FAAC S.p.A. All rights reserved. Reproduction of this manual, in whole or in part, is not allowed without written permission by FAAC S.p.A. The information contained herein is deemed to be reliable as at the date of publication of the document.
-
Page 5: Table Of Contents
Table of Contents General Conditions ............................ 7 Symbols Used in the Manual ..............................7 Captions of Installed Pictograms .............................7 General Characteristics ................................8 Roles .......................................9 Recipients ......................................9 Product Description ..........................11 2.1 Identification Plate ..................................11 2.1.1. Description ........................................11 2.1.2. Positioning ........................................12 2.2 Intended Use ....................................13 2.2.1. - Page 6 This page has been left blank intentionally Ver. 1.0 - 21st Nov. 2014 - ENG...
-
Page 7: General Conditions
GENERAL CONDITIONS SYMBOLS USED IN THE MANUAL Symbol Description Indicates warnings or procedures related to operator safety. Indicates warnings or information of particular importance which do not affect the operator safety. CAPTIONS OF INSTALLED PICTOGRAMS Symbol Description Electrical hazard! Presence of live parts. Hot parts hazard! Presence of hot parts. -
Page 8: General Characteristics
Make sure that the internal parts of the unit do not come into contact with water. ▫ FAAC S.p.A. declines all liability deriving from improper use or use other than that for which the product is intended. ▫ FAAC S.p.A. declines all liability concerning safety and proper operation of the device if non-original system components are used. -
Page 9: Roles
ROLES The following table indicates the expertise and skills of the operators assigned to the different tasks: Icon Qualification Description Liability ▫ System installation according to the inten- ded purpose. ▫ HUB Parking Technology ▫ Commissioning according to the operating technician and safety requirements and delivery to the system manager. - Page 10 This page has been left blank intentionally Ver. 1.0 - 21st Nov. 2014 - ENG...
-
Page 11: Product Description
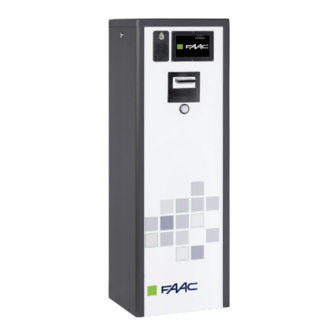
PRODUCT DESCRIPTION IDENTIFICATION PLATE 2.1.1. Description FA A C s . p . a . Vi a C a l a r i , 1 0 4 0 0 6 9 Z o l a P r e d o s a B o l o g n a I t a l y Ty p e : LEPQ1... -
Page 12: Positioning
2.1.2. Positioning The figure shows the positioning of the identification plate (1) on the peripheral. Figure 2 - Identification plate positioning Ver. 1.0 - 21st Nov. 2014 - ENG... -
Page 13: Intended Use
Device to control an entry lane of a parking system Any other use and/or modification is not allowed and can be dangerous. FAAC S.p.A. declines all liability deriving from improper use or use other than that for which the product is intended. -
Page 14: Technical Characteristics
TECHNICAL CHARACTERISTICS 2.3.1. Technical Data Characteristic Value Dimensions (WxDxH) in mm 425 x 360 x 1262 Weight 47 Kg Mains power supply voltage 100-120 / 220-240 V ~ 50-60 Hz Max power (regular load) 30 Watt Max power (with heater) 225 Watt Operating ambient temperature -20°C / + 50°C... -
Page 15: Control Elements
2.3.3. Control elements Figure 4 - Control elements Pos. Element Opt. Service Door Microphone Intercom System Operator Help request button Door lock Loudspeaker Intercom System User display Ticket issue nozzle RFID reader for cards Ticket request button Ver. 1.0 - 21st Nov. 2014 - ENG... -
Page 16: Internal Components
2.3.4. Internal components Pos. Element Opt. Thermo-heater On-Off Switch Power Supply Unit Paper roll support Paper reserve sensor Paper tension level Ventilation User display Intercom System (Analog/VOIP) Ticket Printer RFID reader for cards Paper roll Graphic display management Board ControllerPlus Board Practic 503 Board Interface Board DP2 Detector Board... - Page 17 2.3.5. Base Module and Options The peripheral consists of a Base Module to which different options and accessories can be added to enhance its functionality. Options and accessories are intended to be mounted and wired inside or outside of the device. Device Basic Module External Option...
-
Page 18: General Description
GENERAL DESCRIPTION 2.4.1. Operating mode The peripheral can operate as follows: Type Description ON-LINE It allows all the functions that the system can offer to be used, thanks to the support of the Management System. ▫ connection with PC Management required ▫... -
Page 19: Installation
Make sure the earthing system has been set up accordingly by connecting the specific earth terminal (yellow/green) of the peripheral. On the parking area lanes, you must clearly display appropriate signs (not supplied by the FAAC S.p.A.) prohibiting pedestrians from transiting. -
Page 20: Wall Set-Up
WALL SET - UP 3.3.1. Foundation plate The diagram below indicates the values of the foundation plate. Ref. Dimension 400 mm 360 mm Ø 200 mm Ø 13 mm 5 mm 600 mm 400 mm 500 mm 220 mm Figure 7 - Foundation plate 3.3.2. -
Page 21: Fixing
3.3.3. Fixing Fasten the Peripheral to the plate (1) using the relevant nuts and washers (2). Figure 9 - Fixing Peripheral to the plate Ver. 1.0 - 21st Nov. 2014 - ENG... -
Page 22: Ducts Set-Up
DUCTS SET - UP Before carrying out the required masonry works, make sure all necessary ducts for the passage of the cables (electrical and data connection) are prepared. It is essential to provide separate channels between: mains voltage (230 Vac power cables) and low voltage (cables for: control, safety, intercoms, serial data line, etc.). - Page 23 Pos. Type Device Type of cable Section Power Supply (Vdc) LPR Camera Flame-retardant 2 x 1.5 mm + earth Data LPR Camera UTP cat.5 or higher 8 x 0,2 mm Power Supply (Vac) Vacant/Full Sign Flame-retardant 2 x 1.5 mm + earth Commands Vacant/Full...
-
Page 24: Device Positioning
DEVICE POSITIONING To ensure the parking system operates correctly, all the equipment of the vehicular lane must be positioned, strictly observing the dimensions shown in the layout below. Pay particular attention to the dimensions and positioning of the magnetic loops. The figure shows a complete Peripheral installation where are connected the options. -
Page 25: Connections
CONNECTIONS The cables used for the power supply and the connection of various peripheral of the parking system must have the characteristics indicated in the "DUCTS SET-UP" paragraph. To avoid damage to the vehicles in transit, the barriers must be equipped with the safety option that allows the "vehicle presence"... - Page 26 Pos. Description Connector for Ethernet ETH-485-232 converter. PL programming keyboard connector. Connector for input/output control. No. Pin Description Transit loop output Presence loop output Transit loop Presence loop Input 2 (auxiliary) Input 6 (auxiliary) Input 4 (auxiliary) Input 3 (open beam from from external contact) Common for auxiliary input Common for auxiliary input Output 2 (Reserved command for Close Beam)
- Page 27 Pos. Description Auxiliary connector for device power supply at + 24 Vdc. No. Pin Description + 24 Vdc + 24 Vdc Connector for loops simulation. It is essential to remove the detector integrated DP2, before using this connector. No. Pin Description Loop common input (GND) Transit loop input (+ 24Vdc)
- Page 28 The following are examples for the connection of some devices. 3.6.1.1. Interface Board - 624BLD Board Figure 13 - Connections on interface board Figure 14 - Connections on 624BLD Board Interface Board 624BLD Board (J1) 2 (*) 7 (*) (*) Connect the photocells (optional) for the safety of pedestrians, in series between these two pins. If you are using a different type of barrier, please refer to its installation manual.
- Page 29 3.6.1.2. Interface Board - ETH-485-232 Converter It is necessary to create a connection cable with connector DB9m not supplied by FAAC S.p.A.. Follow the instructions indicated in the table below. DB9 M Figure 15 - Connections on interface board Figure 16 - Connections on ETH-485-232 Converter...
- Page 30 The diagram indicates the connections when an V/F Sign is used code 103130 or 103131. The V/F Sign requires mains power (230V) on the connector (B). Figure 17 - Connections on interface board Figure 18 - V/F Sign connection at ParQube LE Interface Board V/F Sign...
- Page 31 All equipment that can be used in the ParQube parking system has been designed and tested by the FAAC S.p.A., in compliance with the regulations in force. In order to avoid any kind of unexpected behaviour, all the regulations and warnings in this manual must be complied with.
- Page 32 Occasional ticket issuance Engage the Presence loop, press the button to request a ticket and draw the ticket. Verify that the barrier is opened when the ticket is drawn and transit on the lane. Proximity card or Tag reader Engage the Presence loop and bring a "valid" card close to the reader. Verify that the reading outcome message appears on the display and the barrier opens;...
-
Page 33: Settings
SETTINGS DETECTOR DP2 The device is inserted into the interface board and retains the vehicles that transit on the lane. Pos. Description Channel 2 - Green LED (Channel Status) Channel 2 - Red LED (Vehicle on Loop) Description Frequency Channel 2 Retaining time Sensitivity B Sensitivity A... - Page 34 4.1.1.1. Sensitivity The sensitivity of inductance can be varied for each channel, which a vehicle must vary, to activate the relevant output of the detector. This parameter is set separately for each channel, with the aid of two dip switches: Sensitivity Channel 1 Channel 2...
- Page 35 4.1.1.3. Reset and presence time Dip switches 3 and 7 allow you to set a max. constant detection time of 5 minutes, after which it is automatically reset and then self-calibrated. This type of setting is not recommended in parking systems since the vehicles may remain a long time on the loops while waiting in the queue.
-
Page 36: Controllerplus Board
CONTROLLERPLUS BOARD The ControllerPlus electronic board is found in all ParQube parking peripherals. The specifically designed firmware allows you to control all the peripherals totally autonomously or via interaction with the Management System. 4.2.1. Jumper and LED L 1-4 Figure 21 - Jumper and LED Pos. -
Page 37: Function Jumper
Switch off the electronic board before to move the jumper position The ControllerPlus sets its function during the boot loading sequence. Jumper position Function description Notes in CN1 ParQube LE ParQube Fee Computer ParQube LS ParQube Access Reader / Counter ParQube LX ParQube APS... -
Page 38: Termination Resistor On Rs485 Data Communication Line
4.2.3. Termination resistor on RS485 data communication line On the communication line 485, a termination resistor of 120 Ohm can be used on the first and last peripheral of the line to avoid any signal interference (for more details refer to the "DATA LINE DESCRIPTION" chapter in the "Parking System: Fundamentals"... -
Page 39: Declaration Of Conformity
Product ParQube LE Product Description Device to control an entry lane of a parking system in conformity with the following EC Directives when installed in accordance with the instructions found in the operating... - Page 40 HUB Parking Technology a Business Unit of the FAAC Group www.hubparking.com...
Need help?
Do you have a question about the PARQUBE LE and is the answer not in the manual?
Questions and answers