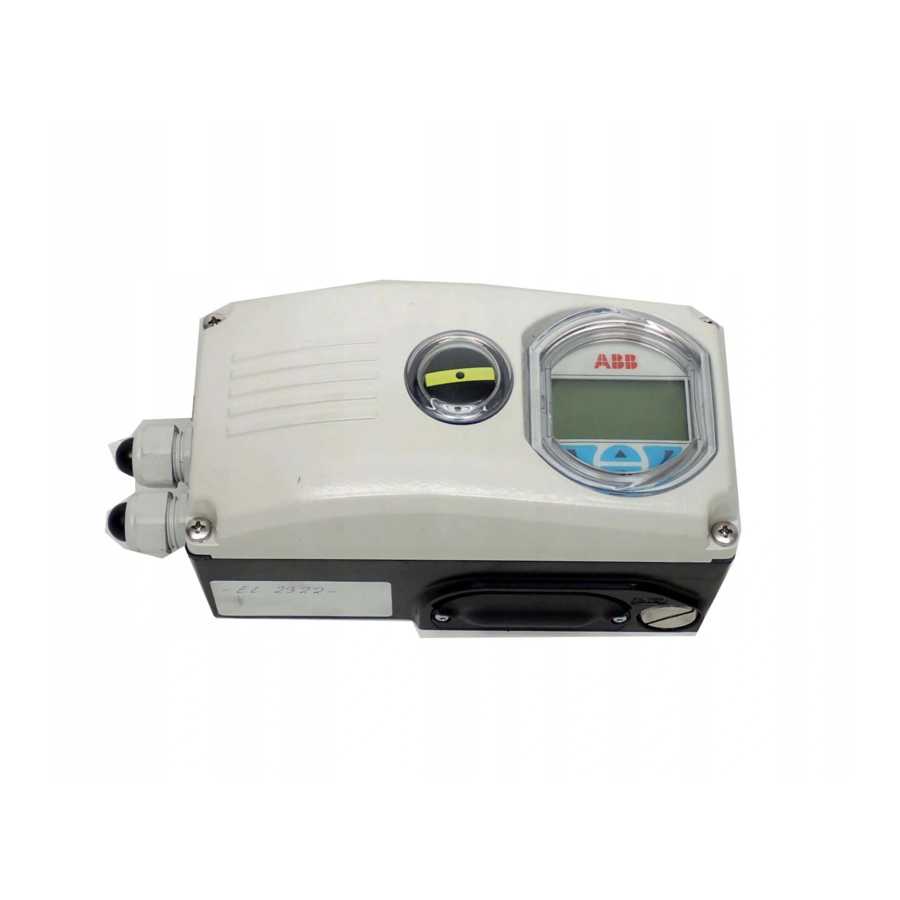
ABB PositionMaster EDP300 Commissioning Instruction
Digital positioner
Hide thumbs
Also See for PositionMaster EDP300:
- Operating instruction (88 pages) ,
- Manual (52 pages) ,
- Instruction (8 pages)

Subscribe to Our Youtube Channel
Related Manuals for ABB PositionMaster EDP300


Summary of Contents for ABB PositionMaster EDP300
- Page 1 Commissioning Instruction CI/EDP300-EN Rev. C PositionMaster EDP300 Digital Positioner...
- Page 2 ABB Automation Products GmbH Industrial Automation Schillerstr. 72 32425 Minden Germany Tel: +49 571 830-0 Fax: +49 571 830-1806 Customer service center Tel: +49 180 5 222 580 Mail: automation.service@de.abb.com Change from one to two columns 2 CI/EDP300-EN Rev. C | PositionMaster EDP300...
-
Page 3: Table Of Contents
12.2 Control Drawing 901305 ........34 Unit..............18 6.4.2 Electrical connection to the EDP300 remote sensor ................19 6.4.3 Electrical data for inputs and outputs ....19 PositionMaster EDP300 | CI/EDP300-EN Rev. C 3... -
Page 4: Safety
The signal word "NOTICE" indicates useful or important information about the product. The signal word "NOTICE" is not a signal word indicating a danger to personnel. The signal word "NOTICE" can also refer to material damage. 4 CI/EDP300-EN Rev. C | PositionMaster EDP300... -
Page 5: Use In Potentially Explosive Atmospheres According To Atex And Iecex
IP rating is met. EAC TR-CU-012 Ex ia IIC T4/T6 Ga X Ex ia IIIC T100°C/T55°C Da IP65 EX nA IIC T4/T6 Gc X Ex tb IIIC T100°C/T55°C Db IP65 PositionMaster EDP300 | CI/EDP300-EN Rev. C 5... -
Page 6: Operation With Flammable Gas
Ventilate and evacuate the EDP300 fully several times. Terminals +83 / -84 Temperature class T1 – T4 Temperature class T6 = 30 V = 28 V = 500 mW = 400 mW = 4.2 nF = negligibly small 6 CI/EDP300-EN Rev. C | PositionMaster EDP300... -
Page 7: Type Of Protection Ex N - Non-Sparking
Terminals Limit 1: +51 / -52 Limit 2: +41 / -42 Temperature class T1 – T4 Temperature class T6 In accordance with type examination certificate PTB 00 ATEX 2049X 1) No IECEx approval PositionMaster EDP300 | CI/EDP300-EN Rev. C 7... -
Page 8: Use In Potentially Explosive Atmospheres In Accordance With Fm And Csa
CL III, Div. 2, T4 or T6 Class I Zone 2, AEx nA IIC, T4 or T6 T4 Ta=(-40 ... +85) °C; (-40 ... +185) °F T6 Ta=(-40 ... +40) °C; (-40 ... +104) °F IP64 8 CI/EDP300-EN Rev. C | PositionMaster EDP300... -
Page 9: Use In Areas With Combustible Dust
Temperature class Ambient temperature T T1 ... T4 -40 °C ... 85 °C -40 °C ... 40 °C Temperature class Ambient temperature T -40 °C ... 85 °C -40 °C ... 40 °C PositionMaster EDP300 | CI/EDP300-EN Rev. C 9... - Page 10 Limit 1: +51 / -52 Limit 2: +41 / -42 Temperature class T1 – T4 Temperature class T6 -25 … 85 °C -25°C … 40°C 1) No IECEx approval Change from two to one column 10 CI/EDP300-EN Rev. C | PositionMaster EDP300...
-
Page 11: Product Identification
All claims for damages must be submitted to the shipper without delay and before installation. must observe the following regulations for shipping purposes: All devices delivered to ABB must be free from any hazardous materials (acids, alkalis, solvents, etc.). Please contact Customer Center Service acc. to page 2 for nearest service location. -
Page 12: Installation
If the device is being operated on a cylinder, for reasons associated with linearity you should run the Auto Adjust function for rotary actuators (see chapter "Start Auto Adjust function" on page 31). 12 CI/EDP300-EN Rev. C | PositionMaster EDP300... -
Page 13: Mechanical Mounting
The usable span is 90°, which must be entirely within the measuring range, but does not necessarily need to run symmetrically to the longitudinal axis. NOTICE During installation make sure that the actuator travel or rotation angle for position feedback is implemented correctly. PositionMaster EDP300 | CI/EDP300-EN Rev. C 13... - Page 14 Tighten the screws as evenly as possible to ensure subsequent linearity. Align the mount bracket in the oblong hole to ensure that the operating range is symmetrical (lever moves between the arrow marks 4 ). 14 CI/EDP300-EN Rev. C | PositionMaster EDP300...
- Page 15 After mounting, check whether the positioner is operating within the sensor range. M11032 Fig. 12: Actuator bolt on valve (rear view) 1 Potentiometer lever 2 Actuator bolts c Valve spindle d Vent lamp e Positioner PositionMaster EDP300 | CI/EDP300-EN Rev. C 15...
-
Page 16: Mounting On Control Valves
Required tools: — Wrench, size 8 / 10 — Allen key, size 3 Fig. 14: Integral mounting on control valves using adapter plate 1 O-Ring 2 Adapter plate 3 Adapter 16 CI/EDP300-EN Rev. C | PositionMaster EDP300... - Page 17 Fig. 18: Screwing the positioner onto the actuator NOTICE After mounting, check whether the operating range for the actuator matches the measuring range for the positioner, see chapter "General information" on page 13. PositionMaster EDP300 | CI/EDP300-EN Rev. C 17...
-
Page 18: Electrical Connections
(Option module) +21 / -22 Universal input UAI 1 / 2 / 3 EDP300 remote sensor (Only for options EDP300 Remote Sensor or EDP300 for remote position sensor) Change from two to one column 18 CI/EDP300-EN Rev. C | PositionMaster EDP300... -
Page 19: Electrical Connection To The Edp300 Remote Sensor
(Control circuit in accordance with DIN 19234/NAMUR) Switching state logical “0”: Current > 0,35 mA … < 1,2 mA “1”: Current > 2,1 mA Direction of action standard logical "0" or logical "1" (configurable) PositionMaster EDP300 | CI/EDP300-EN Rev. C 19... - Page 20 400 Ω at 20 mA Terminals 41 / 42 / 43, 51 / 52 / 53 Supply voltage maximum 24 V AC/DC Load rating Maximum 2 A Change from two to one column 20 CI/EDP300-EN Rev. C | PositionMaster EDP300...
-
Page 21: Connection On The Device
0.25 ... 0.5 mm (AWG 23 ... AWG 22) sleeve no plastic sleeve Flexible with wire end 0.25 ... 0.5 mm (AWG 23 ... AWG 22) sleeve with plastic sleeve Change from two to one column PositionMaster EDP300 | CI/EDP300-EN Rev. C 21... -
Page 22: Connection To Device - Edp300 Control Unit With Edp300 Remote Sensor
(0.44 lbf-in) and then tighten by applying 200 Ncm (1.77 lbf-in). — The pneumatic outputs must be connected to the actuator using pneumatic lines with a minimum diameter of 6 mm. Change from two to one column 22 CI/EDP300-EN Rev. C | PositionMaster EDP300... -
Page 23: Connection To Device - Edp300 Control Unit For Remote Position Sensor
Auto Adjust function for rotary actuators — The pneumatic outputs must be connected to the actuator using pneumatic lines with a minimum diameter of 6 mm. PositionMaster EDP300 | CI/EDP300-EN Rev. C 23... -
Page 24: Installing The Option Modules
4. Attach the new housing cover (with round viewing window) and screw it on to the housing. Tighten the screws so that they are hand-tight. 24 CI/EDP300-EN Rev. C | PositionMaster EDP300... -
Page 25: Setting The Option Modules
2 when the feedback shaft is rotated counter-clockwise (as viewed from the front). 3. Attach the housing cover and screw it onto the housing. 4. Tighten the screws so that they are hand-tight. PositionMaster EDP300 | CI/EDP300-EN Rev. C 25... -
Page 26: Microswitches
It enables the increased pressure to be transferred back to the air inlet line. The opening pressure of the check valve should be < 250 mbar (< 3.6 psi). 26 CI/EDP300-EN Rev. C | PositionMaster EDP300... -
Page 27: Connection On The Device
— The working range for the positioner is between 1.4 ... 10 bar (20 ... 145 psi). PositionMaster EDP300 | CI/EDP300-EN Rev. C 27... -
Page 28: Commissioning
Operating Mode menu. Operating mode Auto Adjust Adaptive Control Manual SP Manual Sensor Configuration Back 2. Use to select the "Manual Sensor" operating mode. 3. Use to move to the relevant end positions. 28 CI/EDP300-EN Rev. C | PositionMaster EDP300... -
Page 29: Operation
Exit menu Back Go back one submenu Cancel Cancel parameter entry Select the next position for entering numerical Next and alphanumeric values Meaning Select Select submenu / parameter Edit parameter Edit Save parameter entered PositionMaster EDP300 | CI/EDP300-EN Rev. C 29... -
Page 30: Menu Levels
Prior to external configuration, always move the actuator to the safety position and activate manual adjustment. NOTICE For detailed information on the parameterization of the device, consult the associated operating instructions and configuration and parameterization instructions. 30 CI/EDP300-EN Rev. C | PositionMaster EDP300... -
Page 31: Start Auto Adjust Function
Dead band time limit Setting range 0 ... 200 seconds successfully, "Auto Adjuste Complete" is displayed. The (monitoring parameter for control until the device then switches to the process display automatically. deviation reaches the dead band) PositionMaster EDP300 | CI/EDP300-EN Rev. C 31... -
Page 32: Housing
< 1 % to 10 g and 80 Hz 1) Freely configurable with 20 reference points Trademarks ® HART is a registered trademark of FieldComm Group, Austin, Texas, Change from two to one column 32 CI/EDP300-EN Rev. C | PositionMaster EDP300... -
Page 33: Appendix
Which substances have come into contact with the device? We hereby state that the devices / components shipped have been cleaned and are free from any dangerous or poisonous substances. Town/city, date Signature and company stamp PositionMaster EDP300 | CI/EDP300-EN Rev. C 33... -
Page 34: Control Drawing 901305
12.2 Control Drawing 901305 34 CI/EDP300-EN Rev. C | PositionMaster EDP300... - Page 35 PositionMaster EDP300 | CI/EDP300-EN Rev. C 35...
- Page 36 36 CI/EDP300-EN Rev. C | PositionMaster EDP300...
- Page 37 PositionMaster EDP300 | CI/EDP300-EN Rev. C 37...
- Page 38 38 CI/EDP300-EN Rev. C | PositionMaster EDP300...
- Page 39 PositionMaster EDP300 | CI/EDP300-EN Rev. C 39...
- Page 40 Howard Road, St. Neots notice. Cambridgeshire, PE19 8EU With regard to purchase orders, the agreed particulars shall prevail. ABB does not accept any responsibility whatsoever for potential errors or Tel: +44 (0)870 600 6122 possible lack of information in this document.
Need help?
Do you have a question about the PositionMaster EDP300 and is the answer not in the manual?
Questions and answers