Advertisement
Quick Links
D3-P K1
Mounting instructions
This manual explains how the D3-P K1 switch is mounted to a wall or door.
At the end of this manual, a template for the correct drilling position is available.
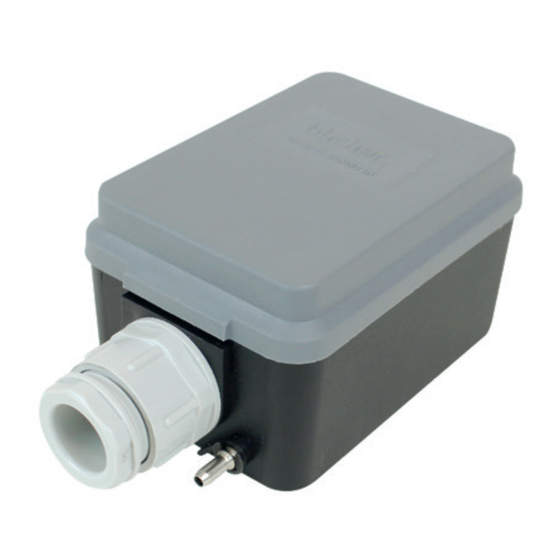
1
Delivered D3-PK1 switch
2
Remove the cover
The hose is mounted in the case without any extreme bending.
3
Removing the D3-P K1 switch
4
Positioning of the housing – template for drill holes
5
35
55
Leave the hose connected to the
switch while marking the hole
positions or attaching the housing.
This ensures proper hose position as
in picture 5 upon re-inserting the
switch.
For the positioning of the mounting
holes use the housing or the drilling
template on page 2.
Once the holes are drilled the
housing can be fixed with screws.
5
Insert the D3-P K1 switch
6
Replace the cover
TROUBLESHOOTING
346906B
When inserting the switch
avoid kinks in the hose.
Correct device assembly and
proper hose position.
Error situation:
The hose has a kink,
functionality cannot be
guaranteed.
Corrective action:
Make sure the hose is
inserted all the way to the
ledge of the connecting piece.
Then slightly rotate the hose
on the switch connecting
piece left or right and insert
the switch - repeat hose
rotation / switch insertion
until the hose position looks
like in picture 5.
1
10/19
Advertisement

Related Manuals for BBC Bircher D3-P K1


Summary of Contents for BBC Bircher D3-P K1
-
Page 1: Mounting Instructions
10/19 D3-P K1 Mounting instructions This manual explains how the D3-P K1 switch is mounted to a wall or door. At the end of this manual, a template for the correct drilling position is available. Delivered D3-PK1 switch Insert the D3-P K1 switch When inserting the switch avoid kinks in the hose. - Page 2 Drilling Template Contact BBC Bircher Smart Access BBC Bircher AG Wiesengasse 20 CH-8222 Beringen www.bircher.com...
Need help?
Do you have a question about the D3-P K1 and is the answer not in the manual?
Questions and answers