
Related Manuals for Elmo Rietschle G-BH1


Summary of Contents for Elmo Rietschle G-BH1
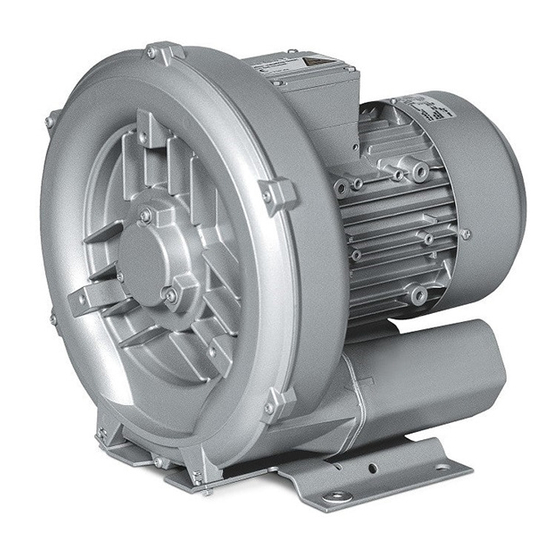
- Page 1 G-Series Side Channel Blower Repair Manual G-BH1 Types 2BH1 6 All rights reserved. 610.44434.40.316 Edition 07-2010 English Original Operating Instructions...
- Page 2 Gardner Denver Deutschland GmbH...
-
Page 3: Table Of Contents
Contents Contents General..................5 About this manual ..................5 Target group ....................5 Other valid documents ................5 Means of illustration ................. 5 Explanations of terms ................6 Safety ..................7 General ....................... 7 Labelling of warning signs ............... 7 Correct Use of The Equipment .............. - Page 4 Contents Gardner Denver Deutschland GmbH...
-
Page 5: General
1 General About this manual 1 General 1.1 About this manual This Repair Manual: • is part of the G-series type 2BH1 6.. side channel compressor • describes the safe, correct repair procedures for the side channel com- pressor • must be available for reference at the place of repair 1.2 Target group The target group for this manual is technically trained specialist staff. -
Page 6: Explanations Of Terms
Explanation Plant Part provided by the user in which the G- BH1 is installed External side of the compres- Side of the G-BH1 to which the motor is con- sor housing nected Motor Side channel compressor's drive motor External side of the compres-... -
Page 7: Safety
2 Safety General 2 Safety The manufacturer is not liable for damage caused by failure to adhere to the overall documentation. 2.1 General The Repair Manual contains all procedures required for repair. Compliance with these procedures will ensure safe handling of the 2BH1 6.. and prevent personal injury and material damage. -
Page 8: Staff Qualifications And Training
2 Safety Staff qualifications and training 2.5 Staff qualifications and training • Make sure that the staff delegated to carry out work have read and under- stood this Manual and all other pertinent documents, in particular the infor- mation on safety, maintenance and repair, before starting work. •... -
Page 9: Transportation, Storage And Disposal
Do not remain under supported loads. d) Set the transported goods down on a horizontal surface. 2BH1... Preparing the G-BH1 for transportation Transportation is made in different ways, depending upon the type: • 2BH11.., 2BH12.., 2BH13.., 2BH14.. and 2BH15.. (1-stage) with a weight... -
Page 10: Disposal
3 Transportation, storage and disposal Disposal 3.2 Disposal Decontamination before disposal WARNING Danger from combustible, corrosive or toxic substances! a) Side channel compressors, which have come into contact with hazard- ous substances, must be decontaminated before disposal. When performing disposal, adhere to the following: a) Collect oil and grease and dispose of them separately in accordance with the valid local regulations. -
Page 11: Tools, Spare Parts And Exploded View Drawings
4 Tools, spare parts and exploded view drawings Tools and expendable materials 4 Tools, spare parts and exploded view drawings 4.1 Tools and expendable materials Tools required The following tools are required to disassemble and assemble the 2BH1 6..: • Circlip pliers 01 Tools 2BH1 •... -
Page 12: Spare Parts List
4 Tools, spare parts and exploded view drawings Spare parts list 4.3 Spare parts list All damaged parts and parts whose replacement interval is specified as "al- ways" must be replaced whenever a repair is carried out. Parts which are marked "if worn" must be replaced depending upon their con- dition. - Page 13 4 Tools, spare parts and exploded view drawings Spare parts list Designation Replacement Inter- Remark Screw Circlip Washer Circlip always Centre body Screw Washer Cover Felt washer always Radial shaft seal always Screw Washer Filler piece Sleeve Screw Washer Silencer housing O-ring Silencer insert if worn...
- Page 14 4 Tools, spare parts and exploded view drawings Spare parts list Designation Replacement Inter- Remark Capacitor, complete Frequency inverter screw Frequency converter Module carrier Frequency converter Silencer, complete if worn 2000 Rating plate Silencer spare parts kit if worn UmrKIT Spare parts kit, frequency inverter Frequency converter CableKIT...
-
Page 15: Exploded View Drawings
4 Tools, spare parts and exploded view drawings Exploded view drawings 4.4 Exploded view drawings 2BH1 60. 2BH1 63. 2BH1 69. 2000 Motor 413* 433* * Ersatzteilkit * Spare part kit Exploded view drawing, 1-stage Gardner Denver Deutschland GmbH... - Page 16 4 Tools, spare parts and exploded view drawings Exploded view drawings 2BH1 61. 2000 Motor 413* 433* * Ersatzteilkit bei Motorgröße 4 / with motor size 4: * Spare part kit Exploded view drawing, 2-stage Gardner Denver Deutschland GmbH...
- Page 17 4 Tools, spare parts and exploded view drawings Exploded view drawings 2BH1 64. 2BH1 66. 2000 Motor 413* 433* * Ersatzteilkit * Spare part kit Exploded view drawing, twin-flow Gardner Denver Deutschland GmbH...
- Page 18 4 Tools, spare parts and exploded view drawings Exploded view drawings 042, 650 042, 650 Blower 042, 650 Blower Exploded view drawing, motor Gardner Denver Deutschland GmbH...
- Page 19 4 Tools, spare parts and exploded view drawings Exploded view drawings Exploded view drawing, add-on frequency inverter 2FC43../2FC44../2FC45../2FC47.. Gardner Denver Deutschland GmbH...
- Page 20 4 Tools, spare parts and exploded view drawings Exploded view drawings Gardner Denver Deutschland GmbH...
-
Page 21: Disassembling The Side Channel Compressor
5 Disassembling the side channel compressor Removing the foot 5 Disassembling the side channel compressor 5.1 Removing the foot • Remove screws (066) with spring washers (067). 030 Removing the foot (2BH16) • Remove screw (063) with spring washer (064) and washer (068). •... - Page 22 5 Disassembling the side channel compressor Disassembling the compressor side 14 Pulling the deep groove ball bearing (007) off (2BH11/13-16/19) NOTICE Do not damage the shaft. • Screw a screw of the correct size into the threaded hole in the shaft to pro- tect it from damage.
- Page 23 5 Disassembling the side channel compressor Disassembling the compressor side 28 Pulling the impeller off and removing the feather key (2BH15/16/19) NOTICE Do not damage the housing components. • Carefully loosen the impeller (027) using flat-bladed screwdrivers and pull it off. •...
-
Page 24: Disassembling The Ventilation Side
5 Disassembling the side channel compressor Disassembling the ventilation side 5.4 Disassembling the ventilation side 48 Removing the frequency inverter (2BH13-18) 2BH1 6.. with frequency in- • Remove the screws (682) and remove the frequency inverter (600) from the top of the terminal box (640). verter fitted •... -
Page 25: Assembling The Side Channel Compressor
6 Assembling the side channel compressor Assembling the ventilation side 6 Assembling the side channel compressor 6.1 Assembling the ventilation side • Lightly grease the complete contact surface of the radial shaft seal (452) 01 Fitting the radial shaft seal (452)/spring washer (467) (all) in the end plate (450). - Page 26 6 Assembling the side channel compressor Assembling the ventilation side • Wear protective gloves! • Switch the hot plate ON. • Place the deep groove ball bearing (008) onto the hot plate, using a metal sleeve as a spacer. • Heat the deep groove ball bearing to a max.
- Page 27 6 Assembling the side channel compressor Assembling the ventilation side 05 Fitting the tolerance ring (039)/ feather key (505) (2BH15/16) Explosion protected version • Push the tolerance ring (039) onto the rotor (005). (ATEX) only, motor axle height ≤90 only motor axle height ≥100 • Insert the feather key (505). •...
-
Page 28: Assembling The Compressor Side
6 Assembling the side channel compressor Assembling the compressor side 12 Fitting the frequency inverter (2BH13-18) 2BH1 6.. with frequency in- • Place the frequency inverter (600) on the upper part of the terminal box (640) and secure it using the screws (682). verter fitted 6.2 Assembling the compressor side •... - Page 29 6 Assembling the side channel compressor Assembling the compressor side 029 Determining the length of the spacer sleeve (2BH13-19:2-stage) Sizing the spacer sleeve (134) If more than one of the following parts are replaced: • Housing (002) • Centre body (072) •...
- Page 30 6 Assembling the side channel compressor Assembling the compressor side NOTICE Deep groove ball bearings can be damaged when being fitted a) Support the rotor (005) against the effects of force when fitting the deep groove ball bearing (007)! • Drive the deep groove ball bearing (007) as far as it will go onto the rotor (005) using a hammer and a plastic tube.
-
Page 31: Fitting The Silencer
6 Assembling the side channel compressor Fitting the silencer 6.3 Fitting the silencer 00.1 Fitting the filler piece (130)/ flange (034/035)/ seal (054/055) (2BH16) • Insert the filler piece (130) into the flange (034). • Position the seal (054/055) and flange (035)/stepped pipe (048/049) and secure them using the screws (098/142). - Page 32 6 Assembling the side channel compressor Fitting the foot Gardner Denver Deutschland GmbH...
-
Page 33: Commissioning
7 Commissioning 7 Commissioning Carry out the following tests after repairing the 2BH1 6..: • Insulation test • Functional test WARNING Special requirements for explosion protected (ATEX) versions of the 2BH1 6.. a) Carry out the prescribed tests and inspections before commissioning explosion protected versions of the 2BH1 6...
Need help?
Do you have a question about the G-BH1 and is the answer not in the manual?
Questions and answers