
Related Manuals for Avantik QS11

Summary of Contents for Avantik QS11
- Page 1 Cryostat QS11 / QS11UV Avantik Cryostat INSTRUCTION MANUAL Avantik 36 Commerce St. Springfield NJ 07081 / USA 387 779 - English...
- Page 2 This instruction manual will be supplied together with each instrument. Further copies can be ordered at the nearest Avantik sales office by giving the serial number of the instrument, the number of the instruction manual and the date of issue.
- Page 3 Before putting the instrument into operation, please read these operating instructions carefully to familiarize you with its proper operation and functions. The Cryostat QS11 / QS11UV is a highly efficient cryostat for sectioning techniques in routine and research. Only skilled or specially trained personnel must operate the microtome cryostat, i.e.
-
Page 4: Table Of Contents
Avantik Cryostat QS11 / QS11UV Intended Use Table of Contents Safety Precautions PART 1 INTRODUCTION Description of the QS11 / QS11UV Technical data QS11 / QS11UV PART 2 OPERATING INSTRUCTIONS Setting up the cryostat Initial turn-on Basic operational rules 2-3-1... - Page 5 Avantik Cryostat QS11 / QS11UV Error code indication 2-9-1 Definition of the error codes 2-10 Accessories 2-10-1 Standard equipment 2-10-2 Additional equipment PART 3 THEORY OF OPERATION Microtome cooling, defrost cycle Cutting movement Specimen coarse feed and trimming stages PART 4 WORKING WITH THE CRYOSTAT...
- Page 6 Avantik Cryostat QS11 / QS11UV SAFETY PRECAUTIONS WARNING SIGNALS AND SYMBOLS The installation and routine use of the QS11 / QS11UV is easy and safe if the instructions in this manual are being observed. Note: Special instructions regarding operation of the instrument.
- Page 7 Please observe the following general precautions during operation of this instrument. Failure to comply with these precautions violates safety standards and the intended use of the instrument. Avantik is not liable for misuse of the instruments and failure to comply with basic safety requirements.
- Page 8 Avantik Cryostat QS11 / QS11UV HAZARD OF INFECTION Use the appropriate safety and disinfection measures when working with infectious specimens. According to the rules and regulations concerning the handling of infectious/radioactive contaminated material of the respective laboratory, safety clothing (e.g. particle mask, gloves, protective shoe covers) must be worn.
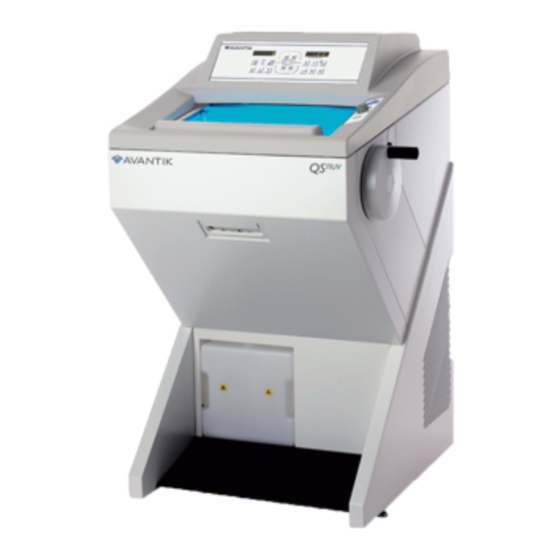
- Page 9 Avantik Cryostat QS11 / QS11UV Fig. 1 Avantik 36 Commerce St. Springfield NJ 07081 / USA 387 779 - English...
-
Page 10: Part 1 Introduction
Avantik Cryostat QS11 / QS11UV INTRODUCTION 1-1 DESCRIPTION OF THE QS11 / QS11UV Fine orientation of specimen 8° universally in x/y- Open cryostat. Stainless steel cooling axis with zero device. Rotatable on Z-axis, 360°. chamber. Chamber temperature regulation variable from +5°C down to –35°C. - Page 11 Avantik Cryostat QS11 / QS11UV Chamber temperature control: ................+5°C to -35°C Fast freezing station via Peltier element depending on the chamber temperature: ........... down to max. -60°C Defrosting: automatic defrosting, adjustable....with temperature control n i t Microtome: Section thickness range: ..........1...500 µm ickness range: ..........
- Page 12 Avantik Cryostat QS11 / QS11UV page -2- Handwheel brake: ..................mechanical Transportation and storage conditions Storage temperature range: ................ -20°C up to +50°C Operating conditions: ......+5°C up to +35°C (at a max. rel. humidity of 60%) . . .
- Page 13 Avantik Cryostat QS11 / QS11UV MICROM HM 525 CHAMBER TEMPERATURE ° C SECTION THICKNESS µm COUNT DOWN RETRACT TRAVEL TRIM THICKNESS µm INTER DEFR MEMO RUPT TIME 70 80 100 150 200 Fig. 2 1 = LED retraction 10 = Display, left...
-
Page 14: Part 2 Operating Instructions
Avantik Cryostat QS11 / QS11UV OPERATING INSTRUCTIONS SETTING UP THE CRYOSTAT Unpacking the instrument: • Cut through the three packing straps and remove the packing. • Remove the upper wooden cover (fig. 3.1). • The hinges of the upper wooden cover are secured with tape. - Page 15 Avantik Cryostat QS11 / QS11UV Warning: The instrument must only be moved in standing or slightly tilted (approx. 30°) position. Choose installation site that • enough ventilation for the cooling system is guaranteed. • the distance between wall and rear panel is approx.
-
Page 16: Initial Turn-On
Avantik Cryostat QS11 / QS11UV INITIAL TURN-ON Note: The kind of the used examination materials and all special conditions for their processing, pre-treatment and, if necessary, storage as well as instrument controls for correct and safe operation is in the responsibility of the operator. -
Page 17: Basic Operational Rules
Avantik Cryostat QS11 / QS11UV BASIC OPERATIONAL RULES After having turned on the instrument, the two displays show the set chamber temperature as well as the number of sections, the section thickness sum as well as the remaining travel to the front end position. Section thicknesses are indicated via LEDs. -
Page 18: Defrosting The Evaporator
Avantik Cryostat QS11 / QS11UV 2-3-2 DEFROSTING THE EVAPORATOR Every 24 hours the evaporator in the rear part of the microtome chamber is defrosted automatically. During a defrosting process, the display shows temperature with letter This temperature refers to the heating of the evaporator and not to the temperature of the cooling chamber, which is normally shown. -
Page 19: Emptying The Defrosting Liquid
Avantik Cryostat QS11 / QS11UV 2-3-4 EMPTYING THE DEFROSTING LIQUID Note: The liquid from the daily defrosting process is collected in the container (fig. 9.1). Please note that this container is emptied in due time according to the safety precautions in this instruction manual. -
Page 20: Freezing On A Specimen
50, 55, 60 and 70 mm. Special sizes on request. For the especially fast and almost artefact-free freezing-on, the QS11 / QS11UV is equipped with a Peltier element (fig. 12.1) (down to max. –60°C surface temperature). -
Page 21: Heat Extractors (Optional Accessories)
Avantik Cryostat QS11 / QS11UV 2-3-7 HEAT EXTRACTORS (optional accessories) When using a heat extractor in combination with the so-called cryo molds, the specimen is frozen faster and more evenly, as the specimen is frozen from above and below at the same time. - Page 22 Avantik Cryostat QS11 / QS11UV 2-3-8 SPECIMEN ORIENTATION In many cases, the orientation of the specimen in relation to the cutting edge would be advantageous. This can easily be done by means of the orienting specimen holder on the microtome.
- Page 23 Avantik Cryostat QS11 / QS11UV 2-3-9 HANDWHEEL BRAKE The function <handwheel brake> allows to lock the handwheel. A pin is situated on the rim of handwheel, which pressed backwards. The handwheel is locked in the upper reversal point. The danger of being injured while adjusting specimen and knife is considerably reduced.
-
Page 24: Cutting Process
Avantik Cryostat QS11 / QS11UV CUTTING PROCESS 2-4-1 CUTTING MOVEMENT AND RETRACTION start cutting movement microtome, turn the handwheel. As the X=selected section thickness specimen moves down, sectioning is carried 1=specimen out (fig. 16.2). Continue turning the handwheel 2=cutting movement to bring the specimen back up (fig. -
Page 25: Setting Section Thickness And Trimming Thickness
Avantik Cryostat QS11 / QS11UV 2-4-2 SETTING SECTION THICKNESS AND TRIMMING THICKNESS The desired section thickness can be selected by means of the buttons (fig. 17.1) on the operating controls and the trimming thickness by means of the buttons (fig. 17.2). The two left buttons lead to lower values and the two right buttons to higher values. -
Page 26: Feed
Avantik Cryostat QS11 / QS11UV FEED 2-5-1 SPECIMEN COARSE FEED For the fast forward and backward travel between knife and specimen, the cryostat microtome has a motorized coarse feed system. To move the specimen holder backwards, press the button <coarse feed backwards> (fig. - Page 27 Avantik Cryostat QS11 / QS11UV Take note that the specimen and knife edge do not come in contact with each other. Carefully observe the narrowing gap between knife edge and specimen to stop the function <coarse feed forwards> in time before the specimen touches the knife edge.
-
Page 28: Memory Function
Avantik Cryostat QS11 / QS11UV 2-5-2 MEMORY FUNCTION The memory function allows the automatic approach between specimen and knife. It is used to find again the first cut position in a very fast way. CHAMBER TEMPERATURE ° C This function can only be used on condition... -
Page 29: Trimming And First Cuts
Avantik Cryostat QS11 / QS11UV 2-5-3 TRIMMING AND FIRST CUTS After the specimen and the knife are adjusted, further gradual feed for trimming can be carried out using the function <trimming>. For different sectioning series, deeper layers of the specimen can be reached with the function <trimming>. -
Page 30: Indication Of Cutting Processes
Avantik Cryostat QS11 / QS11UV INDICATION OF CUTTING PROCESSES Information on the sectioning status can be seen on the display (fig. 21.1). Press the scroll button (fig. 21.2) to show the various functions one after the other. The following information on the present... -
Page 31: Remaining Travel To Front End Position
Avantik Cryostat QS11 / QS11UV 2-6-3 REMAINING TRAVEL TO FRONT END POSITION This value shows the distance, which is left for sectioning. If the specimen holder is in the rear end CHAMBER TEMPERATURE ° C position, the display shows 28 000 µm. This... -
Page 32: Knife Carriers
Avantik Cryostat QS11 / QS11UV KNIFE CARRIERS 2-7-1 STANDARD KNIFE CARRIER The standard knife carrier of the cryostat is easy to use. The knife can be inserted either from the side or from the front. The standard knife holder takes up commercially available conventional knives with c- and d-profiles. - Page 33 Avantik Cryostat QS11 / QS11UV Inserting the knife: • The knife is inserted into the knife carrier either from the side or from the front, independently if one or two clamping plates (fig. 23.1) have been removed. • Loosen the clamping screws (fig. 23.2).
- Page 34 Avantik Cryostat QS11 / QS11UV • Fine adjustment of the anti-roll device: Bring the clamping lever (fig. 23.8) upwards • The fine adjustment of the anti-roll device is into clamping position. • carried out via the knurled screw (fig. 23.6).
-
Page 35: Disposable Blade Carrier Ec
Avantik Cryostat QS11 / QS11UV 2-7-2 DISPOSABLE BLADE CARRIER EC The disposable blade carrier takes up all commercially available low profile blades with a dimension of 80 x 8 mm and a facette angle of approx. 35° and as another version it takes also up high profile blades. - Page 36 Avantik Cryostat QS11 / QS11UV Inserting the blade: • The blade is inserted into the slot (fig. 24.9) behind the clamping plate. Note: When using high profile blades, first loosen the lever (fig. 24.1) and remove the spacer strip (fig. 24.8).
- Page 37 Avantik Cryostat QS11 / QS11UV Caution: To avoid the danger of injury on the blade during adjustment of specimen, always position the knife guards (fig. 24.7) over the blade edge. Fine adjustment of the anti-roll device: • The fine adjustment of the anti-roll plate is carried out via the knurled screw (fig.
- Page 38 Avantik Cryostat QS11 / QS11UV 2-7-3 DISPOSABLE BLADE CARRIER EC 70 The disposable blade carrier EC takes up all commercially available low profile blades with a dimension of 80 x 8 mm and a facette angle of approx. 35° and as another version it takes also up high profile blades.
- Page 39 Avantik Cryostat QS11 / QS11UV Inserting the blade: • The blade is inserted into the slot (fig. 24a.9) behind the clamping plate. Note: When using high profile blades, first loosen the lever (fig. 24a.1) and remove the spacer strip (fig. 24a.8).
- Page 40 Avantik Cryostat QS11 / QS11UV Caution: To avoid the danger of injury on the blade during adjustment of specimen, always position the knife guards (fig. 24a.7) over the blade edge. Fine adjustment of the anti-roll device: • The fine adjustment of the anti-roll plate is carried out via the knurled screw (fig.
-
Page 41: Module U (Optional)
Avantik Cryostat QS11 / QS11UV MODULE U (OPTIONAL) The Cryostat can be additionally equipped with the Module U. The Module U consists of an UV lamp and a controller unit which is used to adjust the disinfection time. When the Module U is activated, the Cryostat chamber is radiated with a germ-reducing UV light. - Page 42 Avantik Cryostat QS11 / QS11UV Cancel disinfection cycle: • The disinfection cycle can be cancelled by turning the regulator anticlockwise to “0”. Measures in case of a power failure: • The status message “Err” appears on the display, when the timer was deranged (e.
-
Page 43: Error Code Indication
Avantik Cryostat QS11 / QS11UV ERROR CODE INDICATION The instrument has an error code indication to define faster and better possible malfunctions. The error codes E-01, E-02 and E-04 refer to the function of the integrated feed mechanism and to the condition of the battery buffer for storing data and is shown on the left display. - Page 44 Avantik Cryostat QS11 / QS11UV To avoid that the wet microtome is cooled The error code E-04 is shown on the left down and consequently the guides freeze display if the rear end position of the integrated solid, the error code E-03 is shown on the feed system is not reached within 2 min.
-
Page 45: Accessories
Avantik Cryostat QS11 / QS11UV 2-10 ACCESSORIES 2-10-1 STANDARD EQUIPMENT The microtome cryostat QS11 / QS11UV is equipped with the following accessories: 6 chucks, 30 mm round 715110 1 Allen key 2,5 mm 362220 1 Allen key 5 mm 362260... -
Page 46: Additional Equipment
Avantik Cryostat QS11 / QS11UV 2-10-2 ADDITIONAL EQUIPMENT (OPTIONAL) Specimen chucks: • • • Cryo-Molds: Knife carriers: e f i i r r i r r Other accessories: Disposable blade SEC 35 (50 pcs. in dispenser) 152200 Avantik 36 Commerce St. -
Page 47: Part 3 Theory Of Operation
Avantik Cryostat QS11 / QS11UV THEORY OF OPERATION CHAMBER COOLING, DEFROSTING The chamber of the cryostat is cooled by a refrigeration machine. In the rear upper area of the microtome chamber is the evaporator which the cold coolant flows through. Due to the heat extraction from the microtome chamber a cooling down to -35°C can be... -
Page 48: Cutting Movement
Avantik Cryostat QS11 / QS11UV CUTTING MOVEMENT The microtome of this cryostat is a rustproof rotary microtome. The cutting movement is carried out turning the handwheel. The rotary movement results in the vertical movement of the specimen orientation which carries the specimen holder with the specimen. -
Page 49: Specimen Coarse Feed And Trimming Stages
Avantik Cryostat QS11 / QS11UV SPECIMEN COARSE FEED AND TRIMMING STAGES After changing the specimen, moving the knife or knife carrier, it is necessary to adjust the specimen to the knife edge again. This can easily be done by means of the specimen coarse feed and the defined trimming values. -
Page 50: Part 4 Working With The Cryostat
Avantik Cryostat QS11 / QS11UV WORKING WITH THE CRYOSTAT PREPARING THE COOLING CHAMBER Before sectioning, the microtome chamber should be at a stable temperature around the desired cutting temperature. The temperature of the knife is determined by the cooling of the microtome chamber. -
Page 51: Orientation And Trimming Of Specimens
Avantik Cryostat QS11 / QS11UV ORIENTATION AND TRIMMING Clamp the specimen stage together with the frozen specimen into the specimen holder. Tighten the orienting lever (fig. 15.2) in a clockwise direction. Loosen the clamping lever (fig. 15.1) to have the possibility to adjust the specimen parallel in relation to the cutting edge by means of the orienting lever. -
Page 52: Temperature List For Cryo Sectioning
Avantik Cryostat QS11 / QS11UV TEMPERATURE LIST FOR CRYO-SECTIONING The optimal cutting temperature of a specimen depends on the respective characteristics of the tissue especially on the fat content. The following table won by experience recommends cutting temperatures for some typical applications: °... -
Page 53: Sectioning And Taking Off Sections
Avantik Cryostat QS11 / QS11UV SECTIONING AND TAKING OFF SECTIONS For sectioning, pre-select the desired section thickness by means of the buttons on the operating controls. Put the anti-roll plate against the knife by means of the knob. Turn the handwheel in a clockwise direction to carry out sectioning. -
Page 54: How To Avoid Malfunctions
Avantik Cryostat QS11 / QS11UV HOW TO AVOID MALFUNCTIONS To cut usable sections, the following points are of utmost importance: • Condition of the knife edge, probably move it horizontally to the left or right side. • Check adjustment of anti-roll guide and correct it, if necessary. -
Page 55: Possible Sources Of Errors - Cause And Removal
Avantik Cryostat QS11 / QS11UV 4-6-1 POSSIBLE SOURCES OF ERRORS – CAUSE AND REMOVAL Cause Removal Problem Cryostat temperature cannot be Ambient temperature too high Lower ambient temperature by achieved fresh air, climate. Please note the specified temperature of +20°C! - Page 56 Avantik Cryostat QS11 / QS11UV Sections do not stretch, although Knife and/or anti-roll plate are Clean with a dry cloth or brush correct temperature not clean been selected and the anti-roll plate been adjusted Edge anti-roll plate Replace anti-roll plate...
-
Page 57: Part 5 Maintenance And Care Of The Cryostat
Avantik Cryostat QS11 / QS11UV MAINTENANCE AND CARE OF THE CRYOSTAT SHUTTING-OFF FOR CLEANING Cleaning, care and decontamination of the cryostat depends on how frequently the instrument used. However, recommended to shut the instrument off every 6 - 8 weeks. -
Page 58: Removing The Microtome
Avantik Cryostat QS11 / QS11UV REMOVING THE MICROTOME • In the left rear part of the microtome there is the so-called connector housing including one electrical connection. • Bring the handwheel handle into its lower position, i.e. the specimen clamping is also in its lower position. -
Page 59: Cleaning And Care Of The Microtome
Avantik Cryostat QS11 / QS11UV CLEANING AND CARE OF THE MICROTOME • Carefully clean and dry the dismounted microtome. • Carefully clean and dry the dismounted knife carrier as well. • As there is condensated humidity inside the microtome, dry the microtome components inside the cooling chamber very carefully. -
Page 60: Cleaning The Cooling Lamella
Avantik Cryostat QS11 / QS11UV CLEANING THE COOLING LAMELLA • Open cleaning opening attached tool (fig. 29.1). • For this, insert the tool through one of the middle ventilation slots. • Turn the tool by 90° so that the t-shaped holder latches into the adjacent slots. -
Page 61: Part 6 Conditions For The Transportation Of The Instrument
Avantik Cryostat QS11 / QS11UV PART 6 CONDITIONS FOR THE TRANSPORTATION OF THE INSTRUMENT 6-1 TAKING BACK THE INSTRUMENT FOR REPAIR OR ROUTINE MAINTENANCE Repair or maintenance work are normally carried out at the site of installation. If this is not possible for some special reasons, the instrument can be returned to manufacturer. - Page 62 Avantik Cryostat QS11 / QS11UV • Clean and disinfect the cryo chamber according to the respective applicable lab regulations. • Unscrew handwheel handle transportation. • Before transportation, loosen fastening screws of the rollers. • Keep the heated sliding window closed during transportation.
- Page 63 NOT to repair. blade/knife carrier and other accessories To order original packaging materials, please as well as tools from the cryo chamber. contact Avantik Biogroup LLC or your local, by Avantik Biogroup LLC authorized, dealer. Note: Clean and disinfect these accessories...
-
Page 64: Disposal Of The Instrument After Final Shutdown
Avantik Cryostat QS11 / QS11UV DISPOSAL OF THE INSTRUMENT AFTER FINAL SHUTDOWN After the final shutdown of the instrument, we recommend to contact a local recycling company for the disposal according to the national applicable regulations. To be applied in the countries...
Need help?
Do you have a question about the QS11 and is the answer not in the manual?
Questions and answers