
Related Manuals for Eyecon 9420


Summary of Contents for Eyecon 9420
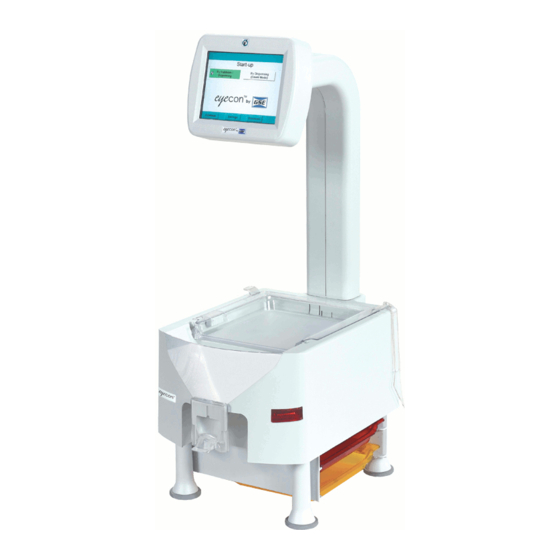
- Page 1 Eyecon 9420 Pill Counting, Inventory, and Validation System Instruction Manual AWT35-501651 Issue AA...
- Page 2 Avery Weigh-Tronix is a trademark of the Illinois Tool Works group of companies whose ultimate parent company is Illinois Tool Works Inc (“Illinois Tool Works”). Copyright © 2017 Illinois Tool Works. All rights reserved. No part of this publication may be reproduced by making a facsimile copy, by the making of a copy in three dimensions of a two-dimensional work and the making of a copy in two dimensions of a three-dimensional work, stored in any medium by electronic means, or transmitted in any form or by any means, including electronic, mechanical, broadcasting, recording or otherwise without the prior written consent of the copyright owner, under license, or as permitted by law.
-
Page 3: Table Of Contents
General description ......................10 Product identification ....................10 Setup ..........................11 Sulfa and penicillin platter ..................12 Preparing the Eyecon for use ..................13 Turn on the Eyecon ......................13 Routine maintenance ....................... 14 Cleaning the machine ...................... 15 Funnel and slide gate ....................15 Rapid fill counting tray .................... - Page 4 Inventory Interface Provider: ..................40 Auto Delete Inventory Data After Export: - ..............41 Download Inventory - ....................41 Delete Inventory Data - ..................... 41 Chapter 4 Eyecon operation ........................42 START screen ......................... 42 Count Only mode ......................43 Counting ........................43 Validation mode operation ....................
- Page 5 Chapter 5 User login barcodes ....................... 68 User login barcodes ......................69 Chapter 6 Audit reports ........................... 70 Access Eyecon Auditor ....................70 Initial use .......................... 70 Specify and view a report ....................70 Accessing the saved photos and reports ..............72 Chapter 7 Accuracy verification procedure ..................
-
Page 6: Chapter 1 General Information And Warnings
1.1.1 Text conventions The buttons used to interface with the Eyecon are via the touch screen display. The buttons are shown in bold letters and reflect the case of the displayed button. -
Page 7: Installation
Machine vision technology allows for identification of most foreign substances and pill variations during the counting and dispensing process. The specialized technology of the Eyecon™ does not support the counting of gel-caps. IF THE EQUIPMENT IS USED IN A MANNER NOT SPECIFIED BY THE MANUFACTURER, THE PROTECTION PROVIDED BY THE EQUIPMENT MAY BE IMPAIRED. -
Page 8: Sharp Objects
1.4 Training Do not attempt to operate or complete any procedure on the Eyecon unless you have received the appropriate training or read this Instruction Manual. To avoid the risk of RSI (Repetitive Strain Injury), place the machine on a surface which is ergonomically satisfactory to the user. -
Page 9: Specifications
28" H x 11" W x 17.5" D Screen 7" Color LCD flat panel touch screen Barcode Scanner Integrated 1D & 2D scanner Supported The Eyecon 9420 scanner supports hundreds of symbologies symbologies. See Supported bar code symbologies on page 75 for the complete list. -
Page 10: Chapter 2 Introduction
Introduction Introduction 2.1 Video training Copy this URL into your browser to see the full list of training videos for the Eyecon 9420: https://www.youtube.com/watch?v=ysdKd1Q1iME&list=PLl- hAOdLOPokPO52rWfNTPbP0rK9RG_ap 2.2 General description Refer to the diagram below for part descriptions and field replaceable and non-field replaceable parts. -
Page 11: Setup
This information will be needed for periodic updates, service, and warranty claims. Figure 2.1 Product Markings 2.3 Setup Place the Eyecon on a level surface and away from direct sunlight. Refer to Figure 2.2 for dimensions of the Eyecon. 8.09 (205.5) 17.30 (439.4) -
Page 12: Sulfa And Penicillin Platter
The platters come with the product but extras may be ordered. See the part numbers below: When ordering the Penicillin platter only, use part number 249400-301A0. When ordering the Sulfa platter only, use part number 249400-302A0. Figure 2.3 Storing Sulfa and Penicillin platters Eyecon 9420 Instruction Manual... -
Page 13: Preparing The Eyecon For Use
2.5 Turn on the Eyecon When you plug in the Eyecon, the unit will power up in five to ten seconds. There is no need to press the pushbutton on the back of the unit. Do not use the pushbutton to turn off the Eyecon. Refer to Figure 2.4... -
Page 14: Routine Maintenance
Power Pushbutton USB Ports Figure 2.5 Eyecon Back Panel For interfaces having a power pin such as external USB ports, ensure that the connectors and wires are suitably rated for 5VDC 0.5A. All connection from/to the product shall be with 60950 certified equipment only. -
Page 15: Cleaning The Machine
Cleaning the machine 2.7 Cleaning the machine Be sure to keep the Eyecon unit clean and free of dust. Do not use harsh detergents or spray water on the Eyecon unit. It is recommended the Eyecon unit be cleaned on a daily basis. Powder and pill dust tends to accumulate on surfaces such as the rapid fill tray and funnel gate. -
Page 16: Rapid Fill Counting Tray
2.7.2 Rapid fill counting tray Lift the counting tray up to a vertical position. Tilt the tray to the left, the right side should pull out of the enclosure. Pull up on the tray to remove completely. Eyecon 9420 Instruction Manual... - Page 17 Before reinstalling the tray, clean the diffuser surface under the tray with a soft damp cloth. Reinstall rapid fill tray onto Eyecon unit by holding the tray vertical and push it into the slots in the housing. Eyecon 9420 Instruction Manual...
-
Page 18: Licensing Agreement
Introduction 2.8 Licensing agreement When the Eyecon is powered up for the first time a Database Subscription Terms and Conditions screen will be displayed, shown at right. Before the Eyecon can be used, you must agree to these terms. Read the terms and conditions thoroughly and check the “I accept”... -
Page 19: Software Updates
The software must be updated quarterly to uphold the Licensing Agreement. This can be done through the Eyecon 9420 menus, if it is connected to the internet, or you can download the software update from www.eyeconvpc.com. These updates contain drug data/photo updates and application enhancements. -
Page 20: Turn Off The Eyecon (Shutdown)
If no message appears when the USB memory stick is plugged in, then follow the instructions below. If you see a message asking if you want to reboot the Eyecon, click on 2.10 Turn off the Eyecon (shutdown) The Shutdown button in the START screen is used for restarting or turning off the Eyecon. -
Page 21: About Eyecon Screen
Press General at the top of the Configuration Manager list at the left of the screen. Press About EYECON 9420 at the top of the list on the right side of the screen. The screen shown in the illustration above is displayed. -
Page 22: Definitions
Short for prescription. 2.15 Detecting misfit objects The Eyecon identifies broken pills and non-matching shapes very well but is not infallible. There may be instances when broken pills may not be detected or an incorrect drug will have a size and shape that escapes detection. Barcode validation is the number one way to ensure the correct drug is dispensed. -
Page 23: Chapter 3 Settings Menu
Eyecon 9420 Configuration Manager Main Menu Item Description Access this to see information about the 9420, enable or disable the Auto Close General Recorded Message, Drug Substitution, Stock Item Verification, Allow an Under- fill or Over-fill and to calibrate the platter. -
Page 24: Setting Time And Date
Access this to manage updates for the Eyecon. Multi-Eyecon Access this to manage communication among multiple connected Eyecons Trained Drugs Access this to import or export the trained pill images to or from this Eyecon. Backup/Restore Access this to backup and restore the database or configuration. Inventory Access this to manage inventory data. -
Page 25: About Eyecon 9420
General menu 3.2.1 About EyeCon 9420 This screen, shown at right, lists various pieces of information about the Eyecon. Press View EULA to view the End User License Agreement (EULA) Press OK to exit the screen. 3.2.2 Auto Close Transaction Recorded Message This is the second item in the General menu. -
Page 26: Stock Item Verification
Remove all foreign objects from the counting platter. Press the Calibrate Platter menu item and the platter will be automatically calibrated. Platter Calibration Successful will be displayed when the calibration is complete, shown at right. Eyecon 9420 Instruction Manual... -
Page 27: Barcode Menu
7 7 7 7 7 7 7 1 2 3 4 5 6 7 8 9 0 1 0 0 5 0 Drug Number Qty. Length: 7 Length: 11 Length: 4 Offset: 0 Offset: 7 Offset: 18 Eyecon 9420 Instruction Manual... -
Page 28: Data Menu
Tap Transaction Purge Time to bring up the numeric keypad. Type in the number of days to hold data before it is purged and press OK to accept the change or Cancel to abort a change. Display returns to the Data menu. You can select up to 365 days. Eyecon 9420 Instruction Manual... -
Page 29: Delete Report Data
If you press Cancel the changes are not implemented and the screen returns to the TCP/IP menu. If you press Exit the changes are accepted and the screen returns to the TCP/IP menu. Eyecon 9420 Instruction Manual... -
Page 30: Pharm. Mgmt. Sw Menu
Generally you should set the Adapter Settings to Dynamic Address (DHCP) and then press Set to allow your router to assign an IP address to your Eyecon. If an IP address of 0.0.0.0 appears, there may be a problem with the connection to the network. Check your cable or connections. -
Page 31: Pmss Provider
Pharm. Mgmt. SW menu This completes the steps for setting up the Eyecon to receive Rx data from a pharmacy system. To setup the Eyecon to send the Rx filling results back to the pharmacy system follow these steps: In the Remote Server menu... -
Page 32: Clear Pmss Data
Settings menu The PMSS data sent by the pharmacy system to the Eyecon is held in a table. Everyday the table is purged of any entries older than the chosen value. This also tracks partial fills that have been dispensed and warns the user if an Rx has already been filled. -
Page 33: Remote Server Menu
The Remote Server Connect Timeout: is used to set the time, in seconds, that the Eyecon will attempt to connect to the remote server before it times out and stops trying. 3.8 Double Check menu The Double Check menu is shown at right. -
Page 34: Login / Scan Out Menu
Tap Edit Users and you will see the table at right. This will list the users you have added and granted access to certain levels of the Eyecon’s functions. Upon initial powerup there will be no users entered. Tap the Add button to access Add New User screen, shown at right. -
Page 35: Count Login, Validation Login, And Inventory Login
Choose to turn the user lookup function On or Off. This completes the Login / Scan Out menu. 3.10 Test menu The Test menu, shown at right, allows you to test the scanner, camera, touchscreen and speaker of the Eyecon. Eyecon 9420 Instruction Manual... -
Page 36: Scanner Test
Follow the instructions to test the touchscreen. 3.10.4 Speaker test Press Speaker to start a tone playing from the Eyecon speaker. Press OK to stop the test and return to the Test menu. Eyecon 9420 Instruction Manual... -
Page 37: Auto Updater Menu
3.11.2 Update Now Press this to begin downloading of the latest Eyecon update. You will see a display similar to the one at right. The download will continue until it is complete and a message will appear asking if want the update installed. -
Page 38: Automatic Updates
Settings menu 3.11.4 Automatic Updates: You can setup the Eyecon to automatically update on a regular schedule. The first step is to enable the update using this menu choice. Use the next seven menu items to configure the auto update. Choose a time of day when you want the update to occur. -
Page 39: Backup / Restore Menu
Backup / Restore menu Import from MDB - Select this to import the TrainedDrugs.mdb file from a USB memory stick inserted in the USB drive of the Eyecon. 3.14 Backup / Restore menu Use the Backup / Restore menu to backup or restore the database and Eyecon configuration files. -
Page 40: Inventory Interface Provider
Tap this and you see the screen at right. Off - Select this to disable the inventory interface. Eyecon Native - Select this to use the native Eyecon interface to query and send inventory counts back and forth with the pharmacy system. -
Page 41: Auto Delete Inventory Data After Export
3.15 Inventory menu 3.15.2 Auto Delete Inventory Data After Export: - Tap this item and choose True to delete inventory information on the Eyecon after the export is finished. Choose False to retain the inventory data. 3.15.3 Download Inventory - Select this to download/export the inventory data. -
Page 42: Chapter 4 Eyecon Operation
Advance to the Validation mode Count Only Advance to the Count Only mode Physical Inventory Advance to the Physical Inventory mode Auditor Advance to the Auditor Settings Change Eyecon settings Shutdown Restart or turn off Eyecon Eyecon 9420 Instruction Manual... -
Page 43: Count Only Mode
Edit drug database on page 57 for more information. The steps below assume you login or scan-out when requested by the Eyecon. Those steps are skipped for brevity. 4.2.1 Counting From the START screen press the Count Only button …... - Page 44 See Dispensing large quantities on page 63 for more information. If any details on the right side of the COUNT ONLY screen are incorrect, press the Edit Drug button. See Edit drug database on page Eyecon 9420 Instruction Manual...
-
Page 45: Validation Mode Operation
30. Typically when an Rx is printed, the PMSS sends the Rx details to the Eyecon through the Ethernet or USB connection. There are advantages to this choice: the Eyecon displays the patient name during the dispensing process and if our bidirectional interface is supported, Eyecon can send the Rx filling results back to the PMSS which includes the drug number dispensed, quantity dispensed, time/date of dispense and User info. -
Page 46: Rx Validation And Dispensing
In the PMSS mode a PMSS Rx Data Viewer button appears in the lower right corner. Press this to view the most recent prescriptions that have been received by the Eyecon from the PMSS. This is for reference and troubleshooting only. Scan the appropriate vial label barcode, which is determined by the mode of operation (Validation or PMSS) …... - Page 47 If the scanned stock bottle is the same drug but does not match the expected stock bottle quantity, a message screen will appear depending on Eyecon configuration. If allowed the top screen at right appears. If not allowed the bottom screen appears. See Drug Substitution on page 25 directions.
- Page 48 See Dispensing large quantities on page 63 for more information. If any details on the right side of the COUNT ONLY screen are incorrect, press the Edit Drug button. See Edit drug database on page Eyecon 9420 Instruction Manual...
- Page 49 When the correct quantity is on the platter, press Finish … The Eyecon returns to the SCAN VIAL LABEL screen. If drug photo does not exist in the Eyecon database Not Found or Disabled will appear in place of the photo.
- Page 50 Repeat the procedure for the next Rx. Partial Fill If an Rx can only be partially filled, the Eyecon will store the partial fill information and when the remainder is ready to be filled, the Rx is recalled. Follow the steps below to perform a partial count and to complete the full Rx quantity.
- Page 51 Finish button. The transaction will be recorded to the database as a completed fill. See Double Count (DEA Controlled Substances) on page 65 and Back Count (DEA Controlled Substances) on page 66 for information on counting controlled substances. Eyecon 9420 Instruction Manual...
-
Page 52: Physical Inventory Mode
39. The first section will detail operation without the interface. Using the interface will follow that. Physical inventory counts are performed on the Eyecon and saved to a database. The database can be exported as a CSV file and then imported into your computer system to update perpetual counts with an accurate physical count. - Page 53 57. If you have more pills than will easily fit on the pill platter, see Dispensing large quantities on page Press the Finish button to record the quantity to the Eyecon inventory database. A message will be displayed briefly along with an audible sound indicating the transaction was recorded.
-
Page 54: Inventory Operation With The Interface Connection
Counting screen. Dispense pills into the stock bottle. See Best filling practice on page Return to step to count more inventory. 4.4.2 Inventory operation with the interface connection Contact the factory for information on this operation. Eyecon 9420 Instruction Manual... -
Page 55: Practices Common To All Modes
A keypad entry screen appears. Key in the user login number with the numeric buttons and press OK to accept the entry. If the login ID was accepted the SCAN STOCK ITEM screen is displayed. Continue with the current process. Eyecon 9420 Instruction Manual... -
Page 56: Manual Ndc Entry
Save to add this drug into your Eyecon’s database. If the pill image was not found the Train Pill Image screen will appear next. See Train or Retrain a pill image on page Eyecon 9420 Instruction Manual... -
Page 57: Edit Drug Database
When removing the excess don’t count each pill as you scrape them off but remove a quantity that may get you close. Let the Eyecon do the counting until you get very close to the final quantity. When counting large quantities of pills, don’t fill the tray more than 70-80% full. See... -
Page 58: Best Filling Practice
Cup your hand around the mouth of the bottle or vial and place this hand under the funnel and place the tongue of the funnel inside the vial or stock bottle. Push your hand up to raise the funnel gate. Eyecon 9420 Instruction Manual... -
Page 59: Common Messages Or Warnings
4.5.8 Unit of Use for pill counting Use this method when: You want to dispense a combination of a full bottle of pills and loose, Eyecon counted pills. This saves the time of opening a full bottle and counting them on the Eyecon. - Page 60 Press the Unit of Use button to include another full bottle or manually enter a quantity. Press the Finish button and the total quantity dispensed is recorded. See screen at right. See Data menu on page 28 information regarding recorded data and pill photo examples. Eyecon 9420 Instruction Manual...
-
Page 61: Hand Counts
Practices common to all modes 4.5.9 Hand counts These instructions assume you are in Validation mode, where Eyecon provides the most value for Hand Counting because it ensures the correct item is being dispensed. If the drug is a unit of... - Page 62 If the Finish button was pressed with a count of 0, a message screen will be displayed. Press Yes to record the zero count or press No to cancel and return to the Hand Count Only screen. Eyecon 9420 Instruction Manual...
-
Page 63: Dispensing Large Quantities
Finish to complete the operation and the transaction is recorded. Lift the tray and dispense the pills into the vial with the first group that had been counted. See Validation mode operation on page Eyecon 9420 Instruction Manual... -
Page 64: Train Or Retrain A Pill Image
Press the Train Pill button and the screen at right appears. If the pill images match the shape of the pills on the platter go to the next step. Eyecon 9420 Instruction Manual... -
Page 65: Double Count (Dea Controlled Substances)
In the example above the schedule is C-II. Re-pour the pills on the platter and be sure the Quantity matches the Target Qty: window. Press the Finish button to finalize the double count. The transaction will be recorded. Eyecon 9420 Instruction Manual... -
Page 66: Back Count (Dea Controlled Substances)
If the dispense results in opening a new stock bottle, the Eyecon takes that into account by adding in the full bottle quantity. The expected back-count amount is displayed at the top of the count screen, in the same manner as the target quantity for Rx filling. - Page 67 If Require Adjust Reasons was selected in the Double Check menu on page 33, a reason menu will be displayed. See the example at right. Select a reason and press the OK button. The display will return to Scan Vial Label. Eyecon 9420 Instruction Manual...
-
Page 68: Chapter 5 User Login Barcodes
You can simply scan a User Login label and the scanned user ID will be established as the new current user. Any of the example labels can be scanned at the Eyecon Scanner Test. SeeTest menu on page 35 to determine which 6 digit code it contains. The User ID's encoded in the barcode labels will still need to be entered into the User Login table as described in Login/Scan out menu item. -
Page 69: User Login Barcodes
I D+7 5 3 2 2 I D+7 5 3 0 7 I D+7 5 3 15 I D+7 5 3 2 3 I D+7 5 3 0 8 I D+7 5 3 16 I D+7 5 3 2 4 Eyecon 9420 Instruction Manual... -
Page 70: Chapter 6 Audit Reports
Audit reports Audit reports Audit reports can be viewed from the Eyecon display or copied to a computer via USB memory stick. The report automatically starts with the most recent data. 6.1 Access Eyecon Auditor Press the Auditor button on the START screen …... - Page 71 View Tray Photo button An example of the screen is shown at right. If more than one image is available, use the arrows to scroll to the other images. Eyecon 9420 Instruction Manual...
-
Page 72: Accessing The Saved Photos And Reports
In the right window is a folder named “EyeconVPC”. Double click on this folder to open it. Inside the folder is a Transactions Report folder with the Eyecon name and serial number. Inside this folder will be a csv folder and a Photos folder. -
Page 73: Chapter 7 Accuracy Verification Procedure
Accuracy verification procedure In order to confirm that counts provided by the Eyecon are accurate, it is recommended to follow the procedure below on a monthly basis, or whenever there is any question regarding the accuracy. This check may be required by some states’ Boards of Pharmacy. - Page 74 Accuracy verification procedure Table 7.1 Eyecon Accuracy Log Quantity Date Time Name Notes Verified Eyecon 9420 Instruction Manual...
-
Page 75: Chapter 8 Supported Bar Code Symbologies
Transmit UPC-E Check Digit Transmit UPC-E1 Check Digit UPC-A Preamble UPC-E Preamble UPC-E1 Preamble Convert UPC-E to A Convert UPC-E1 to A EAN-8/JAN-8 Extend UCC Coupon Extended Code Coupon Report ISSN EAN F1h 69h Disable 9-25 Eyecon 9420 Instruction Manual... -
Page 76: Code 128
Set Lengths for Code 11 Code 11 Check Digit Verification Transmit Code 11 Check Digit(s) 8.1.6 Interleaved 2 of 5 (ITF) Interleaved 2 of 5 (ITF) Set Lengths for I 2 of 5 I 2 of 5 Check Digit Verification Eyecon 9420 Instruction Manual... -
Page 77: Discrete 2 Of 5 (Dtf)
8.1.11 Matrix 2 of 5 Matrix 2 of 5 Matrix 2 of 5 Lengths Matrix 2 of 5 Check Digit Transmit Matrix 2 of 5 Check Digit 8.1.12 Korean 3 of 5 Korean 3 of 5 Eyecon 9420 Instruction Manual... -
Page 78: Inverse 1D
GS1 DataBar Expanded (GS1 DataBar Expanded, GS1 DataBar Expanded Stacked) Convert GS1 DataBar to UPC/EAN 8.1.16 Composite Composite CC-C Composite CC-A/B Composite TLC-39 UPC Composite Mode Composite Beep Mode GS1-128 Emulation Mode for UCC/EAN Composite Codes 8.1.17 2D Symbologies PDF417 MicroPDF417 Eyecon 9420 Instruction Manual... -
Page 79: Symbology-Specific Security Levels
8.1.18 Symbology-Specific Security Levels Redundancy Level Security Level (UPC/EAN and Code 93) Intercharacter Gap Size 8.1.19 Macro PDF Macro PDF Transmit/Decode Mode Symbols Transmit Macro PDF Control Header Escape Characters Flush Macro PDF Buffer Abort Macro PDF Entry Eyecon 9420 Instruction Manual... - Page 80 Supported bar code symbologies Eyecon 9420 Instruction Manual...
-
Page 81: Index
65 2D barcode... 22 Drug Number Not Found... 56 Drug Substitution... 25, 48 About Eyecon... 21 About EyeCon 9420... 25 Edit drug database... 57 Access Eyecon Auditor... 70 External scanner... 13 Accessing the saved photos and reports... Eyecon Native Modes... 42 Eyecon Operation... - Page 82 Touchscreen test... 36 Train or Retrain a pill image... 64 Transaction Purge Time... 28 Tray Photo Count... 29 Rapid Fill Platter... 10 Turn off the Eyecon... 20 Routine Maintenance... 14 Turn on the Eyecon... 13 Rx... 22 Rx barcode... 22 Rx Validation and Dispensing...
- Page 83 Use PMSS Connection Timeout... 31 User login barcodes... 68 Validation... 27, 42 Validation mode operation... 45 Vial... 22 Vial label... 22 Video training... 10 View a Report... 70 Warranty Policy... 21 Wrong Drug... 48 Eyecon 9420 Instruction Manual...
- Page 84 Eyecon 9420 Instruction Manual...
- Page 86 Avery Weigh-Tronix USA 1000 Armstrong Dr. Fairmont MN 56031 USA Tel:507-238-4461 Fax:507-238-4195 Email: usinfo@awtxglobal.com www.averyweigh-tronix.com Avery Weigh-Tronix UK Foundry Lane, Smethwick, West Midlands, England B66 2LP Tel:+44 (0) 8453 66 77 88 Fax: +44 (0)121 224 8183 Email: info@awtxglobal.com www.averyweigh-tronix.com...
Need help?
Do you have a question about the 9420 and is the answer not in the manual?
Questions and answers