Table of Contents
Advertisement
Quick Links
Instruction and Parts Manual
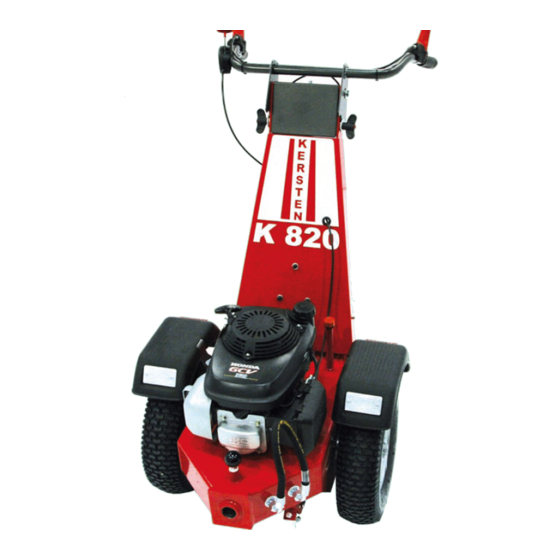
K 820
Front sweeping machine
Part no E00002-1 Pre Machine Number 50144 Copyright Kersten (UK) Ltd © 2008 Compiled 19/01/09
UK
Kersten Maschinenvertriebs
Kersten (UK) Ltd
GmbH
Progress House, 39 Boulton Road
D - 46459 Rees, Empeler Straße
Reading, Berkshire RG2 0NH
93-95
www.kersten-maschinen.de
Phone: 0118 986 9253
Tel.: 028 51 / 92 34 0
Email: info@cnect2.com
Fax: 028 51 / 92 34 44
Advertisement
Table of Contents

Subscribe to Our Youtube Channel
Related Manuals for Kersten K 820

Summary of Contents for Kersten K 820
- Page 1 Instruction and Parts Manual K 820 Front sweeping machine Part no E00002-1 Pre Machine Number 50144 Copyright Kersten (UK) Ltd © 2008 Compiled 19/01/09 Kersten Maschinenvertriebs Kersten (UK) Ltd GmbH Progress House, 39 Boulton Road D - 46459 Rees, Empeler Straße...
-
Page 3: Table Of Contents
CONTENTS Page About this manual 1.1 Product Identification 1.2 Before start-up 1.3 Intended use Safety Precautions 2.1 General safety and accident prevention instructions 2.2 Transporting 2.3 Safety Basic rules 3.1 Before starting up 3.2 Repair work 3.3 Basic maintenance Disposal Warranty Specification Assembly... -
Page 4: About This Manual
Before start up We are not liable for any substantial accident and/or damage. Before you drive this machine or start the engine of the Kersten machine that you are handling, we ask that you urgently to make yourself familiar with this manual and the operation of the machine. -
Page 5: Intended Use
The manual assumes that the operator has a general awareness for Health and Safety to be appointed an operator in the first place. This Kersten machine has been designed, so far as is reasonably practical, So that it will not endanger the safety of the operator or anyone else if... -
Page 6: General Safety And Accident Prevention Instructions
● Consider all additional valid general operating instructions and health and safety regulations ● This machine should not be operated by any person under the age of 16. ● This machine may be subject to regulations when used on the public highway ●... -
Page 7: Safety
These decals indicate types and areas of endangerment and in particular the safety measure which should be taken. Always remain alert and conscious of the dangers the decals indicate on the machine, you are operating, presents to you and others. The decals must be maintained in good condition, they are important safety devices The following decals are present on this machine:... -
Page 8: Before Starting Up
Humidity and rain increases the danger of slippage. Certain conditions may not permit safe handling of the machine ● Wear firm footwear with sufficient profile. Operate only in conditions where sufficient lighting exists Check terrain for hidden hazards prior to commencement of operation ... -
Page 9: Disposal
This device must be disposed of according to the regulation of the municipality or the country. All possible parts should be recycled and the remainder disposed of in a satisfactory manner. The company Kersten Maschinenvertriebs GmbH or Kersten (UK) Ltd does not take responsibility of disposal. Warranty Details of Warranty are included on the warranty registration form. -
Page 10: Specification
Specification Type K-LINE 820 SWEEPER Engine Honda 5.5 hp Fuel Tank .91 litres Electrical Start Forward Driving Speed 3km/h Backwards Driving Speed Hydraulic Oil Tank 7 litres Hydraulic Oil Avia syntofluid N68 (68 grade biodegradable oil) Tyre 4.00 x 8 Tyre Pressure Normal running pressure 15psi + or - 2 Parking Brake... -
Page 11: Assembly
Assembly Assembly Dirt collector Attach left and right hand collector height adjustment brackets to the front of the sweeper housing using counter sunk screws and lock nuts. Attach the collector to the sweeper by folding the catch lever up. Slide the container down on to the two adjustable hooks and fold the catch lever down to lock in to place. -
Page 12: Assembly - Side Broom
Assembly - side broom When attaching the side brush to the sweeper housing for the first time the drive pulley and support casing needs to be fitted to the right hand of the sweeper housing as viewed from the operating position. Remove the 17mm clamping bolt, discard the flat washer. -
Page 13: Adjustment - Removal Of Side Broom
7.4 Adjustment possibilities with the side broom "H" = height adjustment of the side broom is made by turning grasp “H”. Anti-clockwise lowers the brush for more contact with the ground. Clockwise raises the brush for less contact with the ground. Please note that adjusting the height of the main brush will affect the height setting of the gulley brush!! “N”... -
Page 14: Operation
8 Operation Operating instructions - power unit Handlebar adjustment : Equally loosen both wing nuts (position1 + pos.2) and pull the handlebar in for the operator desired height, now retighten the two wing nuts again. To fold the handlebar down, release hand wheel (position3) and unhook threaded rod.. Engine start: Set throttle lever (6) to the start position, (symbol "hare") and pull the starter. -
Page 15: Operating Instructions
Operating instructions - sweeping machine: Height adjusters “A” control the brush depth settings . Twisting them clockwise will lower the brush – anticlockwise will raise the brush. The base setting from which to work is when 40mm of the brush is in contact with the surface to be swept. -
Page 16: Maintenance
Maintenance 11.1 General information Note! Injuries to people or Damages to the machine can occur. You should check before each use that the machine is safe and the relevant parts and hydraulic connections are properly connected. 11.2 Maintenance ● The sweeping machine must be submitted to regular maintenance. ●... -
Page 17: Installinf A Replacement Sweeping Brush
11.5 Installing a replacement sweeping brush Remove the 17mm long clamping bolt from the sweeping machine housing Loosen the three screws on the bearing housing and remove clamp and bearing assembly. Take the square drive tube out of the two sectioned sweeping brush and remove brushes. -
Page 18: Disposal
All possible parts should be recycled and the remainder disposed of in a satisfactory manner. The compnay Kersten does ot take responsibility of disposal. Warranty Details of Warranty are included on the warranty registration form. All conditions must be satisfied. -
Page 19: 14 Certificate Of Conformity
14 Certificate of conformity Certificate of Conformity by the manufacturer (article 8 of the guideline 98/37/EG) Kersten Maschinenvertriebs GmbH Empeler Straße 93-95 D - 46459 R e e s explain that the machine: Hand-guided front sweeping machine with combustion engine... -
Page 20: Parts Lists
PARTS 1. Drives... - Page 21 1. Drives: Bestellnu Bezeichnung Nr. Bestellnum Bezeichnung 900 008 001 712 000 001 Basic housing 820 000 010 Guidance cross-beam 920 000 055 Honda-Motor 5,5PS down 901 008 040 Screw 901 008 025 Screw 905 008 000 lock washer 820 000 020 Guidance cross-beam 705 302 343 Socket 43mm...
- Page 22 2. Hydraulic drive...
- Page 23 2. Hydraulic drive Bestellnu Bezeichnung Nr. Bestellnum Bezeichnung 934 712 029 Hydraulic pump 707 000 001 Basic Housing 712 000 029 Pump carrier 820 101 638 Bowden cable driving lever inside 901 006 025 Screw 820 201 465 Bowden cable 905 006 000 Lock Washer driving lever outside...
- Page 24 Distributed in UK by Kersten (UK) Ltd Tel. 0118 986 9253 Progress House 39 Boulton Road Reading, RG2 0NH www.kerstenuk.com - info@kerstenuk.com...
Need help?
Do you have a question about the K 820 and is the answer not in the manual?
Questions and answers