Advertisement
Quick Links
NetScaler Gateway Appliances
Jun 0 5, 20 15
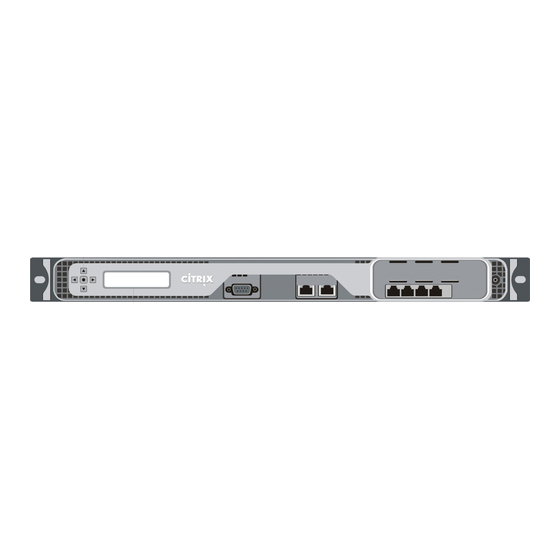
About the NetScaler Gateway MPX Appliance
Model MPX Specifications
Front and Back Panel Components
Ports
Preparing for Installation
Unpacking the Model MPX Appliance
Preparing the Site and Rack
Cautions and Warnings
Install and Setup
Getting Ready to Install the Model MPX Appliance
Selecting a Location for the Appliance
Setting Up the Model MPX Appliance
Installing the Model MPX Appliance in a Rack
Connecting the Cables to the MPX Appliance
T urning on the Model MPX Appliance
Performing the Initial Configuration of the MPX Appliance
Configuring the Model MPX Appliance
Configuring the MPX Appliance by Using the LCD Keyboard
Configuring Initial Settings by Using the Serial Console
Configuring Initial Settings by Using the Setup Wizard
Using DHCP for Initial Access
Accessing an Appliance by Using SSH Keys and No Password
NetScaler Gateway Virtual Appliances
Introducing NetScaler Gateway VPX
NetScaler Gateway VPX Architecture
About XenCenter
https://docs.citrix.com
© 1999-2017 Citrix Systems, Inc. All rights reserved.
p.1
Advertisement

Related Manuals for Citrix NetScaler MPX

Summary of Contents for Citrix NetScaler MPX
- Page 1 Configuring Initial Settings by Using the Setup Wizard Using DHCP for Initial Access Accessing an Appliance by Using SSH Keys and No Password NetScaler Gateway Virtual Appliances Introducing NetScaler Gateway VPX NetScaler Gateway VPX Architecture About XenCenter https://docs.citrix.com © 1999-2017 Citrix Systems, Inc. All rights reserved.
- Page 2 Installing the Model 2010 Appliance in a Rack T urning on the Model 2010 Appliance Configuring the Model 2010 Appliance Replacing the Secure Gateway with NetScaler Gateway Migrating from the Secure Gateway to NetScaler Gateway https://docs.citrix.com © 1999-2017 Citrix Systems, Inc. All rights reserved.
- Page 3 For information about setting up the MPX appliance in a rack, see Installing the Model MPX Appliance in a Rack. T his section discusses the MPX specifications and how to install and configure the MPX appliance. https://docs.citrix.com © 1999-2017 Citrix Systems, Inc. All rights reserved.
- Page 4 You cannot see the fan turning on the back panel. You can see the fixed part of the fan that holds the spinning motor. https://docs.citrix.com © 1999-2017 Citrix Systems, Inc. All rights reserved.
-
Page 5: Front And Back Panel Components
CompactFlash Card. T he CompactFlash drive in all appliances contains the operating system for the unit. It is mounted as /flash. Hard Disk Drive. T he hard disk drive on all appliances contains logs and other data files. It is mounted as /var. https://docs.citrix.com © 1999-2017 Citrix Systems, Inc. All rights reserved. - Page 6 T he following tables list the maximum distance specifications for NetScaler Gateway pluggable media (1G SFP and XFP transceivers). T he1G Pluggable Media table has the following columns: SKU: Citrix maintains multiple SKUs for the same part. Description: T he price list description of the part.
- Page 7 T he port LEDs show whether the link is established and traffic is flowing through the port. T he following table describes the LED indicators for each port. T here are two LED indicators for each port type. https://docs.citrix.com © 1999-2017 Citrix Systems, Inc. All rights reserved.
- Page 8 Link is established but no traffic is passing through the port. Blinking T raffic is passing through the port. green Management Left Speed No connection, or a traffic rate of 10 Mbps. https://docs.citrix.com © 1999-2017 Citrix Systems, Inc. All rights reserved.
- Page 9 T raffic rate of 1 gigabit per second. Right Link/Activity No link. Solid yellow Link is established but no traffic is passing through the port. Blinking T raffic is passing through the port. yellow https://docs.citrix.com © 1999-2017 Citrix Systems, Inc. All rights reserved.
- Page 10 Also, verify that the server cabinet or floor-to-ceiling cabinet is securely bolted to the floor and has sufficient airflow. Only trained and qualified personnel should install, maintain, or replace the appliance and should be sure to follow all cautions and warnings. https://docs.citrix.com © 1999-2017 Citrix Systems, Inc. All rights reserved. p.10...
- Page 11 One available Ethernet port on your network switch or hub for each Ethernet port you want to connect to your network. Note: T ransceiver modules are sold separately. Please contact your Citrix sales representative to order transceiver modules for your appliance. Only transceivers supplied by Citrix are supported on the appliance.
- Page 12 Power connections. At minimum, two standard power outlets per unit. Network connections. At minimum, four Ethernet connections per rack unit. Space requirements. One empty rack unit. https://docs.citrix.com © 1999-2017 Citrix Systems, Inc. All rights reserved. p.12...
-
Page 13: Cautions And Warnings
Never remove a power supply cover or any sealed part that has a label that reads: Hazardous voltage, current, and energy levels are present inside any component that has this label attached. T here are no user-serviceable parts inside these components. If you suspect a problem with none of these parts, contact Citrix T echnical Support. Appliance Precautions Determine the placement of each component in the rack before you install the rail. - Page 14 Always make sure the rack is stable before extending a component from the rack. Extend only one component at a time. Extending two or more simultaneously may cause the rack to become unstable. https://docs.citrix.com © 1999-2017 Citrix Systems, Inc. All rights reserved. p.14...
-
Page 15: Install And Setup
NetScaler Gateway. After you turn on the appliance, you perform the initial configuration, and assign management and network IP addresses. Be sure to observe the cautions and warnings listed with the installation instructions. https://docs.citrix.com © 1999-2017 Citrix Systems, Inc. All rights reserved. p.15... - Page 16 One network cable to connect NetScaler Gateway inside a firewall or to a server load balancer T wo network cables to connect NetScaler Gateway located in the DMZ to the Internet and secure network Citrix recommends that you use a pre-installation checklist for the Model MPX. For more information, see the NetScaler Gateway Pre-Installation Checklist.
- Page 17 Ground the rack to ensure that a reliable ground is maintained at all times. Leave enough clearance in front of the rack to enable you to open the front bezel completely. https://docs.citrix.com © 1999-2017 Citrix Systems, Inc. All rights reserved. p.17...
- Page 18 3. Connect either the serial cable to a Windows-based computer, a cross-over cable to a Windows-based computer, or an RJ-45 network cable to a network switch and NetScaler Gateway. 4. Configure the T CP/IP settings by following the instructions in Configuring Initial Settings by Using the Serial Console. https://docs.citrix.com © 1999-2017 Citrix Systems, Inc. All rights reserved. p.18...
- Page 19 2. Slide out the inner rail toward the front of the assembly. 3. Depress the locking tabs until the inner rail comes all the way out of the rail assembly, as shown in the following figure. Figure 2. Removing inner rails https://docs.citrix.com © 1999-2017 Citrix Systems, Inc. All rights reserved. p.19...
- Page 20 2. Slide the appliance into the rack rails, keeping the pressure even on both sides. 3. Verify that the appliance is locked in place by pulling it all the way out from the rack. https://docs.citrix.com © 1999-2017 Citrix Systems, Inc. All rights reserved. p.20...
- Page 21 Alternatively, you can use a computer connected to the network. Before connecting the console cable, you can accept the following default settings: Computer or terminal supports VT 100 terminal emulation https://docs.citrix.com © 1999-2017 Citrix Systems, Inc. All rights reserved. p.21...
- Page 22 2. Connect the other end of the power cable to a standard 110V/220V power outlet. 3. If a second power supply is provided, repeat steps 1 and 2 to connect the second power supply. https://docs.citrix.com © 1999-2017 Citrix Systems, Inc. All rights reserved. p.22...
- Page 23 Caution: Be aware of the location of the emergency power off (EPO) switch so that you can quickly turn off power to the appliance if an electrical accident occurs. (T he EPO can be located anywhere, including on the rack, the data center, or the lab.) https://docs.citrix.com © 1999-2017 Citrix Systems, Inc. All rights reserved. p.23...
- Page 24 Configuring NetScaler Gateway with the First T ime Use Configuration. You can also use the Setup Wizard to configure the NetScaler Gateway appliance. For more information about available wizards, see Configuring the NetScaler Gateway by Using Wizards. https://docs.citrix.com © 1999-2017 Citrix Systems, Inc. All rights reserved. p.24...
- Page 25 DHCP to assign each new NetScaler Gateway appliance a unique IP address at which you can access the appliance for remote configuration. https://docs.citrix.com © 1999-2017 Citrix Systems, Inc. All rights reserved. p.25...
- Page 26 If you press the ENT ER (.) key without changing any of the digits, the software interprets this keystroke as a user exit request. T he following message appears for three seconds. Exiting menu... xxx.xxx.xxx.xxx https://docs.citrix.com © 1999-2017 Citrix Systems, Inc. All rights reserved. p.26...
- Page 27 If all of the values you enter are valid, when you press the ENT ER (.) key, the following message appears. Values accepted, Rebooting... T he subnet mask, NetScaler Gateway IP address, and gateway values are saved in the configuration file. https://docs.citrix.com © 1999-2017 Citrix Systems, Inc. All rights reserved. p.27...
- Page 28 T he initial configuration of your appliance is complete. T o continue configuring the appliance, see NetScaler Gateway. Note: For information about deploying a high availability pair, see Configuring High Availability on NetScaler Gateway. https://docs.citrix.com © 1999-2017 Citrix Systems, Inc. All rights reserved. p.28...
- Page 29 Licenses Important: Before running the Setup Wizard, you should download your licenses from the Citrix web site and put them in a location on your computer or another device where you can access them from your web browser during configuration.
- Page 30 2. Set up a DHCP server and configure it with the vendor class identifier. To configure a Linux or UNIX DHCP server f or NetScaler Gateway 1. Specify "citrix-NS" as the vendor class identifier for the appliance by adding the following configuration to the server's dhcpd.conf file: subclass "citrix-1"...
- Page 31 If you need to move a NetScaler Gateway appliance to a different subnet, such as from a testing environment to a production environment, you can use DHCP to access a NetScaler Gateway that already has a configuration file. Before https://docs.citrix.com © 1999-2017 Citrix Systems, Inc. All rights reserved. p.31...
- Page 32 To prevent the DHCP client from running when the appliance restarts > set dhcpParams dhcpClient off > save config Note: T his is required only if the ON setting was saved. T he initial configuration of your appliance is complete. https://docs.citrix.com © 1999-2017 Citrix Systems, Inc. All rights reserved. p.32...
- Page 33 To verif y SSH access with public key encryption on the appliance On the Linux client, verify that you can connect to the remote appliance using SSH, without entering the password. At the prompt, type: https://docs.citrix.com © 1999-2017 Citrix Systems, Inc. All rights reserved. p.33...
- Page 34 You should not receive a prompt for a password. Example ssh nsroot@10.102.96.50 https://docs.citrix.com © 1999-2017 Citrix Systems, Inc. All rights reserved. p.34...
- Page 35 Jul 18 , 20 13 Citrix NetScaler Gateway VPX is a virtual appliance that delivers the same features and functionality as the physical appliance. You can deploy NetScaler Gateway VPX as a virtual workload on your own hardware, in addition to or as an alternative to using a physical appliance.
- Page 36 Introducing NetScaler Gateway VPX Jul 18 , 20 13 NetScaler Gateway VPX is a virtual NetScaler Gateway appliance that is hosted on a hypervisor, such as Citrix XenServer. NetScaler Gateway VPX supports all the features and functionality of the physical NetScaler Gateway appliance.
- Page 37 T his technique enables the virtual computers and the hypervisor to work together to achieve high performance for I/O and for CPU and memory virtualization. https://docs.citrix.com © 1999-2017 Citrix Systems, Inc. All rights reserved. p.37...
- Page 38 As shown in the preceding figure, NetScaler Gateway VPX, when deployed in front of application servers, acts as a secure entry point in the internal network for authenticated users. https://docs.citrix.com © 1999-2017 Citrix Systems, Inc. All rights reserved. p.38...
- Page 39 You use vSphere to install the virtual image file (.ova) for NetScaler Gateway on VMware. You also use vSphere to configure the basic settings of the virtual appliance. For details, see Configuring NetScaler Gateway VPX for the First T ime. For more information about vSphere, see the vSphere documentation. https://docs.citrix.com © 1999-2017 Citrix Systems, Inc. All rights reserved. p.39...
- Page 40 Hyper-V is a type 1 hypervisor that comes preinstalled with Windows Server 2008 R2. It needs to be enabled as a role on the Windows Server. For more information about Hyper-V, see the Microsoft web site. Note: Only Access Gateway VPX Versions 9.3 and 10 and NetScaler Gateway 10.1 support Microsoft Hyper-V. https://docs.citrix.com © 1999-2017 Citrix Systems, Inc. All rights reserved. p.40...
- Page 41 T hese requirements differ depending on the version of NetScaler Gateway VPX that you install. T his section contains the specifications for installing NetScaler Gateway VPX on XenServer, VMware ESX or ESXi, and Microsoft Hyper-V. https://docs.citrix.com © 1999-2017 Citrix Systems, Inc. All rights reserved. p.41...
- Page 42 XenServer and VMware must provide adequate virtual computing resources to the NetScaler Gateway VPX as listed in the following table. Table 2. Virtual Computing Resources of NetScaler Gateway VPX Memory 2 GB for NetScaler Gateway VPX Virtual CPU (VCPU) Two VCPUs minimum for NetScaler Gateway VPX https://docs.citrix.com © 1999-2017 Citrix Systems, Inc. All rights reserved. p.42...
- Page 43 Windows XP, Windows Server 2003, Windows Vista, or Windows 7 .NET Framework Version 2.0, 3.0, 3.5, or 4 750 MHz minimum, 1 GHz or faster recommended 1 GB minimum, 2 GB recommended Network 100 Mbps or faster network adapter https://docs.citrix.com © 1999-2017 Citrix Systems, Inc. All rights reserved. p.43...
- Page 44 T he following table lists the virtual computing resources for each NetScaler Gateway VPX running on Hyper-V. Table 1. Minimum Virtual Computing Resources Required f or Running NetScaler Gateway VPX Component Requirement 4 GB Virtual CPU Disk space 20 GB Virtual Network Interfaces https://docs.citrix.com © 1999-2017 Citrix Systems, Inc. All rights reserved. p.44...
- Page 45 For the Hyper-V installation on Microsoft Server 2008 R2, the virtual image is a file name with the file name extension of .vhd. You can get the virtual image from the Citrix web site after you purchase NetScaler Gateway VPX. To download NetScaler Gateway VPX 1.
- Page 46 You can install XenCenter on any Windows-based computer in your network. You can download XenCenter from the XenServer download page on My Citrix. When you go to the download page, select your version of XenServer and then select the XenCenter Windows Management Console for your version to download and install XenCenter.
- Page 47 5. In OVF T emplate Details, click Next. 6. In Name and Location, type a name for the template, such as Citrix Access Gateway and then click Next. 7. In Ready to Complete, confirm the deployment settings, such as the host and cluster name, datastore, and network mapping and then click Finish.
- Page 48 2. In the Settings for <virtual appliance name> dialog box, click Add Hardware in the left pane. 3. In the right pane, from the list of devices, select Network Adapter. https://docs.citrix.com © 1999-2017 Citrix Systems, Inc. All rights reserved. p.48...
- Page 49 3. T ype the NetScaler Gateway IP address, subnet mask, and default gateway for your virtual appliance. You have completed the basic configuration of your virtual appliance. T ype the IP address in a Web browser to access the configuration utility for the virtual appliance. https://docs.citrix.com © 1999-2017 Citrix Systems, Inc. All rights reserved. p.49...
- Page 50 When the installation is complete, you configure settings on the Console tab in the XenCenter console. You configure the basic settings of Access Gateway VPX as you would for a physical appliance that you connect using a serial cable and the serial console. https://docs.citrix.com © 1999-2017 Citrix Systems, Inc. All rights reserved. p.50...
- Page 51 T wo-arm mode uses two virtual network interfaces, one for external and one for internal connections. In two-arm mode, two IP addresses are assigned to Access Gateway— one for the external interface and one for the internal interface. https://docs.citrix.com © 1999-2017 Citrix Systems, Inc. All rights reserved. p.51...
- Page 52 You can upgrade the software that resides on NetScaler Gateway when new releases are made available. You can check for updates on the Citrix Web site. You can upgrade to a new release only if your NetScaler Gateway licenses are under the Subscription Advantage program when the update is released.
- Page 53 T his procedure removes the virtual image, but does not remove the virtual image files. To remove all the files, browse to the location where the virtual image is stored and delete the parent folder. https://docs.citrix.com © 1999-2017 Citrix Systems, Inc. All rights reserved. p.53...
- Page 54 Gateway VPX. To use the virtual image of the NetScaler Gateway software, you need to obtain the exported virtual image file (.ova) and import it to VMware by using vSphere. https://docs.citrix.com © 1999-2017 Citrix Systems, Inc. All rights reserved. p.54...
- Page 55 T he preconfigured IP address of Access Gateway 5.0 on the Model 2010 is 10.20.30.40. To change the IP address, you can use a serial cable and a terminal emulation program, or you can connect Access Gateway by using network cables and the Access Gateway Management Console in Access Gateway 5.0. https://docs.citrix.com © 1999-2017 Citrix Systems, Inc. All rights reserved. p.55...
- Page 56 T he Model 2010 appliance is a standard 1U 19 inch rack-mountable appliance that supports up to 500 concurrent users. T he 2010 appliance has the following ports: T wo front-mounted 10/100/1000 Ethernet ports One RS232 front-mounted serial console port One rear-facing USB port https://docs.citrix.com © 1999-2017 Citrix Systems, Inc. All rights reserved. p.56...
- Page 57 For Access Gateway VPX 4.6, you can use one or two virtual network interfaces. Interfaces For Access Gateway VPX 5.0, you can use up to four virtual network interfaces. Minimum Storage 12 GB Requirement https://docs.citrix.com © 1999-2017 Citrix Systems, Inc. All rights reserved. p.57...
- Page 58 750 MHz minimum, 1 GHz or faster recommended 1 GB minimum, 2 GB recommended Network 100 Mbps or faster network adapter For VMware system requirements, see the VMware Web site. https://docs.citrix.com © 1999-2017 Citrix Systems, Inc. All rights reserved. p.58...
- Page 59 4. Configure the T CP/IP settings by following the instructions in Configuring the Model 2010 Appliance. Figure 1. Access Gateway connection options using a cross-over cable, a network switch, or terminal emulation https://docs.citrix.com © 1999-2017 Citrix Systems, Inc. All rights reserved. p.59...
- Page 60 Installing the appliance in the rack To install the inner rail extension 1. Place the inner rack extensions on the side of the appliance, aligning the hooks of the appliance with the rail extension https://docs.citrix.com © 1999-2017 Citrix Systems, Inc. All rights reserved. p.60...
- Page 61 M5 screws. 4. Repeat the above steps for the second rail. Figure 3. Assembling the outer rails to the rack Figure 4. Installing the outer rails to the server rack https://docs.citrix.com © 1999-2017 Citrix Systems, Inc. All rights reserved. p.61...
- Page 62 When the appliance is pushed completely into the rack, you should hear the locking tabs click. 4. (Optional) Insert and tighten the thumbscrews that hold the front of the appliance to the rack. Figure 5. Installing the Access Gateway into the rack https://docs.citrix.com © 1999-2017 Citrix Systems, Inc. All rights reserved. p.62...
- Page 63 T he only difference in the installation procedure is the positioning of the rack brackets to the rack. Space them apart just enough to accommodate the width of the Telco rack, as shown in the following illustration. Figure 6. Installing the Access Gateway in a two-post (T elco) rack https://docs.citrix.com © 1999-2017 Citrix Systems, Inc. All rights reserved. p.63...
- Page 64 Note: T he model 2010 appliance does not have a power switch, so the appliance turns on when you plug it in. As it turns on, the appliance hums, and various lights on the surface flash. After a few seconds, the rapid changes in sound and lights become a steady hum. https://docs.citrix.com © 1999-2017 Citrix Systems, Inc. All rights reserved. p.64...
- Page 65 For more information about configuring Access Gateway to work in your network, see the following: If you are using Access Gateway 5.0, see Access Gateway 5.0. If you are using Access Gateway 4.6, download the Access Gateway 4.6, Standard Edition PDF. https://docs.citrix.com © 1999-2017 Citrix Systems, Inc. All rights reserved. p.65...
- Page 66 Gateway Jul 15, 20 13 If you currently use the Secure Gateway to enable remote access to servers running Citrix XenApp or Citrix XenDesktop, you can replace the Secure Gateway with Citrix NetScaler Gateway. One of the benefits of choosing the appliance-based NetScaler Gateway includes support for additional applications and protocols.
- Page 67 Web Interface. T his scenario provides greater security because there are two fewer Windows servers in the DMZ. Important: When the Web Interface is placed in the secure network, you must configure authentication and authorization on NetScaler Gateway. https://docs.citrix.com © 1999-2017 Citrix Systems, Inc. All rights reserved. p.67...
- Page 68 T he certificate must be in PEM format before you can install it on NetScaler Gateway. If you are unfamiliar with the process of converting certificates, Citrix recommends a new installation of NetScaler Gateway and the use of a new certificate.
- Page 69 Performing a Parallel Migration Citrix recommends as a best practice that you run Secure Gateway parallel to NetScaler Gateway until all users are properly migrated to the appliance. To perform a parallel migration, you need to do the following: Obtain a new FQDN and certificate.
Need help?
Do you have a question about the NetScaler MPX and is the answer not in the manual?
Questions and answers