Table of Contents
Advertisement
Quick Links
Advertisement
Table of Contents

Related Manuals for Ripmax Sigma EQ ECO II


Summary of Contents for Ripmax Sigma EQ ECO II
-
Page 2: Table Of Contents
CONTENTS W h a t ’s N e w I n S i g m a E Q E C O I I ......................0 3 F O R E W O R D..............................0 4 S p e c i f i c a t i o n s ..............................0 4 S p e c i a l f e a t u r e s ............................5 - 6 Cy c l i c Ch a rg i n g / D i s c h a rg i n g........................07 L i t h i u m p o l y m e r b a l a n c e c h a rg e p ro g ra m a n d c o n n e c t i o n d i a g ra m.......... -
Page 3: W H A T 'S N E W I N S I G M A E Q E C O I
W H AT ’ S N E W I N S I G M A E Q E C O I I Max charge current now reaches to 10A instead of 6A, that means it can speed up your charge by █... -
Page 4: F O R E W O R
F O R E W O R D Thank you purchasing the Sigma EQ Eco II balance charger. This product is a rapid charger with a high performance microprocessor and specialised operating software. Please read this entire operating manual before using this product. It covers a wide range of information on operating and safety. -
Page 5: S P E C I A L F E At U R E S
Adaptable to various type of lithium batteries Sigma EQ Eco II is adaptable to various types of Lithium batteries, such as Li-ion, Li-Po, Li-HV and the new Li-Fe. Fast and storage modes of lithium batteries The purpose to charge a Lithium battery varies, “fast“ charge reduces the duration of charging, whereas “store“... -
Page 6: Cyclic Charging/Discharging
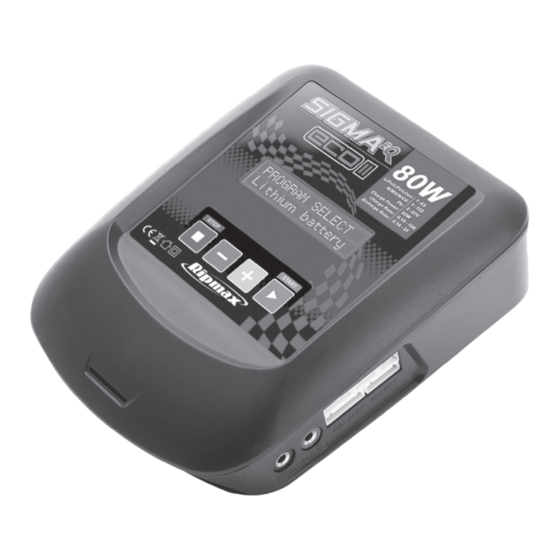
Automatic charging current limits ou can set the upper limit for the charging current when charging your NiCd or NiMH batteries; It is useful for NiMH batteries of low impedance and capacity in the “AUTO” charging mode. Capacity limit The charging capacity is always calculated as the charging current multiplied by the time. If the charging capacity exceeds the limit, the process will be terminated automatically. - Page 7 C H A R G E R L AYO U T Output charge lead Input power socket LCD screen 4mm banana plug 18V DC Balance lead sockets Input power socket JST-XH ports 240V AC Output Scroll through the Main Menu Resume or start charge processes Stop any charge processes Confirm an action...
-
Page 8: L I T H I U M P O L Y M E R B A L A N C E C H A Rg E P Ro G Ra M A N D C O N N E C T I O N D I A G Ra M
C O N N E C T I O N D I AG R A M This diagram shows the correct way to connect your battery to the Sigma EQ Eco II charger whilst charging in the balance charge program mode only. -
Page 9: Wa R N I N G A N D S A F E T Y N Ote
WA R N I N G A N D S A F E T Y N O T E S These warnings and safety notes are par ticularly impor tant. Please follow the instructions for maximum safety or the charger and the batter y can, at best, be damaged, or worst cause a fire. - Page 10 Li- Po Voltage level: 3.7V/cell Max. charge voltage: 4.2V/cell - Allowable fast charge current: 1C or less recommended. Consult the battery manufacturer for higher Discharge voltage cut off level: 3.0V/cell or higher Li- Fe Voltage level: 3.3V/cell Max. charge voltage: 3.6V/cell - Fast charge current: 1C or less. Consult the battery manufacturer for higher Discharge voltage cut off level: 2.0V/cell or higher Li- HV Voltage level: 3.8V/cell...
- Page 11 Never attempt to charge or discharge the following types of batteries. A battery pack which consists of different types of cells (including different manufacturers). Non-rechargeable batteries (Explosion hazard). Batteries that require a different charge technique from NiCd, NiMh, Li-ion, Li-Fe, Li-HV, LiPo or Gel cell (Pb, Lead acid).
- Page 12 Charging. During the charge process,a specific quantity of electrical energy is fed into the battery. The charge quantity is calculated by multiplying the charge current by the charge time. The maximum permissible charge current varies depending on the battery type or its performance and can be found in the information from the battery manufacturer.
- Page 13 Discharging. The main purpose of discharging is to check the capacity of a battery or to reduce the battery’s voltage to a defined level. The same attention should be paid to the discharging process as charging. The final discharge voltage should be set up correctly to avoid deep-discharging. Lithium batteries cannot be discharged to lower than the minimum voltage, or it will cause a rapid loss of capacity or a total failure.
-
Page 14: Program Flow Char T
Program flow char t. As a default setting, this charger will be set to typical user values when it is connected to a PROGR A M SELECT LiPo FAST CH A RGE LiPo BAL ANCE CHG LiPo CHARGE Lithium battery 2.0A AUTO 2.0A... -
Page 15: P Ro G Ra M S E L E C T U S E R S E T T I N G
Program select user settings To avoid an erroneous setting by the user, the charger will automatically detect the cell count Lithium battery of a Lithium battery at the beginning of the charge or discharge process. To prevent an CHK Time 10 min over discharged battery from being detected incorrectly, resulting in an error, you can set a time limit for the processor to verify the cell count. - Page 16 When the charge process starts,the integrated safety timer starts to run simultaneously. If an error is detected or the termination circuit cannot detect whether the battery is fully charged Safety Timer 120min or not. This unit is programmed to prevent overcharging. Please refer to the statement (shown right) to calculate the timer you should set.
-
Page 17: Safe Timer Calculation
This screen sets the termination voltage of battery types (LiPo 4.1-4.3V/S, LiIo 4.0-4.2V/S, LiFe LiPo Termination 3.5-3.7V/S, LiHv 4.25-4.45V/S, Pb 2.3-2.45V/P). Use the default in the middle of each range Voltage 4.20V/S but the ability is there for experienced modellers to vary if needed. This program, provides you with two languages (English and German). -
Page 18: C H A Rg I N G O F L I T H I U M B A T T E R I E
Charging of Lithium batteries without balancing cells The left side of the first line shows the type of battery you choose. The value on the left of the LiPo CHARGE second line of the charger is the current set and the right the series cell count. After setting 2.0A 11.1V(3S) the current and voltage, press the button for more than 3 seconds to start the process. -
Page 19: I N D I V I D U A L C E L L C O N N E C T I O N D I A G Ra M ( P I N - A S S I G N M E Nt O F 8 - P I
Individual cell connection diagram Pin-assignment of 8 -pin Fast charging a Lithium batter y When charging lithium batteries in the fast mode the charging current will become lower towards the end of charging cycle. When the current is down to 1/5 of the current you set during the CV term, it will stop the process and eliminate the forcible requirement of the balance precision (Whether it is been connected to the balance port or not). -
Page 20: S To Ra G E C O Nt Ro L O F L I T H I U M B A T Te R I E S
Storage control of Lithium batter y This function is for charging/discharging batteries which are not used at once. This program is designed for charging or discharging batteries of a specific original state. They are classified by types: 3.70V LiIo, 3.80V LiPo, 3.85V LiHV and 3.30V LiFe. -
Page 21: P Ro G Ra M S E L E C T N I C D / N I M H B A T Te R I E S
The processor detects that the voltage of one cell is too low. The 4th cell was damaged. Note: The value of a voltage may be zero if disconnection occurs. Program select NiCd/NiMH batter y This program is for charging and discharging NiCd/NiMH batteries associated with R/C model NiMH CHARGE AUTO applications. - Page 22 Charge/discharge/cycle NiCd/NiMH batter y You can set battery type in the top left corner followed by the order (Charge>Discharge NiMH CYCLE or Discharge>Charge) on the left and the number of cycles on the right. You can balance, D>C Cnt:3 refresh or bed-in a new battery with this function. You can set a temporary cool-off procedure in the user setting.
- Page 23 Charging a Pb batter y Set up the charge current on the left and the nominal voltage on the right. The range of current is 0.1- 10.0A. The voltage should match the battery being charged. Press the button for more than 3 seconds to start charging. The screen displays the real-time charging status.
-
Page 24: Program Select Load Memor Y
Program select load memor y For your convenience Sigma EQ Eco II has a data memory function. It automatically stores the last 20 operations data, so you can call back the data when charging or discharging without setting up the program again. - Page 25 Various information in the programs You can check for various types of information on the LCD screen during the charging Li3s 1.2A 12.59V process. Press the button and the charger will display the user’s setting. You can press the BAL022 43 00682 button to monitor the voltage of each cell while the battery is connected to the balance port.
-
Page 26: Program Select Extra Function
Program select extra function In this program, you can select other functons. 1>Measure internal resistance program In this program, the charger can measure the per-cell internal resistance (only available for lithium batteries) 1 > measure IR The battery pack starts to measure internal resistance. ---->... - Page 27 3>Lixx balance of batter y In this program, you can simply balance your 2-6S Lix x batteries using the integrated balancer. It indicates the voltage the for each cell in your battery pack. 3>Lixx Balance Press the button. ----> Press the button again, then Press the or the button to select your battery type...
- Page 28 WARNING: Do not operate the motor with anything attached and keep the rotating parts clear of hazards. Sigma EQ Eco II Connect your brushed motor to the output socket of , always connect 5>Brushed Motor...
- Page 29 You can stop the test at any time by pressing the button. STOP000:00 0.0W 1>Check ESC/Motor PPM The Sigma EQ Eco II is an advanced charger that incorporates a feature which allows 7>Esc/Motor PPM you to check an electric motor/ESC combination. WARNING: Do not operate the motor with ---->...
- Page 30 SignalOut: 900us This screen shows the output signal. This can be changed using or buttons . 8>Thrust Calculator In this program, you can easily calculate the thrust of a propeller without connecting it to the 8>Thrust Calc charger. ----> Press the or the button, You can set up the RPM in on the left side of first line and the parameter of the propeller on the right side of the first line.
- Page 31 Warning and error information Sigma EQ Eco II incorporates a variety of functions for the systems to verify processes and the state of the electronics. In the case of an error the screen will display the cause of error and emit an audible sound.
- Page 32 The charger is expecting a different voltage, please check the voltage of the input battery. The voltage of the battery pack has been selected incorrectly! The charger has malfunctioned for some reason. Seek professional advice. The voltage is lower than the value set. Please check the number of cells in the battery pack. The voltage is higher than the value set.
- Page 33 BATTERY VOLTAGE Voltage of one cell in the battery pack is too low, please check the voltage of each cell. CELL LOW VOL BATTERY VOLTAGE Voltage of one cell in the battery pack is too high, please check the voltage of each cell. CELL HIGH VOL BATTERY VOLTAGE Wrong connection of the connector detected, please check the connector and cable.
-
Page 34: Wa R Ra Nt Y A N D S E R V I C
Reprinting, also in part, is prohibited. These operating instructions represent the technical status at the time of printing. Changes in technology and equipment reserved. Manufactured for: Ripmax Ltd., 241 Green Street, Enfield. EN3 7SJ. United Kingdom... - Page 35 Notes...
- Page 36 Ripmax Ltd. Ripmax GmbH 241 Green Street, Futaba RC - Service Enfield, Stuttgarter Straße 20/22 EN3 7SJ 75179 Pforzheim United Kingdom Germany Tel: +44 (0)20 82827500 Tel: +49(0)7231 46 94 10 Email: mail@ripmax.com Email: info@ripmax.de Website: www.ripmax.com Website: www.ripmax.de Made in China...
Need help?
Do you have a question about the Sigma EQ ECO II and is the answer not in the manual?
Questions and answers