
Related Manuals for helena V8 NEXUS

Summary of Contents for helena V8 NEXUS
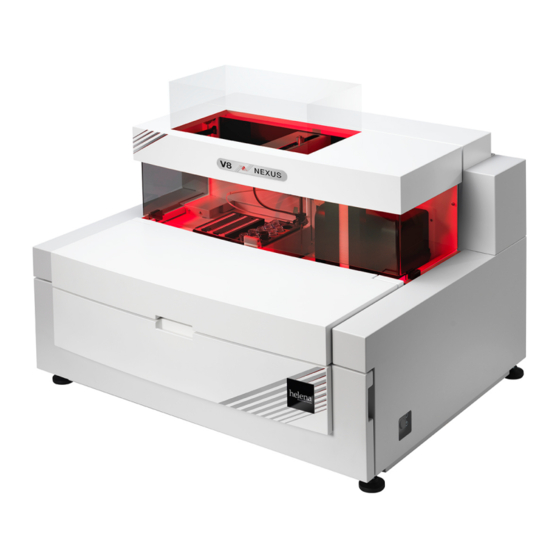
- Page 1 High Performance Clinical Capillary Electrophoresis Operator Manual English V8 Operator Manual 1 of 125...
-
Page 2: Table Of Contents
Table of Contents Revisions to this operator manual Copyright notice Company liability Health and safety Informational Symbols Preface: Welcome to your V8 Terminology used in this manual Acronyms Intended Purpose Intended purpose V8 technologies and functionality: quick reference guide Installation and special requirements Overview Storage and Transport Packaging and installation... - Page 3 5.7.7.1 Placing samples on-board V8 5.7.8 Sample tube barcodes 5.7.8.1 Adding a tube ID to processed samples 5.7.8.2 To remove a “Sample Missing Barcode” flag from Platinum 5.7.8.3 How to remove a rack from the worklist 5.7.8.4 Skip position barcode 5.7.9 V8 gel tray handling 5.7.9.1...
- Page 4 5.9.12.4 Removing an M-spike 5.9.12.5 Removing artefacts from traces 5.9.13 Slice data 5.9.14 Skim data 5.9.15 Searching for & attaching an Immunotyping result 5.9.16 Result comments 5.9.16.1 To compose the standard comments 5.9.16.2 Adding a comment to a sample result 5.9.17 Quality Control 5.9.18...
- Page 5 7.2.11 Expert System 7.2.12 Instrument status communication Regulatory Information 7.3.1 Proprietary notice 7.3.2 Warranty 7.3.3 WEEE 7.3.4 Applicable standards and directives 7.3.5 Precautions and limitations Hazards: Residual Residual risks and user protection 8.1.1 Cleaning of sample analysis and preparation area 8.1.2 Decontamination 8.1.3...
-
Page 6: Revisions To This Operator Manual
Revisions to this operator manual This section lists all amendments which have been made to the content or design of this operator manual. Initial publication: HL-2-2219P 2011/09 (1) Issued September 2011 Second publication: HL-2-2219P 2013/04 (2) Issued April 2013 Third publication: HL-2-2219P ... -
Page 7: Copyright Notice
© Copyright 2008-2016 Helena Biosciences Europe. All rights reserved. This operator manual may not be copied, in whole or in part, without the written consent of Helena Biosciences Europe. Microsoft, and Windows, are trademarks or registered trademarks of Microsoft Corporation. Other company and product names mentioned within this manual are trademarks of their respective companies. -
Page 8: Company Liability
The information in this manual has been carefully compiled and verified for technical accuracy, and should be read thoroughly to ensure correct and safe usage. Helena Biosciences Europe trusts that the information contained herein is valid and accurate; and thereby accepts no liability or responsibility for system malfunctions, damage or personal injury caused by misuse or mishandling. For more information, please contact your local Helena Biosciences Europe representative. -
Page 9: Health And Safety
Helena Biosciences assumes no liability for the operator’s failure to comply with these requirements. Protection impairment if the operator uses the system in a manner not as specified by Helena Biosciences. -
Page 10: Informational Symbols
Informational Symbols The following information applies to operating personnel. It is the responsibility of the user to ensure that all safety information and operating instructions are read and understood before use. General warnings and cautions will be found throughout the manual where they apply. - Page 11 CAUTION separate collection of electric and electronic waste at the end of life, as required by European legislation. CAUTION WARNING: Pinch point hazard HAZARD Laser Radiation: Laser beam hazard. LASER RADIATION Danger: Serious health hazard. May damage fertility or the unborn child DANGER V8 Operator Manual 11 of 125...
-
Page 12: Preface: Welcome To Your V8
Preface: Welcome to your V8 Helena Biosciences Europe welcomes you to your brand new V8 system; an advance in automated Clinical Capillary Electrophoresis – now at the heart of your laboratory. Your V8 system promises to deliver you the latest automated technology and software systems for the diagnosis and monitoring of patient health across a broad spectrum of clinical investigations. - Page 13 Terminology used in this manual In order to make this document as clear as possible, these conventions will be followed: Text alerts and messages Text, in the form of messages and alerts from Platinum or Windows™ software, will be shown as follows: “It is now safe to remove the device.”...
- Page 14 Acronyms Clinical Capillary Electrophoresis Carbohydrate Deficient Transferrin Capillary Electrophoresis Cerebrospinal Fluid Capillary Zone Electrophoresis Coefficient of Variation Dynamic Compression Injection Electroosmotic Flow Electrophoresis Sample Handler Free on Board Haemoglobin Isoelectric Focussing Immunofixation Instructions for Use Immunodisplacement Laboratory Automated System LIMS Laboratory Information Management System Laboratory Information System Printed Circuit Board...
-
Page 15: V8 Technologies And Functionality: Quick Reference Guide
In capillary electrophoresis, the velocity of analyte migration is the key mode of separation. Central to resolving complex samples is the manipulation and control of these velocities. While Velocity stands at the heart of CE, it also captures the spirit of Helena Biosciences’... - Page 16 Understand the automated maintenance procedures on the V8, see 9.1 and 9.2 Future proof your V8, see 9.8, 9.9, 9.10 and 9.11 Contact your local Helena Biosciences representative for the latest product information and developments; or consult www.helena-biosciences.com Eco System Energy efficient technology for a green result you can rely on...
-
Page 17: Installation And Special Requirements
V8 has been carefully packaged to safely secure all items and mechanical components from damage during transportation and storage. Your V8 will be unpacked and installed by a Helena Biosciences trained and certified service engineer, who will ensure that the entire system is fit for purpose. - Page 18 Item Description Quantity Supplied Ethernet cable (1 x cross cable, 1x patch cable) Mains flex Fuses T6.3A Barcode Scanner Spare Capillaries ID/Hb Overlay Sample Tray Sticker Sheet Waste Drawer Skip Position Barcode Sticker Sheet V8 Operator Manual 18 of 125...
-
Page 19: Basic Installation Requirements
Class 1 device. This instrument must be earthed. Platinum to V8 configuration The V8 must be configured to the PC and Platinum which are supplied as part of the system. The Helena Biosciences installation engineer will configure the V8 to the PC. -
Page 20: Operator Levels
The level of access for each operator is set by the Level 3 user. When logging into Platinum for the first time, the Level 3 operator will be assigned a password set by Helena Biosciences. Please see your local distributor/sales representative for further information. -
Page 21: Configuration Of Demographics
Level Level 2, or Level 3 from the drop down level menu. Choose File > Customise to open the customisation dialogue box. Click the Configure menus tab from the customisation dialogue box. Configuration of demographics With the Customisation window open; click the Configure Demographics tab and input up to 10 demographic fields as required. - Page 22 demos.dem Click the Save button, save the file under the name in the Platinum folder. Click Load, and find the file you have saved in the previous step. Choose the required file to open. This will activate the correct demographic fields. Click to return to the V8 or Gel session.
-
Page 23: Getting To Know Your V8
Getting to know your V8 Capillary Electrophoresis Capillary electrophoresis is a powerful analytical technique which separates sample components based on differences in mass to charge ratio. This is achieved using a microbore, fused silica capillary filled with an appropriate electrolyte medium under high voltage. -
Page 24: Performance Characteristics And Specifications
Performance characteristics and specifications V8 technical specifications Identification Positive patient identification. Sample rack bar coded identification. Bar coded buffer and reagent containers. Bar code Embedded bar code reader. 70° angle. Symbologies: Code 39, Codabar, Code 128, Interleave 2 of 5, Code 93 and UPC/EAN. Loading Up to 14 sample racks of 8 primary tubes;... -
Page 25: V8 Schematic
Serum Protein 6-band. Serum Protein SPE. Serum Protein 6-band Zoom. Urine Protein 6-band. Urine Protein SPE. Urine Protein 6-band Zoom. Immunodisplacement (IgG, IgA, IgM, Kappa, Lambda). Fast CE. Carbohydrate Deficient Transferrin. Haemoglobin IEF. Haemoglobin A1c. Sensitivity Detection of serum proteins at 208mg/L (Method dependent). Detection of urine proteins at 20mg/L. -
Page 26: V8 Instrument Technical Overview
mains supply for system power; network ports for bi-directional host interfacing; and web access for remote service support. The V8 clinical capillary electrophoresis system 4.2.2 V8 instrument technical overview Instrument technical drawing Top cover The sample preparation and analysis lid contains the components which make up the sample preparation and analysis area. This part of the instrument is concealed to prevent sample and fluid contamination;... - Page 27 This area is not accessible to the end-user for health and safety reasons; and should only be directly handled by a Helena Biosciences trained and certified engineer. HAZARD...
- Page 28 Sample cup load tower The sample cup dispenser is a holding magazine that contains and dispenses disposable sample cups into the sample cup fill area. Sample preparation and analysis area The sample preparation and analysis area contains all the primary components facilitating the automatic preparation and analysis of samples held on-board the V8.
- Page 29 cup has been prepared for analysis, it will be transported for capillary loading under the separation unit. Reagent bottle area The on-board reagent area has locations for ten reagent bottles e.g. antisera, lysing agent and sample diluent. The sample handling arm can access any of these locations which are defined by the method. An active Peltier device cools the bottle area to 15°C so that reagents can be left on-board throughout the day and overnight if required.
- Page 30 can accept the full range of SAS and SPIFE sample trays. The optical reader embedded in the surface automatically detects the type of tray on the system and ensures that it matches the method selected. (Sample tray must have V8 identification sticker applied to base).
-
Page 31: Operating The V8
Operating the V8 The V8 system is designed to be simple to use. As such, the daily routine of operation can be broken down into the following steps. It is strongly advised that these are conducted everyday so as to maintain the optimum performance of the instrument. For more information on how best to maintain the condition of the instrument, please refer to Part 9: Maintenance of the V8. -
Page 32: Preparing The V8 For Operation
N.B. The V8 MUST be switched off at the side switch (position ) and allowed to complete the post-conditioning cycle before it is switched off using the rear switch (failure to do so WILL cause irreparable damage to the capillaries). Preparing the V8 for operation The power switch located at the rear of the V8 will be ON and the side switch set to . -
Page 33: Selecting Default Assay
This will open the V8 Mode Selection window where the desired test mode can be selected. Additionally, should the test mode be used in conjunction with a Reflex test, the priority of the retest can be assigned. 5.4.2 Selecting default assay To choose the default assay: Choose V8 System >... -
Page 34: Reflex Test Priority
Method to Use list. Advanced customisation options are available for each defined assay, however, it is recommended that these are set to default. 5.4.3 Reflex test priority The reflex test priority determines when the V8 performs reflex tests, whether these have been ordered manually or automatically. For more information on reflex testing please refer to section 5.9.3.5 ... -
Page 35: Shutting Down The V8 After Use
Installation of buffer bottles The V8 will only accept Helena Biosciences V8 buffers and reagents. Each bottle has a unique barcode and this information MUST be entered when the user is prompted before the buffer will be accepted on-board. Once a bottle has been exhausted, it cannot be refilled and placed back on-board. -
Page 36: To Install A New Buffer
The V8 has active liquid level sensing, and as such will always notify the user when a buffer bottle is empty or when the waste bottle is full. The waste cap designated with the biohazard sticker should ONLY be used with port 7. 5.7.2 To install a new buffer Attach a new filter unit to the inlet pipe of the bottle connecter cap. -
Page 37: Checking Buffer Levels
N.B. In sites with multiple V8 instruments, partially used bottles cannot be taken off one V8 and installed on another. When switching assays, it is recognised by Helena Biosciences that partially used bottles will be removed and re-installed on the V8 at a later time. -
Page 38: Loading Sample Cups
Choose V8 System > Define Reagents to open the Reagents window or click Scan or enter barcode information on the side of the reagent bottle, ensuring that the positions in Platinum correspond with those on-board the V8. Multiple reagents can be entered in one go. Once entered, close the lid to the sample preparation and handling area. -
Page 39: Clinical Waste Drawer
N.B. If the V8 is in operation, raising this top cover will cause the V8 to ‘PAUSE’ all sample handling activity. Once closed, normal operation will continue. Remove stacked sample cups from packaging; ensuring cups remain in the same orientation. Hold the stacked cups between thumb and forefinger, with the lipped edge facing forward. - Page 40 5.7.7.1 Placing samples on-board V8 Sample racks are loaded on to the left hand side of the sample rack transport area ensuring that the rack barcode is facing the top left hand corner of the sample rack transport area. Racks can only be loaded in one orientation. At the bar coded end of the rack is a lip that slots in to the side of the sample rack transport area base plate.
- Page 41 the V8 has not been able to read the barcode on the sample tube, or there is not a sample tube in every position of a sample rack this will be left blank. To avoid disruption to the workflow, the V8 will process all the samples, performing the default assay for any unlabelled or mis-read tubes.
- Page 42 The V8 automates sample handling and preparation of recalled samples for analysis by agarose gel electrophoresis. The sample handler is able to aliquot samples into a removable gel sample tray which can then be transferred onto one of Helena Biosciences SAS/SPIFE instruments for further analysis.
- Page 43 error messages. All information regarding the status of the instrument can be found here. It is strongly recommended that this box remain open during V8 operation. To access V8 system warnings and status choose V8 System > Show Status or click on the in the toolbar.
- Page 44 5.7.11 List of attention messages and actions required Attention message Machine pauses Action required Liquid missing (specified) Replace missing liquid if necessary click clear button 10% liquid remaining in bottle No – Though will Change depleted buffer bottle or load a second bottle into an imminently available port.
- Page 45 ticked. N.B. This dialogue box can also be accessed by right-clicking a processed sample in the navigation work list and choosing Disable Capillary. Accessing the Expert System The Expert System can be turned on, turned off, configured or results viewed only when viewing an active session or any previous sessions, via the relevant Expert System icons or the Expert System menu options: Expert System OFF –...
- Page 46 Once the Expert System is activated, many more tabs are available and the Configuration tab can be set up: The tabs that run along the configuration window are for each set of parameters that can be configured to assign samples to being normal, warning, abnormal or wrong number of bands.
- Page 47 Should automatic reflex testing be selected, the Expert System has the ability to not reflex test under certain circumstances. If it is selected to exclude results from automatic reflex testing, the user can base this on two variables (1) the patient has an immunodisplacement or immunofixation result in the database or (2) the patient has any previous result in the database.
- Page 48 Configuring Parameters – Ratios The peak ratios tab allows the user to select certain ratios based on relative area, absolute area, peak timings (position) and peak heights: The activation option allows the user to activate some or all of the peak ratio parameters. The drop down menu allows the user to select which ratio parameter is selected for editing.
- Page 49 Band 1 is the column that will be used first in the ratio calculation (e.g. Albumin as peak 1 and Gamma as peak 2 would see the Albumin peak divided by the Gamma peak). Band 2 is the column that will be used as the divisible in the ratio calculation (e.g. Albumin as peak 1 and Gamma as peak 2 would see the Albumin peak divided by the Gamma peak).
- Page 50 The high abnormal column allows users to input the highest value after which the result is definitely abnormal. It is recommended that users assign suitable values for each chemistry data based on the reference ranges for each chemistry value. Default settings in the Expert System for chemistry values cannot be reliably used as different users set up their LIMS settings differently.
- Page 51 The Activate Formula Analysis button allows the user to select to use a combination of band statistics as a way to interpret an electropherogram. The formula tabs allows the user to select and configure up to 5 different formulas. The activate formula option allows for the particular formula configuration to be activated. The activate column allows for up to five different parameters to be configured for each formula.
- Page 52 The Activate Peak Numbers Analysis button allows the user to select to use the number of bands in the trace as part of the interpretation. The number of peaks expected is linked to the ‘Bands’ section of the Configure V8 Methods window. The number of bands that are expected for the method will be populated here.
- Page 53 window can be opened. This is a floating window that sits in FRONT of the main Platinum screen. The results are displayed within the navigation worklist to easily identify the patient result and can be sorted by Expert System status by sorting by the status column: To view the parameters that have caused a sample to be marked as anything other than normal, the View Expert System Results window can be opened.
- Page 54 It is recommended that all Expert System parameters are adjusted and validated prior to relying on the Expert System solely for interpretation. Platinum Platinum is one of the world’s most advanced software package for automated clinical capillary electrophoresis. Designed specifically to make the management, analysis and interpretation of clinical test results as simple, accurate and as efficient as possible, Platinum provides a comprehensive set of analytical tools and user-defined options that can meet the data analysis needs of the clinician.
- Page 55 Backup changed / new Backup / Archive Restore Attach to scan Save, Email RTF Open data Find attached scans Search data Help Open similar data Operator Print Preview printer output Redo Save Save as Store screen layout 1 Store screen layout 2 Store screen layout 3 Store screen layout 4 Store screen layout 5...
- Page 56 V8 system actual values V8 system status Allow reflex tests Enter reflex test status Reset Communication Define buffers Define reagents Enable / Disable capillaries Manage test list Select V8 system Worklist Select gel type Select default method Undo Scan Usage Session Usage V8 mode selection 5.9.1.3...
- Page 57 Suspect Levey-Jennings 5.9.1.5 Editing tools Filtering Edit regions / zones Set scale Edit baseline Align gel Match shapes No stretching View as gel View as navigation worklist View as traces Gel contrast Edit peaks Skim Slice Stretch Smoothing Re-interpret scan Select all lanes Optimise scale 5.9.1.6...
- Page 58 Zoom out Zoomed / Full scale IFE Zoomed / Full scale First derivative Helper lines Show mean trace Add comment Gain Make normal overlay 5.9.1.7 Report icons Centre text Left align text Right align text Bold text Underlined text Italic text New bands list New demographics item New gel image plot...
- Page 59 New Worklist 5.9.1.8 Expert System Expert system OFF Expert system ON Redo external chemistry values 5.9.1.9 Gel icons Configure gel Re-interpret gel Scan Mark gel 5.9.1.10 LIMS icons Queue pending approval Unqueue for LIMS Show LIMS queue window Approve send to LIMS Send selected to LIMS Send all to LIMS 5.9.2...
- Page 60 dongle or can reinstall the dongle drivers. However if the user does not have a Platinum dongle they can still continue to use the system in “Viewer Mode”. This will allow the user to access archive data to interpret and to report this data but not to acquire new data or start new sessions.
- Page 61 Select Close The set colour will now be the active session top toolbar colour. Active Platinum sesson V8 Operator Manual 61 of 125...
- Page 62 Inactive Platinum session 5.9.2.4 Performing tasks in Platinum Once the samples have been processed, the raw data will be shown in Platinum. This sub-section details the functions within the Platinum software that will allow data manipulation and editing. Some tasks are generic to both CE and gel sessions, whilst others are specific to one or the other.
- Page 63 assume that all barcodes are unique and therefore should not appear twice. Once the barcode is entered, the desired test can be ordered from the dropdown menu. Any additional dilutions that are required and not set as default can be assigned here. Once the information is entered, click and the test will appear in the Manage Test List...
- Page 64 To create the optimum dilution, the software uses pre-existing data to calculate the best dilution ratio. This dilution is used to automatically pipette from the sample tube into a sample cup which is then ready to be loaded into the Helena SAS gel electrophoresis system.
- Page 65 Reflex Test Ordering Window with the relevant boxes highlighted. Select OK and the V8 will prepare the dilution (in Batch Priority Mode the user must select “Allow Reflex Test Batches” for the reflex test to begin). Using IFE Auto-Dilution with the Manage Test function For users that will order immunofixation tests on samples which have been tested in a separate Platinum session: Select Worklist >...
- Page 66 Additionally, 7 generic filters are available: System type: Gel scans or CE sessions Scan Type: Sample, Normal (control), Abnormal (control), Calibration Gel Name: e.g. SAS-3, Serum Protein 3 band Analysis type Type of test e.g. serum protein Measurement time (dd/mm/yyyy) start and end date point can be selected.
- Page 67 By inputting any required demographic filters i.e. patient ID and clicking the Search button, a list of search results will appear. To view the required search results, left click the mouse over the sample, this will highlight the sample blue. This can then be repeated for additional samples.
- Page 68 The original scan or gel for any ordered test can be easily recalled. To view the source data, select the desired ordered test and right-click. Choose Load Source Data to view the original gel scan or CE electropherogram. 5.9.4.2 Searching Reagent Statistics Platinum has a function that allowed the V8 usage logs to be searched intelligently, based on definable critera.
- Page 69 If not already activated, Archive searching must be set to On and the Demographic search mode set to Global. 5.9.5.1 Archiving The archiving tool allows users to archive data collected before a certain date. The tool can be accessed by going to Database >...
- Page 70 The tool will provide options for Date, Analysis Type, Result Type and Archive Key. These options will filter the entries on the database to select the records for archiving as follows; Date – The date set here will archive any records made before this date. Analysis Type –...
- Page 71 After the archiving process has completed, a window will appear in Platinum reporting that the archive is complete. Clicking this window will take the user back to the open Platinum session. Archived Data Storage C:\Program After an archive has been performed, the archived data will be stored in archive databases within the Files\Platinum folder in the Archives folder.
- Page 72 Searching and Loading Archived Data To search for and restore archived data into the current database, Archive searching must be enabled. To enable this, go to File > Customise and select the Configure Demographics tab. Then switch the Archive searching mode to On from the dropdown menu. To establish that the process has moved the data into the archive, you can open the Search window and leaving all search items...
- Page 73 This will result in an icon appearing to indicate that historical data exists for this Patient ID (or whichever demographic used for the Archive Key). 5.9.6 Merging to a Local Target Database Open Platinum and start a new V8 or gel session. Open File >...
- Page 74 C:\Program Files\Platinum\ Open . Ensure the target database is present whether it is a clean blank database or an Baseline.accdb DIB.accdb existing functioning database. Check that it is split into four component sub-databases; Platinum.accdb Scan.accdb N.B. You will also see two other .accdb files; Reflex.accdb is a local reflex test database and PlatinumCopy.accdb is a full copy of the current database before it was split.
- Page 75 platinum.accdb Select and click Open. C:\Program Check that the FROM database is set to the location of the Historical database and the TO database is set to Files\Platinum\Platinum.accdb . Click Merge. V8 Operator Manual 75 of 125...
- Page 76 The Database Merge progress window will appear indicating the status of the merging process. 1000 traces are loaded from the historic database and saved to the target database whilst the Platinum session files are moved from the original location to the location for new data configured in Step 2.
- Page 77 Open Platinum and start a new V8 or Gelscan session. Open File > Customise… > File Locations. Ensure the Network Database and Slave fields are selected and the Network Z:\Data\ Database Location and Location for new data pathways are set to respectively.
- Page 78 Set the Historical database from the desktop as the From this Database : field by clicking the icon. Navigate to Desktop > ‘Historical database’ folder. platinum.accdb Select and click Open. V8 Operator Manual 78 of 125...
- Page 79 Check that the FROM database is set to the location of the Historical database and the TO database is set to Z:\Platinum.accdb . Click Merge. The Database Merge progress window will appear indicating the status of the merging process. 1000 traces are loaded from the historic database and saved to the target database whilst the Platinum session files are moved from the original location to the location for new data configured in Step 2.
- Page 80 5.9.8 Editing When a trace or gel image is first displayed, it is likely that the data will require some form of adjustment so that the correct interpretation of the result(s) can be reported. Every sample trace can therefore be edited to user preferences. Samples are displayed in the navigation work list and are colour coordinated to visually show the user the editing status.
- Page 81 5.9.8.7 Smoothing To smooth a trace, click the icon, or choose Trace > Smoothing from the drop down menu. 5.9.8.8 Filtering To filter a trace, click the icon, and choose either the option of threshold filtering or slope filtering, or select Trace >...
- Page 82 Pre auto-stretching Post auto-stretching 5.9.9.5 Mean traces Allows a visual range of normal samples to be viewed on screen relative to the currently selected trace. To add traces to the mean overlay, highlight the sample and choose Trace > Add to Mean Traces from the drop down menu.
- Page 83 5.9.9.6 Trace regions Choose V8 system > Configure V8 Methods > Edit Regions/Zones tab, and enter the region names and limits. Similarly, with gels, select Gel > Configure Gel Methods > Edit Regions/Zones and enter the names. Suggestions of band(s) that would appear in this region can also be added in the appropriate column.
- Page 84 5.9.10 Derivative Shows the first derivative of the selected trace. This can highlight peaks which may not be immediately apparent in the generated trace. Choose View > Trace Options > Show Derivative click the show derivative icon or alternatively right click on the trace and select Show Derivative.
- Page 85 background and remove this from the quantitation. 5.9.12.1 Adding a skimmed M-spike Select the Edit Peaks icon, then right click on the monoclonal spike and select Add Skimmed M-spike. Platinum will then estimate the extent of the monoclonal peak and highlight this area by filling in the trace with ‘hashed lines’. To edit the location of the start and end points of the area quantitated, hover the mouse pointer over the trough marker until a double headed arrow appears, then drag and drop until a suitable location is found.
- Page 86 To remove an un-necessary M-spike, right click the mouse while hovering over the M-spike and choose Remove M-spike. The hashed area will then be removed. 5.9.12.5 Removing artefacts from traces Artefacts are not common, but are sometimes a problem; this function enables the removal of an artefact from a trace without disturbing the data.
- Page 87 N.B. To detach a linked immunotyping right click on the immunotyping result and select [Detach] 5.9.16 Result comments It is possible within Platinum to store predefined comments which can be added to the individual sample records. 5.9.16.1 To compose the standard comments Choose Comments >...
- Page 88 comments.cmt Save the file as and if prompted to replace existing file choose Yes. Click close to exit the configuration window. 5.9.16.2 Adding a comment to a sample result To add a comment to a result click the add comment icon and then highlight the required comment and click OK.
- Page 89 Mark as abnormal control Levey Jennings menu QC status icons Passed QC and within date QC out of date QC failure Input lot ID Lot ID page located in V8 system -> Configure V8 methods Select the appropriate method from the methods list Click on the Lot ID tab Use the assay sheet provided with the control material to fill in the appropriate ranges below, including lot ID and expiry date Note if you wish to use peak percentage you should input a % symbol after the value.
- Page 90 Levey-Jennings Chart How to populate the Levey Jennings chart Run the QC using the appropriate control method ensuring the control lot information is populated Multiple control types can be used by populating the Levey-Jennings chart using data derived from different base methods, i.e. all controls tested using the SPE control method will be populated into a separate chart to controls ran using the SPE method.
- Page 91 5.9.18 Performing statistics in Platinum Within Platinum, it is possible to perform basic statistical analysis on the data and to print or display this information. To compare data from multiple samples, it is necessary to have all of the results in the same analysis window, either on a single gel image, or as the result of a database search.
- Page 92 To preview a report before printing, choose Report > Preview Current Report In Platinum it is possible to use user definable reports, but Helena Biosciences also provides an array of report templates that the user can customise to suit their own needs.
- Page 93 Repeat the selection for the Reports with IDs. This report definitions will be applied to all data generated going forward. 5.9.19.6 Applying a report definition retrospectively to data. From time to time it may be necessary to use a different report or apply a new report to some old data retrospectively. In this circumstance the user may wish that this application be session specific.
- Page 94 5.9.19.7 Configuring ID reports ID reports are configured to provide an easy to interpret document (see below). This can be further customised by the user providing a unique and tailored solution. By right clicking on the individual trace and select Config ID Plot (see below).
- Page 95 5.9.20 Database The Platinum database stores all data that is processed and imported. 5.9.20.1 Back up new data To back up new data in Platinum, choose Database > Backup > New and Changed or click the icon. 5.9.20.2 Back up all data To back up all data in Platinum, choose Database >...
- Page 96 To approve an individual sample to be released from the LIMS queue, click the Approve sending lane to LIMS icon (Trace > Approve sending lane to LIMS). A blue tick will appear next to the LIMS icon To approve multiple selected samples to be released from the LIMS queue, click the icon (Trace >...
- Page 97 5.9.22.3 Operator usage log This function allows all viewing/editing functions carried out by a specific user for a defined time period to be identified. Right clicking on the selected entry allows the original file data to be opened. To view this, click the icon, or select Quality Control >...
- Page 98 Show All – all data can be loaded in to the search window. By default, only the most recent data is shown without the user having to scroll down the window. 5.9.23 Tasks specific to V8 sessions 5.9.23.1 Configure V8 systems Platinum must be linked to the V8 instrument that is to be used.
- Page 99 Example Name To describe the V8 system. This is user definable. Biomedical Lab TCP/IP Unique IP address of the V8. Contact your local Helena Biosciences representative for further 192.168.1.2 address: information Port: Unique port number for the V8. Contact your local Helena Biosciences representative for 5000 further information.
- Page 100 In Platinum, it is necessary to configure the templates that are used in processing samples. These templates are used to specify what the limits for each protein fraction are; default smoothing and filtering levels, and other factors that are interchangeable. This function is only available at Level 3 supervisor level.
- Page 101 Two vertical markers represent the left and right hand limits of each row and a single horizontal marker indicates the centre position of the first sample in each row. Each marker can be positioned either by clicking and dragging with the cursor, or by altering the values that are displayed in the table.
- Page 102 Calibration procedures Instrument calibration All V8 instrument calibration should be carried out by a Helena Biosciences trained and certified engineer; this will be carried out during scheduled site service visits and at installation. Any attempts by untrained/unqualified personnel to calibrate the V8 instrument could invalidate the warranty.
- Page 103 It is recommended that suitable Personal Protective Equipment (PPE) is worn at all times. Local regulations should be adhered to for precise instructions of necessary clothing, but as a minimum Helena Biosciences recommends that the following safety equipment is used at all times: safety glasses, gloves and a laboratory coat.
- Page 104 Proprietary notice The information contained in this manual is derived from the patented and proprietary data of Helena Biosciences Europe. Publication of this information does not imply any rights to reproduce or use this manual for purposes other than installing, operating, or maintaining this instrument and software.
- Page 105 This warranty shall be fulfilled by the repair or replacement, at the option of Helena Biosciences Europe, of any part or parts, free of charge including labour, F.O.B. it’s factory or authorised service centre. This warranty shall be voided by any repair, alteration, or modification, by persons other than employees of Helena Biosciences Europe, or those expressly authorised by Helena Biosciences Europe to perform repairs, and by any abuse, misuse, or neglect of the product, or by use not in accordance with Helena Biosciences Europe’s published instructions.
- Page 106 Only use the instrument for the intended purpose stated, see section 1.1. The instrument should only be operated when installed by a Helena Biosciences trained engineer. If the system is operated in a manner not specified by the manufacturer, the protection provided by the equipment may be impaired.
- Page 107 Hazards: Residual Residual risks and user protection In addition to the instrument’s on-board safety mechanisms, it is necessary for the user to take adequate protection measures in relation to risks that cannot be eliminated by system design, such as the disposal of clinical waste, or the handling of hazardous reagents and patient samples.
- Page 108 Repositioning or relocation of the V8 system without the aid or assistance of a Helena Biosciences certified and trained engineer could cause serious physical harm and injury, and risk the terms and...
- Page 109 Ensure that all parts of the V8 are undamaged and in good working order. Do not attempt to relocate the V8 before use, or move the instrument during operation. Only Helena Biosciences reagents, buffers, sample racks and disposable cups should be used to guarantee system efficiency and normal operation.
- Page 110 Please refer to this section to understand daily, monthly and annual service and maintenance requirements. Daily maintenance The Helena V8 performs all required daily maintenance automatically. There are two automated processes programmed into the instrument: pre-conditioning and post-conditioning. This is conducted when the instrument is switched to Start-up and Shut-down by the side switch or when there is an idle period of 4 hours.
- Page 111 As a minimum Helena Biosciences recommends the use of safety glasses, gloves and laboratory work coat. Maximum volume of solid waste produced per hour will be 24 sample cups. The waste tray will not hold more than 100 sample cups.
- Page 112 Annual maintenance Annual maintenance of the V8 should only be carried out by a Helena Biosciences trained and certified engineer. Capillaries will be changed and the system will be calibrated and fully serviced. The V8 will notify the end-user when maintenance is required. No user specific intervention is required.
- Page 113 9.16 Long-term storage of the V8 Helena Biosciences recommend that the instrument is preconditioned at least twice a week. If the system is to be left unused for longer periods, please consult your Helena Biosciences representative for further instructions. 9.17...
- Page 114 Adequate personal protective equipment must be worn at all times when operating the V8. Local regulations or requirements should be consulted for precise instructions of correct clothing. Helena Biosciences recommends that at a minimum the following safety equipment is used:...
- Page 115 Appendix 1 Toolbar functions in Platinum V8 sessions The following toolbar functions apply to V8 functions in Platinum. Active analysis window When Platinum is carrying out active analysis, it will look like this. Once a set of samples has been run, or stored data has been opened, then it is displayed in the active analysis window as seen below.
- Page 116 Print Preview: preview the report for the selected sample on the preconfigured report template. Printer Setup: allows the configuration of the printer that will be used to print report. Print Selection to PDF: creates PDF reports of selected samples. Print Session to PDF: creates PDF reports of all samples in the session.
- Page 117 Colour Peaks: This separates each peak / band area by colour, to further delineate between areas on the trace Show Gel: This shows a computer generated image of what the trace would look like were it ran on a gel Second trace as solid: If two traces are compared within the worklist the second trace will be displayed as a solid coloured trace...
- Page 118 Worklist menu Set Up Worklist: allows the operator to set up a work list of patient demographic information. This can be stored for later use when samples are scanned, or it can be implemented immediately if the samples are on board the instrument. Show Conflicts: allows the user to identify conflicts with data imported from LIMS.
- Page 119 sample in the active window. Once found, the IFE is attached so that when the trace data is retrieved the attached IFE is displayed. Attach Immunotyping to Scans: this is used to search the database for an IFE that will be linked and displayed relating to a specific patient next to the corresponding serum protein trace for use as a reference.
- Page 120 Help menu Platinum Help: displays help information for using the V8. Open V8 Operator Manual: Opens the Helena Biosciences V8 operator manual. Open Gel Operator Manual: Opens the Helena Biosciences gel operator manual. Product Activation: Allows activation of premium features.
- Page 121 report settings. Scan Parameters: this allows the user to specify the scan mode (8/24 bits or 12/36 bits) and to alter the resolution and gamma correction values. Scan: this allows the user to enter the ID of the gel tray that is loaded onto the instrument. This can be typed or scanned. Show LIMS COMS View: Allows the operator to monitor the incoming and outgoing LIMS data transfer traffic.
- Page 122 If after a restart the error reoccurs, or the instrument will not restart successfully, please contact the Service Department at Helena Biosciences Europe, or at your local distributor. In this instance, it is important that any error messages displayed in Platinum have been noted down and are passed to the Service Department.
- Page 123 Problem Cause Solution Viscous sample Warm sample to room temperature and rerun V8 light display V8 light states are not to be used as an indication of instrument state. Platinum remains the primary user interface for instrument status. The V8 visually communicates system status such as idle, busy, maintenance and fault status through colour coded system illumination.
- Page 124 Platinum error messages Platinum Message Action ERROR MESSAGES “Z motor position cannot be reached, please Restart instrument, if problem persists contact service. restart the V8” “X-Motor position cannot be reached, please Restart instrument, if problem persists contact service. restart the V8” "Y-Motor position cannot be reached, please Restart instrument, if problem persists contact service.
- Page 125 Platinum Message Action "Postconditioning Capilllaries and shutting No action required down" "Starting analysis" No action required "Asking for reflex tests" No action required "Starting V8" No action required "Purging outlet" No action required "Purging needle" No action required "Purging inlet" No action required "Conditioning capillaries"...
Need help?
Do you have a question about the V8 NEXUS and is the answer not in the manual?
Questions and answers