Table of Contents
Advertisement
Quick Links
11. Storage Drawer Assembly Continued.
You need: 8x Screws, 4x Castors and a Screwdriver
Carefully fit the Base by sliding it downwards into the grooves on the inside faces of the sides,
also making sure that it is fully engaged into the groove in the back of the Drawer Front. Once
the Base is correctly in position, fit the back onto the assembly by locating the exposed heads
of the fitted Dowels and Cam Pins into the holes in the sides and Brace. Once the parts are
aligned and engaged correctly, tighten each Cam to secure the back (don't forget the Cam in
the Brace).
Carefully flip the assembly over and fit the 4x Castors to the bottom of the Drawer as shown
using 2x Screws for each castor as shown.
Please now recheck that all fittings are properly tightened and finally place each
in your required position under the Day Bed.
11
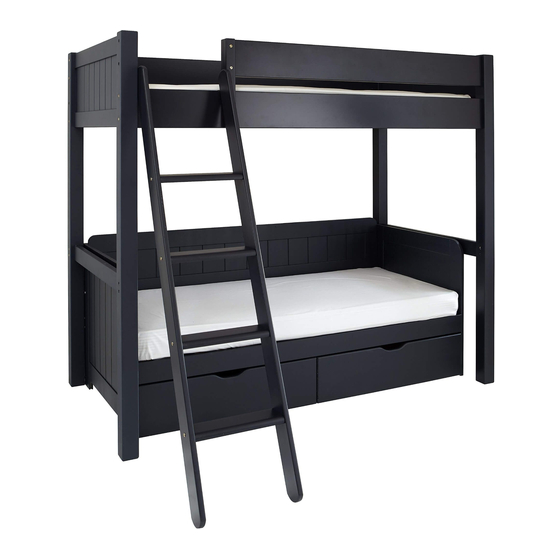
Warwick
High Sleeper
Code: 2807 - 2806
IMPORTANT-READ CAREFULLY-RETAIN FOR FUTURE REFERENCE
Advertisement
Table of Contents

Summary of Contents for Aspace Warwick
- Page 1 Brace). Carefully flip the assembly over and fit the 4x Castors to the bottom of the Drawer as shown using 2x Screws for each castor as shown. Warwick High Sleeper Code: 2807 - 2806 Please now recheck that all fittings are properly tightened and finally place each IMPORTANT-READ CAREFULLY-RETAIN FOR FUTURE REFERENCE in your required position under the Day Bed.
- Page 2 Orientation Options Parts Check List (Storage Drawers - Per Drawer) Please refer to the orientation option images below to help you decide and understand which way to construct the product. 6x Dowels 10x Cams These are the only two recommended options for orientation. 10x Cam Pins Orientation Option A (Including Desk) 4x Castors...
- Page 3 Most of us at ASPACE are parents too, so we know how important it is to give children a downwards. Spread the comfortable, secure and individual space where they can sleep, learn and play. We’ve been slats out along the length of kitting out children’s bedrooms with clever furniture ideas for over 20 years, with every bunk...
- Page 4 Parts Check List (Bed). Parts Check List (Desk) Images not to scale 1x Desk Support 1x Desk Top 6x Bolts (35mm) Ladder Legs x2 Mattress Base x1 Non Ladder End x1 Ladder End x1 2x Screw Bolts (50mm) (Left & Right) Assembly (Desk) Lower Rear Brace x1 Ladder Treads x4...
- Page 5 6. Construct the Ladder. Assembly (Bed). You need: 8x Bolts (60mm), 8x Barrel Nuts, an Allen Key and a Screwdriver 1. Attach the rear Rails to the Sides. (not supplied). Lay both Ladder Legs and all four Ladder Treads on a soft floor. Use the holes on the back You need: 12x Bolts (110mm), 12x Barrel nuts, 1x Allen Key and possibly a Screwdriver.
- Page 6 2. Attach The Ladder Right Mattress Rail. 4. Attach the Front Safety Rail. You need: 4x Bolts (110mm), 4x Barrel Nuts and an Allen Key You need: 2x Bolts (50mm), 2x Bolts (110mm), 2x Barrel Nuts and an Allen Key. NOTE: With a minimum of two people carefully stand the assembly upright.
Need help?
Do you have a question about the Warwick and is the answer not in the manual?
Questions and answers