Table of Contents
Advertisement
User manual
(EN)
Full HD
1080p
CPU
CryptoBox 702T
H265
H265
codec
codec
RAM
NEW CPU
HIGH SPEED
CORE
DDRIII MEMORY
HD Terrestrial Receiver
Media
Media
PVR
PVR
Player
Player
TimeShift
TimeShift
CA
USB
SMARTCARD
UNIVERSAL
READER
SERIAL PORT
1x
2x
Analog
Analog
Eco
Audio
Audio
friendly
RS232
DOLBY
SERVICE
DOLBY
PORT
AUDIO
1x
Advertisement
Table of Contents

Related Manuals for ab CryptoBox 702T mini


Summary of Contents for ab CryptoBox 702T mini
- Page 1 User manual (EN) Full HD H265 H265 Media Media Analog Analog 1080p codec codec Player Player TimeShift TimeShift Audio Audio friendly RS232 DOLBY NEW CPU HIGH SPEED SMARTCARD UNIVERSAL SERVICE DOLBY CORE DDRIII MEMORY READER SERIAL PORT PORT AUDIO CryptoBox 702T HD Terrestrial Receiver...
-
Page 3: Table Of Contents
Content 1. Reference ............3 1.1 General Features ........3 1.2 Accessories ..........3 2. Product Overview ..........3 2.1 Front Panel ..........3 2.2 Rear Panel ..........4 2.3 Remote Control Unit (RCU) ....4 3. STB ..............5 4. - Page 4 6.1 System Settings .......... 7 6.2 OSD Setup ..........9 6.3 Parental control ......... 9 6.4 Times ............9 6.5 USB Update ..........10 6.6 About STB ..........10 7.X-tras ..............11 7.1 Calendar ........... 11 7.2 Games ............11 8.
-
Page 5: Reference
1. Reference 1.1 General Features DVB-T2 Compliant (MPEG-II/ MPEG-IV/ H.264/ H.265) PAL/NTSC Conversion Storing memory: 500 transponders and 2000 channels 26 favorite group and parental lock supported Multi-language menu supported Multi-language audio supported Multi-language DVB Subtitle output 7 days Electronic Program Guide (EPG) Teletext output through VBI and OSD USB 2.0 Interface Manufactured under license from Dolby Laboratories. -
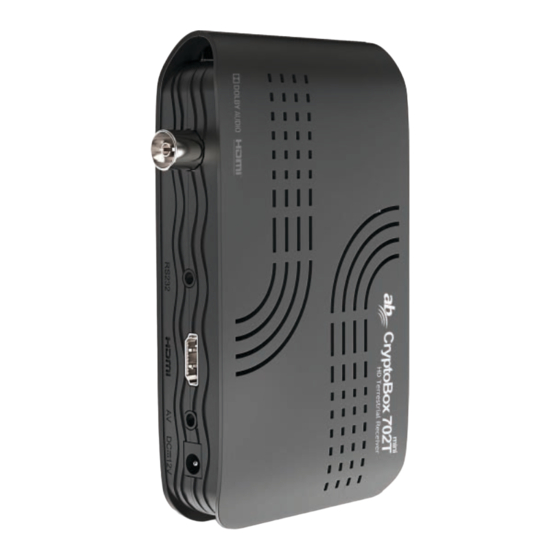
Page 6: Rear Panel
2.USB2.0: Two USB 2.0 Host Port. 2.2 Rear Panel 1.ANT IN: Connect the DVB-T2 cable. 2.RS232: Connect to the computer using a serial line. 3. HDMI: Connect to the TV using an HDMI cable. 4.AV: Connect to the TV using a AV cable. 5. -
Page 7: Stb
program guide. 17. V+/V- : Change volume in viewing mode. 18. CH+/ch-: Change program. 19. INFO: Display the program information. 20. FAV: Display favorite channel list you set before. 21. NUMERIC KEY (0~9): Enter a TV/radio channel number or menu option number. -
Page 8: Auto Search
Add, Edit and Delete functions according to the help information. 4.2 Auto Search Menu-> Installation->Auto Search Search automatically and save the found channels. 4.3 Antenna Power Setting Menu-> Installation->Antenna Power Setting You can set Antenna Power to off or on. 4.4Factory Default Menu->... -
Page 9: Tv Favorites
5.3 TV Favorites Menu-> Edit Channel -> TV Favorites 5.3.1In this menu, you can add favorite channels like Movies /Sports /News /Music /Children/Education /Weather/ Culture. 5.3.2 Press the corresponding color key to mark the channel as the selected favorite group. 5.3.3 Press the EXIT button to exit the menu and save it. - Page 10 Tip: You can set all the settings here by pressing ◄/►button. 1. Menu Language: Set the menu language. 2. Audio1: Set the preferred audio language. 3. Audio2: Set the sub-prime audio language. 4.Subtitle Language: Set the subtitle language. 5.Subtitle Control: IF you set ON, it will auto load subtitle.
-
Page 11: Osd Setup
Clock, LED display is time. 18.Channel list type: You can select Wide or simple. 19.Channel name auto update: When you select on, the program name is automatically updated. If off is selected, the program name will not be updated. 6.2 OSD Setup Menu->... -
Page 12: Usb Update
time offset and summer time. 2. Event Timer: It will record or play the program automatically according to the timer event list that you set. 1). Press the GREEN button to setup a timer, and press the OK button to save the timer after setup. -
Page 13: X-Tras
7. X-tras 7.1 Calendar Menu->X-tras-> calendar Calendar can get the date information. And you can add the memo of the day. 7.2 Games Menu->X-tras-> games Games offer 9 funny games you can play. 8. Multimedia 8.1 USB Menu -> Multimedia-> USB USB Menu->... - Page 14 Subtitle: You can press the SUB to select the language for the subtitle if the program provides subtitle information. Teletext: You can press the TXT button to view the teletext information of this program. INFO: You can view the program information by pressing the INFO button while watching a program.
-
Page 15: Trouble Shooting
stop time of the timer. 3) If the free space on the USB HDD or USB disk is insufficient, recording will stop. 3. Other Operations while Recording While the recording channel is current channel, press the INFO button can display the recording time. And press the INFO button twice can display the detail information of the recording. -
Page 16: Technical Specification
Remote control does not operate • The top end of the remote control should point directly towards the receiving part of the product or replace new batteries Technical Specification Tuner & Channel No. of Tuners QPSK ,8PSK" LNB Tone Switch" Frequency Range 117.5 MHz to 862MHz Signal Level... - Page 17 ror! Voltage ok mar k not defi Protection Power Max. 30 W Consumption Protection Separate internal fuse. Input shall have lightening Protection Physical Specification Weight (Net) About 2.5kg Operating Temp 0℃ to + 40℃ Storage Temp -40℃ to + 65℃...
- Page 20 CryptoBox 702T HD Terrestrial Receiver...
Need help?
Do you have a question about the CryptoBox 702T mini and is the answer not in the manual?
Questions and answers